 ## Supported Sign-in Methods
We support authentication using the following providers:
* Google
* GitHub
* Custom Single-Sign-on (configurable once you sign-up with the above)
## Account Creation
When signing in for the first time:
* Select either GitHub or Google as your authentication provider, and complete authentication through your selected provider.
* You'll be prompted to create a new organization or join an existing one
* If your email domain matches an organization's allowed domains, you'll see available organizations to join
## Account Deletion
If you no longer want to keep your Gitpod Account, you can delete it, together with all of your data at any time. Navigate to Settings > Profile and confirm your want to delete your account.
# Use Gitpod docs with AI
Source: https://www.gitpod.io/docs/gitpod/ai/use-docs-with-ai
Learn how to use Gitpod documentation with AI tools and language models for better development workflows.
You can use Gitpod documentation with your AI tool of choice, making it easy to search and get answers from our docs right from your editor or other AI tools.
## How it works
Large language models (LLMs) are great at reading markdown because, unlike HTML, there's a lot less noise for them to parse. To make our documentation more accessible to AI, we've provided markdown-accessible versions of our documentation so you can reference it with your own AI tools.
You can access plain-text markdown versions of our docs in a few ways:
* **[Our llms.txt file](#use-our-llm-sitemap)**: This is an emerging standard and acts as a sort of LLM-friendly sitemap. It provides links to our markdown files so your LLM can access markdown versions of our pages without having to download them.
* **[Download individual markdown pages](#download-plain-text-documentation)**: You can download or reference individual pages to add to your own knowledge base or use them as a reference for your LLM.
## Use our LLM sitemap
You can access or download our LLM-friendly documentation files to help your LLM access, and provide answers based on, markdown versions of our documentation.
We provide two versions of our documentation sitemap based on the emerging llms.txt standard:
* **[llms.txt](https://www.gitpod.io/docs/llms.txt)**: A concise version with links to all our documentation pages
* **[llms-full.txt](https://www.gitpod.io/docs/llms-full.txt)**: A comprehensive version with full content of all documentation pages included inline
The llms.txt files are flattened versions of our documentation sitemap based on an emerging standard for LLM-friendly documentation. While it's still an early standard, it can be a handy way to get answers from our docs without having to open a new browser tab or download individual pages.
* [Access our concise llms.txt file](https://www.gitpod.io/docs/llms.txt)
* [Access our comprehensive llms-full.txt file](https://www.gitpod.io/docs/llms-full.txt)
* [Learn more about the proposed llms.txt standard](https://llmstxt.org)
## Download plain text documentation
You can download or copy our documentation as plain text markdown files for use with your LLM of choice—you can even create your own GPTs and tools!
All of our documentation is written in MDX (Markdown with JSX), which is easily parseable by LLMs. You can access the source markdown for any page by adding `.md` to the end of most URLs to get the raw markdown version.
For example, you can check out the markdown for this page at `https://www.gitpod.io/docs/gitpod/ai/use-docs-with-ai.md`.
# Audit Logs
Source: https://www.gitpod.io/docs/gitpod/audit-logs/overview
Audit logs provide a record of all actions taken in a Gitpod organization. Using the audit logs, you can track who performed an operation, on which resource, and when. Gitpod produces audit logs for all operations within an organization.
## Accessing Audit Logs
Audit logs are accessible to users with the **Organization Owner** role. You can retrieve audit logs using the **Gitpod CLI** or the **Gitpod API**.
### Using the CLI
You can view audit logs using the `gitpod` CLI, which is pre-installed on all Gitpod environments.
```bash
gitpod audit-logs [--limit=number_of_entries]
```
For additional options, including filtering and output formatting (JSON or YAML), run:
```bash
gitpod audit-logs --help
```
#### Example Output
```bash
➜ gitpod audit-logs
SUBJECT ID SUBJECT TYPE ACTOR ID ACTOR PRINCIPAL ACTION CREATED AT
01951d94-d6ac-7edf-9021-a044cfd1908f RESOURCE_TYPE_ENVIRONMENT 0193e2f2-d0b5-7d52-87eb-235deadaf625 PRINCIPAL_RUNNER changed update_time, status, phase, last_running_session 2025-02-21T12:10:05Z
0194f5dd-01ca-75f4-a200-74381ed43f86 RESOURCE_TYPE_ENVIRONMENT 0193e2f2-d0b5-7d52-87eb-235deadaf625 PRINCIPAL_RUNNER changed update_time, status, phase, last_running_session 2025-02-21T12:10:03Z
...
```
### Using the API
You can retrieve audit logs programmatically via the Gitpod API. For detailed documentation, refer to the [API Reference](https://www.gitpod.io/docs/api-reference/resources/events/methods/list/).
#### Example Request
```bash
curl https://app.gitpod.io/api/gitpod.v1.EventService/ListAuditLogs \
-H 'Content-Type: application/json' \
-H "Authorization: Bearer $GITPOD_API_KEY" \
-d '{}'
```
# Configuring Automations
Source: https://www.gitpod.io/docs/gitpod/configuration/automations/basic-configuration
Explore Gitpod's automation features: Services and Tasks. Learn how to configure long-running services and execute specific tasks to streamline your development workflow. Understand execution options, dependencies, and best practices for efficient environment management.
# Basic configuration
When an environment is created the system loads Automations from the default file: `.gitpod/automations.yaml` relative to your repository root. You can change this location using [Projects](/flex/projects). An `automations.yaml` consists of services and tasks defined at the root level, for example:
```yaml
services: ...
tasks: ...
```
Services and tasks are a map where the key serves as reference for the corresponding item. When looking at task dependencies their use becomes clear.
See [reference](/flex/configuration/automations#reference) for a full example.
## Services in the automations.yaml
Example workflow:
```yaml
services:
database:
name: PostgreSQL
description: The backend database
triggeredBy:
- postEnvironmentStart
commands:
start: 'docker run --rm -t --name database postgres:latest'
redis:
name: Redis
description: Our message bus
triggeredBy:
- postEnvironmentStart
commands:
start: >-
docker run --rm -t --name redis -p 6379:6379
redis/redis-stack-server:latest
backend:
name: Application Backend
description: The application backend
triggeredBy:
- postEnvironmentStart
commands:
start: cd backend && go run main.go
```
## Tasks in the automations.yaml
Example workflow:
```yaml
tasks:
buildAll:
name: Build All
description: builds all code
command: go build .
runUnitTests:
name: Runs unit tests
command: go test -v ./...
validate:
name: Validate
description: Builds and tests the code
triggeredBy:
- postEnvironmentStart
dependsOn:
- buildAll
- runUnitTests
```
## Iterating on Automations
You can iterate on Automations using the [CLI](/flex/cli) which is available by default in every Gitpod environment. The CLI can
* reload the Automations file using:
```sh
gitpod automations update [optional-path-to-automations.yaml]
```
* start a task or service:
```sh
gitpod automations service start ...
gitpod automations task start ...
```
## Using Automations outside of an environment
The CLI commands to interact with an environment’s Automations are also available outside of an environment. The following snippet brings up an environment, adds a task, runs it, waits for the task to complete and brings the environment back down again:
```sh
# gitpod env create will set the environment context to the newly created env
gitpod env create https://github.com/some/repo
# add the task to the environment
cat <
## Supported Sign-in Methods
We support authentication using the following providers:
* Google
* GitHub
* Custom Single-Sign-on (configurable once you sign-up with the above)
## Account Creation
When signing in for the first time:
* Select either GitHub or Google as your authentication provider, and complete authentication through your selected provider.
* You'll be prompted to create a new organization or join an existing one
* If your email domain matches an organization's allowed domains, you'll see available organizations to join
## Account Deletion
If you no longer want to keep your Gitpod Account, you can delete it, together with all of your data at any time. Navigate to Settings > Profile and confirm your want to delete your account.
# Use Gitpod docs with AI
Source: https://www.gitpod.io/docs/gitpod/ai/use-docs-with-ai
Learn how to use Gitpod documentation with AI tools and language models for better development workflows.
You can use Gitpod documentation with your AI tool of choice, making it easy to search and get answers from our docs right from your editor or other AI tools.
## How it works
Large language models (LLMs) are great at reading markdown because, unlike HTML, there's a lot less noise for them to parse. To make our documentation more accessible to AI, we've provided markdown-accessible versions of our documentation so you can reference it with your own AI tools.
You can access plain-text markdown versions of our docs in a few ways:
* **[Our llms.txt file](#use-our-llm-sitemap)**: This is an emerging standard and acts as a sort of LLM-friendly sitemap. It provides links to our markdown files so your LLM can access markdown versions of our pages without having to download them.
* **[Download individual markdown pages](#download-plain-text-documentation)**: You can download or reference individual pages to add to your own knowledge base or use them as a reference for your LLM.
## Use our LLM sitemap
You can access or download our LLM-friendly documentation files to help your LLM access, and provide answers based on, markdown versions of our documentation.
We provide two versions of our documentation sitemap based on the emerging llms.txt standard:
* **[llms.txt](https://www.gitpod.io/docs/llms.txt)**: A concise version with links to all our documentation pages
* **[llms-full.txt](https://www.gitpod.io/docs/llms-full.txt)**: A comprehensive version with full content of all documentation pages included inline
The llms.txt files are flattened versions of our documentation sitemap based on an emerging standard for LLM-friendly documentation. While it's still an early standard, it can be a handy way to get answers from our docs without having to open a new browser tab or download individual pages.
* [Access our concise llms.txt file](https://www.gitpod.io/docs/llms.txt)
* [Access our comprehensive llms-full.txt file](https://www.gitpod.io/docs/llms-full.txt)
* [Learn more about the proposed llms.txt standard](https://llmstxt.org)
## Download plain text documentation
You can download or copy our documentation as plain text markdown files for use with your LLM of choice—you can even create your own GPTs and tools!
All of our documentation is written in MDX (Markdown with JSX), which is easily parseable by LLMs. You can access the source markdown for any page by adding `.md` to the end of most URLs to get the raw markdown version.
For example, you can check out the markdown for this page at `https://www.gitpod.io/docs/gitpod/ai/use-docs-with-ai.md`.
# Audit Logs
Source: https://www.gitpod.io/docs/gitpod/audit-logs/overview
Audit logs provide a record of all actions taken in a Gitpod organization. Using the audit logs, you can track who performed an operation, on which resource, and when. Gitpod produces audit logs for all operations within an organization.
## Accessing Audit Logs
Audit logs are accessible to users with the **Organization Owner** role. You can retrieve audit logs using the **Gitpod CLI** or the **Gitpod API**.
### Using the CLI
You can view audit logs using the `gitpod` CLI, which is pre-installed on all Gitpod environments.
```bash
gitpod audit-logs [--limit=number_of_entries]
```
For additional options, including filtering and output formatting (JSON or YAML), run:
```bash
gitpod audit-logs --help
```
#### Example Output
```bash
➜ gitpod audit-logs
SUBJECT ID SUBJECT TYPE ACTOR ID ACTOR PRINCIPAL ACTION CREATED AT
01951d94-d6ac-7edf-9021-a044cfd1908f RESOURCE_TYPE_ENVIRONMENT 0193e2f2-d0b5-7d52-87eb-235deadaf625 PRINCIPAL_RUNNER changed update_time, status, phase, last_running_session 2025-02-21T12:10:05Z
0194f5dd-01ca-75f4-a200-74381ed43f86 RESOURCE_TYPE_ENVIRONMENT 0193e2f2-d0b5-7d52-87eb-235deadaf625 PRINCIPAL_RUNNER changed update_time, status, phase, last_running_session 2025-02-21T12:10:03Z
...
```
### Using the API
You can retrieve audit logs programmatically via the Gitpod API. For detailed documentation, refer to the [API Reference](https://www.gitpod.io/docs/api-reference/resources/events/methods/list/).
#### Example Request
```bash
curl https://app.gitpod.io/api/gitpod.v1.EventService/ListAuditLogs \
-H 'Content-Type: application/json' \
-H "Authorization: Bearer $GITPOD_API_KEY" \
-d '{}'
```
# Configuring Automations
Source: https://www.gitpod.io/docs/gitpod/configuration/automations/basic-configuration
Explore Gitpod's automation features: Services and Tasks. Learn how to configure long-running services and execute specific tasks to streamline your development workflow. Understand execution options, dependencies, and best practices for efficient environment management.
# Basic configuration
When an environment is created the system loads Automations from the default file: `.gitpod/automations.yaml` relative to your repository root. You can change this location using [Projects](/flex/projects). An `automations.yaml` consists of services and tasks defined at the root level, for example:
```yaml
services: ...
tasks: ...
```
Services and tasks are a map where the key serves as reference for the corresponding item. When looking at task dependencies their use becomes clear.
See [reference](/flex/configuration/automations#reference) for a full example.
## Services in the automations.yaml
Example workflow:
```yaml
services:
database:
name: PostgreSQL
description: The backend database
triggeredBy:
- postEnvironmentStart
commands:
start: 'docker run --rm -t --name database postgres:latest'
redis:
name: Redis
description: Our message bus
triggeredBy:
- postEnvironmentStart
commands:
start: >-
docker run --rm -t --name redis -p 6379:6379
redis/redis-stack-server:latest
backend:
name: Application Backend
description: The application backend
triggeredBy:
- postEnvironmentStart
commands:
start: cd backend && go run main.go
```
## Tasks in the automations.yaml
Example workflow:
```yaml
tasks:
buildAll:
name: Build All
description: builds all code
command: go build .
runUnitTests:
name: Runs unit tests
command: go test -v ./...
validate:
name: Validate
description: Builds and tests the code
triggeredBy:
- postEnvironmentStart
dependsOn:
- buildAll
- runUnitTests
```
## Iterating on Automations
You can iterate on Automations using the [CLI](/flex/cli) which is available by default in every Gitpod environment. The CLI can
* reload the Automations file using:
```sh
gitpod automations update [optional-path-to-automations.yaml]
```
* start a task or service:
```sh
gitpod automations service start ...
gitpod automations task start ...
```
## Using Automations outside of an environment
The CLI commands to interact with an environment’s Automations are also available outside of an environment. The following snippet brings up an environment, adds a task, runs it, waits for the task to complete and brings the environment back down again:
```sh
# gitpod env create will set the environment context to the newly created env
gitpod env create https://github.com/some/repo
# add the task to the environment
cat <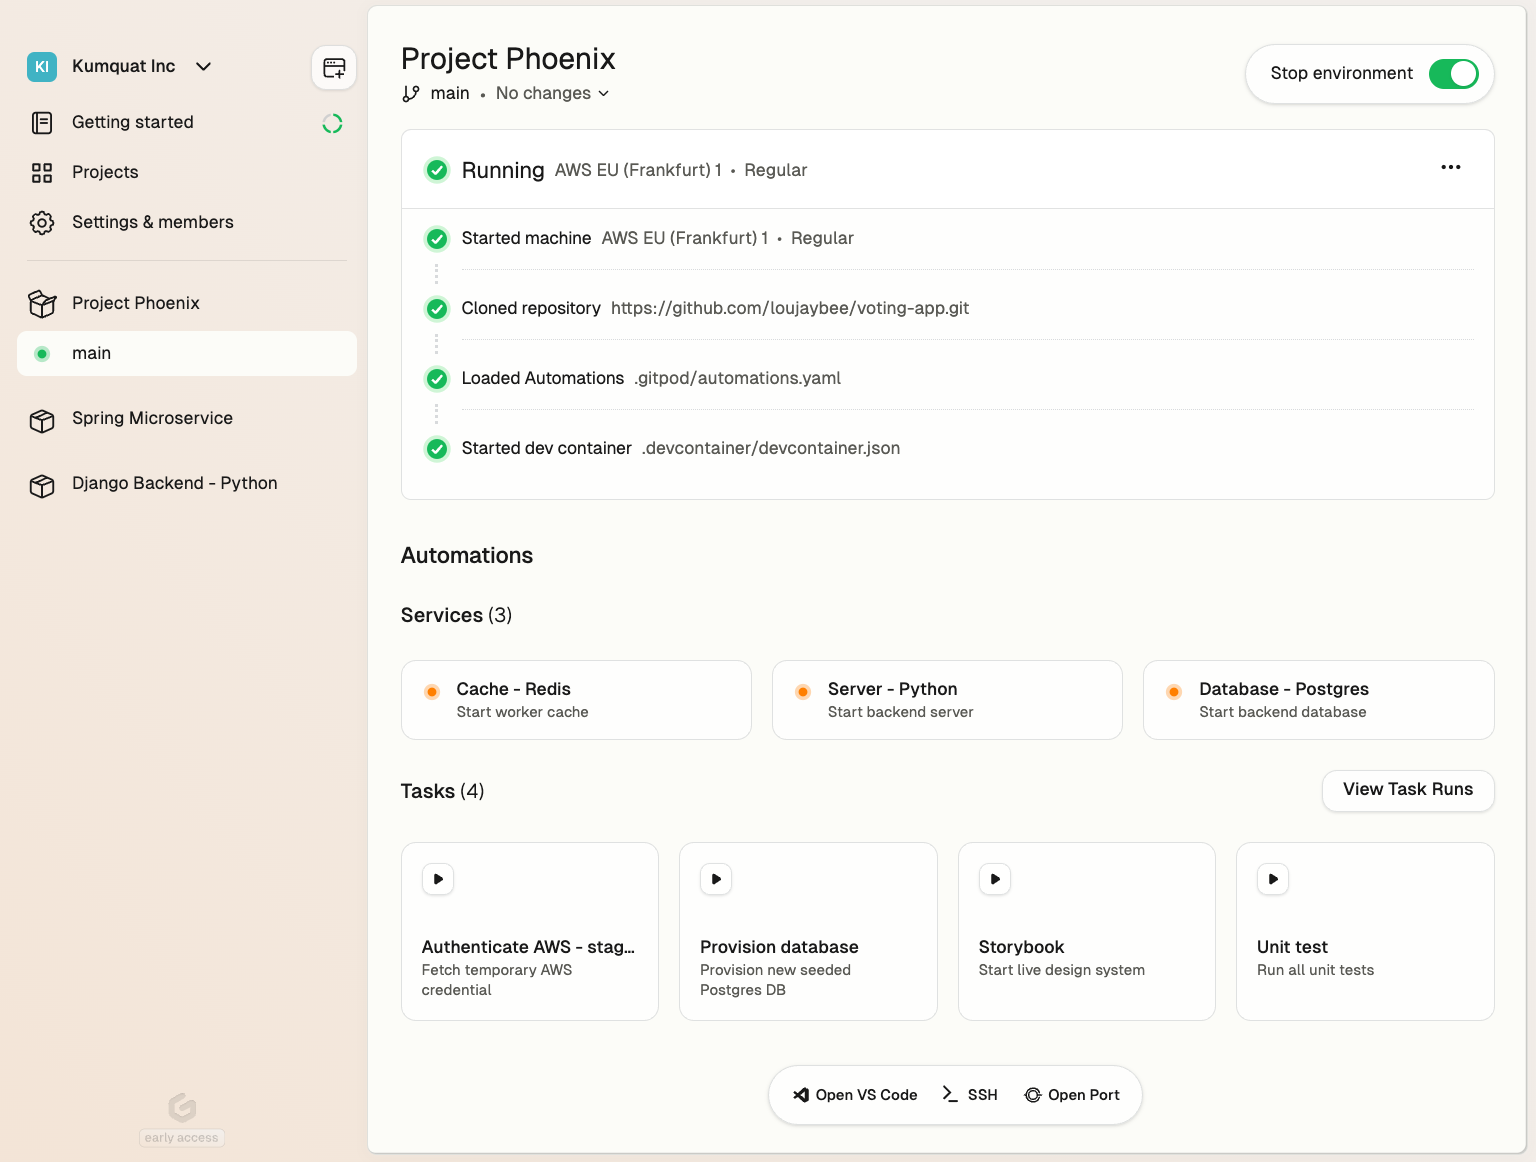 Using Automations you can automate:
* **Setup** - Seed a database, provision infra or authenticate with a cloud account
* **Operations** - Turn your runbooks into one-click self-service actions
* **Editor interfaces** - Start up a server such as Jupyter notebook
* **Enforce policies** - Run security or scanning tools
* **AI workflows** - Configure AI agents or code assistants
See [examples](/flex/configuration/automations/examples) for more.
Automations are defined in configuration YAML files that can live alongside your source code, in another repo, or any location accessible from the development environment.
* [Automations](#automations)
* [The two modes of Automations](#the-two-modes-of-automations)
* [Services](#services)
* [Service Configuration](#service-configuration)
* [Tasks](#tasks)
* [Triggers](#triggers)
* [Available Triggers](#available-triggers)
* [Runners vs. Gitpod Desktop behaviors](#runners-vs-gitpod-desktop-behaviors)
* [Dependencies](#dependencies)
* [Best Practices for Using Triggers](#best-practices-for-using-triggers)
* [Reference](#reference)
## The two modes of Automations
Gitpod supports two primary types of Automations:
1. **[services](#services)** - for long-running processes like starting a server
2. **[tasks](#tasks)** - for performing one-off actions like executing unit tests
```yaml
services:
database:
name: PostgreSQL
commands:
start: docker run postgres
tasks:
run-unit-tests:
name: Runs unit tests
command: go test -v ./...
```
**Caption:** A minimal automation definition.
## Services
Services are **designed for long-running processes**. These are typically components that need to be continuously available throughout your development session.
Common examples include:
* Databases like PostgreSQL
* Caching systems such as Redis
* Your project's backend and frontend servers.
The key characteristic of a service is its persistent nature – it's not expected to terminate on its own but to remain active and ready for interaction as long as your development environment is running.
See [reference](#reference) for a full example.
### Service Configuration
Configuring a service involves defining up to three key commands:
* `start` (required) - The service itself. The process is expected to continue running until stopped. If this command fails (i.e. exits with a non-zero exit code), the service is considered failed.
* `ready` (optional) - Acts as a health check, determining when the service is fully operational and available for use. Gitpod executes this command periodically (once per second) until it exits with a status code of 0, indicating the service is ready. If you don't specify a `ready` command, Gitpod assumes the service is immediately available after the `start` command completes.
* `stop` (optional) - Defines a graceful shutdown procedure for your service. If omitted, Gitpod will send a `SIGTERM` signal to terminate the service when needed.
## Tasks
In contrast to services, **tasks are individual commands designed to perform specific, often one-off actions within your environment**.
Common examples include:
* Compiling code
* Executing test suites
* Populating a database with test data
* Authenticating with cloud services
* Resetting your local environment to a known state.
Tasks are typically short-lived, executing a defined set of operations and then terminating once complete. Tasks consist of a single command to be executed, however their power lies in their ability to be chained and dependent on other components of your environment.
Tasks will exit immediately if a command exits with a non-zero status code, and the task will be marked as failed. This behavior allows for proper error handling in automation pipelines and dependency chains. For example, if a task depends on another task that fails (exits with non-zero status), the dependent task will not be executed.
See [reference](#reference) for a full example.
### Stop a Task
A started task can be stopped prematurely, which will send a `SIGTERM` signal to the task's command (or any chained commands). Once the command has exited, the task will be marked as stopped.
If the command does not exit within 10 seconds, it will be forcefully terminated and the task run will be marked as failed.
## Triggers
Triggers are **the events that initiate the execution of Automations in your Gitpod environment**. This section covers the available triggers and explains their behavior.
### Available Triggers
Gitpod supports three main types of triggers for Automations:
* The `postEnvironmentStart` trigger activates every time the environment is started. This includes both the initial start of the environment and any subsequent restarts. It's particularly useful for operations that need to be performed consistently on every environment start, regardless of the underlying container state. For example, you might use this trigger to set up environment variables or check for updates to critical tools.
* The `postDevcontainerStart` trigger, on the other hand, is activated every time the devcontainer is started. This occurs during the first start of the environment and any subsequent devcontainer restarts, such as after a rebuild. This trigger is ideal for setup tasks that are specific to the devcontainer configuration, like initializing databases or compiling project-specific dependencies.
* The `manual` trigger provides a unique affordance in the user interface, allowing developers to start an action on demand. This trigger is particularly valuable for curating a set of actions that developers frequently perform. By using manual triggers, you can shape and refine the experience others will have in your Gitpod environment. For instance, you might create manual triggers for running tests, generating documentation, or deploying to a staging environment. This approach not only streamlines common tasks but also helps standardize processes across your team.
See [reference](#reference) for a full example.
### Runners vs. Gitpod Desktop behaviors
It's important to note that the behavior of these triggers can vary depending on the Gitpod runner being used. The AWS runner typically uses a suspend/resume model for environment management. When an environment is restarted on EC2, it usually resumes from a suspended state. In this scenario, `postDevcontainerStart` is not called on restart, but `postEnvironmentStart` is still triggered.
Gitpod Desktop takes a different approach. Instead of using suspend/resume, it reboots the entire environment on restart. This causes both `postDevcontainerStart` and `postEnvironmentStart` to run on every environment restart.
This intentional difference in behavior is designed to help recreate state that might be lost due to the lifecycle of individual elements in different environments. For AWS runners, the suspended state preserves most of the environment, so fewer reinitializations are needed. For Gitpod Desktop, the full reboot ensures a clean state each time, which may require more extensive reinitialization.
### Dependencies
Tasks can specify dependencies, allowing you to create sophisticated automation workflows. A task can depend on other tasks, ensuring that these dependencies are executed beforehand. This feature is particularly useful for setting up complex environments where certain operations must occur in a specific order.
It's important to note that task dependencies are re-evaluated and re-executed each time the main task runs. This ensures that your environment is always in the expected state before a task begins, even if it's run multiple times during a development session.
Each task execution is treated as an isolated event. This means that if you modify a task's definition while it's running, those changes won't affect the current execution. This isolation ensures consistency and predictability in your automation workflows.
### Best Practices for Using Triggers
When working with triggers, it's advisable to use `postEnvironmentStart` for tasks that should run on every start, regardless of the runner or whether it's a fresh start or a resume.
Use `postDevcontainerStart` for tasks specifically related to devcontainer setup or for operations that need to run after a full environment reboot. This could involve compiling dependencies or initializing databases.
The `manual` trigger is best used for discretionary tasks that developers might need to perform multiple times during a session, or for complex operations that don't need to run automatically. By thoughtfully implementing manual triggers, you can significantly improve the usability of your Gitpod environment for all team members.
## Reference
Automations are defined as YAML, in a [file](/flex/configuration/automations/basic-configuration) or [directly uploaded to the system](/flex/configuration/automations/generating-automations).
```yaml
# defines automation services (optional)
services:
# serviceReference is an identifier for the service within the environment.
# It is used when referencing the service, e.g. from the CLI.
# It needs to only contain alphanumeric characters, underscores, and hyphens, and must be between 1 and 128 characters long.
serviceReference:
# Name is a required, human readable string.
name: Human readable name
description: Optional description providing more detail
# triggeredBy lists all trigger that start the service. If none are provided the service isn't started automatically.
# See below for a complete list of trigger.
triggeredBy:
- ...
commands:
# start is a mandatory command constitutes the service itself and is expected to continue running until stopped.
# If this command fails (i.e. exits with a non-zero exit code), the service is considered failed.
start: your-service-command
# ready acts as a readiness check, determining when the service is fully operational and available for use.
# Gitpod executes this command periodically (once per second) until it exits with a status code of 0, indicating the service is ready. # If you don't specify a ready command, Gitpod assumes the service is immediately available after the start command completes.
ready: your-service-command --is-running
# This optional command allows you to define a graceful shutdown procedure for your service.
# If omitted, Gitpod will send a SIGTERM signal to terminate the service when needed.
stop: killall your-service-command
# defines automation tasks (optional)
tasks:
taskReference:
# Name is a required, human readable string.
name: Human readable name
description: Optional description providing more detail
# triggeredBy lists all trigger that start the service. If none are provided the service isn't started automatically.
# See below for a complete list of trigger.
triggeredBy:
# postEnvironmentStart activates every time the environment is started, e.g. on first start
- postEnvironmentStart
# postDevcontainerStart activates every time the devcontainer is started, e.g. on first start or devcontainer rebuild
- postDevcontainerStart
# manual trigger provides a unique affordance in the user interface, allowing developers to start an action on demand.
- manual
# dependsOn expresses a dependency on another task which ensures that this other task runs before this one.
dependsOn:
- someOtherTask
# command is the actual task command that gets executed. Gitpod will run this as a shell script, i.e. multiline input is possible
command: |
echo We are in the workspace directory: $PWD
echo Let's go
```
# Getting started
Source: https://www.gitpod.io/docs/gitpod/configuration/devcontainer/getting-started
Explore Gitpod's Dev Container features. Learn about the benefits of using Dev Containers, how to create a devcontainer.json file, and how to use Gitpod's Dev Container support.
Using Automations you can automate:
* **Setup** - Seed a database, provision infra or authenticate with a cloud account
* **Operations** - Turn your runbooks into one-click self-service actions
* **Editor interfaces** - Start up a server such as Jupyter notebook
* **Enforce policies** - Run security or scanning tools
* **AI workflows** - Configure AI agents or code assistants
See [examples](/flex/configuration/automations/examples) for more.
Automations are defined in configuration YAML files that can live alongside your source code, in another repo, or any location accessible from the development environment.
* [Automations](#automations)
* [The two modes of Automations](#the-two-modes-of-automations)
* [Services](#services)
* [Service Configuration](#service-configuration)
* [Tasks](#tasks)
* [Triggers](#triggers)
* [Available Triggers](#available-triggers)
* [Runners vs. Gitpod Desktop behaviors](#runners-vs-gitpod-desktop-behaviors)
* [Dependencies](#dependencies)
* [Best Practices for Using Triggers](#best-practices-for-using-triggers)
* [Reference](#reference)
## The two modes of Automations
Gitpod supports two primary types of Automations:
1. **[services](#services)** - for long-running processes like starting a server
2. **[tasks](#tasks)** - for performing one-off actions like executing unit tests
```yaml
services:
database:
name: PostgreSQL
commands:
start: docker run postgres
tasks:
run-unit-tests:
name: Runs unit tests
command: go test -v ./...
```
**Caption:** A minimal automation definition.
## Services
Services are **designed for long-running processes**. These are typically components that need to be continuously available throughout your development session.
Common examples include:
* Databases like PostgreSQL
* Caching systems such as Redis
* Your project's backend and frontend servers.
The key characteristic of a service is its persistent nature – it's not expected to terminate on its own but to remain active and ready for interaction as long as your development environment is running.
See [reference](#reference) for a full example.
### Service Configuration
Configuring a service involves defining up to three key commands:
* `start` (required) - The service itself. The process is expected to continue running until stopped. If this command fails (i.e. exits with a non-zero exit code), the service is considered failed.
* `ready` (optional) - Acts as a health check, determining when the service is fully operational and available for use. Gitpod executes this command periodically (once per second) until it exits with a status code of 0, indicating the service is ready. If you don't specify a `ready` command, Gitpod assumes the service is immediately available after the `start` command completes.
* `stop` (optional) - Defines a graceful shutdown procedure for your service. If omitted, Gitpod will send a `SIGTERM` signal to terminate the service when needed.
## Tasks
In contrast to services, **tasks are individual commands designed to perform specific, often one-off actions within your environment**.
Common examples include:
* Compiling code
* Executing test suites
* Populating a database with test data
* Authenticating with cloud services
* Resetting your local environment to a known state.
Tasks are typically short-lived, executing a defined set of operations and then terminating once complete. Tasks consist of a single command to be executed, however their power lies in their ability to be chained and dependent on other components of your environment.
Tasks will exit immediately if a command exits with a non-zero status code, and the task will be marked as failed. This behavior allows for proper error handling in automation pipelines and dependency chains. For example, if a task depends on another task that fails (exits with non-zero status), the dependent task will not be executed.
See [reference](#reference) for a full example.
### Stop a Task
A started task can be stopped prematurely, which will send a `SIGTERM` signal to the task's command (or any chained commands). Once the command has exited, the task will be marked as stopped.
If the command does not exit within 10 seconds, it will be forcefully terminated and the task run will be marked as failed.
## Triggers
Triggers are **the events that initiate the execution of Automations in your Gitpod environment**. This section covers the available triggers and explains their behavior.
### Available Triggers
Gitpod supports three main types of triggers for Automations:
* The `postEnvironmentStart` trigger activates every time the environment is started. This includes both the initial start of the environment and any subsequent restarts. It's particularly useful for operations that need to be performed consistently on every environment start, regardless of the underlying container state. For example, you might use this trigger to set up environment variables or check for updates to critical tools.
* The `postDevcontainerStart` trigger, on the other hand, is activated every time the devcontainer is started. This occurs during the first start of the environment and any subsequent devcontainer restarts, such as after a rebuild. This trigger is ideal for setup tasks that are specific to the devcontainer configuration, like initializing databases or compiling project-specific dependencies.
* The `manual` trigger provides a unique affordance in the user interface, allowing developers to start an action on demand. This trigger is particularly valuable for curating a set of actions that developers frequently perform. By using manual triggers, you can shape and refine the experience others will have in your Gitpod environment. For instance, you might create manual triggers for running tests, generating documentation, or deploying to a staging environment. This approach not only streamlines common tasks but also helps standardize processes across your team.
See [reference](#reference) for a full example.
### Runners vs. Gitpod Desktop behaviors
It's important to note that the behavior of these triggers can vary depending on the Gitpod runner being used. The AWS runner typically uses a suspend/resume model for environment management. When an environment is restarted on EC2, it usually resumes from a suspended state. In this scenario, `postDevcontainerStart` is not called on restart, but `postEnvironmentStart` is still triggered.
Gitpod Desktop takes a different approach. Instead of using suspend/resume, it reboots the entire environment on restart. This causes both `postDevcontainerStart` and `postEnvironmentStart` to run on every environment restart.
This intentional difference in behavior is designed to help recreate state that might be lost due to the lifecycle of individual elements in different environments. For AWS runners, the suspended state preserves most of the environment, so fewer reinitializations are needed. For Gitpod Desktop, the full reboot ensures a clean state each time, which may require more extensive reinitialization.
### Dependencies
Tasks can specify dependencies, allowing you to create sophisticated automation workflows. A task can depend on other tasks, ensuring that these dependencies are executed beforehand. This feature is particularly useful for setting up complex environments where certain operations must occur in a specific order.
It's important to note that task dependencies are re-evaluated and re-executed each time the main task runs. This ensures that your environment is always in the expected state before a task begins, even if it's run multiple times during a development session.
Each task execution is treated as an isolated event. This means that if you modify a task's definition while it's running, those changes won't affect the current execution. This isolation ensures consistency and predictability in your automation workflows.
### Best Practices for Using Triggers
When working with triggers, it's advisable to use `postEnvironmentStart` for tasks that should run on every start, regardless of the runner or whether it's a fresh start or a resume.
Use `postDevcontainerStart` for tasks specifically related to devcontainer setup or for operations that need to run after a full environment reboot. This could involve compiling dependencies or initializing databases.
The `manual` trigger is best used for discretionary tasks that developers might need to perform multiple times during a session, or for complex operations that don't need to run automatically. By thoughtfully implementing manual triggers, you can significantly improve the usability of your Gitpod environment for all team members.
## Reference
Automations are defined as YAML, in a [file](/flex/configuration/automations/basic-configuration) or [directly uploaded to the system](/flex/configuration/automations/generating-automations).
```yaml
# defines automation services (optional)
services:
# serviceReference is an identifier for the service within the environment.
# It is used when referencing the service, e.g. from the CLI.
# It needs to only contain alphanumeric characters, underscores, and hyphens, and must be between 1 and 128 characters long.
serviceReference:
# Name is a required, human readable string.
name: Human readable name
description: Optional description providing more detail
# triggeredBy lists all trigger that start the service. If none are provided the service isn't started automatically.
# See below for a complete list of trigger.
triggeredBy:
- ...
commands:
# start is a mandatory command constitutes the service itself and is expected to continue running until stopped.
# If this command fails (i.e. exits with a non-zero exit code), the service is considered failed.
start: your-service-command
# ready acts as a readiness check, determining when the service is fully operational and available for use.
# Gitpod executes this command periodically (once per second) until it exits with a status code of 0, indicating the service is ready. # If you don't specify a ready command, Gitpod assumes the service is immediately available after the start command completes.
ready: your-service-command --is-running
# This optional command allows you to define a graceful shutdown procedure for your service.
# If omitted, Gitpod will send a SIGTERM signal to terminate the service when needed.
stop: killall your-service-command
# defines automation tasks (optional)
tasks:
taskReference:
# Name is a required, human readable string.
name: Human readable name
description: Optional description providing more detail
# triggeredBy lists all trigger that start the service. If none are provided the service isn't started automatically.
# See below for a complete list of trigger.
triggeredBy:
# postEnvironmentStart activates every time the environment is started, e.g. on first start
- postEnvironmentStart
# postDevcontainerStart activates every time the devcontainer is started, e.g. on first start or devcontainer rebuild
- postDevcontainerStart
# manual trigger provides a unique affordance in the user interface, allowing developers to start an action on demand.
- manual
# dependsOn expresses a dependency on another task which ensures that this other task runs before this one.
dependsOn:
- someOtherTask
# command is the actual task command that gets executed. Gitpod will run this as a shell script, i.e. multiline input is possible
command: |
echo We are in the workspace directory: $PWD
echo Let's go
```
# Getting started
Source: https://www.gitpod.io/docs/gitpod/configuration/devcontainer/getting-started
Explore Gitpod's Dev Container features. Learn about the benefits of using Dev Containers, how to create a devcontainer.json file, and how to use Gitpod's Dev Container support.
 #### Common Registry Hostnames
* Docker Hub: `https://index.docker.io/v1/` (note the https\:// prefix)
* GitHub Container Registry: `ghcr.io`
* GitLab Container Registry: `registry.gitlab.com`
* Azure Container Registry: `[registry-name].azurecr.io`
* Google Container Registry: `gcr.io`
* AWS ECR: \[account-id].dkr.ecr.\[region].amazonaws.com (with runner-native support on EC2 runners)
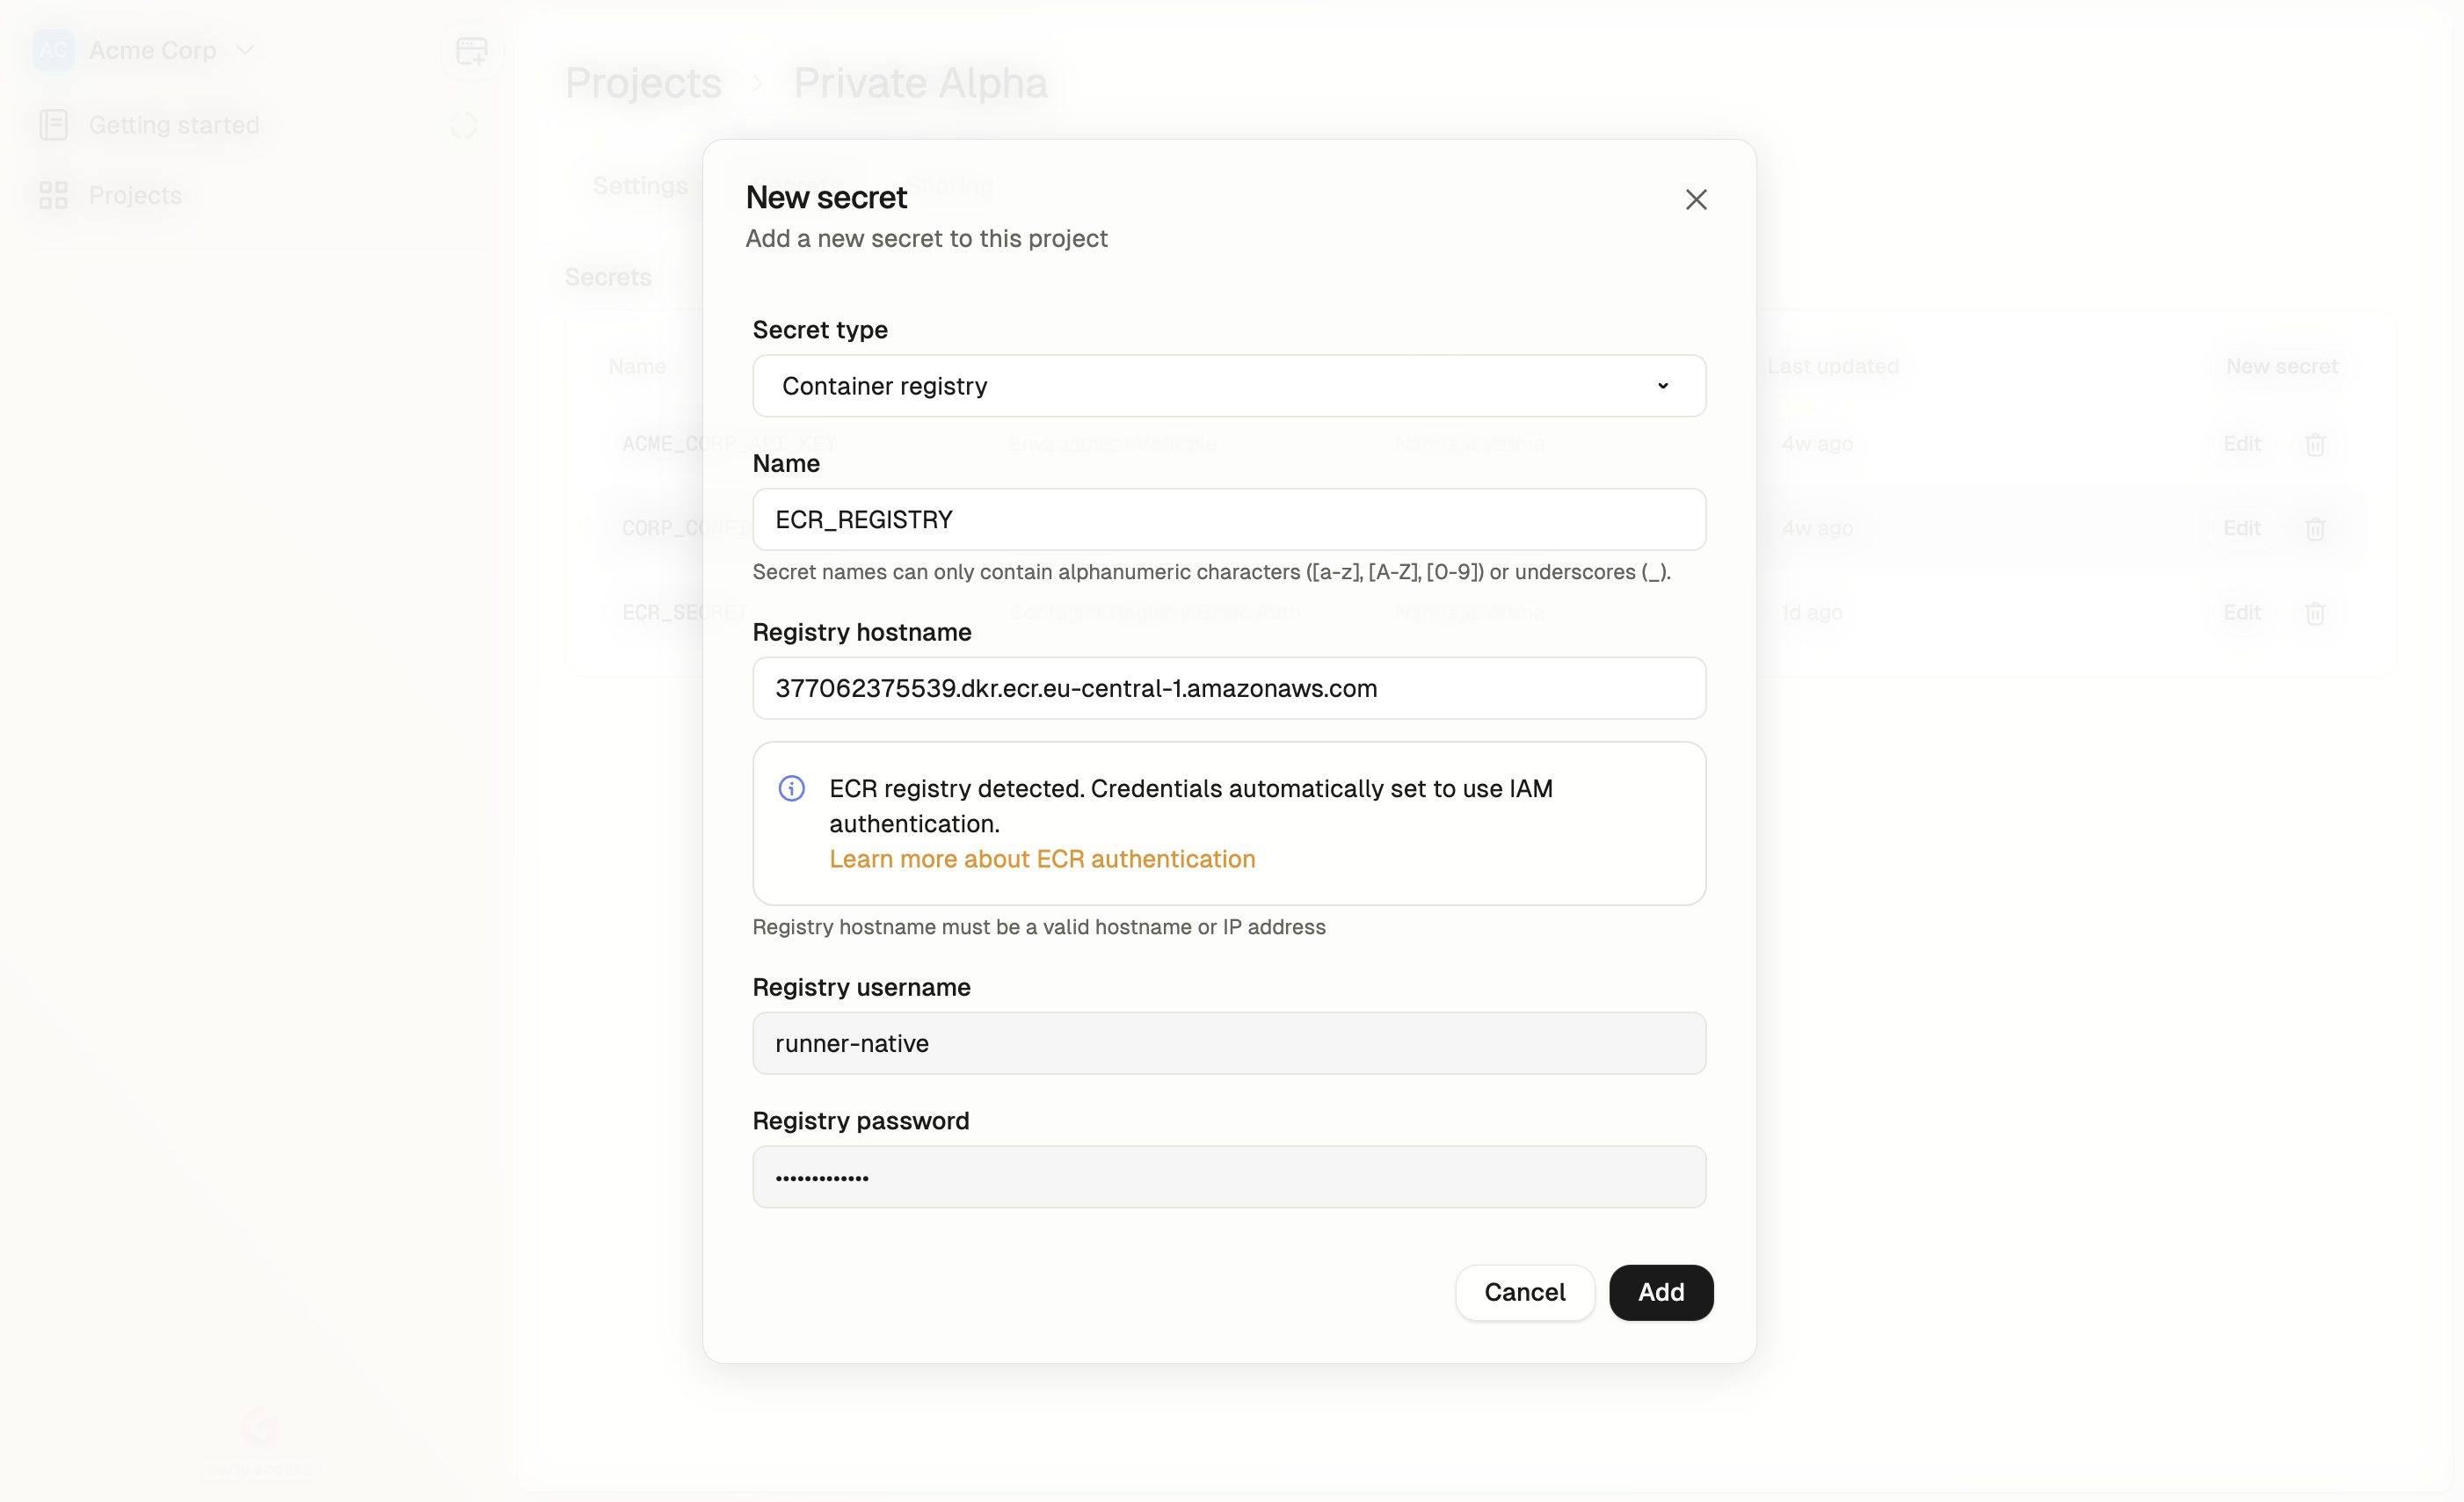
## Using AWS ECR with IAM authentication
Gitpod now supports AWS ECR registries with IAM based authentication when using AWS EC2 runners. This means you can access private ECR repositories without manually managing credentials.
### Prerequisites
* You must be using AWS EC2 runners for your Gitpod environments
* Your ECR registry and EC2 runners must be in the same AWS account or have appropriate cross-account access configured
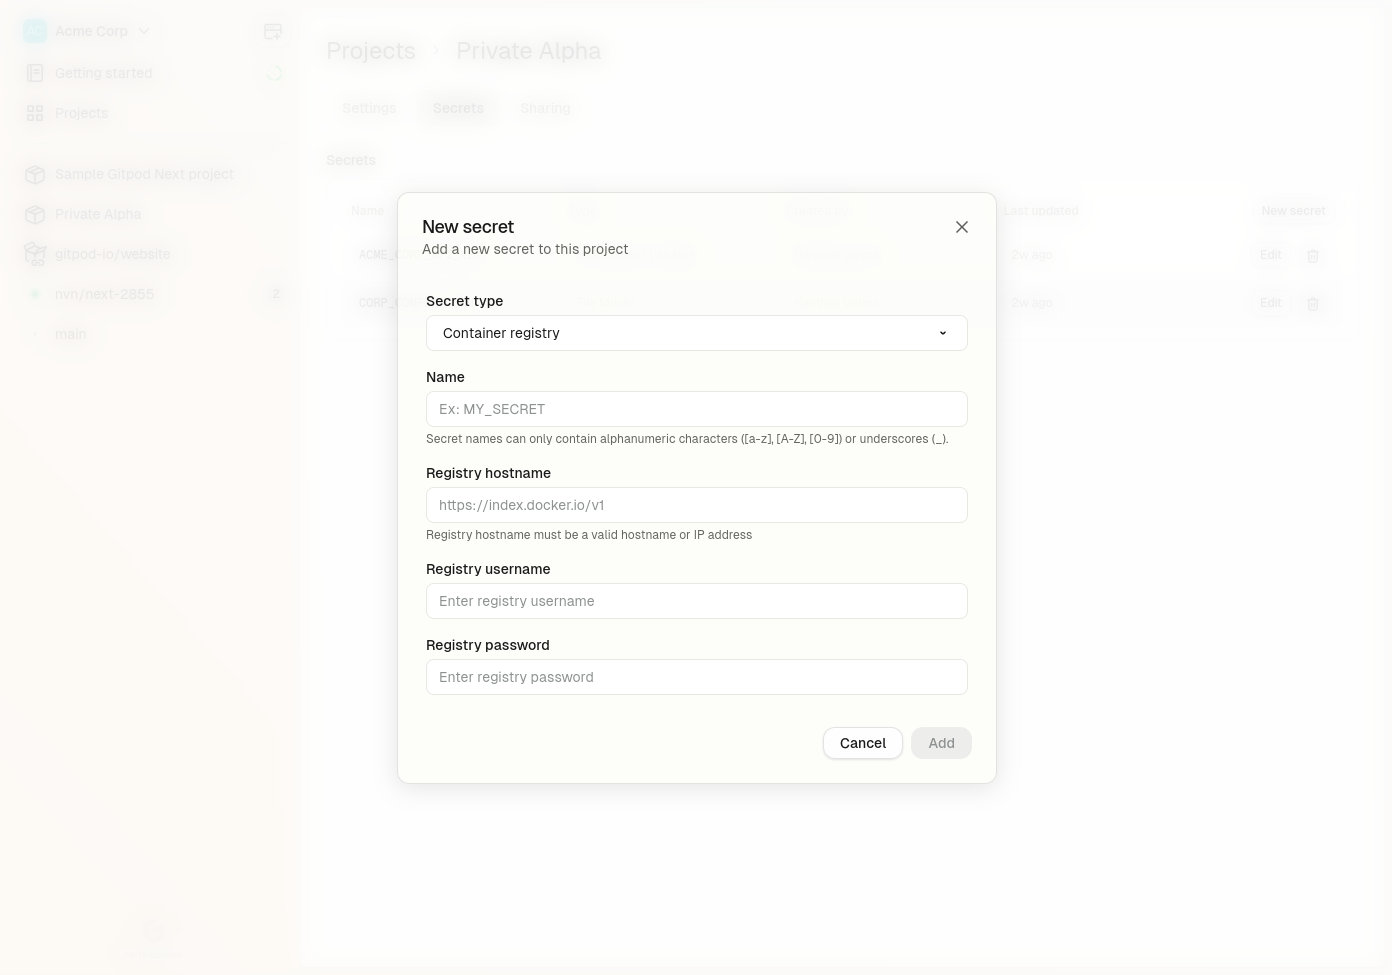
### Setting up ECR Registry Access
* Navigate to Project > Secrets > New Secret in your Gitpod dashboard
* Select Container Registry Basic Auth from the type dropdown
* For the Registry hostname, enter your ECR registry hostname in the format: \[account-id].dkr.ecr.\[region].amazonaws.com
* When you enter an ECR registry hostname, the username and password fields will automatically be filled with runner-native to indicate that native runner authentication will be used
* Click Add
#### Common Registry Hostnames
* Docker Hub: `https://index.docker.io/v1/` (note the https\:// prefix)
* GitHub Container Registry: `ghcr.io`
* GitLab Container Registry: `registry.gitlab.com`
* Azure Container Registry: `[registry-name].azurecr.io`
* Google Container Registry: `gcr.io`
* AWS ECR: \[account-id].dkr.ecr.\[region].amazonaws.com (with runner-native support on EC2 runners)
## Using AWS ECR with IAM authentication
Gitpod now supports AWS ECR registries with IAM based authentication when using AWS EC2 runners. This means you can access private ECR repositories without manually managing credentials.
### Prerequisites
* You must be using AWS EC2 runners for your Gitpod environments
* Your ECR registry and EC2 runners must be in the same AWS account or have appropriate cross-account access configured
### Setting up ECR Registry Access
* Navigate to Project > Secrets > New Secret in your Gitpod dashboard
* Select Container Registry Basic Auth from the type dropdown
* For the Registry hostname, enter your ECR registry hostname in the format: \[account-id].dkr.ecr.\[region].amazonaws.com
* When you enter an ECR registry hostname, the username and password fields will automatically be filled with runner-native to indicate that native runner authentication will be used
* Click Add
 ### Configuring IAM Permissions
To enable your EC2 runners to access your ECR repositories, you need to configure the appropriate IAM permissions:
* Locate your runner environment's IAM role from your CloudFormation stack outputs
* Attach appropriate ECR permissions to this role to allow it to pull images from your ECR repositories
* Update the repository policy of your ECR repository to allow access from the runner's IAM role
* Ensure the IAM role's permission boundaries (if configured) include the required ECR permissions
Here's an example policy you can attach to your runner's IAM role:
```
{
"Version": "2012-10-17",
"Statement": [
{
"Effect": "Allow",
"Action": [
"ecr:GetAuthorizationToken"
],
"Resource": "*"
},
{
"Effect": "Allow",
"Action": [
"ecr:GetDownloadUrlForLayer",
"ecr:BatchGetImage",
"ecr:BatchCheckLayerAvailability"
],
"Resource": "arn:aws:ecr:[region]:[account-id]:repository/[repository-name]"
}
]
}
```
You'll also need to update the repository policy of your ECR repository to allow the runner's IAM role to access it. Here's an example ECR repository policy:
```
{
"Version": "2012-10-17",
"Statement": [
{
"Sid": "AllowGitpodRunnerPull",
"Effect": "Allow",
"Principal": {
"AWS": "arn:aws:iam::[account-id]:role/[runner-role-name]"
},
"Action": [
"ecr:BatchGetImage",
"ecr:GetDownloadUrlForLayer",
"ecr:BatchCheckLayerAvailability"
]
}
]
}
```
### Limitations
* ECR runner-native registry support is only available for AWS EC2 runners
* Your EC2 runners and ECR registry must have properly configured IAM permissions
* Existing environments must be recreated to apply changes to ECR permissions
## Accessing Container Registry Secrets
Once created, container registry secrets serve two purposes:
1. They authenticate with private registries to pull images for your Dev Container during environment creation.
2. If your Dev Container image includes the `docker` CLI, Gitpod automatically runs `docker login` inside your environment to enable continued access to the registry.
### Configuring IAM Permissions
To enable your EC2 runners to access your ECR repositories, you need to configure the appropriate IAM permissions:
* Locate your runner environment's IAM role from your CloudFormation stack outputs
* Attach appropriate ECR permissions to this role to allow it to pull images from your ECR repositories
* Update the repository policy of your ECR repository to allow access from the runner's IAM role
* Ensure the IAM role's permission boundaries (if configured) include the required ECR permissions
Here's an example policy you can attach to your runner's IAM role:
```
{
"Version": "2012-10-17",
"Statement": [
{
"Effect": "Allow",
"Action": [
"ecr:GetAuthorizationToken"
],
"Resource": "*"
},
{
"Effect": "Allow",
"Action": [
"ecr:GetDownloadUrlForLayer",
"ecr:BatchGetImage",
"ecr:BatchCheckLayerAvailability"
],
"Resource": "arn:aws:ecr:[region]:[account-id]:repository/[repository-name]"
}
]
}
```
You'll also need to update the repository policy of your ECR repository to allow the runner's IAM role to access it. Here's an example ECR repository policy:
```
{
"Version": "2012-10-17",
"Statement": [
{
"Sid": "AllowGitpodRunnerPull",
"Effect": "Allow",
"Principal": {
"AWS": "arn:aws:iam::[account-id]:role/[runner-role-name]"
},
"Action": [
"ecr:BatchGetImage",
"ecr:GetDownloadUrlForLayer",
"ecr:BatchCheckLayerAvailability"
]
}
]
}
```
### Limitations
* ECR runner-native registry support is only available for AWS EC2 runners
* Your EC2 runners and ECR registry must have properly configured IAM permissions
* Existing environments must be recreated to apply changes to ECR permissions
## Accessing Container Registry Secrets
Once created, container registry secrets serve two purposes:
1. They authenticate with private registries to pull images for your Dev Container during environment creation.
2. If your Dev Container image includes the `docker` CLI, Gitpod automatically runs `docker login` inside your environment to enable continued access to the registry.
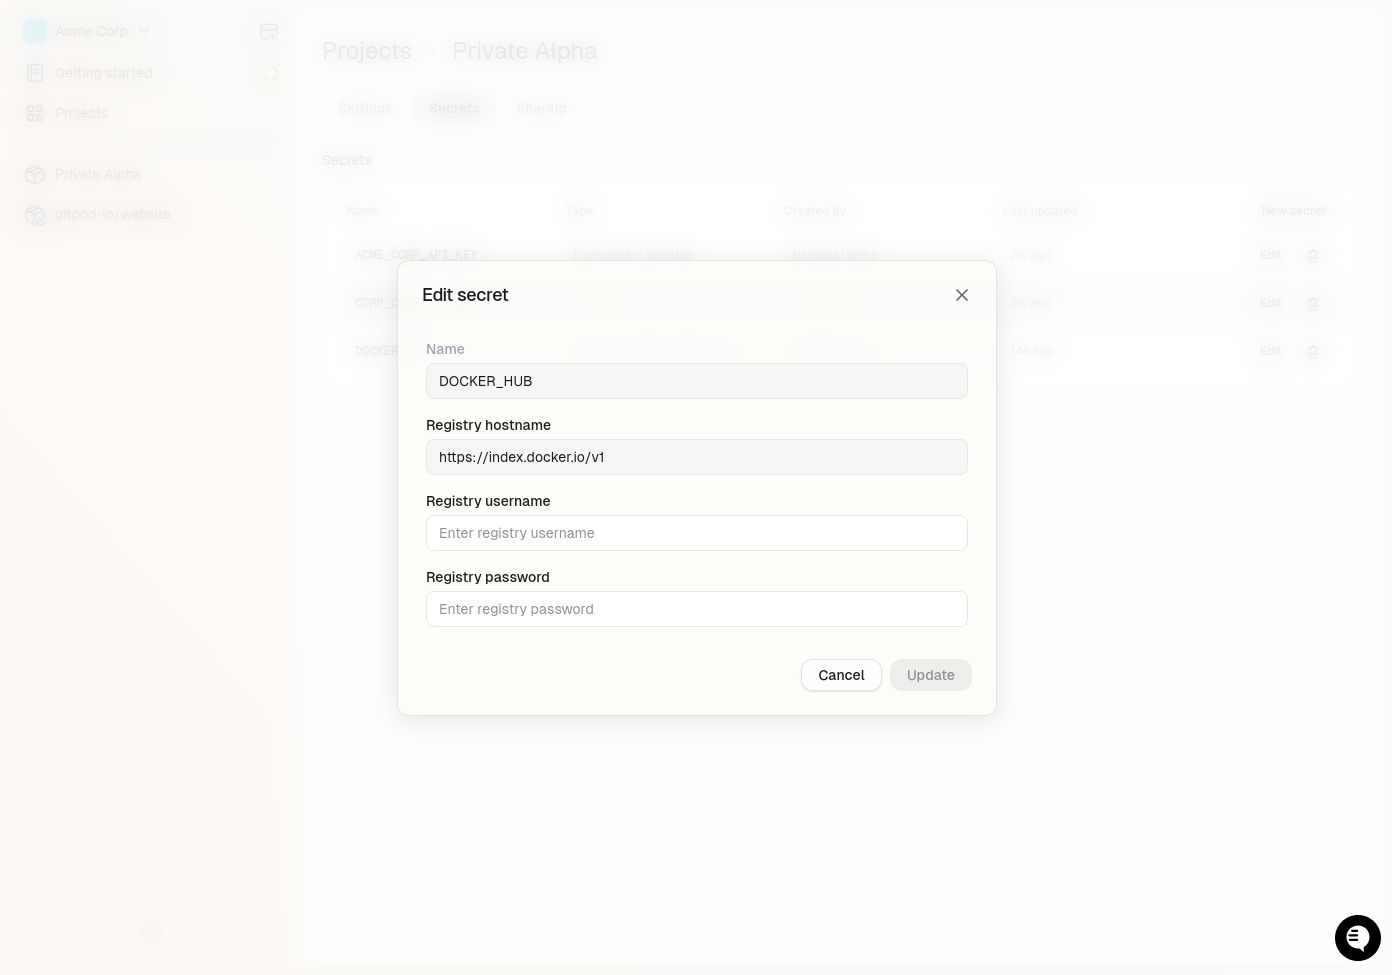 When you update a Container Registry Secret:
* **New environments** will use the updated credentials
* **Existing running environments** will continue to use the old credentials until they are restarted
* **Registry hostname** cannot be modified after creation
* To apply updates to running environments, you must restart them
## Deleting a Container Registry Secret
To delete a Container Registry Secret:
1. Navigate to secret managent in your Gitpod dashboard
* **Project > Secrets** for Project secrets
* **Settings > Secrets** for User secrets
2. Find your Container Registry Secret and click the `Delete` button
3. Confirm the deletion
After deletion:
* New environments launched from the project will no longer have access to the secret
* Existing environments that already have the secret will retain it until those environments themselves are deleted
* This may cause image pull failures if your environment depends on images from that registry
**Note:** When a project is deleted, all its secrets are automatically deleted as well.
# Environment Variables
Source: https://www.gitpod.io/docs/gitpod/configuration/secrets/environment-variables
Environment variables allow you to store and manage configuration settings that your application needs at runtime. These variables are accessible to your application's processes as standard environment variables, enabling you to:
* Configure your application for different environments (development, staging, production)
* Store configuration settings separate from your code
* Manage API keys and other configuration values
Environment Variable secrets you create in the Gitpod dashboard become accessible as system environment variables in your environment. The name you provide for the secret becomes the environment variable name.
## When to use Environment Variables
**Security Consideration**: For sensitive data (passwords, API tokens, private keys), we strongly recommend using [**files**](/flex/secrets/files) instead of environment variables.
### Comparison: Files vs Environment Variables
| Files | Environment Variables |
| ----------------------------------------------- | ------------------------------------------ |
| Support complex structures (JSON, certificates) | Limited to simple string values |
| Not visible in process listings | Visible via `ps auxe` commands |
| Not included in crash reports or logs | Often dumped in logs and error reports |
| Explicitly used by processes | Automatically inherited by child processes |
Use environment variables for non-sensitive configuration like feature flags, API endpoints, or application modes.
## Creating an Environment Variable Secret
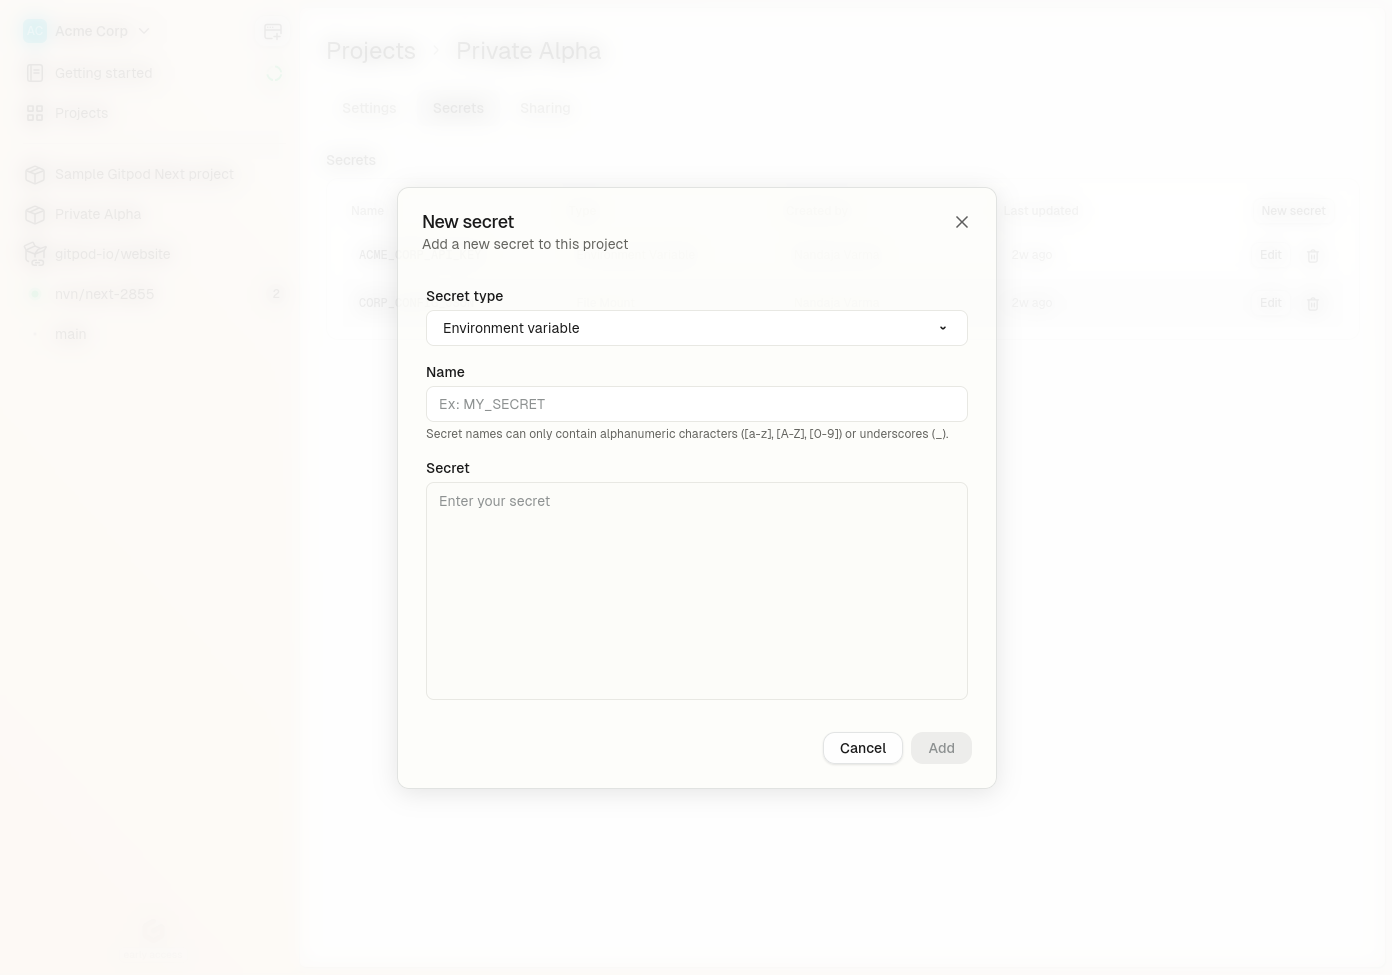
To create an Environment Variable Secret:
1. Navigate to secret managent in your Gitpod dashboard
* **Project > Secrets > New Secret** for Project secrets
* **Settings > Secrets > New Secret** for User secrets
2. Select **Environment Variable** from the type dropdown
3. Configure the following fields:
* **Type of secret**: "Environment Variable" (cannot be changed after creation)
* **Name**: A unique identifier (3-127 characters, only alphanumeric characters, underscores, and hyphens)
* **Value**: The value to be stored (maximum size: 4KB)
When you update a Container Registry Secret:
* **New environments** will use the updated credentials
* **Existing running environments** will continue to use the old credentials until they are restarted
* **Registry hostname** cannot be modified after creation
* To apply updates to running environments, you must restart them
## Deleting a Container Registry Secret
To delete a Container Registry Secret:
1. Navigate to secret managent in your Gitpod dashboard
* **Project > Secrets** for Project secrets
* **Settings > Secrets** for User secrets
2. Find your Container Registry Secret and click the `Delete` button
3. Confirm the deletion
After deletion:
* New environments launched from the project will no longer have access to the secret
* Existing environments that already have the secret will retain it until those environments themselves are deleted
* This may cause image pull failures if your environment depends on images from that registry
**Note:** When a project is deleted, all its secrets are automatically deleted as well.
# Environment Variables
Source: https://www.gitpod.io/docs/gitpod/configuration/secrets/environment-variables
Environment variables allow you to store and manage configuration settings that your application needs at runtime. These variables are accessible to your application's processes as standard environment variables, enabling you to:
* Configure your application for different environments (development, staging, production)
* Store configuration settings separate from your code
* Manage API keys and other configuration values
Environment Variable secrets you create in the Gitpod dashboard become accessible as system environment variables in your environment. The name you provide for the secret becomes the environment variable name.
## When to use Environment Variables
**Security Consideration**: For sensitive data (passwords, API tokens, private keys), we strongly recommend using [**files**](/flex/secrets/files) instead of environment variables.
### Comparison: Files vs Environment Variables
| Files | Environment Variables |
| ----------------------------------------------- | ------------------------------------------ |
| Support complex structures (JSON, certificates) | Limited to simple string values |
| Not visible in process listings | Visible via `ps auxe` commands |
| Not included in crash reports or logs | Often dumped in logs and error reports |
| Explicitly used by processes | Automatically inherited by child processes |
Use environment variables for non-sensitive configuration like feature flags, API endpoints, or application modes.
## Creating an Environment Variable Secret
To create an Environment Variable Secret:
1. Navigate to secret managent in your Gitpod dashboard
* **Project > Secrets > New Secret** for Project secrets
* **Settings > Secrets > New Secret** for User secrets
2. Select **Environment Variable** from the type dropdown
3. Configure the following fields:
* **Type of secret**: "Environment Variable" (cannot be changed after creation)
* **Name**: A unique identifier (3-127 characters, only alphanumeric characters, underscores, and hyphens)
* **Value**: The value to be stored (maximum size: 4KB)
 ## Accessing Environment Variables
Once created, environment variables are automatically available in your Gitpod environment as system environment variables by the name you provided. No special code is required to access them.
## Updating an Environment Variable Secret
You can update the value of an environment variable at any time:
1. Navigate to secret managent in your Gitpod dashboard
* **Project > Secrets** for Project secrets
* **Settings > Secrets** for User secrets
2. Click the `Edit` button
3. Update the value
4. Click `Save`
## Accessing Environment Variables
Once created, environment variables are automatically available in your Gitpod environment as system environment variables by the name you provided. No special code is required to access them.
## Updating an Environment Variable Secret
You can update the value of an environment variable at any time:
1. Navigate to secret managent in your Gitpod dashboard
* **Project > Secrets** for Project secrets
* **Settings > Secrets** for User secrets
2. Click the `Edit` button
3. Update the value
4. Click `Save`
 When you update a secret value:
* **New environments** will receive the updated value
* **Existing running environments** will continue to use the old value until they are restarted
* To apply updates to running environments, you must restart them
## Deleting an Environment Variable Secret
To delete an environment variable:
1. Navigate to secret managent in your Gitpod dashboard
* **Project > Secrets** for Project secrets
* **Settings > Secrets** for User secrets
2. Click the `Delete` button
3. Confirm the deletion
After deletion:
* New environments launched from the project will no longer have access to the secret
* Existing environments that already have the secret will retain it until those environments themselves are deleted
**Note:** When a project is deleted, all its secrets are automatically deleted as well.
# Files
Source: https://www.gitpod.io/docs/gitpod/configuration/secrets/files
File secrets mount sensitive data as actual files in your Gitpod environment at a specified location. These files are automatically created when your environment starts, allowing your applications to read them like any other file on the filesystem.
## When to use File Secrets
File secrets are the recommended choice for:
* **Complex data structures** - JSON configurations, certificates, or other multi-line content
* **Sensitive credentials** - API keys, authentication tokens, and passwords
* **Binary data** - Certificates, keystore files, or other non-text content
* **Configuration that applications expect in file format** - Many applications look for specific configuration files
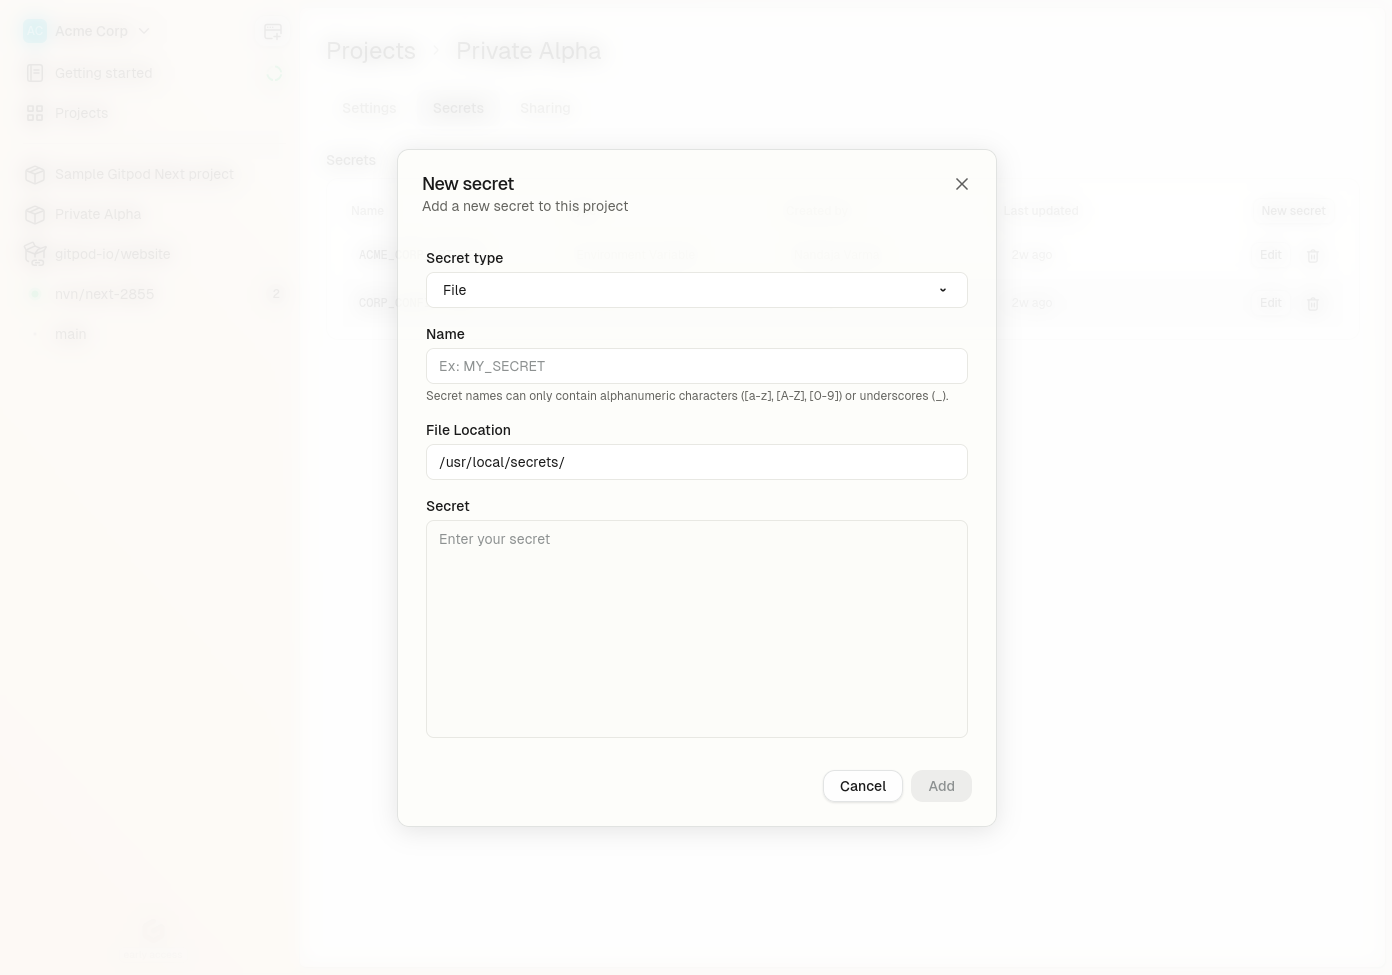
## Creating a File Secret
To create a File Secret:
1. Navigate to secret managent in your Gitpod dashboard
* **Project > Secrets > New Secret** for Project secrets
* **Settings > Secrets > New Secret** for User secrets
2. Select **File** from the type dropdown
3. Configure the following fields:
* **Type of secret**: "File" (cannot be changed after creation)
* **Name**: A unique identifier (3-127 characters, only alphanumeric characters, underscores, and hyphens)
* **Value**: The content to be stored in the file (maximum size: 4KB)
* **Mount Path**: The filepath where the secret will be mounted in your environment (cannot be changed after creation)
When you update a secret value:
* **New environments** will receive the updated value
* **Existing running environments** will continue to use the old value until they are restarted
* To apply updates to running environments, you must restart them
## Deleting an Environment Variable Secret
To delete an environment variable:
1. Navigate to secret managent in your Gitpod dashboard
* **Project > Secrets** for Project secrets
* **Settings > Secrets** for User secrets
2. Click the `Delete` button
3. Confirm the deletion
After deletion:
* New environments launched from the project will no longer have access to the secret
* Existing environments that already have the secret will retain it until those environments themselves are deleted
**Note:** When a project is deleted, all its secrets are automatically deleted as well.
# Files
Source: https://www.gitpod.io/docs/gitpod/configuration/secrets/files
File secrets mount sensitive data as actual files in your Gitpod environment at a specified location. These files are automatically created when your environment starts, allowing your applications to read them like any other file on the filesystem.
## When to use File Secrets
File secrets are the recommended choice for:
* **Complex data structures** - JSON configurations, certificates, or other multi-line content
* **Sensitive credentials** - API keys, authentication tokens, and passwords
* **Binary data** - Certificates, keystore files, or other non-text content
* **Configuration that applications expect in file format** - Many applications look for specific configuration files
## Creating a File Secret
To create a File Secret:
1. Navigate to secret managent in your Gitpod dashboard
* **Project > Secrets > New Secret** for Project secrets
* **Settings > Secrets > New Secret** for User secrets
2. Select **File** from the type dropdown
3. Configure the following fields:
* **Type of secret**: "File" (cannot be changed after creation)
* **Name**: A unique identifier (3-127 characters, only alphanumeric characters, underscores, and hyphens)
* **Value**: The content to be stored in the file (maximum size: 4KB)
* **Mount Path**: The filepath where the secret will be mounted in your environment (cannot be changed after creation)
 ## Accessing File Secrets
Once created, the file secret is automatically mounted at the specified path in your Gitpod environment. Your application can read it like any other file on the filesystem. No special code is required to access the file beyond normal file system operations.
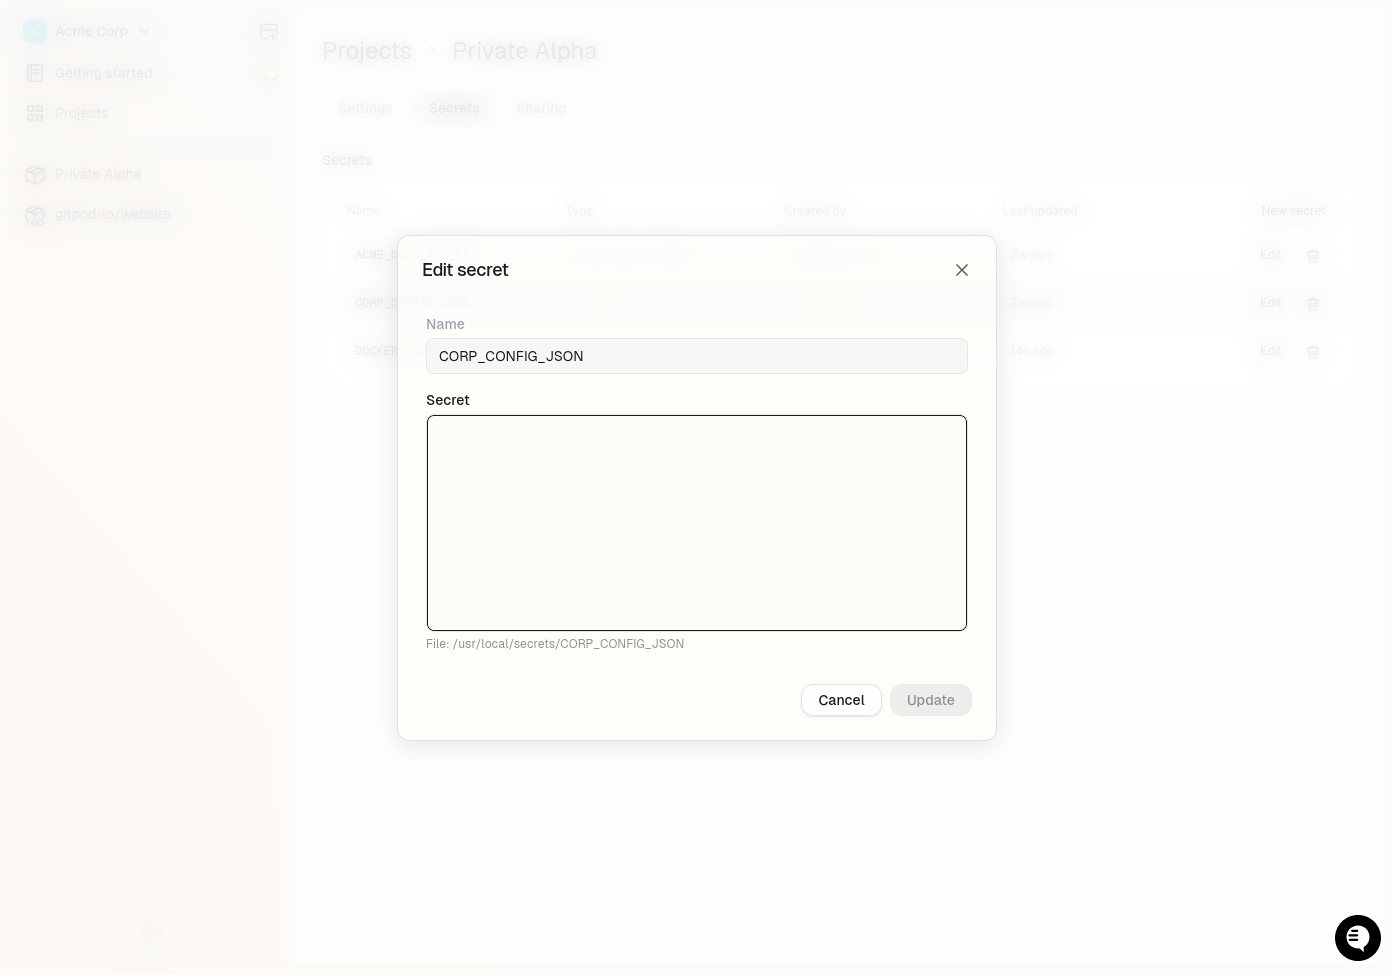
## Updating a File Secret
You can update the content of a file secret at any time, although the mount path cannot be changed once the secret is created.
1. Navigate to the **Project > Secrets** page in your Gitpod dashboard
2. Click the `Edit` button
3. Update the value
4. Click `Save`
## Accessing File Secrets
Once created, the file secret is automatically mounted at the specified path in your Gitpod environment. Your application can read it like any other file on the filesystem. No special code is required to access the file beyond normal file system operations.
## Updating a File Secret
You can update the content of a file secret at any time, although the mount path cannot be changed once the secret is created.
1. Navigate to the **Project > Secrets** page in your Gitpod dashboard
2. Click the `Edit` button
3. Update the value
4. Click `Save`
 When you update a secret value:
* **New environments** will receive the updated file content
* **Existing running environments** will continue to use the old file content until they are restarted
* To apply updates to running environments, you must restart them
* The mount path cannot be changed after creation
## Deleting a File Secret
To delete a file secret:
1. Navigate to the **Project > Secrets** page in your Gitpod dashboard
2. Click the `Delete` button
3. Confirm the deletion
After deletion:
* New environments launched from the project will no longer have access to the secret
* Existing environments that already have the secret will retain it until those environments themselves are deleted
**Note:** When a project is deleted, all its secrets are automatically deleted as well.
# Overview
Source: https://www.gitpod.io/docs/gitpod/configuration/secrets/overview
Learn how to configure secrets in Gitpod
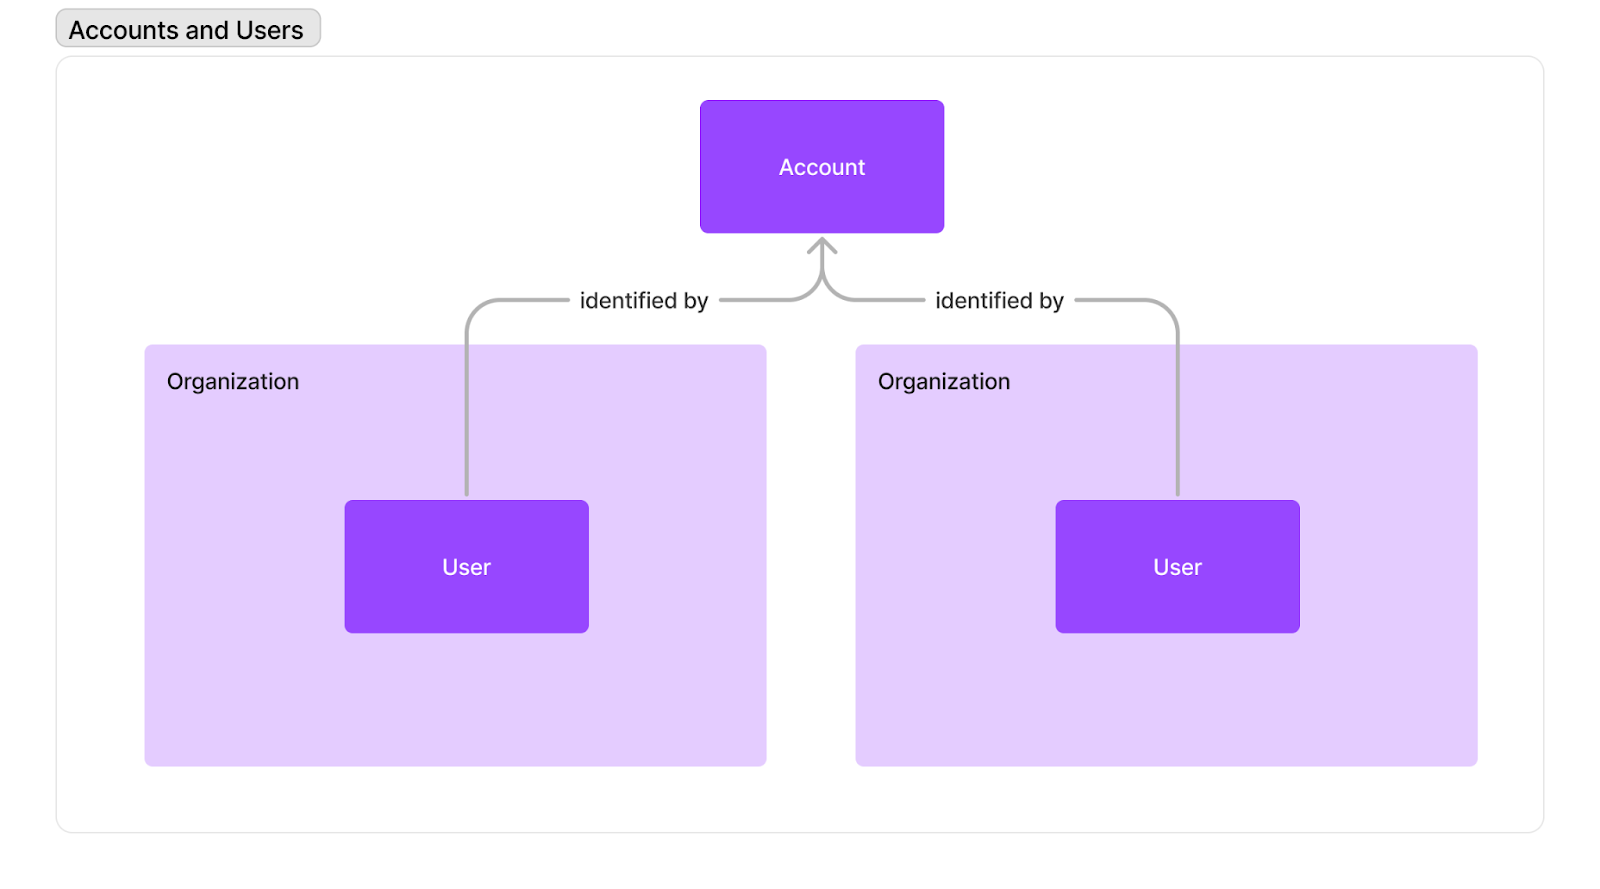
Secrets allow you to securely store and inject sensitive data into your environments. These include API keys, access tokens, credentials, and certificates that your applications need but shouldn't be exposed in your source code.
Secrets are configured at three levels: organization, project, or user. They are automatically made available to any environment launched from that project. This ensures consistent and secure access to sensitive data across your development workflow.
## Secret Precedence
When secrets with the same name exist at different levels, they follow a strict precedence order:
1. **User Secrets** - Highest precedence
2. **Project Secrets** - Middle precedence
3. **Organization Secrets** - Lowest precedence
This means:
* User secrets override both project and organization secrets with the same name and mount
* Project secrets override organization secrets with the same name
* Organization secrets have the lowest priority
Learn more about managing [organization secrets](/flex/organizations/organization-secrets), [project secrets](/flex/projects/project-secrets), or [user secrets](/flex/configuration/secrets/user-secrets).
## Encryption of Secrets
All secrets you create are protected with industry-standard encryption. Secrets can only be retrieved by environments created from your projects (for Project secrets) or your user (for User secrets).
We use `AES256-GCM` to encrypt all secrets at rest in the database, with an additional layer of protection through AWS RDS encryption. This dual-layer approach ensures your sensitive data remains secure both at the application level and infrastructure level. In transit, all secrets are encrypted using TLS.
**Gitpod employees do not have access to the encryption keys and cannot decrypt your secrets.**
## Types of Secrets
Gitpod supports multiple types of secrets to accommodate different needs:
* [Files](/flex/configuration/secrets/files): Securely store and inject entire files into your environment
* [Environment Variables](/flex/configuration/secrets/environment-variables): Key-value pairs injected into your environment's process space
* [Container Registry Secrets](/flex/configuration/secrets/container-registry-secret): Authentication credentials for private container registries
Each type of secret serves a specific purpose in your development workflow. Click the links above to learn more about how to use each type effectively.
# User Secrets
Source: https://www.gitpod.io/docs/gitpod/configuration/secrets/user-secrets
Learn how to configure user secrets in your Gitpod Project
User secrets are a type of secret that are specific to a user. They are used to store sensitive data that is specific to a user, such as API keys, access tokens, and credentials which are shared across all projects and environments of a user.
**User secrets have the highest precedence** in the secrets hierarchy. This means they will override any project or organization secrets with the same name, allowing you to customize your environment without affecting other team members.
To manage your user secrets, navigate to the **Settings > My account > Secrets** page in your Gitpod dashboard.
When you update a secret value:
* **New environments** will receive the updated file content
* **Existing running environments** will continue to use the old file content until they are restarted
* To apply updates to running environments, you must restart them
* The mount path cannot be changed after creation
## Deleting a File Secret
To delete a file secret:
1. Navigate to the **Project > Secrets** page in your Gitpod dashboard
2. Click the `Delete` button
3. Confirm the deletion
After deletion:
* New environments launched from the project will no longer have access to the secret
* Existing environments that already have the secret will retain it until those environments themselves are deleted
**Note:** When a project is deleted, all its secrets are automatically deleted as well.
# Overview
Source: https://www.gitpod.io/docs/gitpod/configuration/secrets/overview
Learn how to configure secrets in Gitpod
Secrets allow you to securely store and inject sensitive data into your environments. These include API keys, access tokens, credentials, and certificates that your applications need but shouldn't be exposed in your source code.
Secrets are configured at three levels: organization, project, or user. They are automatically made available to any environment launched from that project. This ensures consistent and secure access to sensitive data across your development workflow.
## Secret Precedence
When secrets with the same name exist at different levels, they follow a strict precedence order:
1. **User Secrets** - Highest precedence
2. **Project Secrets** - Middle precedence
3. **Organization Secrets** - Lowest precedence
This means:
* User secrets override both project and organization secrets with the same name and mount
* Project secrets override organization secrets with the same name
* Organization secrets have the lowest priority
Learn more about managing [organization secrets](/flex/organizations/organization-secrets), [project secrets](/flex/projects/project-secrets), or [user secrets](/flex/configuration/secrets/user-secrets).
## Encryption of Secrets
All secrets you create are protected with industry-standard encryption. Secrets can only be retrieved by environments created from your projects (for Project secrets) or your user (for User secrets).
We use `AES256-GCM` to encrypt all secrets at rest in the database, with an additional layer of protection through AWS RDS encryption. This dual-layer approach ensures your sensitive data remains secure both at the application level and infrastructure level. In transit, all secrets are encrypted using TLS.
**Gitpod employees do not have access to the encryption keys and cannot decrypt your secrets.**
## Types of Secrets
Gitpod supports multiple types of secrets to accommodate different needs:
* [Files](/flex/configuration/secrets/files): Securely store and inject entire files into your environment
* [Environment Variables](/flex/configuration/secrets/environment-variables): Key-value pairs injected into your environment's process space
* [Container Registry Secrets](/flex/configuration/secrets/container-registry-secret): Authentication credentials for private container registries
Each type of secret serves a specific purpose in your development workflow. Click the links above to learn more about how to use each type effectively.
# User Secrets
Source: https://www.gitpod.io/docs/gitpod/configuration/secrets/user-secrets
Learn how to configure user secrets in your Gitpod Project
User secrets are a type of secret that are specific to a user. They are used to store sensitive data that is specific to a user, such as API keys, access tokens, and credentials which are shared across all projects and environments of a user.
**User secrets have the highest precedence** in the secrets hierarchy. This means they will override any project or organization secrets with the same name, allowing you to customize your environment without affecting other team members.
To manage your user secrets, navigate to the **Settings > My account > Secrets** page in your Gitpod dashboard.
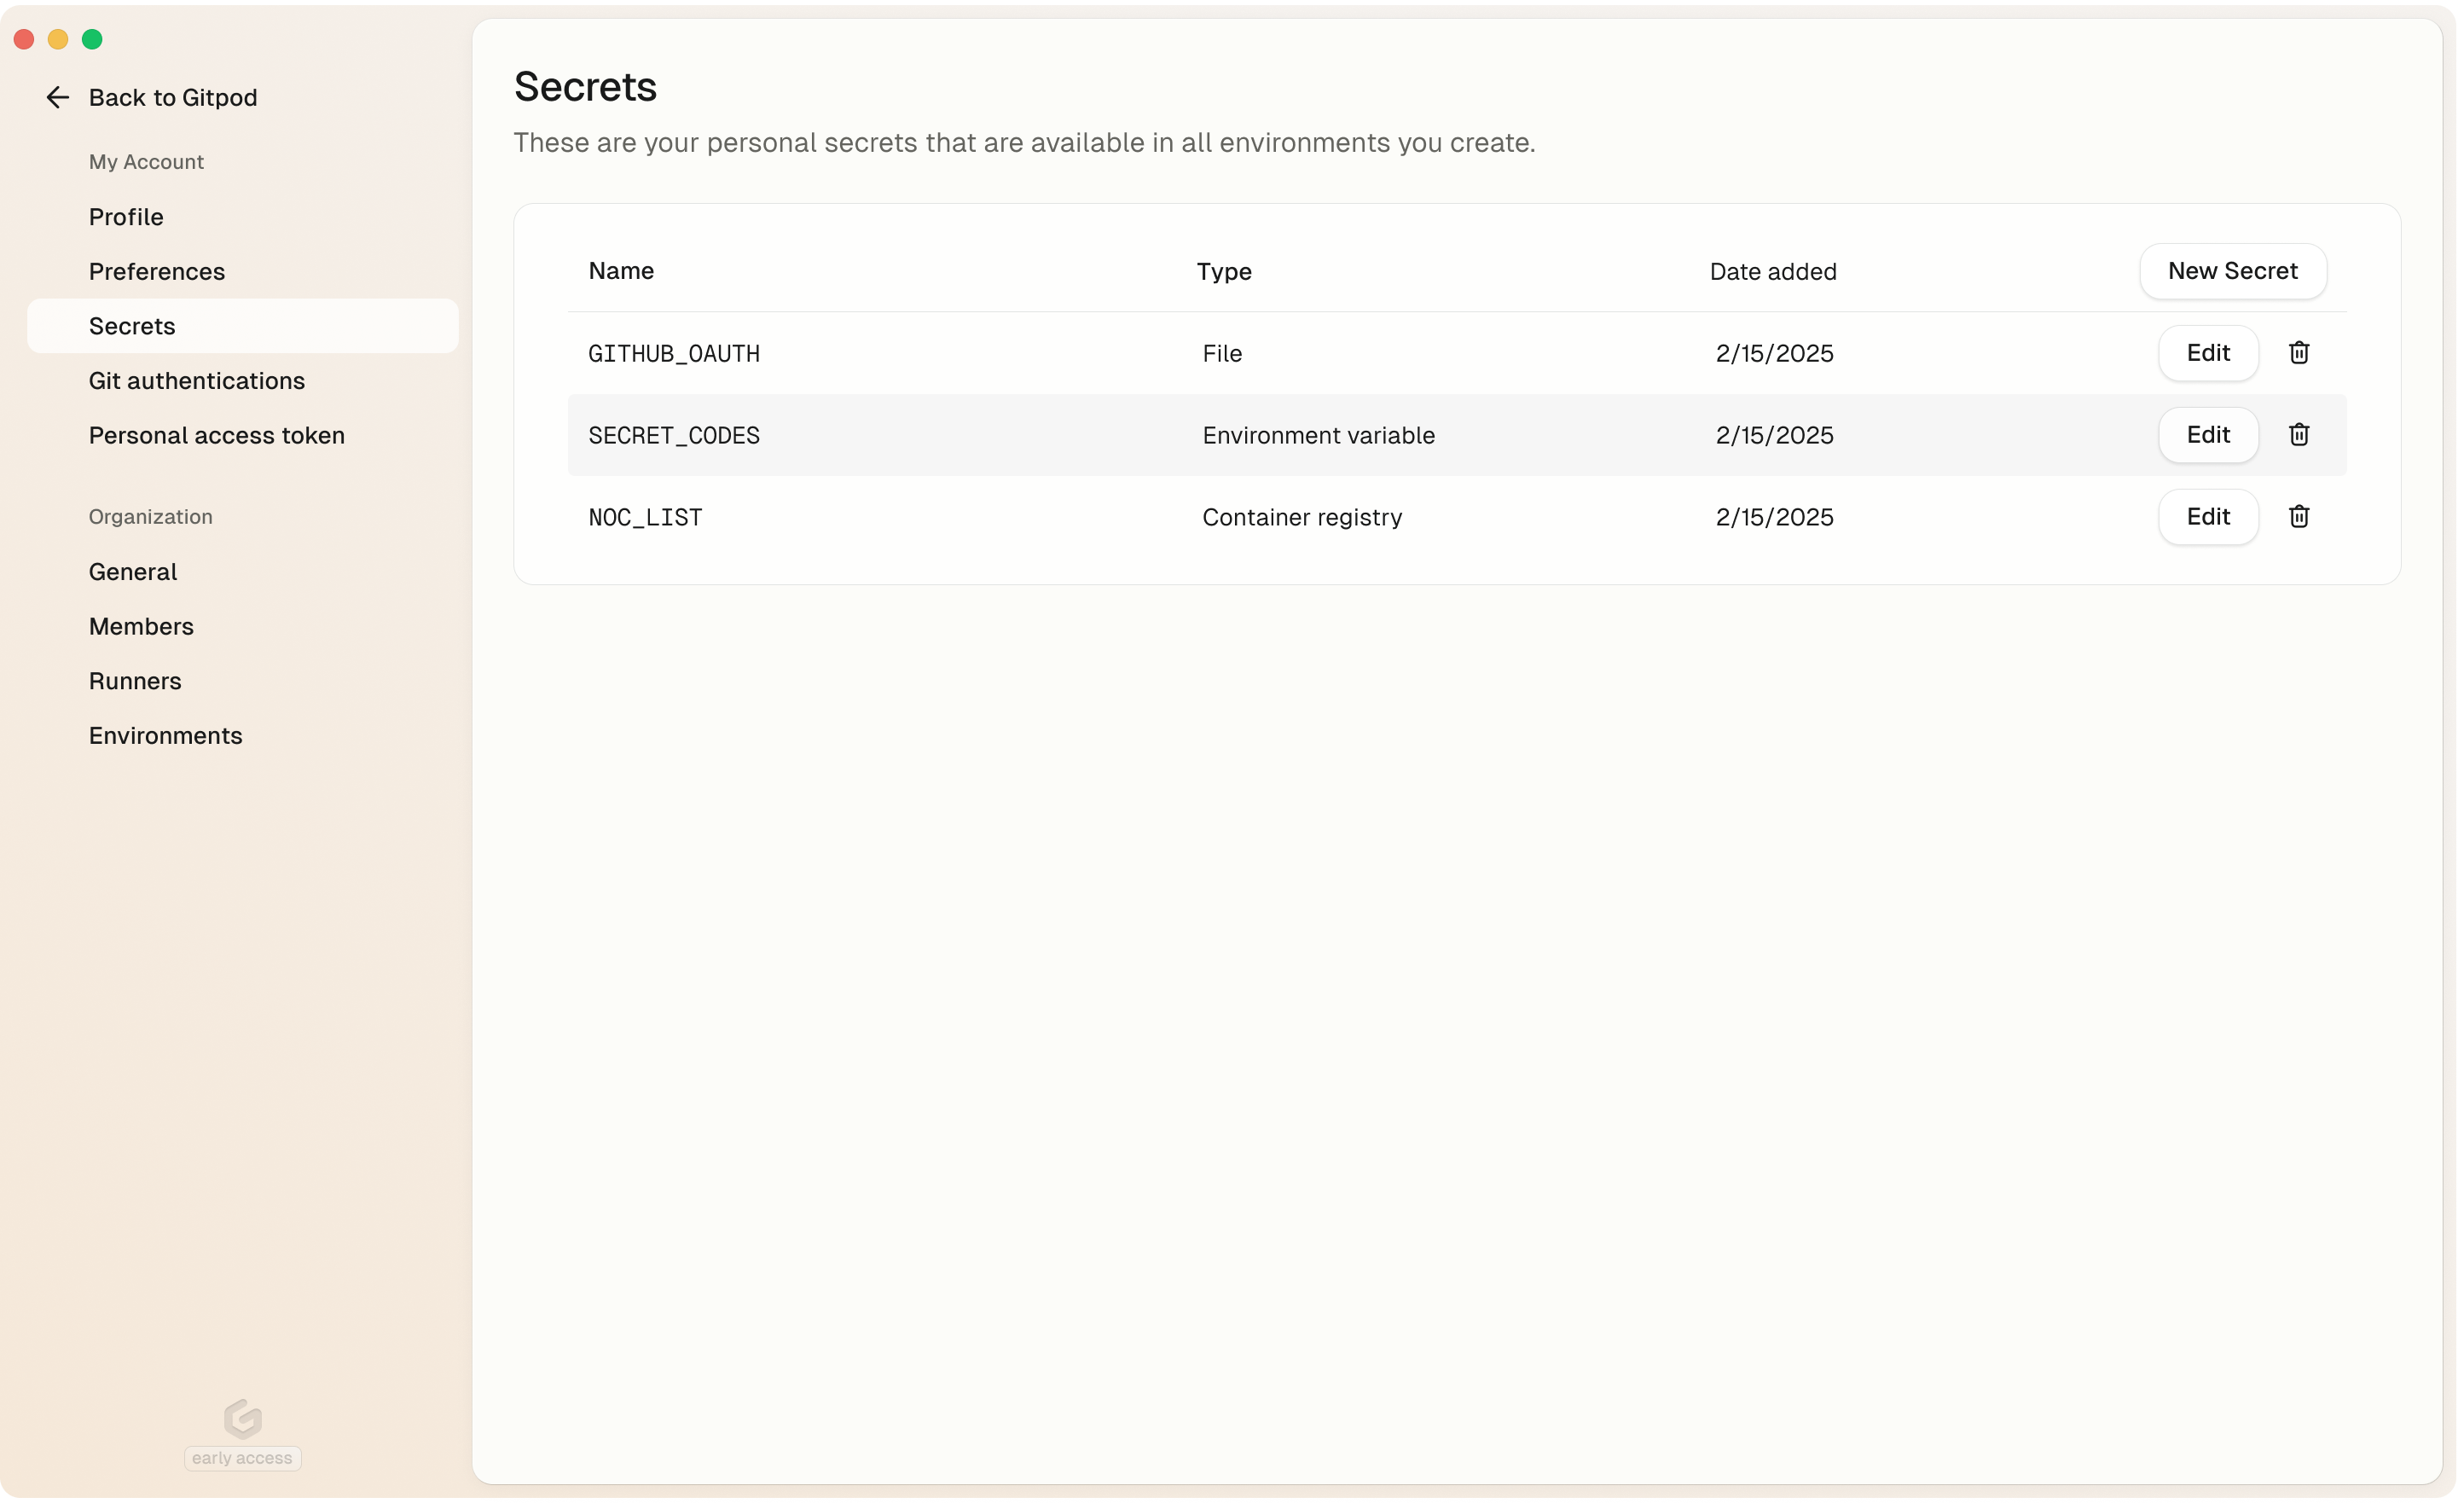 ## Secret Types
User secrets support the following types:
* [Environment Variables](/flex/configuration/secrets/environment-variables)
* [Files](/flex/configuration/secrets/files)
* [Container Registry Secrets](/flex/configuration/secrets/container-registry-secret)
## Creating a User Secret
To create a user secret, navigate to the **Settings > My account > Secrets** page in your Gitpod dashboard and click the **New Secret** button.
## Updating a User Secret
To update a user secret, navigate to the **Settings > My account > Secrets** page in your Gitpod dashboard and click the **Edit** button.
## Deleting a User Secret
To delete a user secret, navigate to the **Settings > My account > Secrets** page in your Gitpod dashboard and click the **Delete** button.
# Cursor
Source: https://www.gitpod.io/docs/gitpod/editors/cursor
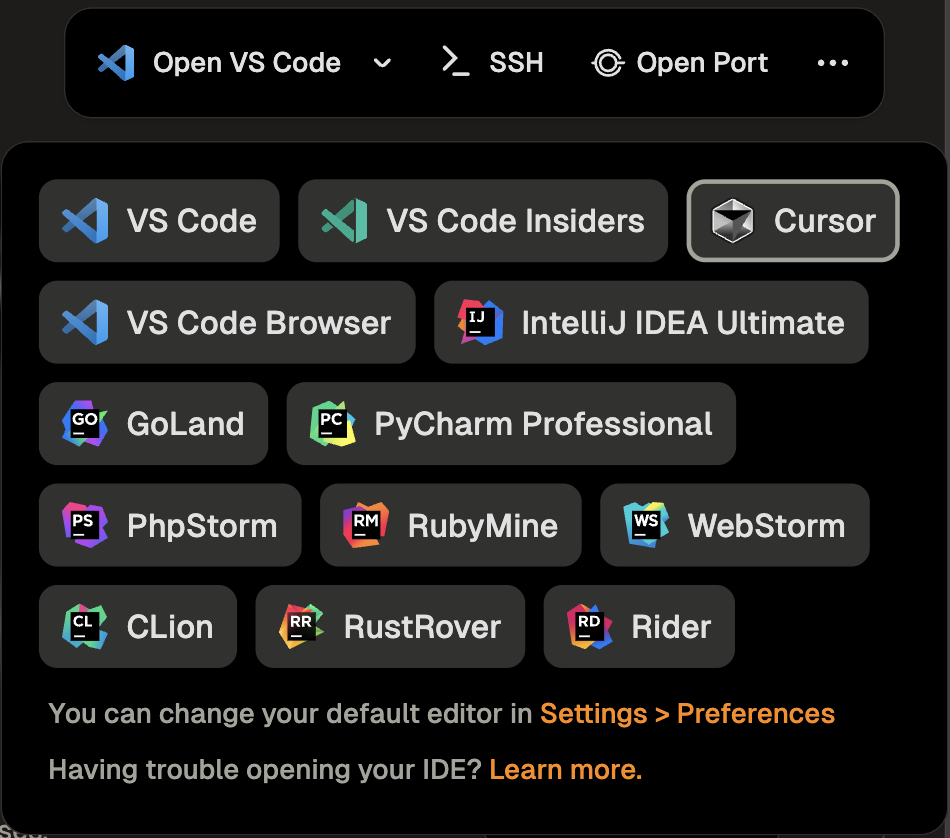
[Cursor](https://www.cursor.com/) uses the same extension as VS Code. Most of [VS Code documentation](/flex/editors/vscode) is applicable to Cursor. When reaching out to support, please specify that you are using Cursor as your editor.
## Opening an Environment
You can select Cursor from the editor selector dropdown by clicking on the dropdown arrow next to the editor button on the action bar.
## Secret Types
User secrets support the following types:
* [Environment Variables](/flex/configuration/secrets/environment-variables)
* [Files](/flex/configuration/secrets/files)
* [Container Registry Secrets](/flex/configuration/secrets/container-registry-secret)
## Creating a User Secret
To create a user secret, navigate to the **Settings > My account > Secrets** page in your Gitpod dashboard and click the **New Secret** button.
## Updating a User Secret
To update a user secret, navigate to the **Settings > My account > Secrets** page in your Gitpod dashboard and click the **Edit** button.
## Deleting a User Secret
To delete a user secret, navigate to the **Settings > My account > Secrets** page in your Gitpod dashboard and click the **Delete** button.
# Cursor
Source: https://www.gitpod.io/docs/gitpod/editors/cursor
[Cursor](https://www.cursor.com/) uses the same extension as VS Code. Most of [VS Code documentation](/flex/editors/vscode) is applicable to Cursor. When reaching out to support, please specify that you are using Cursor as your editor.
## Opening an Environment
You can select Cursor from the editor selector dropdown by clicking on the dropdown arrow next to the editor button on the action bar.
 # JetBrains
Source: https://www.gitpod.io/docs/gitpod/editors/jetbrains
Integrate JetBrains IDEs with Gitpod
Gitpod seamlessly integrates with JetBrains IDEs including IntelliJ IDEA Ultimate, GoLand, PhpStorm, PyCharm, RubyMine, WebStorm, Rider, CLion, and RustRover.
This guide will walk you through the setup process and provide tips for managing your development environments.
# JetBrains
Source: https://www.gitpod.io/docs/gitpod/editors/jetbrains
Integrate JetBrains IDEs with Gitpod
Gitpod seamlessly integrates with JetBrains IDEs including IntelliJ IDEA Ultimate, GoLand, PhpStorm, PyCharm, RubyMine, WebStorm, Rider, CLion, and RustRover.
This guide will walk you through the setup process and provide tips for managing your development environments.
 ## Prerequisites
Before starting, ensure that you have:
1. [JetBrains Toolbox](https://www.jetbrains.com/toolbox-app/) installed on your system
> **Tip**: Keep JetBrains Toolbox for the best experience.
## Opening an Environment
1. Start an environment in Gitpod
2. Select your preferred JetBrains IDE (e.g., "Open IntelliJ IDEA Ultimate") from the action bar
## Prerequisites
Before starting, ensure that you have:
1. [JetBrains Toolbox](https://www.jetbrains.com/toolbox-app/) installed on your system
> **Tip**: Keep JetBrains Toolbox for the best experience.
## Opening an Environment
1. Start an environment in Gitpod
2. Select your preferred JetBrains IDE (e.g., "Open IntelliJ IDEA Ultimate") from the action bar
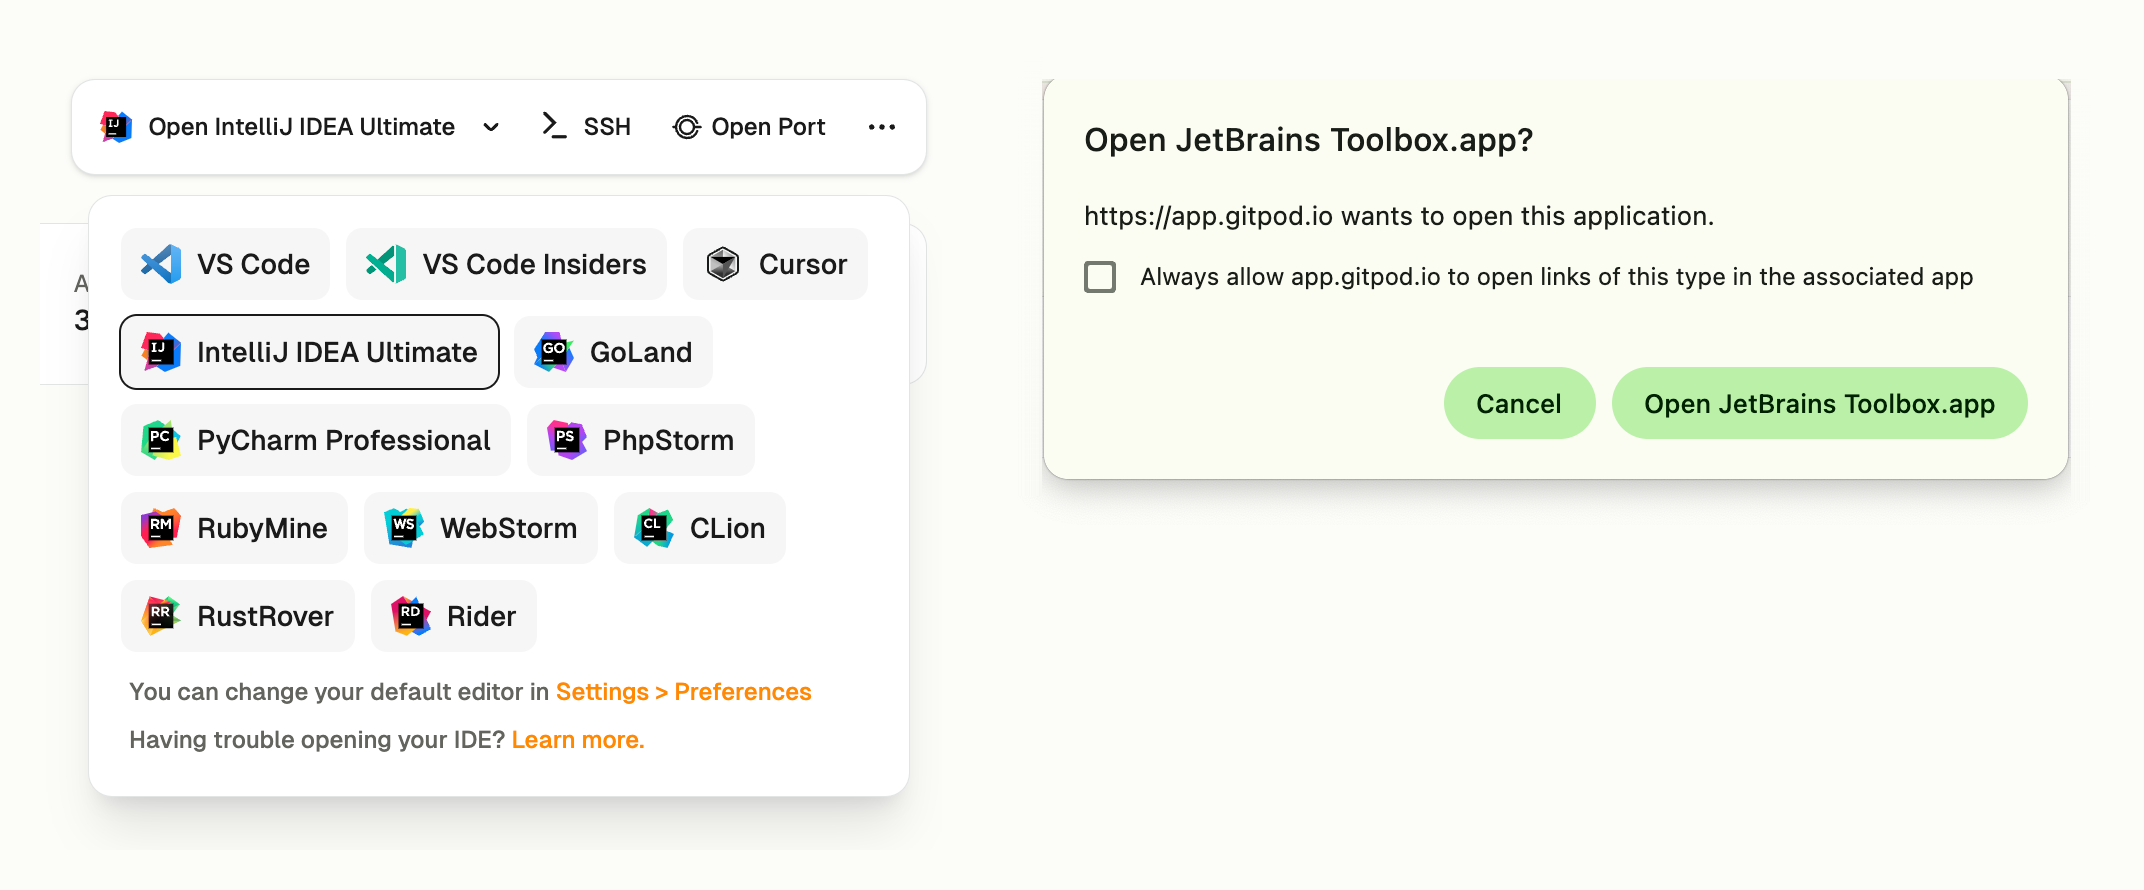 ### First-time Setup
On your first environment open, the setup process will:
1. Launch JetBrains Toolbox
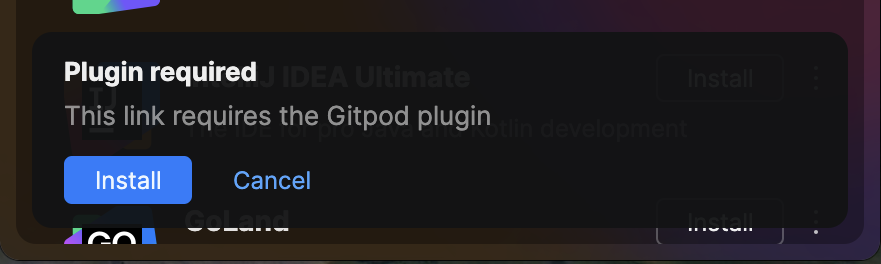
2. Install the Gitpod plugin when prompted
### First-time Setup
On your first environment open, the setup process will:
1. Launch JetBrains Toolbox
2. Install the Gitpod plugin when prompted
 3. Request authentication with your Gitpod account
 ### Connection Process
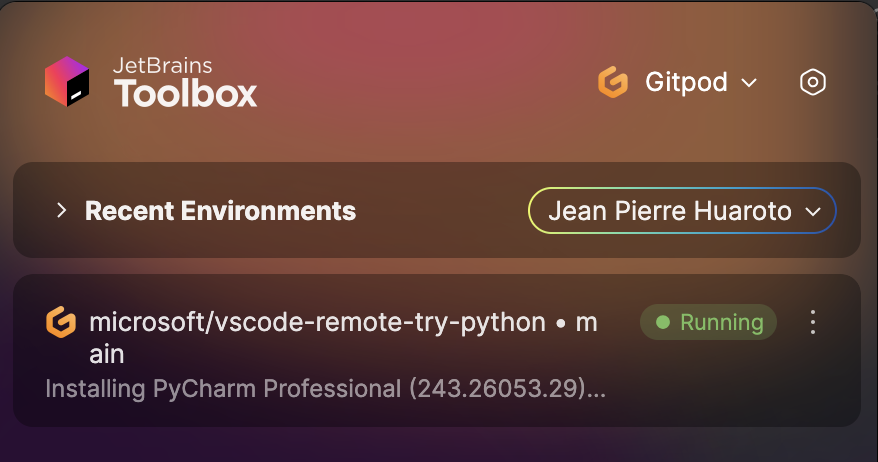
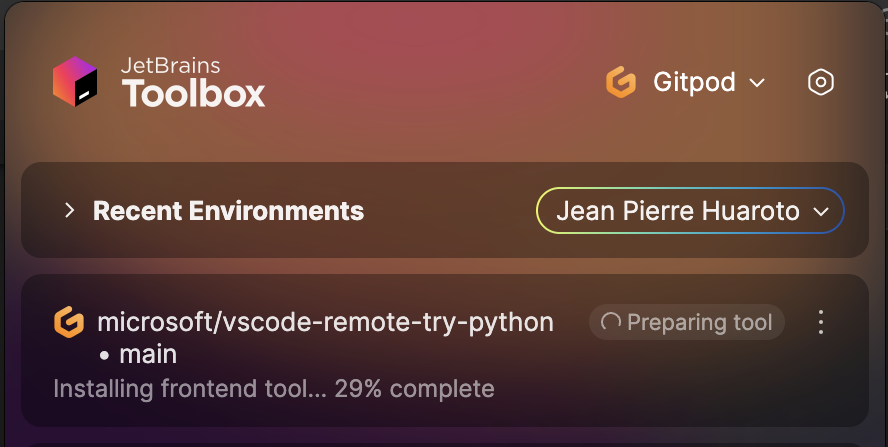
After authentication, Toolbox will:
1. Download and provision the IDE backend
### Connection Process
After authentication, Toolbox will:
1. Download and provision the IDE backend
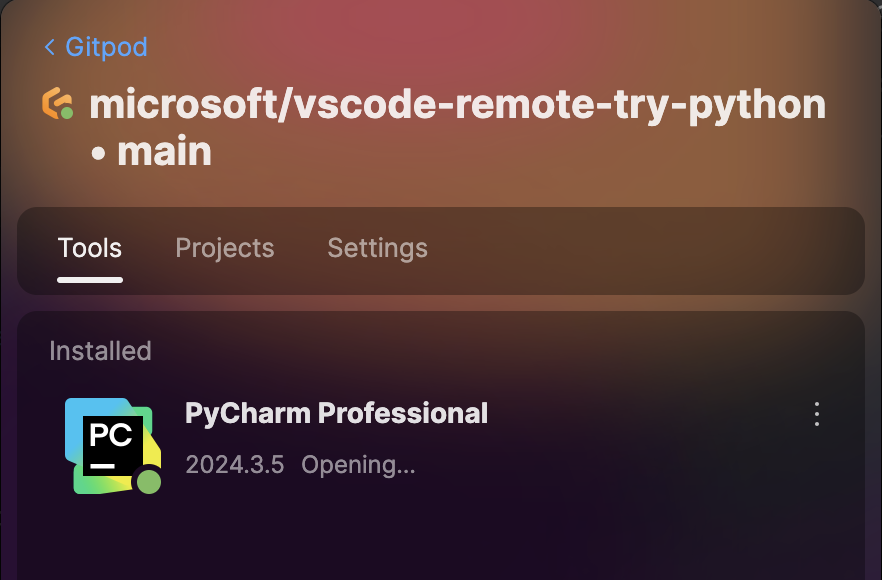
 2. Start your local IDE client
 3. Connect to your environment automatically
 ## Limitations
* The version of JetBrains IDEs cannot be changed.
* JetBrains IDE settings and plugins cannot be customized.
## Managing Authentication
To change your Gitpod account or sign out from JetBrains Toolbox:
1. Open JetBrains Toolbox
2. Go to Settings → Providers → Gitpod
3. Click "Sign Out"
4. Click "Sign In" to authenticate with a different account
## Limitations
* The version of JetBrains IDEs cannot be changed.
* JetBrains IDE settings and plugins cannot be customized.
## Managing Authentication
To change your Gitpod account or sign out from JetBrains Toolbox:
1. Open JetBrains Toolbox
2. Go to Settings → Providers → Gitpod
3. Click "Sign Out"
4. Click "Sign In" to authenticate with a different account
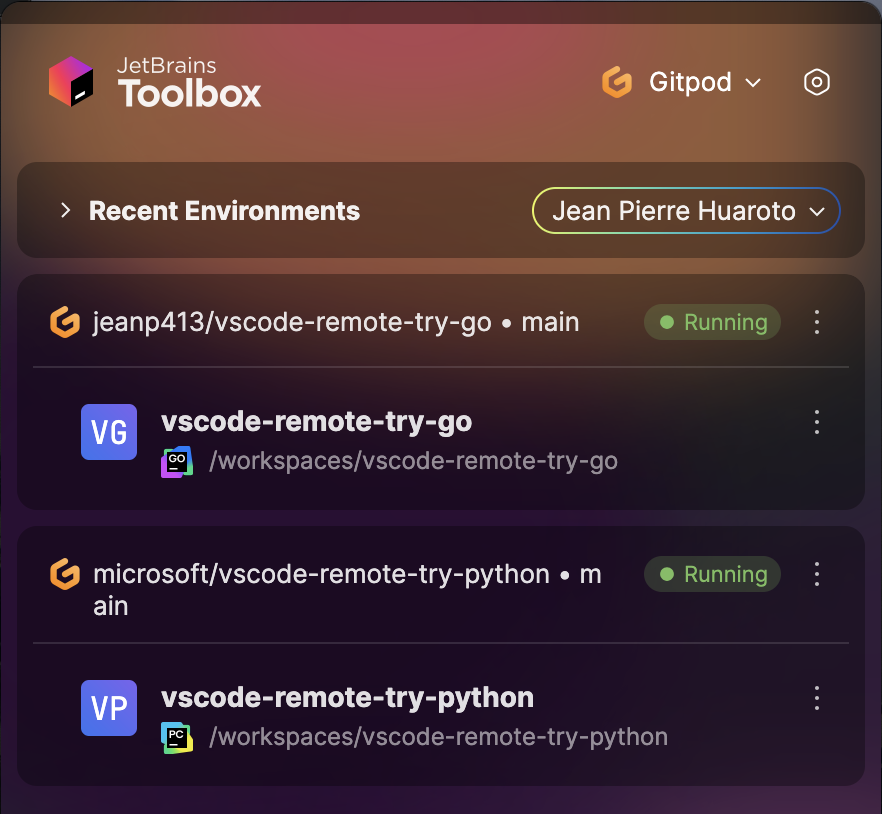
 ## Managing Environments
Toolbox list shows only recent environments you've previously opened. Open new environments from Gitpod directly.
## Managing Environments
Toolbox list shows only recent environments you've previously opened. Open new environments from Gitpod directly.
 ## Rebuilding Dev Containers
When rebuilding a devcontainer:
1. Close your current IDE window
2. Wait for rebuild to complete
3. Return to Gitpod
4. Select the IDE in the action bar to reconnect
## Troubleshooting
### Connection Issues
If your IDE doesn't connect:
1. Verify JetBrains Toolbox is running
2. Ensure your environment is running in Gitpod
3. Try closing the IDE and reopening from Gitpod
### Collecting Toolbox Logs
For persistent issues:
1. Open JetBrains Toolbox
2. Navigate to Settings → About
3. Click "Show log files"
4. Locate `toolbox.log`
5. Send to [support@gitpod.io](mailto:support@gitpod.io)
## Rebuilding Dev Containers
When rebuilding a devcontainer:
1. Close your current IDE window
2. Wait for rebuild to complete
3. Return to Gitpod
4. Select the IDE in the action bar to reconnect
## Troubleshooting
### Connection Issues
If your IDE doesn't connect:
1. Verify JetBrains Toolbox is running
2. Ensure your environment is running in Gitpod
3. Try closing the IDE and reopening from Gitpod
### Collecting Toolbox Logs
For persistent issues:
1. Open JetBrains Toolbox
2. Navigate to Settings → About
3. Click "Show log files"
4. Locate `toolbox.log`
5. Send to [support@gitpod.io](mailto:support@gitpod.io)
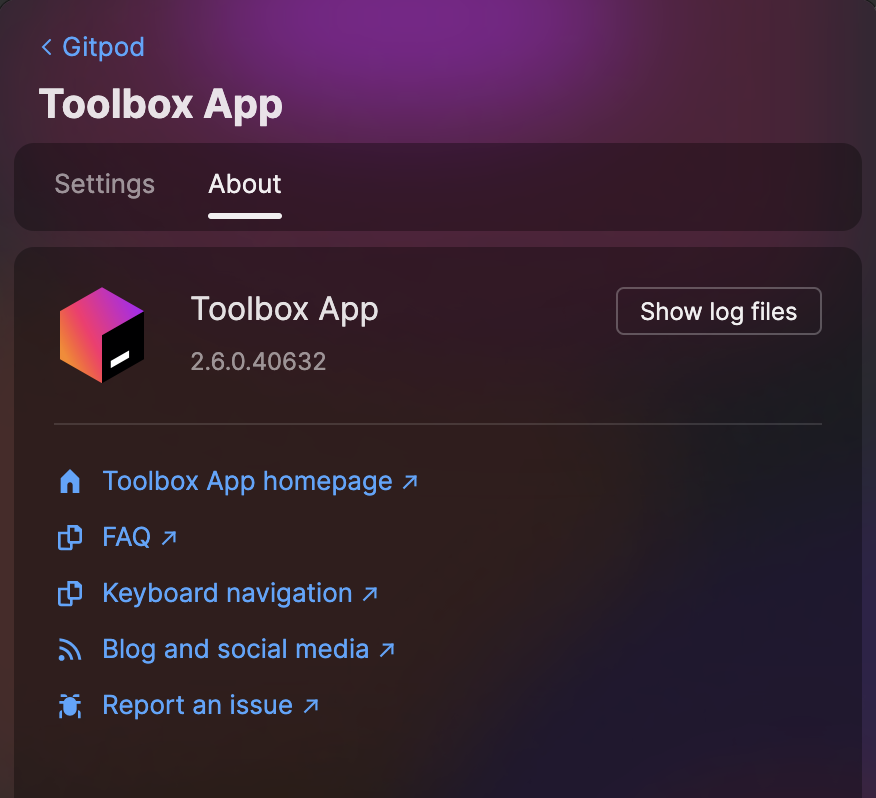
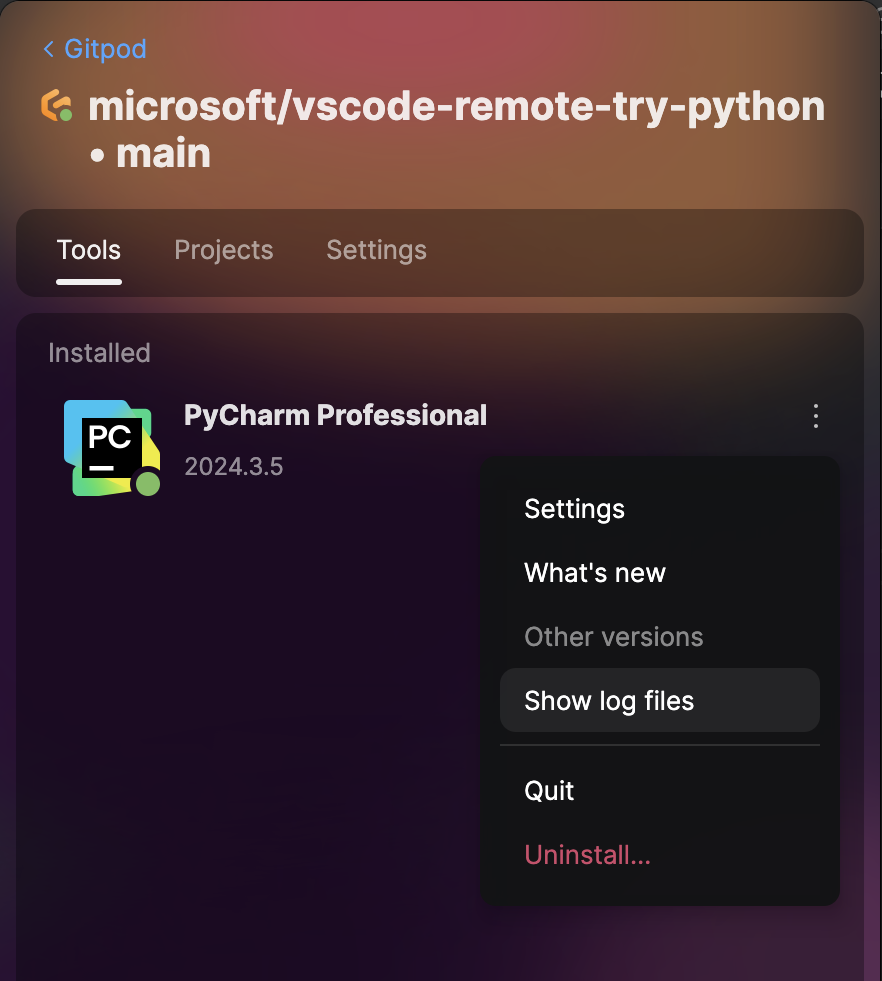
 ## Prerequisites
Before starting, ensure that you have the following:
1. [VS Code](https://code.visualstudio.com/download) installed.
2. The [Gitpod Flex](https://marketplace.visualstudio.com/items?itemName=gitpod.gitpod-flex) extension for VS Code installed and enabled.
3. The [Remote - SSH](https://marketplace.visualstudio.com/items?itemName=ms-vscode-remote.remote-ssh) extension installed and enabled in VS Code.
> **Tip**: Keep your VS Code and extensions updated for the best experience.
## Opening an Environment
### VS Code
1. Start an environment in Gitpod
2. Open in **VS Code**
* While the environment is starting, you can click the **Open in VS Code** button on the action bar. This button is available at any stage—even when the environment is not fully running yet.
## Prerequisites
Before starting, ensure that you have the following:
1. [VS Code](https://code.visualstudio.com/download) installed.
2. The [Gitpod Flex](https://marketplace.visualstudio.com/items?itemName=gitpod.gitpod-flex) extension for VS Code installed and enabled.
3. The [Remote - SSH](https://marketplace.visualstudio.com/items?itemName=ms-vscode-remote.remote-ssh) extension installed and enabled in VS Code.
> **Tip**: Keep your VS Code and extensions updated for the best experience.
## Opening an Environment
### VS Code
1. Start an environment in Gitpod
2. Open in **VS Code**
* While the environment is starting, you can click the **Open in VS Code** button on the action bar. This button is available at any stage—even when the environment is not fully running yet.
 * Alternatively, use the **VS Code** icon from the sidebar to launch the environment.
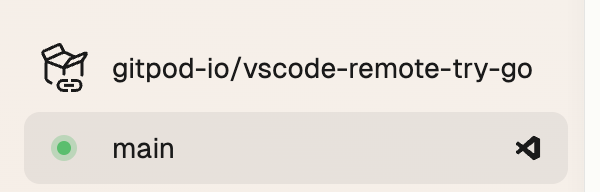 3. VS Code should open or you should see a dialog asking you to open. See **Prerequisites** if you cannot open VS Code.
 ### VS Code Insiders
You can select **VS Code Insiders** from the editor selector dropdown by clicking on the dropdown arrow next to the editor button on the action bar.
### VS Code Insiders
You can select **VS Code Insiders** from the editor selector dropdown by clicking on the dropdown arrow next to the editor button on the action bar.
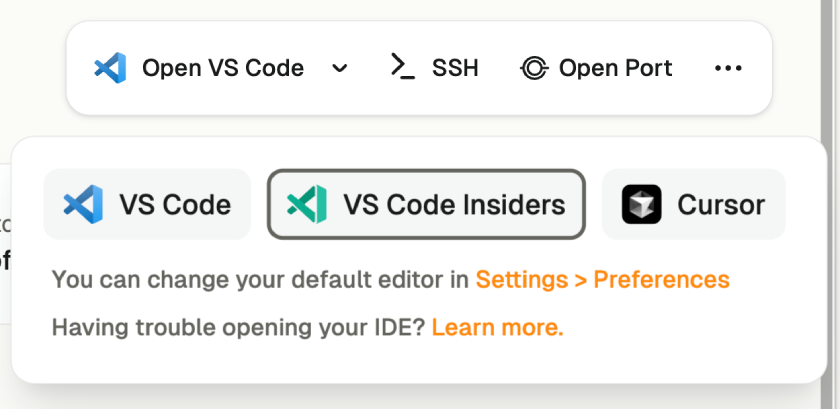 ## Install and Sign In
#### 1. Install the Gitpod Flex Extension
After opening, VS Code will prompt you to install the **Gitpod Flex** extension if it's not already installed.
* Click **Allow** when prompted.
## Install and Sign In
#### 1. Install the Gitpod Flex Extension
After opening, VS Code will prompt you to install the **Gitpod Flex** extension if it's not already installed.
* Click **Allow** when prompted.
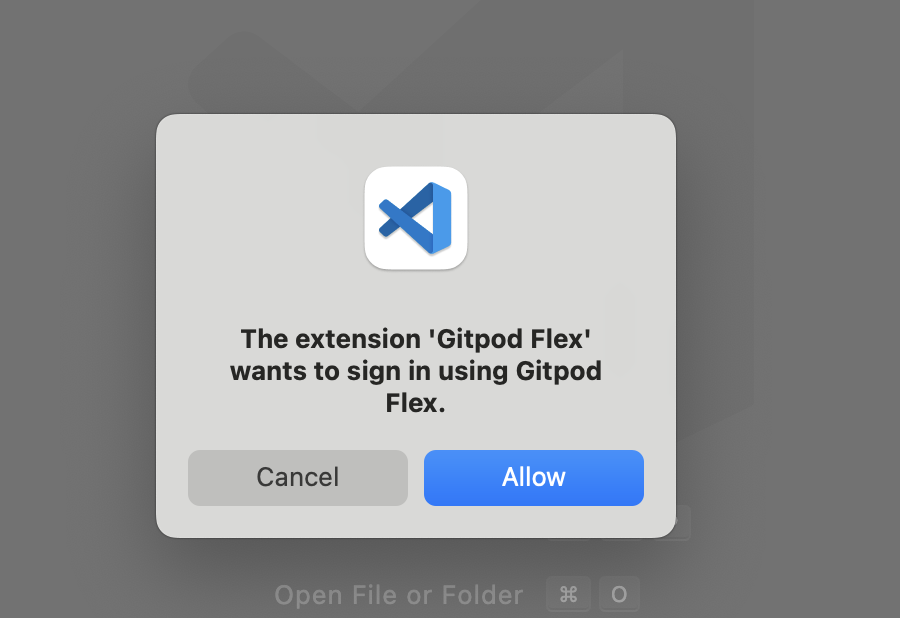 > **Note**: The extension will make changes to your local SSH configuration to enable a smooth experience. This allows for seamless connectivity between VS Code and your environments.
#### 2. Install Remote Development Extensions
The integration requires both the **Remote - SSH** extension to function. If this is not already installed, VS Code will notify you to add it.
* Click **Install** to add this dependency.
> **Note**: The extension will make changes to your local SSH configuration to enable a smooth experience. This allows for seamless connectivity between VS Code and your environments.
#### 2. Install Remote Development Extensions
The integration requires both the **Remote - SSH** extension to function. If this is not already installed, VS Code will notify you to add it.
* Click **Install** to add this dependency.
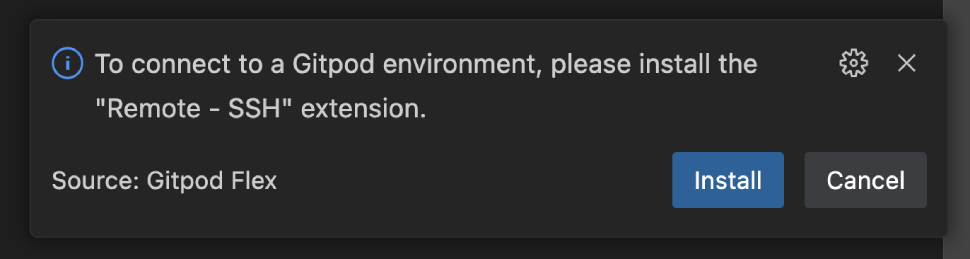 #### 3. Authenticate with Gitpod
VS Code will then ask you to authenticate with your Gitpod account:
1. Click **Open** when prompted to navigate to the Gitpod authentication page.
#### 3. Authenticate with Gitpod
VS Code will then ask you to authenticate with your Gitpod account:
1. Click **Open** when prompted to navigate to the Gitpod authentication page.
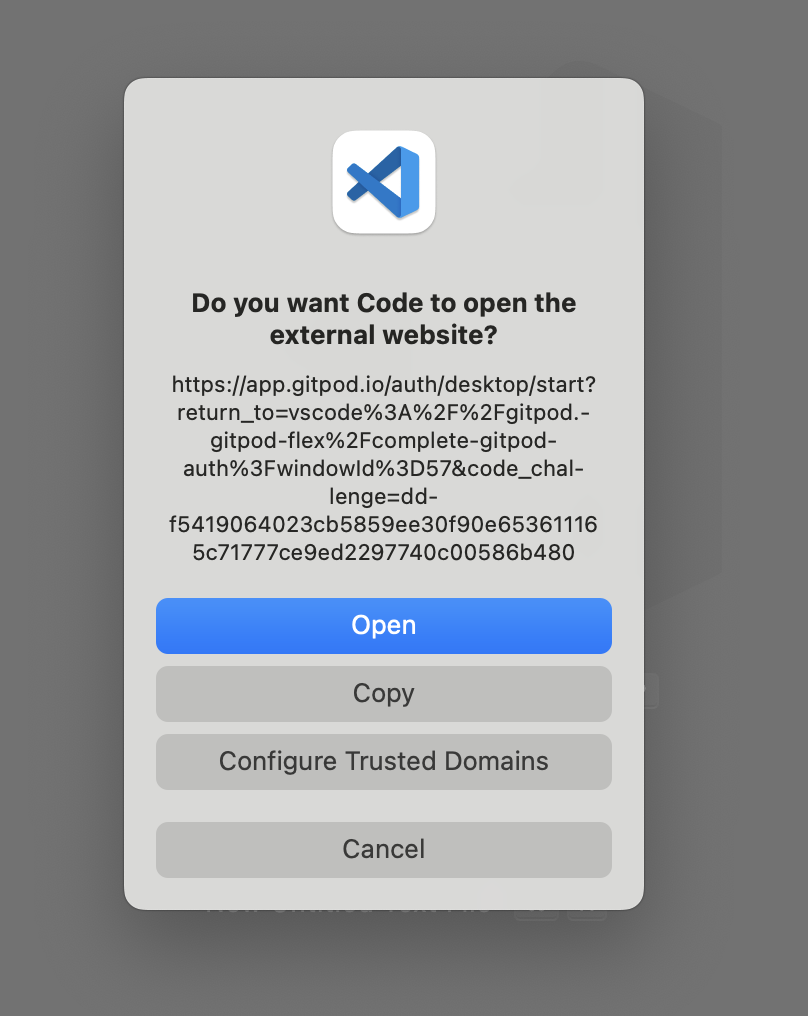 2. Follow the authentication process to complete the sign-in.
 3. After signing in, you will be redirected back to VS Code and the page can be closed.
> **Note**: If you encounter any issues during the sign-in process, it may be helpful to sign out and try again.
## Workspace Trust
When connecting to a new environment, VS Code may prompt you to trust the workspace. This is a standard security measure for potentially untrusted code. For more information, refer to the [VS Code documentation](https://code.visualstudio.com/editor/workspace-trust).
Gitpod environments always run in isolated VMs, ensuring that code doesn't access secrets outside the environment. The environment remains secure regardless of how you access it. If you're familiar with the repository, you can safely click **Trust Folder & Continue**.
3. After signing in, you will be redirected back to VS Code and the page can be closed.
> **Note**: If you encounter any issues during the sign-in process, it may be helpful to sign out and try again.
## Workspace Trust
When connecting to a new environment, VS Code may prompt you to trust the workspace. This is a standard security measure for potentially untrusted code. For more information, refer to the [VS Code documentation](https://code.visualstudio.com/editor/workspace-trust).
Gitpod environments always run in isolated VMs, ensuring that code doesn't access secrets outside the environment. The environment remains secure regardless of how you access it. If you're familiar with the repository, you can safely click **Trust Folder & Continue**.
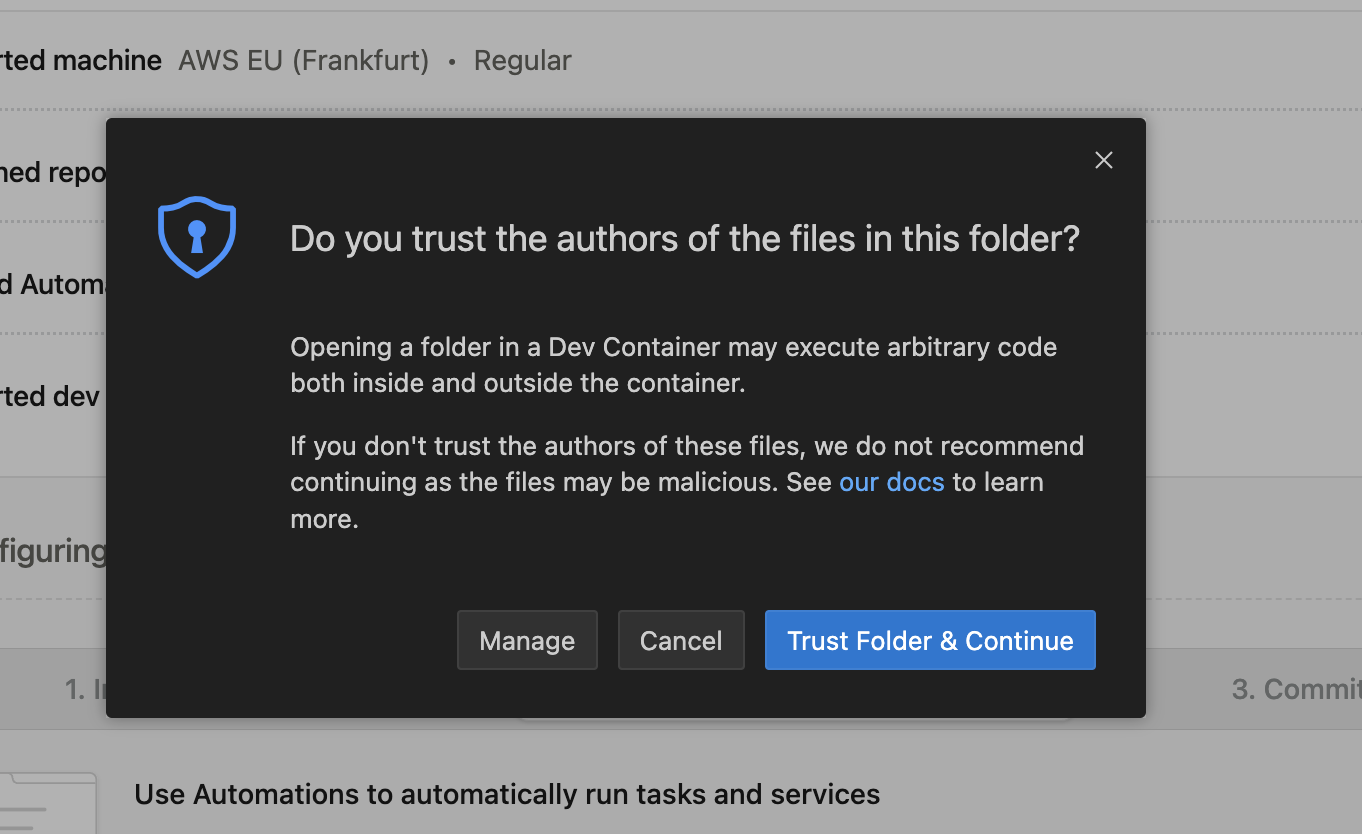 ## Managing Your Environment
Once connected, you can manage your environment directly from VS Code:
### Viewing Environment Details
* Check the status, active branch, and logs using the **Environment Details** panel.
* If you closed the panel, re-open it using the `Gitpod Flex: Show Environment Details` command from the Command Palette.
## Managing Your Environment
Once connected, you can manage your environment directly from VS Code:
### Viewing Environment Details
* Check the status, active branch, and logs using the **Environment Details** panel.
* If you closed the panel, re-open it using the `Gitpod Flex: Show Environment Details` command from the Command Palette.
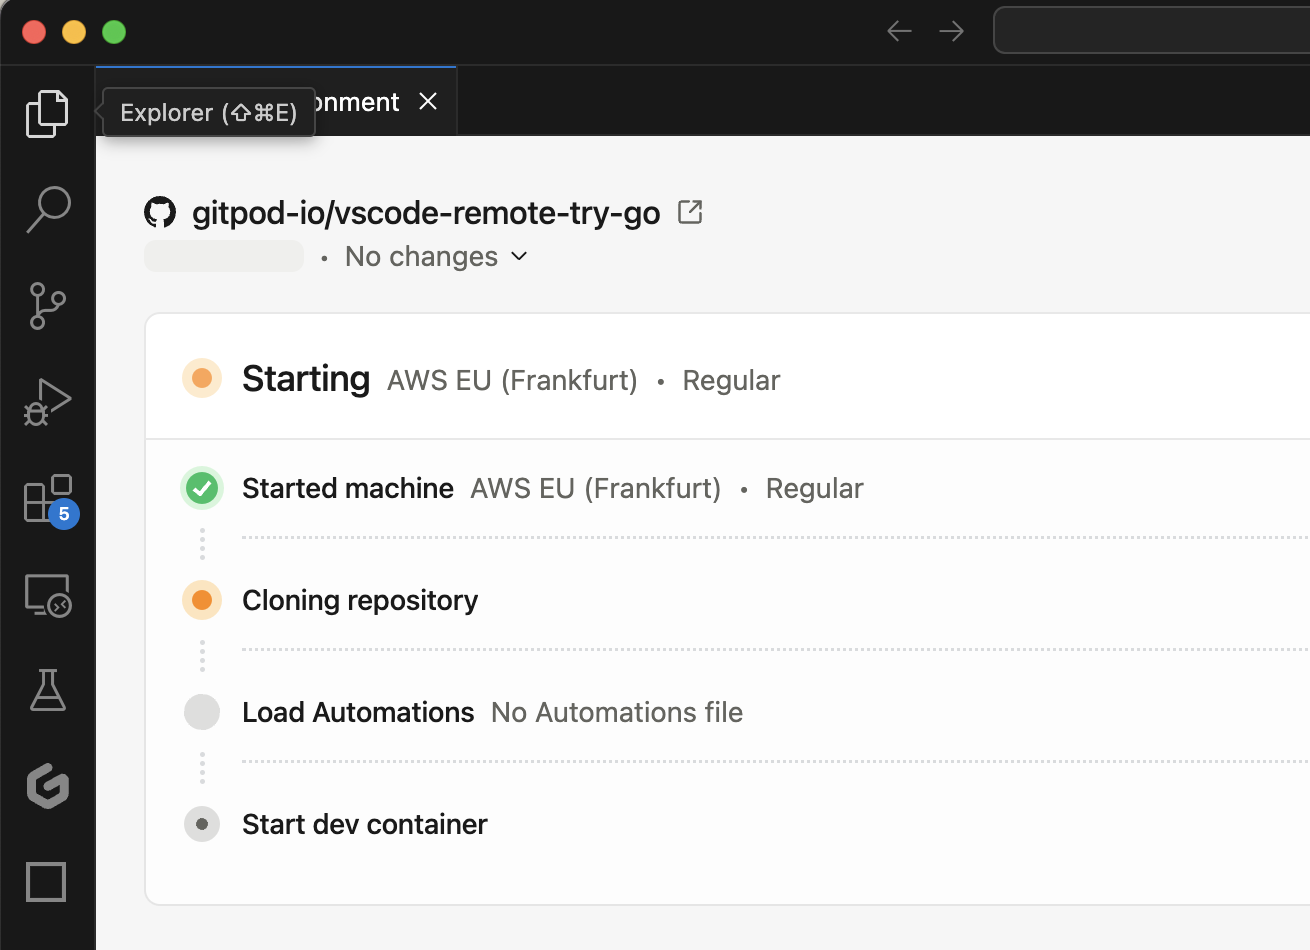 > **Note**: Clicking on **details** while opening the environment will also open the **Environment Details** panel.
 ### Accessing Commands
* Open the Command Palette (`Cmd+Shift+P` or `Ctrl+Shift+P`) and type `Gitpod Flex` to view commands such as:
### Accessing Commands
* Open the Command Palette (`Cmd+Shift+P` or `Ctrl+Shift+P`) and type `Gitpod Flex` to view commands such as:
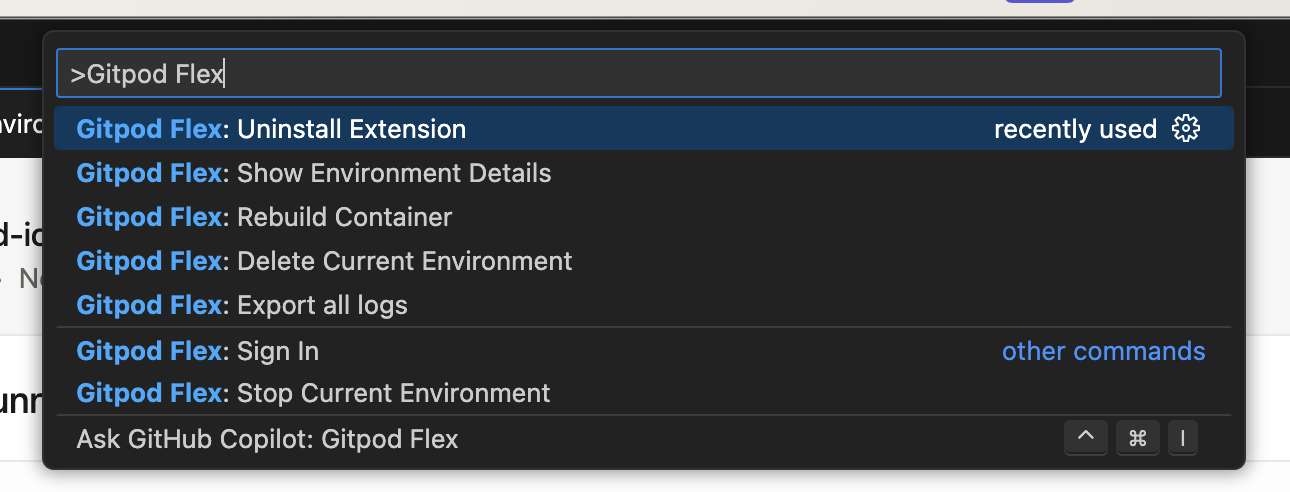 * Clicking on the **remote indicator** in the bottom-left corner of the remote window also shows a quick menu of Gitpod commands.
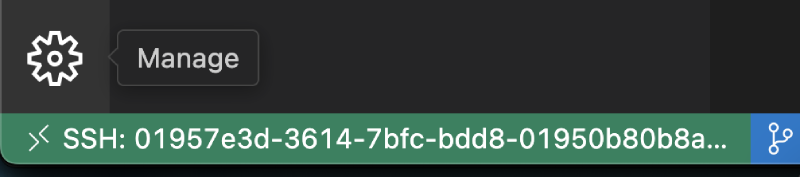 ### Rebuild
Rebuilding is necessary to apply changes made to `.devcontainer.json`, `Dockerfile`, or `docker-compose.yml` files to the container. This process ensures that your development environment reflects the latest configuration updates.
To rebuild the container, you have two options:
1. **Command Palette**: Use `Gitpod Flex: Rebuild Container`
2. **Rebuild Prompt**: VS Code detects changes and prompts
### Rebuild
Rebuilding is necessary to apply changes made to `.devcontainer.json`, `Dockerfile`, or `docker-compose.yml` files to the container. This process ensures that your development environment reflects the latest configuration updates.
To rebuild the container, you have two options:
1. **Command Palette**: Use `Gitpod Flex: Rebuild Container`
2. **Rebuild Prompt**: VS Code detects changes and prompts
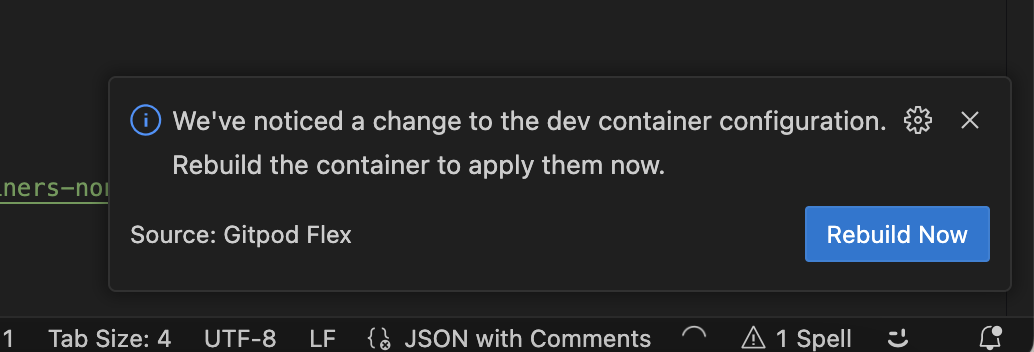 While the container is rebuilding, you will be disconnected and automatically reconnected when it's finished. You can inspect the details view to learn about the progress and inspect logs.
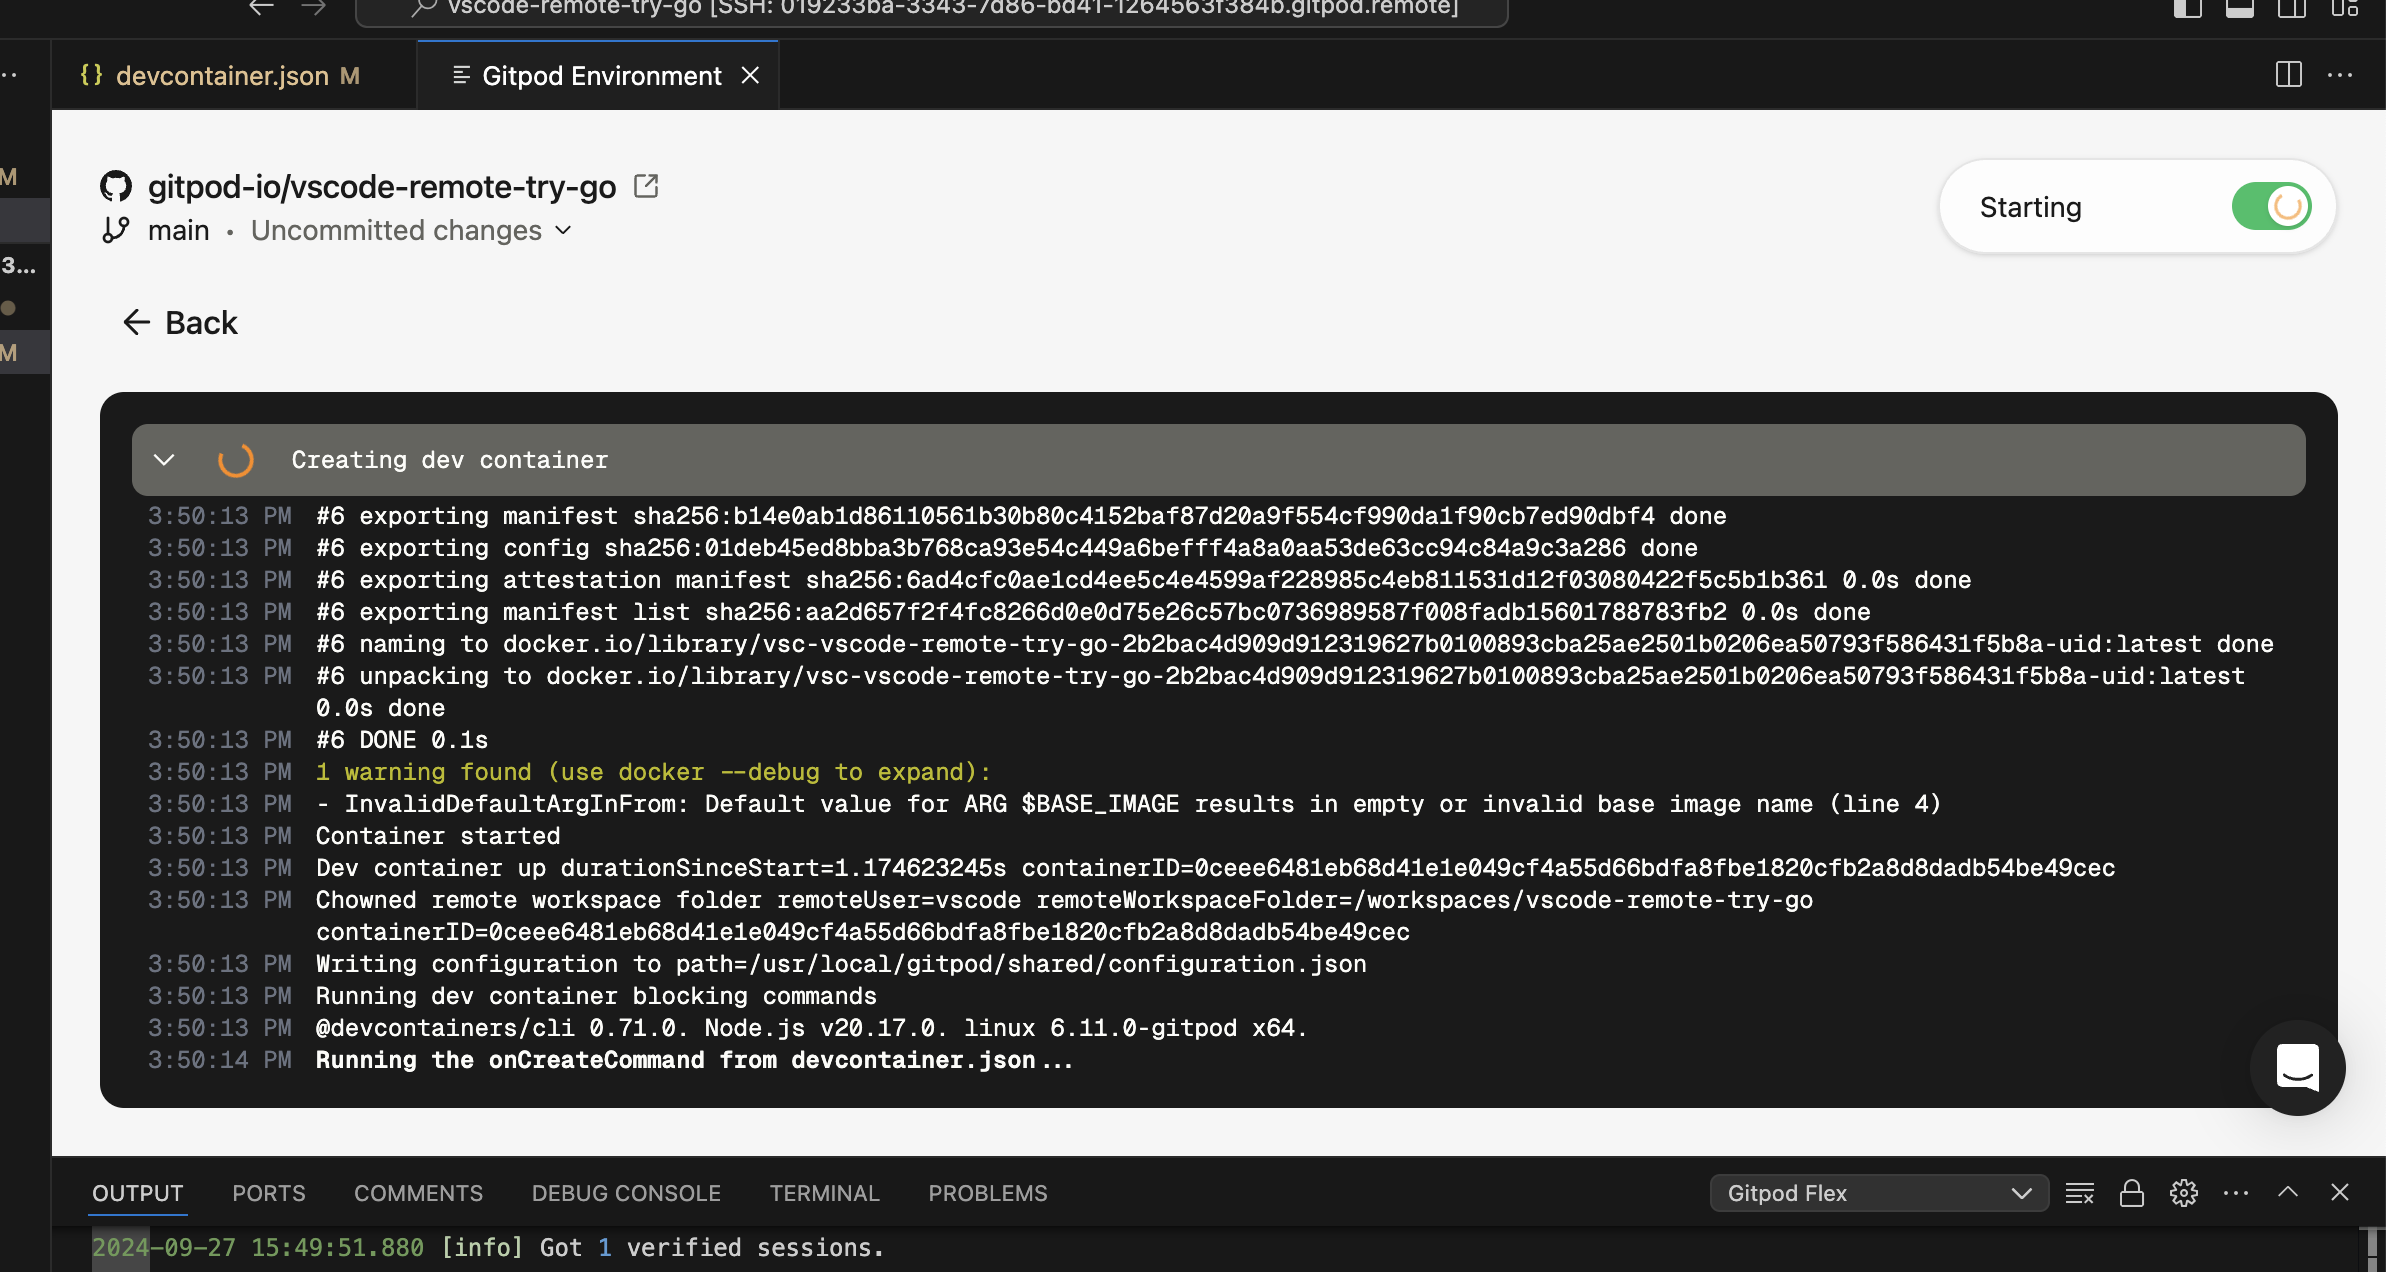 ## Troubleshooting
### Limitations
Currently there are a couple limitations related to the devcontainer specification:
* Port forwarding does not work for hosts other than `localhost`. For instance, forwarding ports from other services specified in a docker-compose.yml .
* ✅ Workaround: Use `network_mode: host` in your docker-compose.yml for the services you want to port forward.
* `remoteEnv` environment variables values are not applied unless the devcontainer is rebuilt.
### Build Issues
If the initial build or a rebuild fails, you will enter recovery mode.
When a build failure occurs:
1. A modal will appear notifying you of the failure.
## Troubleshooting
### Limitations
Currently there are a couple limitations related to the devcontainer specification:
* Port forwarding does not work for hosts other than `localhost`. For instance, forwarding ports from other services specified in a docker-compose.yml .
* ✅ Workaround: Use `network_mode: host` in your docker-compose.yml for the services you want to port forward.
* `remoteEnv` environment variables values are not applied unless the devcontainer is rebuilt.
### Build Issues
If the initial build or a rebuild fails, you will enter recovery mode.
When a build failure occurs:
1. A modal will appear notifying you of the failure.
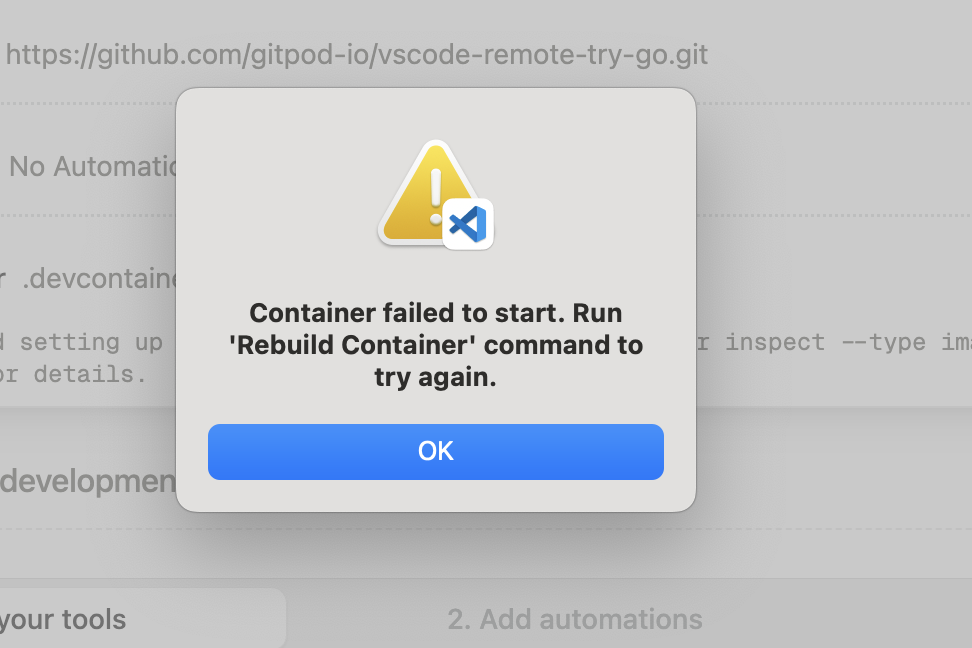 2. Pay close attention to the error messages in the details view.
 3. Inspect the logs as necessary to understand the root cause of the failure.
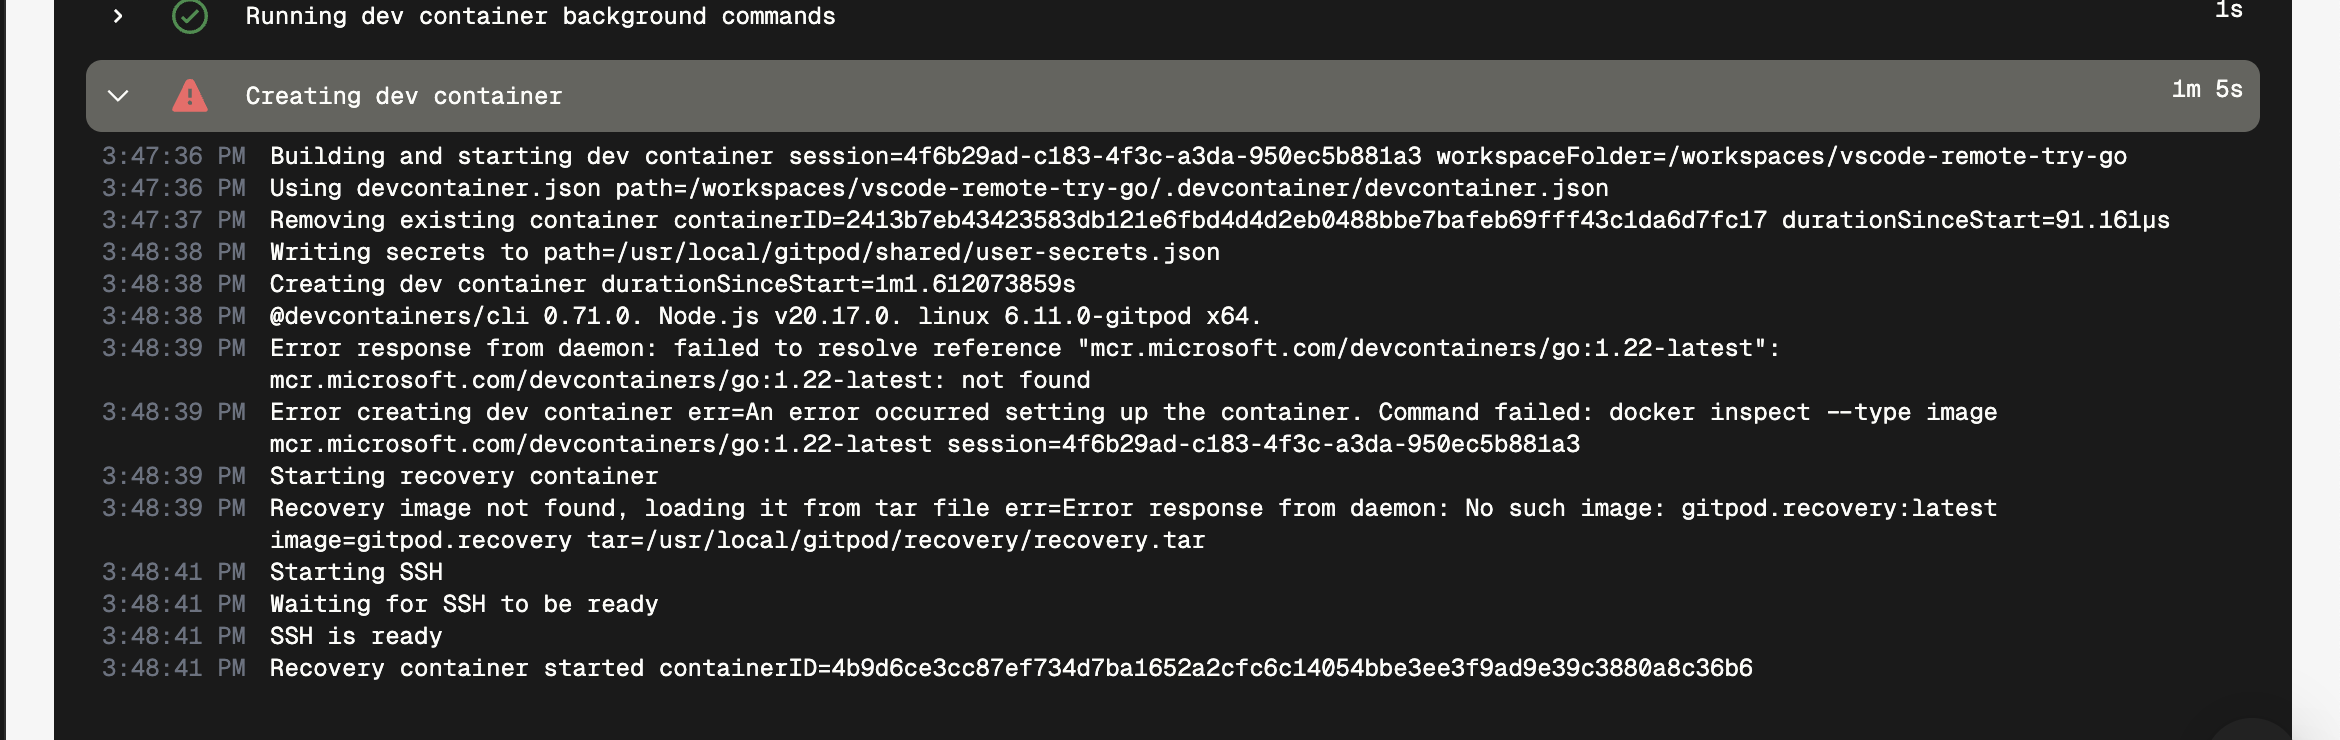 4. Make the required changes to the `.devcontainer.json` file to address the issue.
5. Trigger a rebuild using the `Gitpod Flex: Rebuild Container` command.
> **Important**: The recovery mode is not stable for development. Always aim to fix the configuration and successfully rebuild the container.
### Authentication Issues
If you're experiencing authentication issues or need to switch accounts:
1. Use the `Gitpod Flex: Sign Out` command to sign out.
2. Confirm the sign-out when prompted.
3. You can then sign in again with the same or a different account.
### General Issues
If you encounter unexpected problems:
1. Check the `Gitpod Flex` output view for any useful information.
2. Check your network settings, sometimes the VPN or firewall settings can interfere with the connection.
3. When sharing reports with us:
* Use `Developer: Set Log Level...` command to Trace, it would give us more insights. Remember to set it back to Info afterwards.
* In your VS Code settings, set `remote.SSH.logLevel` to `trace`.
* Use the `Gitpod Flex: Export all logs` command from the problematic window. This will contain all relevant logs.
> **Note**: Be cautious when sharing logs on the internet, as they may contain sensitive information.
## Uninstalling
When uninstalling the Gitpod Flex extension, simply removing the extension from VS Code is not sufficient for a complete uninstall. Using the `Uninstall Extension` command ensures that all associated configurations, including SSH settings, are properly cleaned up.
1. Use the `Gitpod Flex: Uninstall Extension` command to initiate the uninstallation process.
2. Follow the prompts to complete the uninstallation process.
If you've already uninstalled the extension without using the command, you can install it again and then use the uninstall command.
# Visual Studio Code Browser
Source: https://www.gitpod.io/docs/gitpod/editors/vscode-browser
You can connect to your environments using VS Code in the browser, providing a zero-install, “ready to code” experience.
This guide will walk you through the setup process and provide tips for managing and troubleshooting within VS Code Browser.
4. Make the required changes to the `.devcontainer.json` file to address the issue.
5. Trigger a rebuild using the `Gitpod Flex: Rebuild Container` command.
> **Important**: The recovery mode is not stable for development. Always aim to fix the configuration and successfully rebuild the container.
### Authentication Issues
If you're experiencing authentication issues or need to switch accounts:
1. Use the `Gitpod Flex: Sign Out` command to sign out.
2. Confirm the sign-out when prompted.
3. You can then sign in again with the same or a different account.
### General Issues
If you encounter unexpected problems:
1. Check the `Gitpod Flex` output view for any useful information.
2. Check your network settings, sometimes the VPN or firewall settings can interfere with the connection.
3. When sharing reports with us:
* Use `Developer: Set Log Level...` command to Trace, it would give us more insights. Remember to set it back to Info afterwards.
* In your VS Code settings, set `remote.SSH.logLevel` to `trace`.
* Use the `Gitpod Flex: Export all logs` command from the problematic window. This will contain all relevant logs.
> **Note**: Be cautious when sharing logs on the internet, as they may contain sensitive information.
## Uninstalling
When uninstalling the Gitpod Flex extension, simply removing the extension from VS Code is not sufficient for a complete uninstall. Using the `Uninstall Extension` command ensures that all associated configurations, including SSH settings, are properly cleaned up.
1. Use the `Gitpod Flex: Uninstall Extension` command to initiate the uninstallation process.
2. Follow the prompts to complete the uninstallation process.
If you've already uninstalled the extension without using the command, you can install it again and then use the uninstall command.
# Visual Studio Code Browser
Source: https://www.gitpod.io/docs/gitpod/editors/vscode-browser
You can connect to your environments using VS Code in the browser, providing a zero-install, “ready to code” experience.
This guide will walk you through the setup process and provide tips for managing and troubleshooting within VS Code Browser.
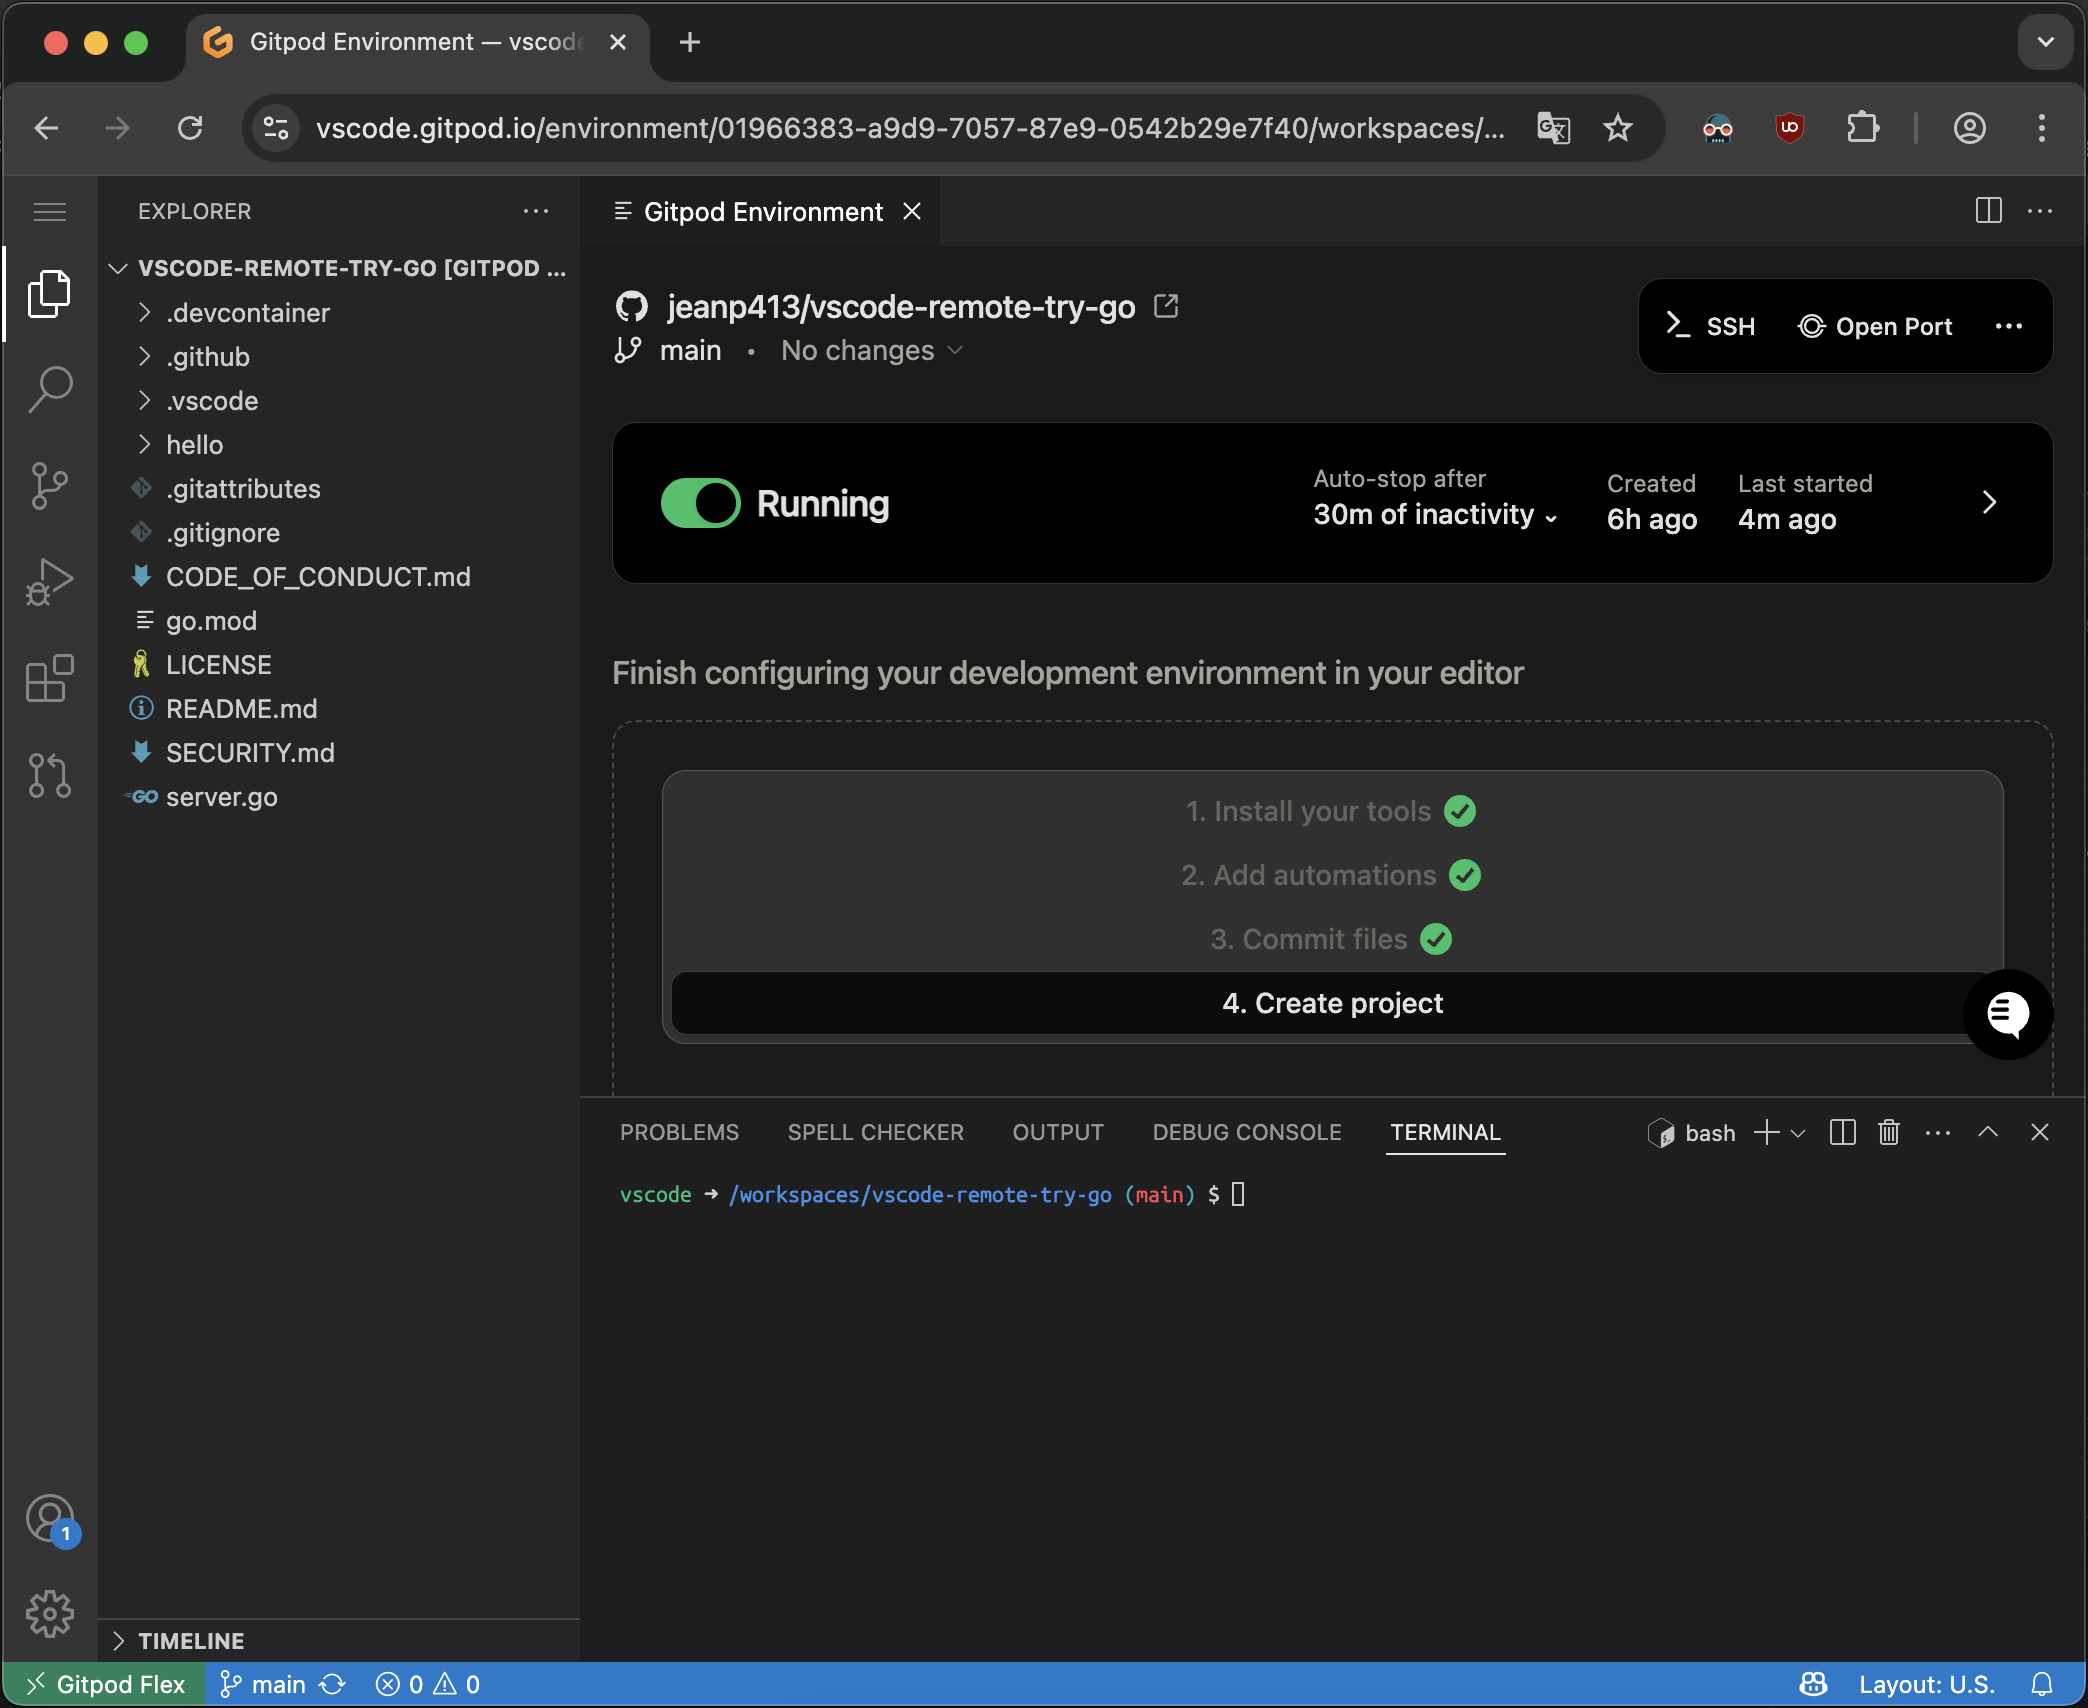 ## Opening an Environment
1. Start an environment in Gitpod
2. Open in **VS Code Browser**
* While the environment is starting, you can click the **Open in VS Code Browser** button on the action bar, which is possible even when the environment is not fully running yet. VS Code Browser should open in a new tab.
## Opening an Environment
1. Start an environment in Gitpod
2. Open in **VS Code Browser**
* While the environment is starting, you can click the **Open in VS Code Browser** button on the action bar, which is possible even when the environment is not fully running yet. VS Code Browser should open in a new tab.
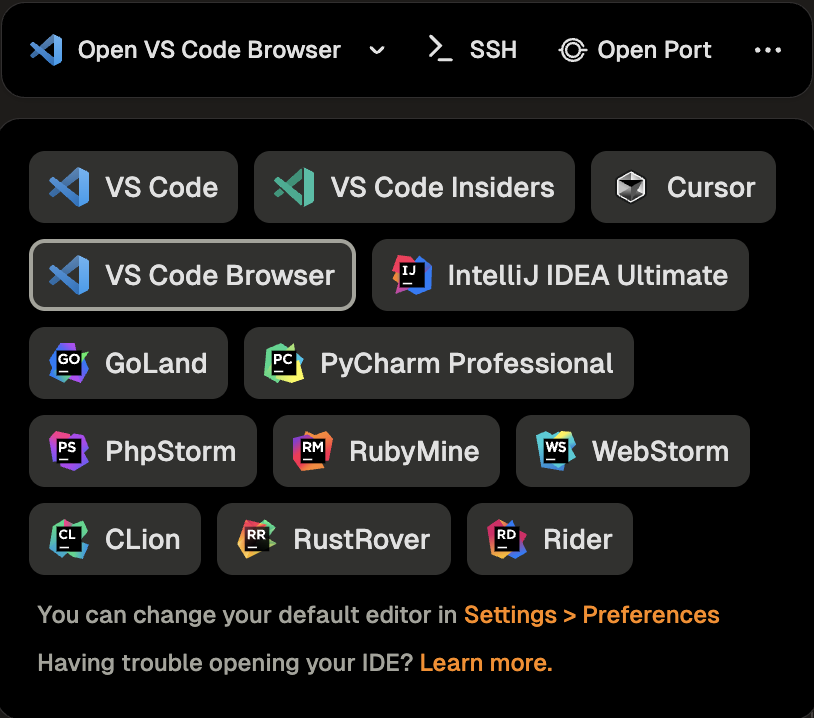 3. VS Code Browser will then ask you to authenticate with your Gitpod account:
1. Click **Allow** when prompted to sign in to navigate to the Gitpod authentication page.
3. VS Code Browser will then ask you to authenticate with your Gitpod account:
1. Click **Allow** when prompted to sign in to navigate to the Gitpod authentication page.
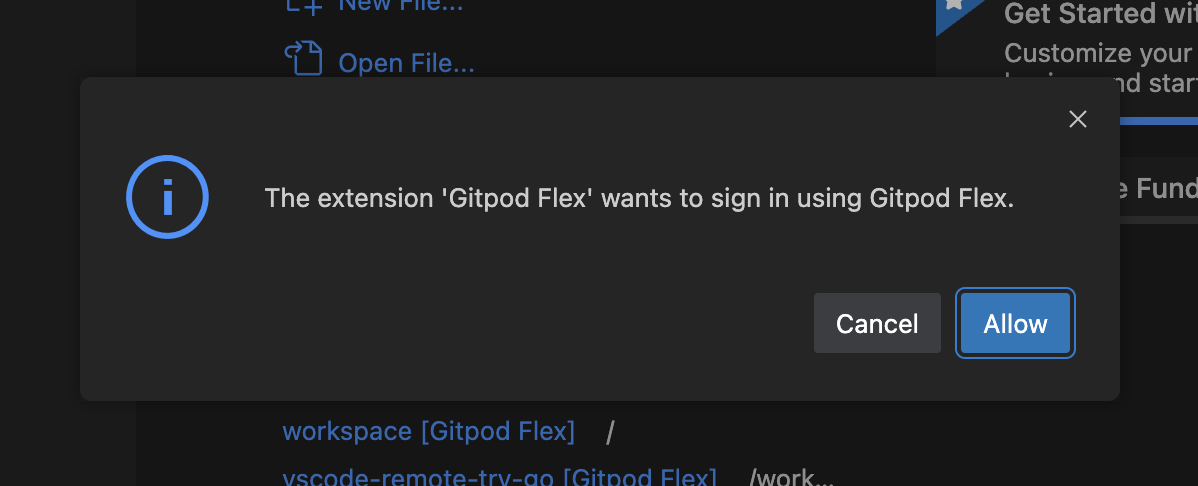 2. Follow the authentication process to complete the sign-in.
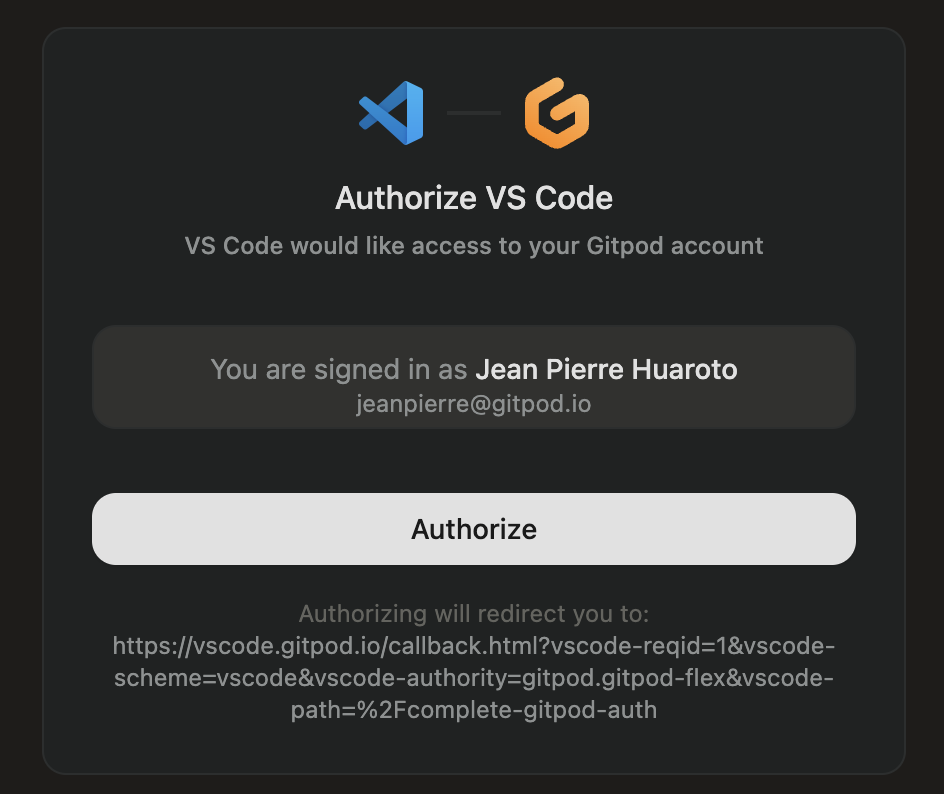 3. After signing in, you will be redirected back to VS Code and the page can be closed.
> **Note**: If you encounter any issues during the sign-in process, it may be helpful to sign out and try again.
## Managing Your Environment
Once connected, you can manage your environment directly from VS Code in the Browser:
### Viewing Environment Details
* Check the status, active branch, and logs using the **Environment Details** panel.
* If you closed the panel, re-open it using the `Gitpod Flex: Show Environment Details` command from the Command Palette.
3. After signing in, you will be redirected back to VS Code and the page can be closed.
> **Note**: If you encounter any issues during the sign-in process, it may be helpful to sign out and try again.
## Managing Your Environment
Once connected, you can manage your environment directly from VS Code in the Browser:
### Viewing Environment Details
* Check the status, active branch, and logs using the **Environment Details** panel.
* If you closed the panel, re-open it using the `Gitpod Flex: Show Environment Details` command from the Command Palette.
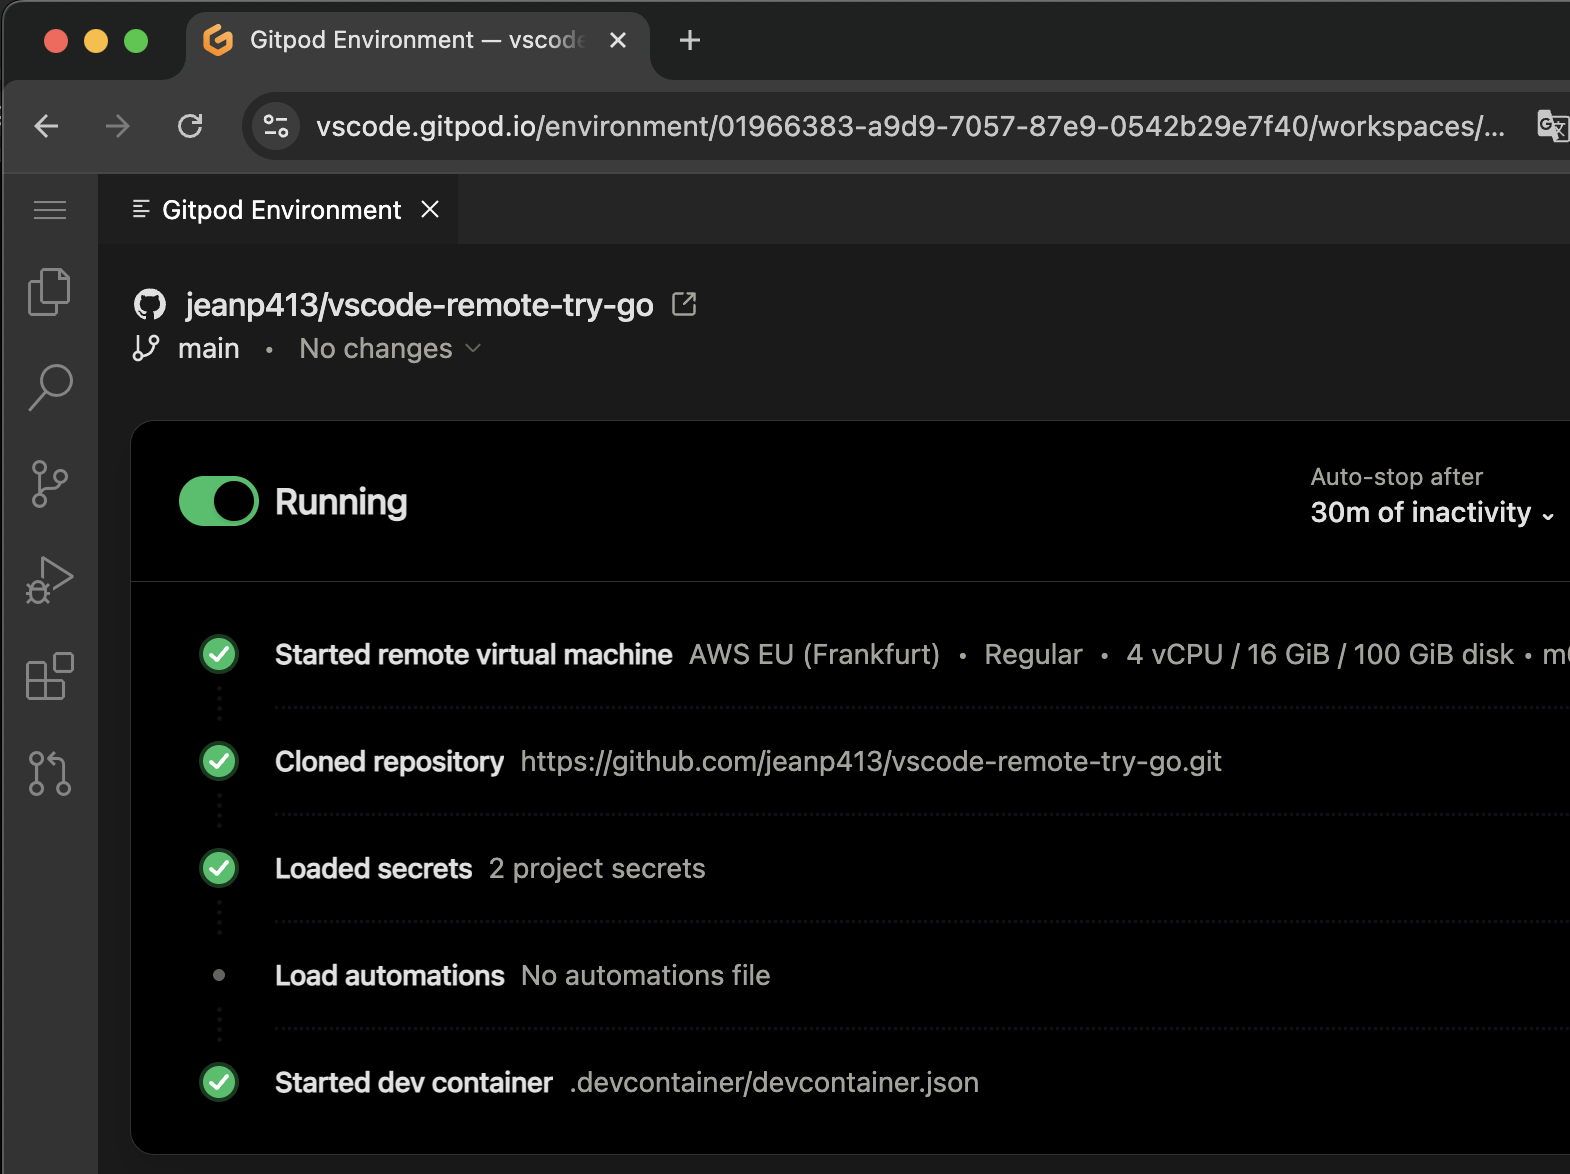 ### Accessing Commands
* Open the Command Palette (`Cmd+Shift+P` or `Ctrl+Shift+P`) and type `Gitpod Flex` to view commands such as:
### Accessing Commands
* Open the Command Palette (`Cmd+Shift+P` or `Ctrl+Shift+P`) and type `Gitpod Flex` to view commands such as:
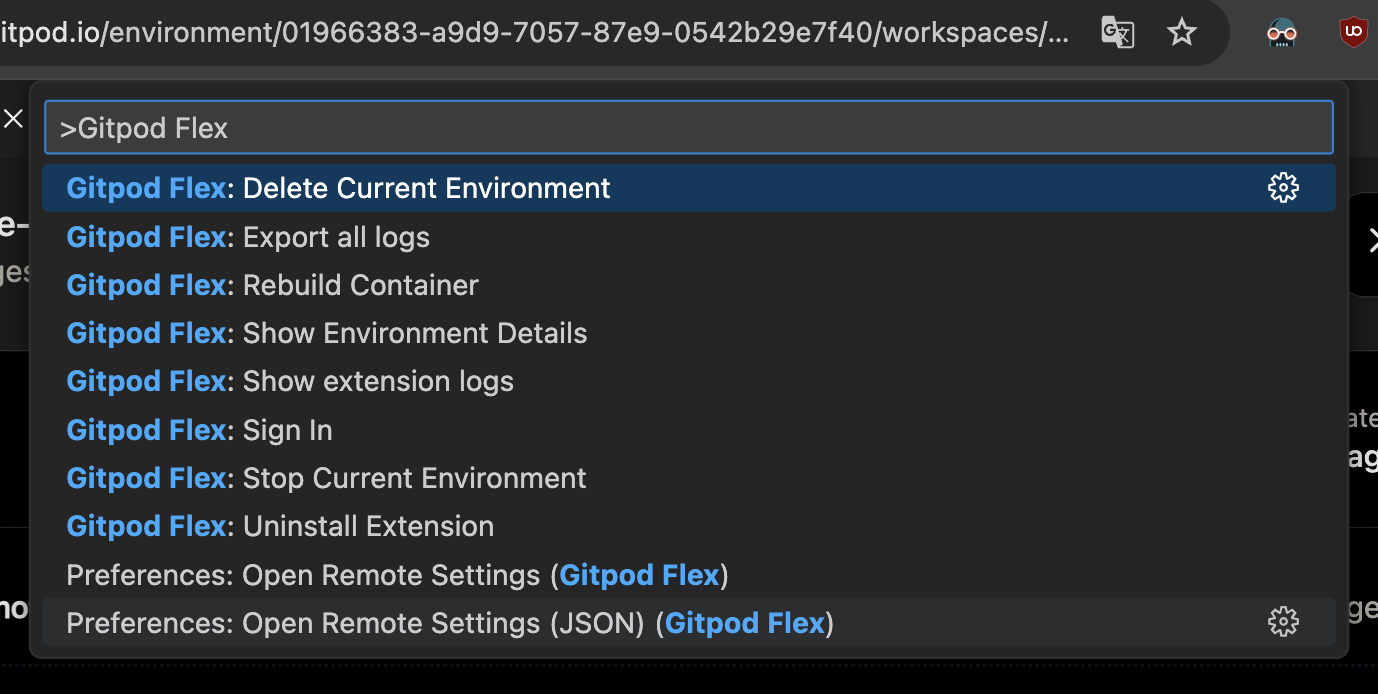 * Clicking on the **remote indicator** in the bottom-left corner of the window also shows a quick menu of Gitpod commands.
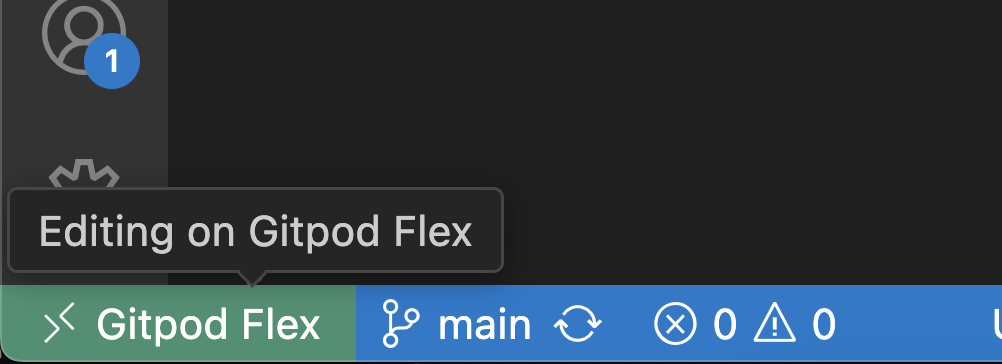 ### Rebuild
Rebuilding is necessary to apply changes made to `.devcontainer.json`, `Dockerfile`, or `docker-compose.yml` files to the container. This process ensures that your development environment reflects the latest configuration updates.
To rebuild the container, you have two options:
1. **Command Palette**: Use `Gitpod Flex: Rebuild Container`
2. **Rebuild Prompt**: VS Code detects changes and prompts
While the container is rebuilding, you will be disconnected and automatically reconnected when it's finished. You can inspect the details view to learn about the progress and inspect logs.
### Settings Sync
Enable Settings Sync to sync all your extensions and other preferences from VS Code Desktop in VS Code Browser, read more about over at the [offical Settings Sync documentation](https://code.visualstudio.com/docs/configure/settings-sync#_turning-on-settings-sync).
## Troubleshooting
### Limitations
The following limitations are present in addition to the [limitations listed for VS Code Desktop](/flex/editors/vscode#limitations):
* For environments using a Docker Compose configuration, it's required to set `network_mode: "host"` on the main service in your Docker Compose file for VS Code Browser to successfully connect to the environment.
* VS Code Browser is not supported for [local environments](/gitpod-desktop/overview#local-environments) created using Gitpod Desktop.
### Authentication Issues
If you're experiencing authentication issues or need to switch accounts:
1. Use the `Gitpod Flex: Sign Out` command to sign out.
2. Confirm the sign-out when prompted.
3. You can then sign in again with the same or a different account.
### General Issues
If you encounter unexpected problems:
1. Check the `Gitpod Flex` output view for any useful information.
2. When sharing reports with us:
* Use `Developer: Set Log Level...` command to Trace, it would give us more insights. Remember to set it back to Info afterwards.
* Use the `Gitpod Flex: Export all logs` command from the problematic window. This will contain all relevant logs.
> **Note**: Be cautious when sharing logs on the internet, as they may contain sensitive information.
# Windsurf
Source: https://www.gitpod.io/docs/gitpod/editors/windsurf
[Windsurf](https://windsurf.com/) uses the same extension as VS Code. Most of [VS Code documentation](/flex/editors/vscode) is applicable to Windsurf. When reaching out to support, please specify that you are using Windsurf as your editor.
## Opening an Environment
You can select Windsurf from the editor selector dropdown by clicking on the dropdown arrow next to the editor button on the action bar.
### Rebuild
Rebuilding is necessary to apply changes made to `.devcontainer.json`, `Dockerfile`, or `docker-compose.yml` files to the container. This process ensures that your development environment reflects the latest configuration updates.
To rebuild the container, you have two options:
1. **Command Palette**: Use `Gitpod Flex: Rebuild Container`
2. **Rebuild Prompt**: VS Code detects changes and prompts
While the container is rebuilding, you will be disconnected and automatically reconnected when it's finished. You can inspect the details view to learn about the progress and inspect logs.
### Settings Sync
Enable Settings Sync to sync all your extensions and other preferences from VS Code Desktop in VS Code Browser, read more about over at the [offical Settings Sync documentation](https://code.visualstudio.com/docs/configure/settings-sync#_turning-on-settings-sync).
## Troubleshooting
### Limitations
The following limitations are present in addition to the [limitations listed for VS Code Desktop](/flex/editors/vscode#limitations):
* For environments using a Docker Compose configuration, it's required to set `network_mode: "host"` on the main service in your Docker Compose file for VS Code Browser to successfully connect to the environment.
* VS Code Browser is not supported for [local environments](/gitpod-desktop/overview#local-environments) created using Gitpod Desktop.
### Authentication Issues
If you're experiencing authentication issues or need to switch accounts:
1. Use the `Gitpod Flex: Sign Out` command to sign out.
2. Confirm the sign-out when prompted.
3. You can then sign in again with the same or a different account.
### General Issues
If you encounter unexpected problems:
1. Check the `Gitpod Flex` output view for any useful information.
2. When sharing reports with us:
* Use `Developer: Set Log Level...` command to Trace, it would give us more insights. Remember to set it back to Info afterwards.
* Use the `Gitpod Flex: Export all logs` command from the problematic window. This will contain all relevant logs.
> **Note**: Be cautious when sharing logs on the internet, as they may contain sensitive information.
# Windsurf
Source: https://www.gitpod.io/docs/gitpod/editors/windsurf
[Windsurf](https://windsurf.com/) uses the same extension as VS Code. Most of [VS Code documentation](/flex/editors/vscode) is applicable to Windsurf. When reaching out to support, please specify that you are using Windsurf as your editor.
## Opening an Environment
You can select Windsurf from the editor selector dropdown by clicking on the dropdown arrow next to the editor button on the action bar.
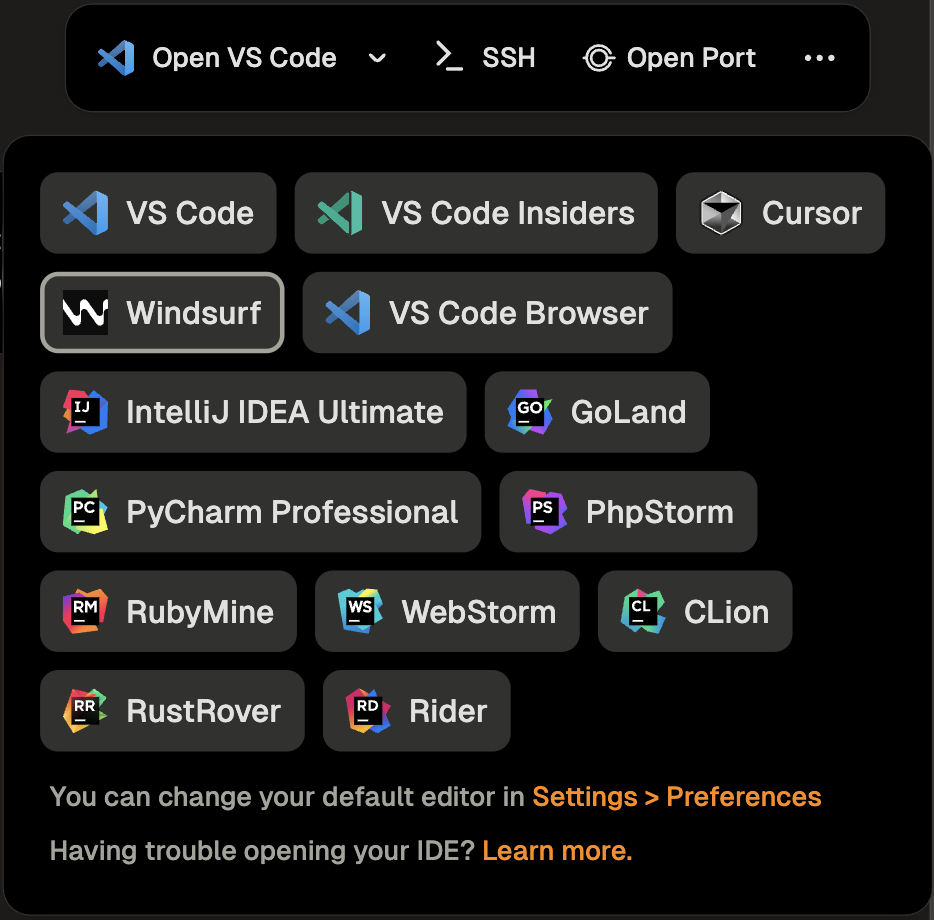 # Zed
Source: https://www.gitpod.io/docs/gitpod/editors/zed
## Connecting an environment to Zed
Gitpod works with any remote and SSH compatible editor, including [Zed](https://zed.dev/download).
### Step 1 - Install the CLI and setup your SSH configuration
The easiest way to setup SSH configuration is by installing the [Gitpod CLI](/flex/integrations/cli).
Once installed, run `gitpod env ssh-config` to update your **local** SSH configuration.
To validate ensure the directory `~/.ssh/gitpod` is created on your local machine.
### Step 2 - Find the host for your environment
You can find the host name on your started environment details page.
The host format is: `
# Zed
Source: https://www.gitpod.io/docs/gitpod/editors/zed
## Connecting an environment to Zed
Gitpod works with any remote and SSH compatible editor, including [Zed](https://zed.dev/download).
### Step 1 - Install the CLI and setup your SSH configuration
The easiest way to setup SSH configuration is by installing the [Gitpod CLI](/flex/integrations/cli).
Once installed, run `gitpod env ssh-config` to update your **local** SSH configuration.
To validate ensure the directory `~/.ssh/gitpod` is created on your local machine.
### Step 2 - Find the host for your environment
You can find the host name on your started environment details page.
The host format is: `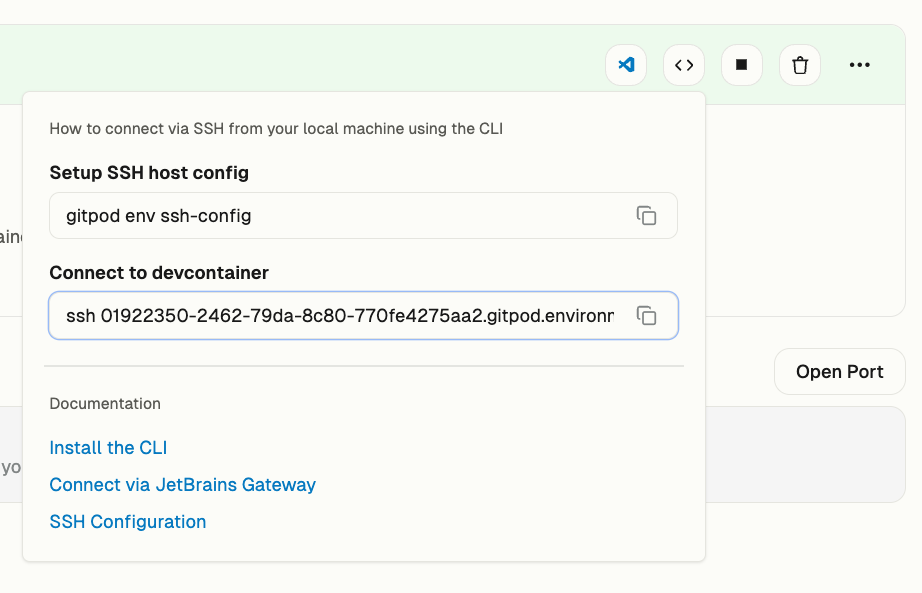 > **Note:** You do not need the `ssh` command when connecting to JetBrains.
### Step 3 - Connect with your environment
In Zed open the remote projects dialogue with `cmd-shift-p remote`. - Add a connection. - Insert the SSH host from above.
> **Note:** You do not need the `ssh` command when connecting to JetBrains.
### Step 3 - Connect with your environment
In Zed open the remote projects dialogue with `cmd-shift-p remote`. - Add a connection. - Insert the SSH host from above.
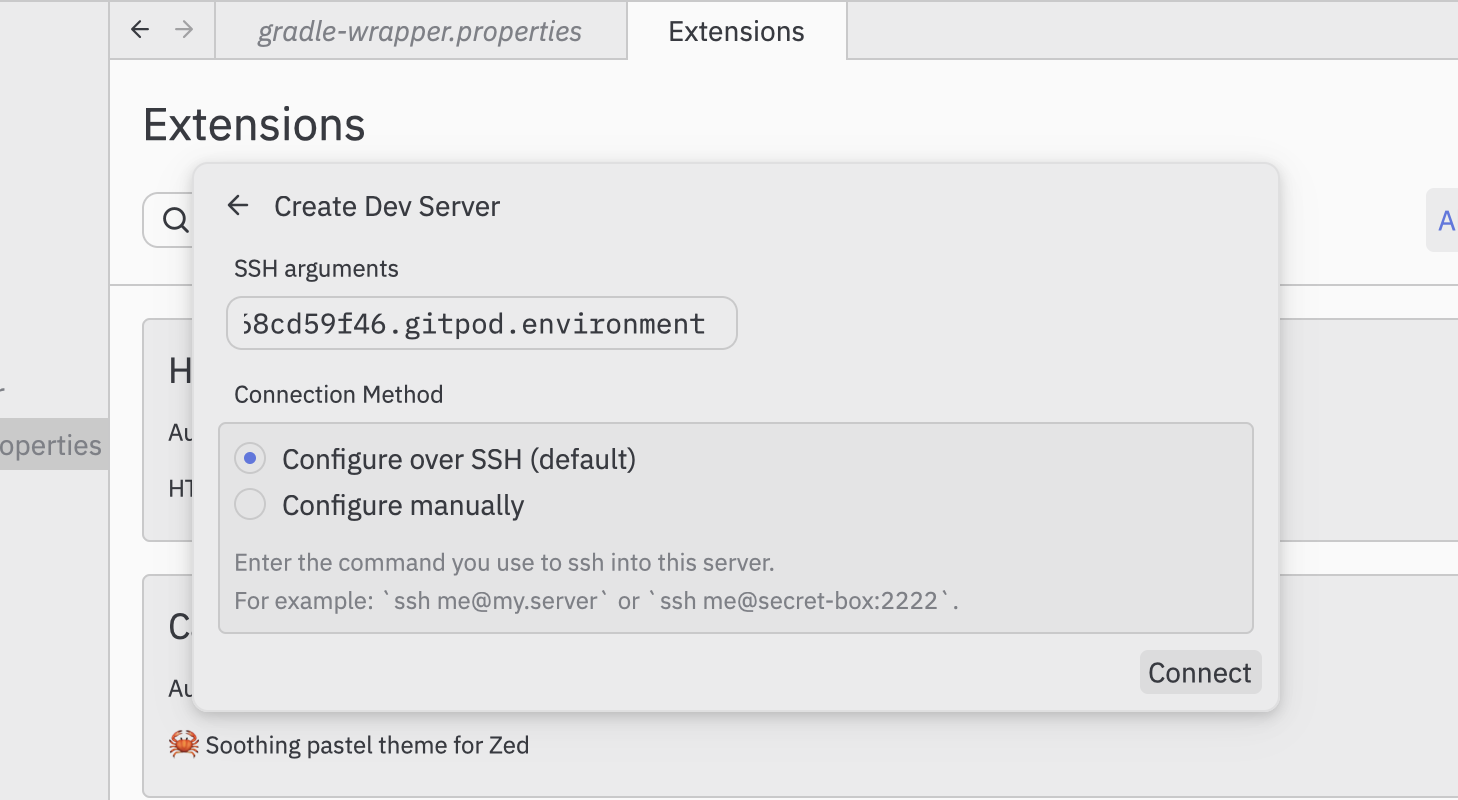 See [zed documentation](https://zed.dev/remote-development) for more.
# Archive & Auto-delete
Source: https://www.gitpod.io/docs/gitpod/environments/archive-auto-delete
Automatically manage inactive environments to optimize storage costs
Archive & Auto-delete automatically manages inactive environments through a two-stage lifecycle: archival after 7 days of inactivity, then auto-deletion based on configurable policies.
## How it works
1. **Automatic archiving**: After 7 days of inactivity (fixed)
2. **Configurable auto-deletion**: After 1, 2, or 4 weeks, or never
### Environment lifecycle
```mermaid
graph LR
A[Active] -->|7 days inactive| B[Archived]
B -->|After 1w, 2w, or 4w| C[Auto-deleted]
B -->|Unarchive| A
B -->|Delete| D[Deleted]
```
## Automatic archiving
Environments are archived when stopped for 7 consecutive days (fixed period).
Archived environments:
* Move to a separate archive view
* Can be unarchived or deleted
## Accessing archived environments
See [zed documentation](https://zed.dev/remote-development) for more.
# Archive & Auto-delete
Source: https://www.gitpod.io/docs/gitpod/environments/archive-auto-delete
Automatically manage inactive environments to optimize storage costs
Archive & Auto-delete automatically manages inactive environments through a two-stage lifecycle: archival after 7 days of inactivity, then auto-deletion based on configurable policies.
## How it works
1. **Automatic archiving**: After 7 days of inactivity (fixed)
2. **Configurable auto-deletion**: After 1, 2, or 4 weeks, or never
### Environment lifecycle
```mermaid
graph LR
A[Active] -->|7 days inactive| B[Archived]
B -->|After 1w, 2w, or 4w| C[Auto-deleted]
B -->|Unarchive| A
B -->|Delete| D[Deleted]
```
## Automatic archiving
Environments are archived when stopped for 7 consecutive days (fixed period).
Archived environments:
* Move to a separate archive view
* Can be unarchived or deleted
## Accessing archived environments
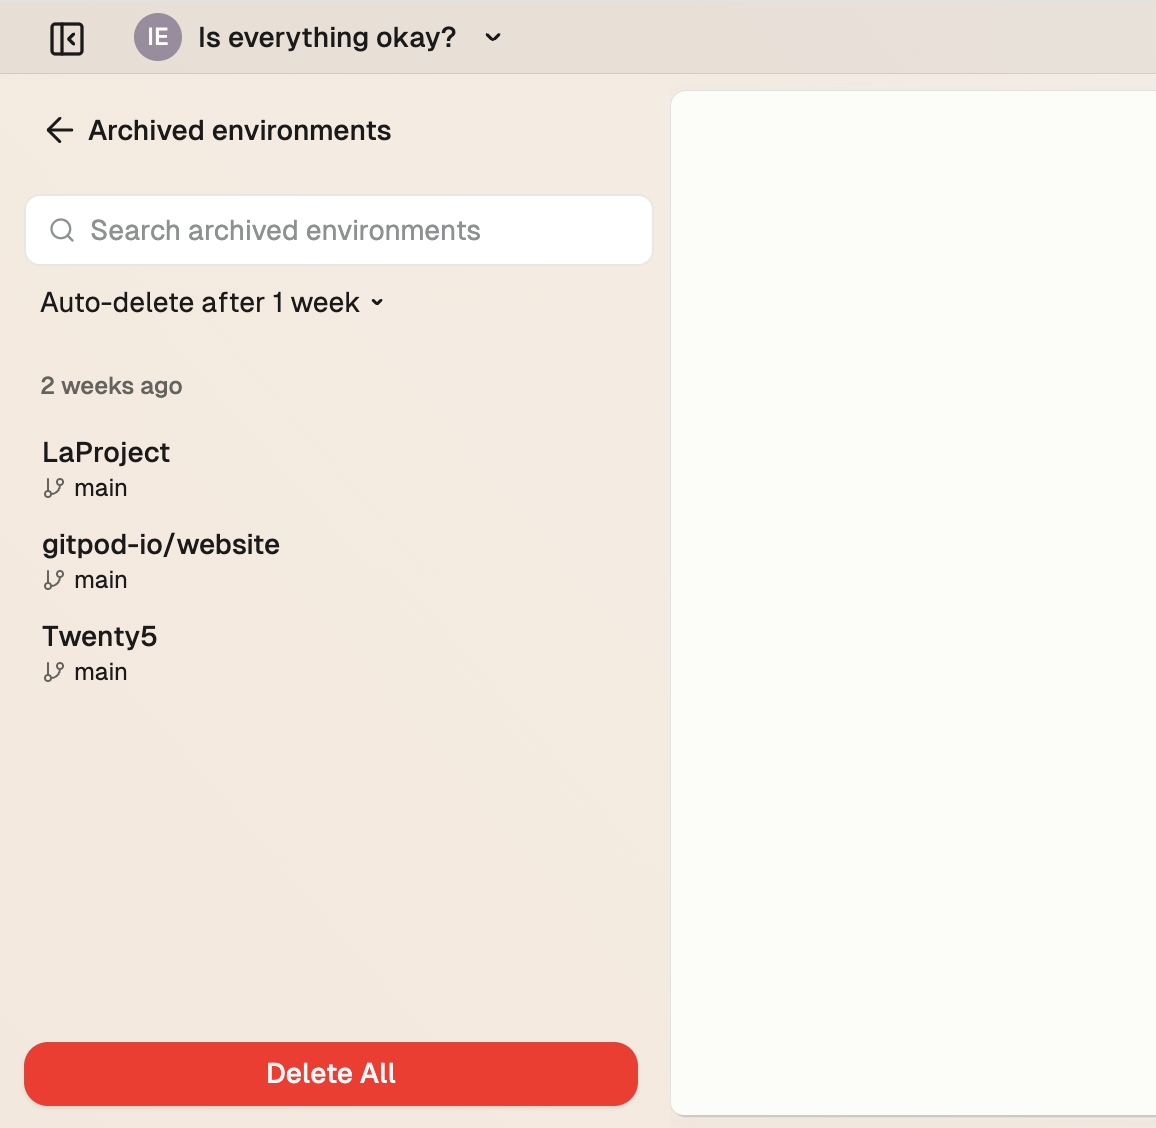 ## Managing archived environments
### Archive view organization
Environments are grouped by when they were archived:
* **1 week ago**
* **2 weeks ago**
* **1+ month ago**
### Available actions
## Managing archived environments
### Archive view organization
Environments are grouped by when they were archived:
* **1 week ago**
* **2 weeks ago**
* **1+ month ago**
### Available actions
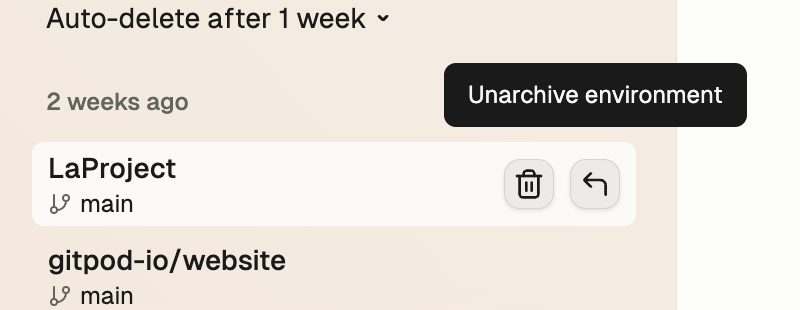 #### Unarchive an environment
Hover over the environment and click the restore button to unarchive. The environment returns to your main list immediately.
#### Delete an environment
Hover over the environment and click the delete button to delete. Confirm in the dialog.
#### Unarchive an environment
Hover over the environment and click the restore button to unarchive. The environment returns to your main list immediately.
#### Delete an environment
Hover over the environment and click the delete button to delete. Confirm in the dialog.
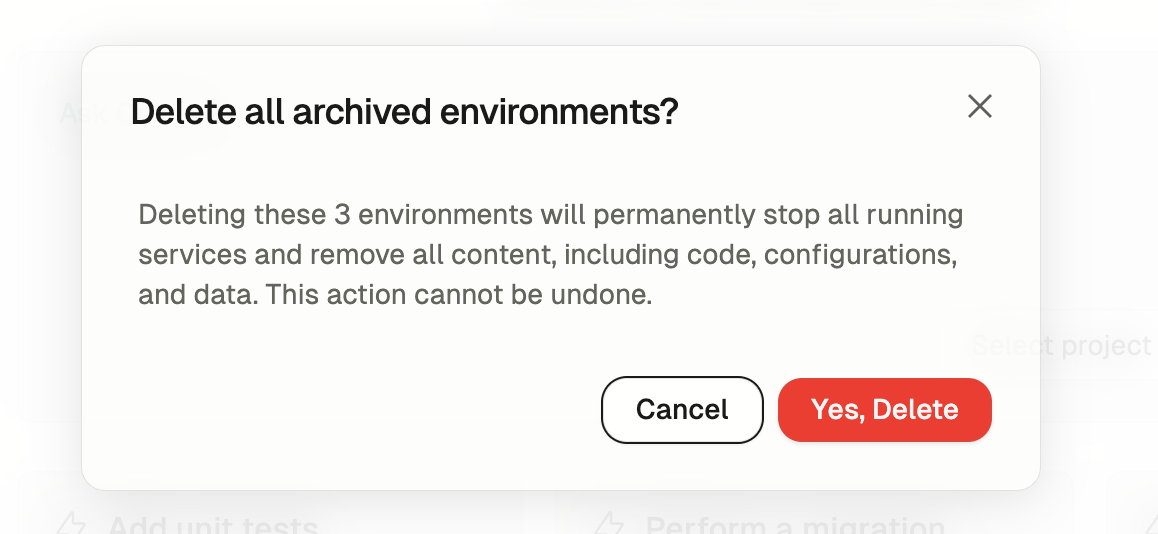 Click the **Delete All** button at the bottom and confirm to delete all archived environments.
## Auto-delete configuration
### Setting your preference
Click the **Delete All** button at the bottom and confirm to delete all archived environments.
## Auto-delete configuration
### Setting your preference
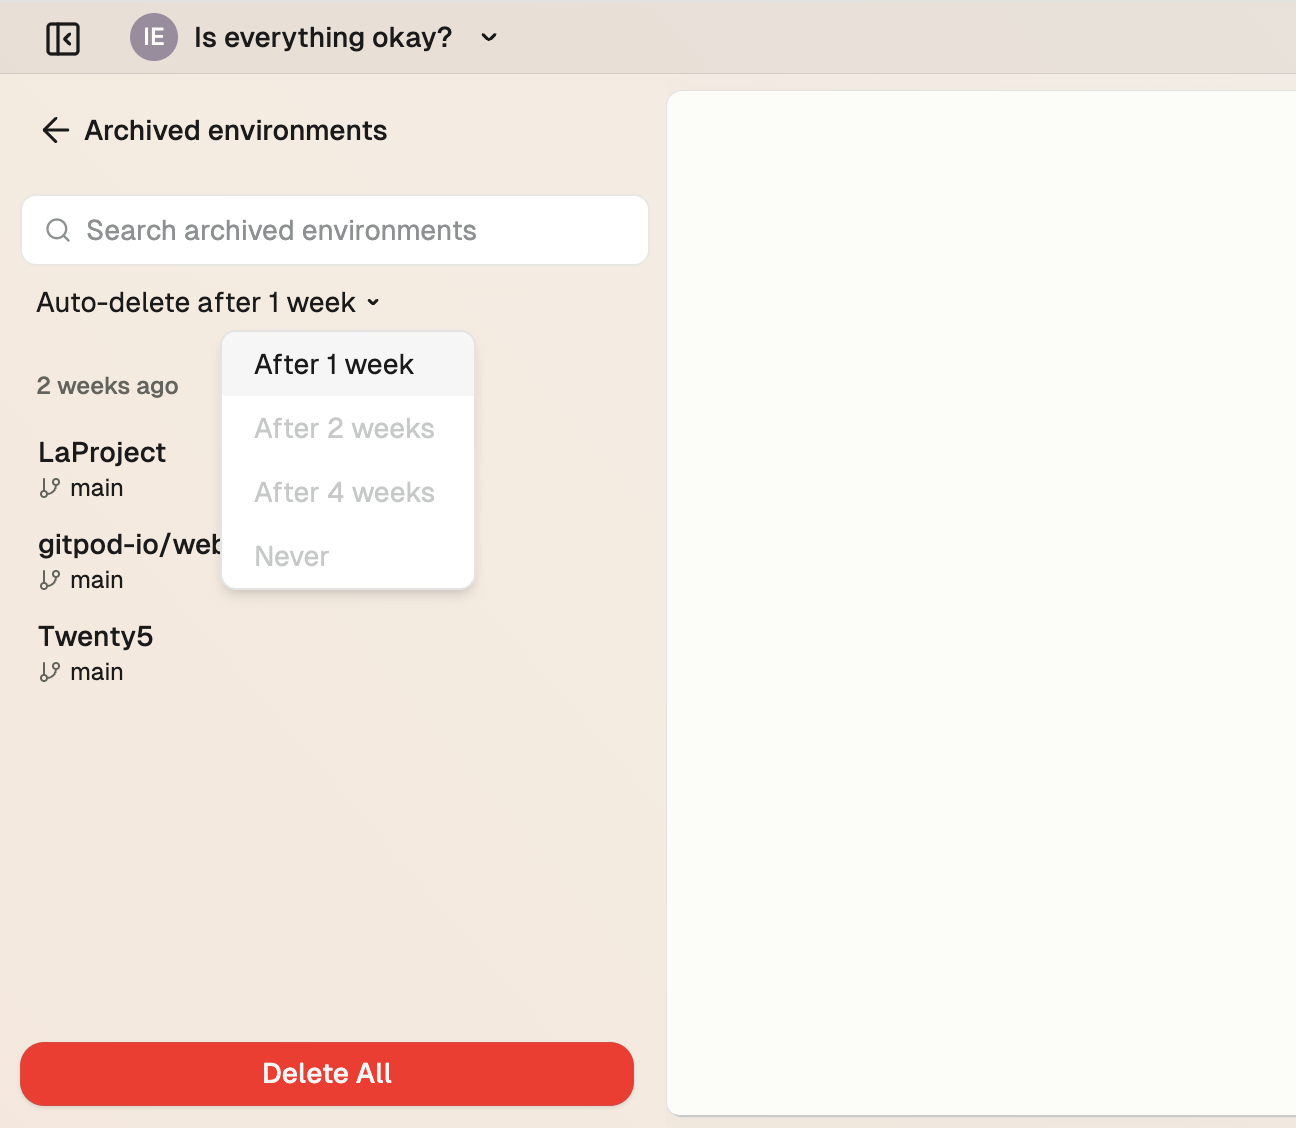 Select your auto-delete preference from the dropdown:
* **After 1 week**: 14 days total from last use
* **After 2 weeks**: 21 days total from last use
* **After 4 weeks**: 35 days total from last use
* **Never**
### Organization policies
Organization policies override user preferences when more restrictive. Disabled options in the dropdown indicate policy restrictions.
## Best practices
* **Before archiving**: Commit and push important work
* **Team coordination**: Align deletion timelines with your workflow needs
## Frequently asked questions
**When are environments archived?**
After 7 days of inactivity (fixed period).
**Can I recover deleted environments?**
No, deletion is permanent. Only archived environments can be recovered.
**Why are some auto-delete options disabled?**
Your organization policy may enforce maximum retention periods.
**Do running environments get archived?**
No, only stopped environments are archived.
## Troubleshooting
**Can't change auto-delete preference**: Check for organization policy restrictions.
# Configure a dev environment
Source: https://www.gitpod.io/docs/gitpod/getting-started/configure-dev-environment
With Gitpod, you have a fully configured development environment that starts in a single-click. We achieve this through configuring a Dev Container and Automations. This guide takes you through configuring your first environment.
Select your auto-delete preference from the dropdown:
* **After 1 week**: 14 days total from last use
* **After 2 weeks**: 21 days total from last use
* **After 4 weeks**: 35 days total from last use
* **Never**
### Organization policies
Organization policies override user preferences when more restrictive. Disabled options in the dropdown indicate policy restrictions.
## Best practices
* **Before archiving**: Commit and push important work
* **Team coordination**: Align deletion timelines with your workflow needs
## Frequently asked questions
**When are environments archived?**
After 7 days of inactivity (fixed period).
**Can I recover deleted environments?**
No, deletion is permanent. Only archived environments can be recovered.
**Why are some auto-delete options disabled?**
Your organization policy may enforce maximum retention periods.
**Do running environments get archived?**
No, only stopped environments are archived.
## Troubleshooting
**Can't change auto-delete preference**: Check for organization policy restrictions.
# Configure a dev environment
Source: https://www.gitpod.io/docs/gitpod/getting-started/configure-dev-environment
With Gitpod, you have a fully configured development environment that starts in a single-click. We achieve this through configuring a Dev Container and Automations. This guide takes you through configuring your first environment.
Install [Gitpod Desktop or the AWS Runner](/flex/getting-started) before completing this guide.
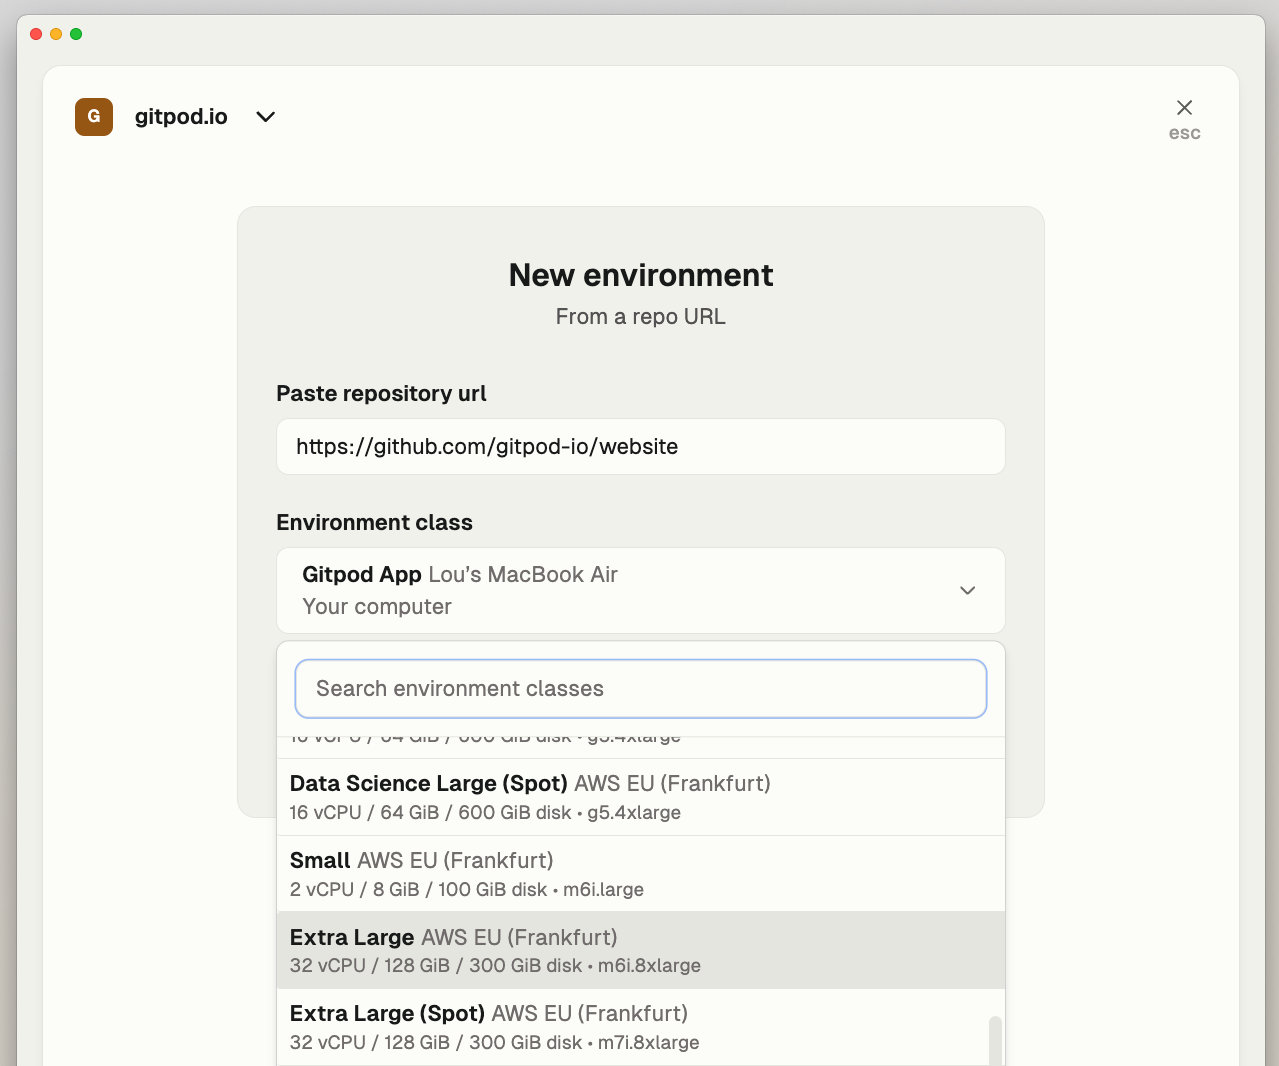 ## Configure your Dev Container
Let's get started with Dev Container to eliminate the need to manually install tools and dependencies. If you don't have an existing devcontainer in your repository Gitpod will create a basic example file for you in your environment.
A basic Dev Container example stored in `.devcontainer/devcontainer.json`
```json
{
"name": "Node.js Dev Container",
"image": "mcr.microsoft.com/devcontainers/javascript-node:0-18",
"customizations": {
"vscode": {
"settings": {},
"extensions": ["dbaeumer.vscode-eslint"]
}
},
"remoteUser": "node"
}
```
As you make changes you can rebuild your environment by running:
`gitpod environment devcontainer rebuild`.
See [devcontainer](/flex/configuration/devcontainer) for more.
## Configuring Automations
Automations go beyond Dev Container and are a powerful way to define, automate and share common workflows that you perform with your development environment
Automations are defined in configuration YAML files and updated via the Gitpod CLI that comes preinstalled in your environment.
For example:
* Seeding a database
* Running a unit test.
See [automations - examples](/flex/configuration/automations/examples) for many more automation examples.
An example Automations file example stored in `.gitpod/automations.yaml`
```yaml
services:
database:
name: PostgreSQL
commands:
start: docker run postgres
tasks:
run-unit-tests:
name: Runs unit tests
command: go test -v ./...
install-dependencies:
name: Install dependencies
command: npm install
triggeredBy:
- postDevcontainerStart
- manual
```
When you’re done run `gitpod automations update` to register your Automations with Gitpod.
See [automations](/flex/configuration/automations) for more.
## Publishing your project
When done commit both your devcontainer and automation configuration files and hit publish on your project in Gitpod. You’ve now set up a fully-configured project that is your blueprint for a fully-configured development environment and it’s now shared with your team inside your Gitpod organization.
## What next?
Now that you're done, why not take a look at:
{/* */}
* Setting up an [AWS Runnner](/flex/runners/aws) or [Gitpod Desktop]() (if you haven't already)
* Further [optimizing your devcontainer](/flex/configuration/devcontainer/optimizing-startup-times)
* Exploring an [integration](/flex/integrations)
# Gitpod Desktop
Source: https://www.gitpod.io/docs/gitpod/getting-started/create-dev-environment-desktop-app
Run Gitpod environments locally on your Apple silicon Mac with Gitpod Desktop
Gitpod Desktop is the fastest and easiest way to run and recreate cloud development environments locally on your Apple silicon Mac. It provides a seamless development experience with the benefits of local computing resources.
## Benefits of Gitpod Desktop
* **Local Performance:** Harness the full power of your Apple silicon Mac.
* **Cost Efficiency:** Use your local machine resources without incurring additional cloud computing costs.
* **Work Offline:** Continue working in already-running environments even when you lose internet connectivity.
* **Resource Isolation:** Run development environments in isolation from your host system for improved security and dependency management.
* **Easy Setup:** One-click environment setup without complex virtualization configuration.
* **Consistent Experience:** Enjoy the same reliable, reproducible environments whether working locally or in the cloud.
## Prerequisites
* **Operating System**: macOS Sonoma or later
* **CPU**: Apple M1 chip or newer (Apple silicon)
* **RAM**: 16GB or more
* **Architecture**: Apple silicon (ARM-based Macs)
## Download and Install
1. Visit [app.gitpod.io](https://app.gitpod.io/) and look for the download link in the navigation bar
2. Alternatively, download directly from [gitpod.io/gitpod-desktop/download](https://www.gitpod.io/gitpod-desktop/download)
3. Install the application on your Mac
## Configure your Dev Container
Let's get started with Dev Container to eliminate the need to manually install tools and dependencies. If you don't have an existing devcontainer in your repository Gitpod will create a basic example file for you in your environment.
A basic Dev Container example stored in `.devcontainer/devcontainer.json`
```json
{
"name": "Node.js Dev Container",
"image": "mcr.microsoft.com/devcontainers/javascript-node:0-18",
"customizations": {
"vscode": {
"settings": {},
"extensions": ["dbaeumer.vscode-eslint"]
}
},
"remoteUser": "node"
}
```
As you make changes you can rebuild your environment by running:
`gitpod environment devcontainer rebuild`.
See [devcontainer](/flex/configuration/devcontainer) for more.
## Configuring Automations
Automations go beyond Dev Container and are a powerful way to define, automate and share common workflows that you perform with your development environment
Automations are defined in configuration YAML files and updated via the Gitpod CLI that comes preinstalled in your environment.
For example:
* Seeding a database
* Running a unit test.
See [automations - examples](/flex/configuration/automations/examples) for many more automation examples.
An example Automations file example stored in `.gitpod/automations.yaml`
```yaml
services:
database:
name: PostgreSQL
commands:
start: docker run postgres
tasks:
run-unit-tests:
name: Runs unit tests
command: go test -v ./...
install-dependencies:
name: Install dependencies
command: npm install
triggeredBy:
- postDevcontainerStart
- manual
```
When you’re done run `gitpod automations update` to register your Automations with Gitpod.
See [automations](/flex/configuration/automations) for more.
## Publishing your project
When done commit both your devcontainer and automation configuration files and hit publish on your project in Gitpod. You’ve now set up a fully-configured project that is your blueprint for a fully-configured development environment and it’s now shared with your team inside your Gitpod organization.
## What next?
Now that you're done, why not take a look at:
{/* */}
* Setting up an [AWS Runnner](/flex/runners/aws) or [Gitpod Desktop]() (if you haven't already)
* Further [optimizing your devcontainer](/flex/configuration/devcontainer/optimizing-startup-times)
* Exploring an [integration](/flex/integrations)
# Gitpod Desktop
Source: https://www.gitpod.io/docs/gitpod/getting-started/create-dev-environment-desktop-app
Run Gitpod environments locally on your Apple silicon Mac with Gitpod Desktop
Gitpod Desktop is the fastest and easiest way to run and recreate cloud development environments locally on your Apple silicon Mac. It provides a seamless development experience with the benefits of local computing resources.
## Benefits of Gitpod Desktop
* **Local Performance:** Harness the full power of your Apple silicon Mac.
* **Cost Efficiency:** Use your local machine resources without incurring additional cloud computing costs.
* **Work Offline:** Continue working in already-running environments even when you lose internet connectivity.
* **Resource Isolation:** Run development environments in isolation from your host system for improved security and dependency management.
* **Easy Setup:** One-click environment setup without complex virtualization configuration.
* **Consistent Experience:** Enjoy the same reliable, reproducible environments whether working locally or in the cloud.
## Prerequisites
* **Operating System**: macOS Sonoma or later
* **CPU**: Apple M1 chip or newer (Apple silicon)
* **RAM**: 16GB or more
* **Architecture**: Apple silicon (ARM-based Macs)
## Download and Install
1. Visit [app.gitpod.io](https://app.gitpod.io/) and look for the download link in the navigation bar
2. Alternatively, download directly from [gitpod.io/gitpod-desktop/download](https://www.gitpod.io/gitpod-desktop/download)
3. Install the application on your Mac
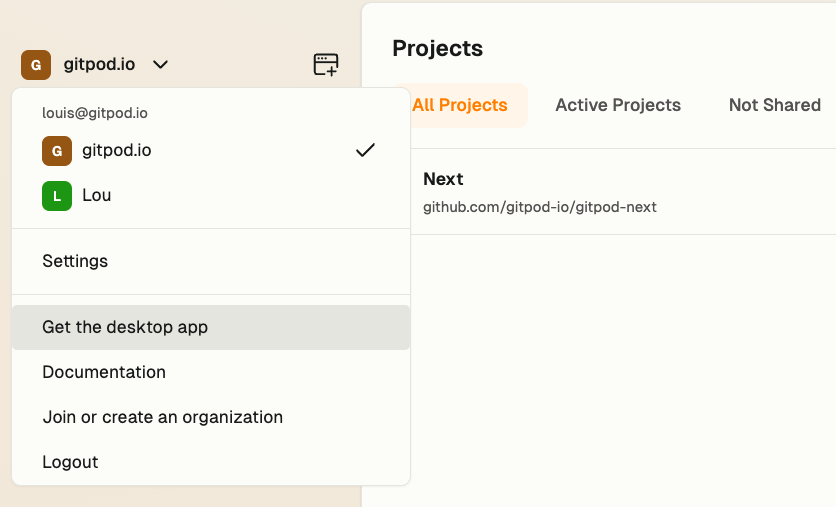 ## First-Time Setup
When you first launch Gitpod Desktop, the application will:
1. Verify and configure the macOS runner
2. Set up the file system (this may take several minutes)
3. Display installation progress
4. Prompt you to authenticate with your Gitpod account
5. Guide you through Git authentication setup
## Create Your Environment
Once the setup is complete:
1. In the sidebar, click **Create an environment**
2. Paste a public or private repository URL
3. Click **Create environment**
## First-Time Setup
When you first launch Gitpod Desktop, the application will:
1. Verify and configure the macOS runner
2. Set up the file system (this may take several minutes)
3. Display installation progress
4. Prompt you to authenticate with your Gitpod account
5. Guide you through Git authentication setup
## Create Your Environment
Once the setup is complete:
1. In the sidebar, click **Create an environment**
2. Paste a public or private repository URL
3. Click **Create environment**
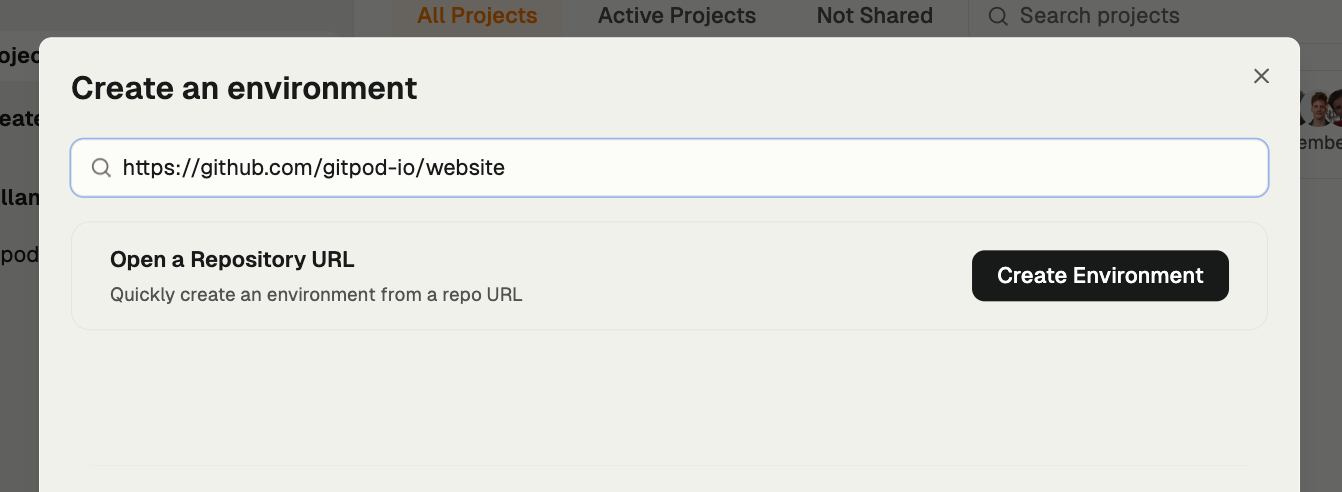 ## Choose Gitpod Desktop
To run your environment locally:
1. When prompted to select an environment class, choose **Gitpod Desktop**
2. Your local Gitpod Desktop application will begin setting up the environment
3. The setup process will pull necessary container images and configure your workspace
## Git Authentication
For accessing repositories (especially private ones), Gitpod Desktop provides several authentication options:
1. **Automatic detection**: The runner checks your local credential manager for existing Git tokens
2. **Manual token entry**: If no token exists, you'll be prompted to provide a Personal Access Token (PAT)
3. **Token management**: Manage your PATs under Settings → Git Authentication
4. **Token refresh**: Authentication tokens are automatically refreshed when environments restart
For self-hosted source control providers, organization administrators must configure them in organization settings first.
## Features and Limitations
### Key Features
* Uses your local machine resources at no additional cloud cost
* Built-in Linux virtualization optimized for Apple Silicon
* One-click setup with full workload isolation
* Limited offline capabilities for already-running environments
* Organization administrators can disable local runners
### Limitations
* No port sharing available (unlike cloud runners)
* Currently only available for Apple silicon Macs
## Troubleshooting
If you encounter issues with Gitpod Desktop:
* **Runner installation failures**: Verify system requirements and macOS version
* **Account switching issues**: Only one runner can be active at a time, tied to a single organization
* **Git authentication problems**: Check your credentials or generate a new PAT
* **Unexpected runner failures**: Restart the application or reset the runner
For persistent issues:
1. Collect logs through Help → Troubleshooting → Collect Logs and Diagnostics
2. Contact support through the support chat
3. If needed, perform a clean uninstall by following the instructions in the support documentation
## Advanced Configuration
* **Organization settings**: Administrators can control local runner usage through Settings → Runners → Gitpod Desktop
* **Repository access**: Administrators can configure repository access to source control providers
* **Git authentication**: Users can configure and manage Git authentication settings
* **Cache management**: Clear shared cache for Docker images and builds as needed
* **Preview builds**: Advanced users can switch between Stable and Insiders (preview) builds
## Next Steps
* Learn about [environment configuration](/flex/configuration) to customize your development setup
* Explore [VS Code extensions](/flex/vscode-extensions) to enhance your development environment
* Check out how to [switch between local and cloud environments](/flex/switching-environments) for different workflows
For additional help, visit the [Gitpod Community](https://community.gitpod.io/) or [contact support](https://www.gitpod.io/contact).
# Self-host Linux runner
Source: https://www.gitpod.io/docs/gitpod/getting-started/create-dev-environment-linux-runner
Run Gitpod environments on your own Linux machine
The Linux runner enables you to run Gitpod environments directly on your own Linux machine. This gives you full control over your infrastructure while enjoying Gitpod's collaborative features.
## Benefits of self-hosting
Self-hosting a Linux runner offers several advantages:
* **Full infrastructure control**: Maintain complete control over your hardware and environment configurations
* **Fixed costs**: Only pay for your own hardware with no usage-based billing
* **Network access**: Direct access to your local network services and resources
* **Resource allocation**: Support for up to 10 concurrent environments on a single runner
* **Security**: Keep your code and development activities within your own infrastructure
* **Customization**: Tailor hardware resources to your specific development needs
## Prerequisites
Before setting up a Linux runner, ensure your system meets these requirements:
* A Linux machine with AMD64/x86\_64 architecture
* Hardware virtualization support (KVM)
* Minimum 2GB RAM per environment you plan to run
* Root/sudo access for initial setup
* Admin access to your Gitpod organization
For detailed system requirements, see the [requirements documentation](/flex/runners/linux/requirements).
## Security considerations
When self-hosting a Linux runner:
* The runner requires root access during installation but runs with reduced privileges
* Environments run in isolated containers but can access the host network
* Consider network isolation if running on shared infrastructure
* Regularly update the runner for security patches
## Limitations
* Maximum of 10 concurrent environments per runner
* No built-in high availability options
## Installation and setup
To set up your Linux runner:
1. [Set up your Linux runner](/flex/runners/linux/setup)
2. [Configure environment classes](/flex/runners/linux/setup#environment-classes)
3. [Set up repository access](/flex/runners/linux/setup#repository-access)
For detailed information about Linux runners, including maintenance and troubleshooting, see the [Linux runners documentation](/flex/runners/linux).
# AWS Runner
Source: https://www.gitpod.io/docs/gitpod/getting-started/create-dev-environment-self-hosted-aws-runner
Deploy a Gitpod runner in your AWS account to create secure, cloud-based development environments for your entire team
Deploy a Gitpod runner in your AWS account to create secure, cloud-based development environments for your entire team. Unlike Gitpod Desktop which is installed per user, an AWS runner is deployed once and can be used by multiple team members.
## Benefits of the AWS Runner
* **Team-wide deployment**: Install once, benefit the entire team
* **Enhanced security**: Development environments run within your own AWS infrastructure
* **Resource efficiency**: Centralized management of compute resources
* **VPC integration**: Securely access internal services and resources within your AWS network
* **Customizable performance**: Configure environment classes to match your development needs
* **Scalability**: Support for multiple team members without individual installations
## Prerequisites
* **Admin role** in your Gitpod organization
* An AWS account with permissions to create CloudFormation stacks
* Basic knowledge of AWS networking concepts (VPC, subnets)
## Steps to set up an AWS runner
### 1. Create a runner configuration
1. Visit [app.gitpod.io](https://app.gitpod.io/)
2. Open your organization settings
3. Click **Runners** in the navigation
4. Click **Setup an AWS runner**
## Choose Gitpod Desktop
To run your environment locally:
1. When prompted to select an environment class, choose **Gitpod Desktop**
2. Your local Gitpod Desktop application will begin setting up the environment
3. The setup process will pull necessary container images and configure your workspace
## Git Authentication
For accessing repositories (especially private ones), Gitpod Desktop provides several authentication options:
1. **Automatic detection**: The runner checks your local credential manager for existing Git tokens
2. **Manual token entry**: If no token exists, you'll be prompted to provide a Personal Access Token (PAT)
3. **Token management**: Manage your PATs under Settings → Git Authentication
4. **Token refresh**: Authentication tokens are automatically refreshed when environments restart
For self-hosted source control providers, organization administrators must configure them in organization settings first.
## Features and Limitations
### Key Features
* Uses your local machine resources at no additional cloud cost
* Built-in Linux virtualization optimized for Apple Silicon
* One-click setup with full workload isolation
* Limited offline capabilities for already-running environments
* Organization administrators can disable local runners
### Limitations
* No port sharing available (unlike cloud runners)
* Currently only available for Apple silicon Macs
## Troubleshooting
If you encounter issues with Gitpod Desktop:
* **Runner installation failures**: Verify system requirements and macOS version
* **Account switching issues**: Only one runner can be active at a time, tied to a single organization
* **Git authentication problems**: Check your credentials or generate a new PAT
* **Unexpected runner failures**: Restart the application or reset the runner
For persistent issues:
1. Collect logs through Help → Troubleshooting → Collect Logs and Diagnostics
2. Contact support through the support chat
3. If needed, perform a clean uninstall by following the instructions in the support documentation
## Advanced Configuration
* **Organization settings**: Administrators can control local runner usage through Settings → Runners → Gitpod Desktop
* **Repository access**: Administrators can configure repository access to source control providers
* **Git authentication**: Users can configure and manage Git authentication settings
* **Cache management**: Clear shared cache for Docker images and builds as needed
* **Preview builds**: Advanced users can switch between Stable and Insiders (preview) builds
## Next Steps
* Learn about [environment configuration](/flex/configuration) to customize your development setup
* Explore [VS Code extensions](/flex/vscode-extensions) to enhance your development environment
* Check out how to [switch between local and cloud environments](/flex/switching-environments) for different workflows
For additional help, visit the [Gitpod Community](https://community.gitpod.io/) or [contact support](https://www.gitpod.io/contact).
# Self-host Linux runner
Source: https://www.gitpod.io/docs/gitpod/getting-started/create-dev-environment-linux-runner
Run Gitpod environments on your own Linux machine
The Linux runner enables you to run Gitpod environments directly on your own Linux machine. This gives you full control over your infrastructure while enjoying Gitpod's collaborative features.
## Benefits of self-hosting
Self-hosting a Linux runner offers several advantages:
* **Full infrastructure control**: Maintain complete control over your hardware and environment configurations
* **Fixed costs**: Only pay for your own hardware with no usage-based billing
* **Network access**: Direct access to your local network services and resources
* **Resource allocation**: Support for up to 10 concurrent environments on a single runner
* **Security**: Keep your code and development activities within your own infrastructure
* **Customization**: Tailor hardware resources to your specific development needs
## Prerequisites
Before setting up a Linux runner, ensure your system meets these requirements:
* A Linux machine with AMD64/x86\_64 architecture
* Hardware virtualization support (KVM)
* Minimum 2GB RAM per environment you plan to run
* Root/sudo access for initial setup
* Admin access to your Gitpod organization
For detailed system requirements, see the [requirements documentation](/flex/runners/linux/requirements).
## Security considerations
When self-hosting a Linux runner:
* The runner requires root access during installation but runs with reduced privileges
* Environments run in isolated containers but can access the host network
* Consider network isolation if running on shared infrastructure
* Regularly update the runner for security patches
## Limitations
* Maximum of 10 concurrent environments per runner
* No built-in high availability options
## Installation and setup
To set up your Linux runner:
1. [Set up your Linux runner](/flex/runners/linux/setup)
2. [Configure environment classes](/flex/runners/linux/setup#environment-classes)
3. [Set up repository access](/flex/runners/linux/setup#repository-access)
For detailed information about Linux runners, including maintenance and troubleshooting, see the [Linux runners documentation](/flex/runners/linux).
# AWS Runner
Source: https://www.gitpod.io/docs/gitpod/getting-started/create-dev-environment-self-hosted-aws-runner
Deploy a Gitpod runner in your AWS account to create secure, cloud-based development environments for your entire team
Deploy a Gitpod runner in your AWS account to create secure, cloud-based development environments for your entire team. Unlike Gitpod Desktop which is installed per user, an AWS runner is deployed once and can be used by multiple team members.
## Benefits of the AWS Runner
* **Team-wide deployment**: Install once, benefit the entire team
* **Enhanced security**: Development environments run within your own AWS infrastructure
* **Resource efficiency**: Centralized management of compute resources
* **VPC integration**: Securely access internal services and resources within your AWS network
* **Customizable performance**: Configure environment classes to match your development needs
* **Scalability**: Support for multiple team members without individual installations
## Prerequisites
* **Admin role** in your Gitpod organization
* An AWS account with permissions to create CloudFormation stacks
* Basic knowledge of AWS networking concepts (VPC, subnets)
## Steps to set up an AWS runner
### 1. Create a runner configuration
1. Visit [app.gitpod.io](https://app.gitpod.io/)
2. Open your organization settings
3. Click **Runners** in the navigation
4. Click **Setup an AWS runner**
 **Note:** A runner is associated with an organization. You can have multiple runners, each restricted to a single AWS region.
### 2. Connect the runner to AWS
1. Ensure you're logged into the correct AWS account
2. Click **Continue on AWS**
**Note:** A runner is associated with an organization. You can have multiple runners, each restricted to a single AWS region.
### 2. Connect the runner to AWS
1. Ensure you're logged into the correct AWS account
2. Click **Continue on AWS**
 > If you don't have direct AWS access, you can copy the runner details from this page and share them with your AWS account administrator.
3. Complete the CloudFormation form with the **required** fields:
* VPC
* Availability zone
* Subnet
If you're unsure which values to use, select the [default networking](https://docs.aws.amazon.com/vpc/latest/userguide/default-vpc.html) options, which should auto-populate in the form.
> If you don't have direct AWS access, you can copy the runner details from this page and share them with your AWS account administrator.
3. Complete the CloudFormation form with the **required** fields:
* VPC
* Availability zone
* Subnet
If you're unsure which values to use, select the [default networking](https://docs.aws.amazon.com/vpc/latest/userguide/default-vpc.html) options, which should auto-populate in the form.
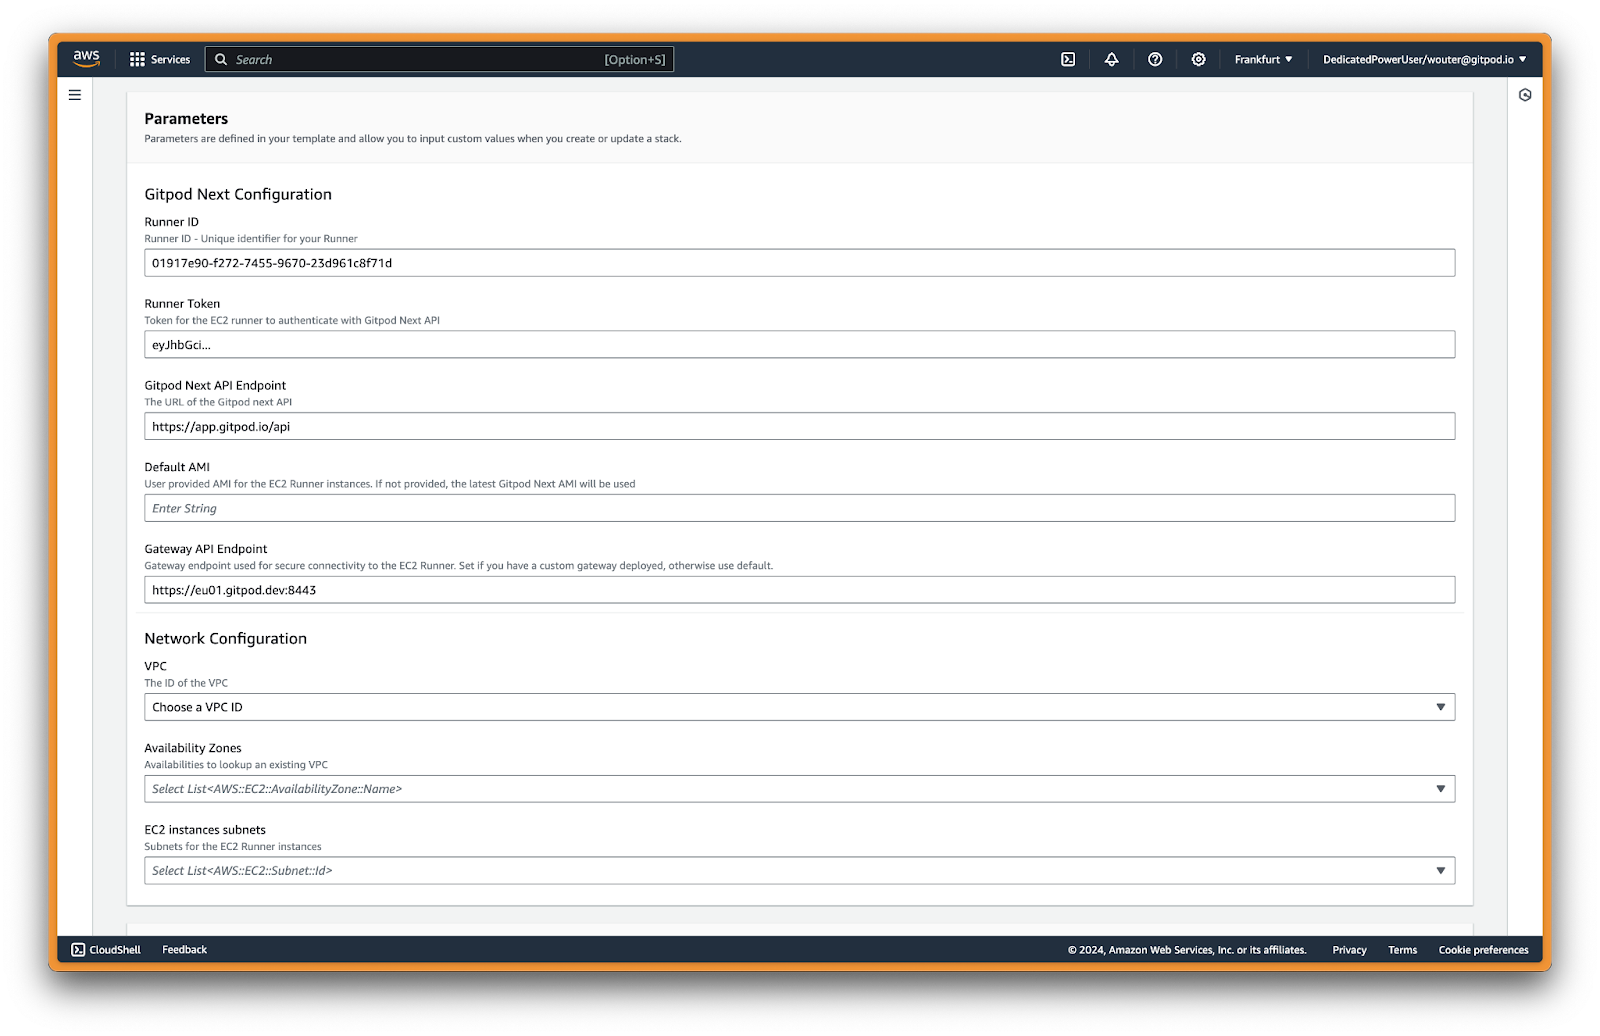 4. Click **Create stack**
The CloudFormation stack typically takes about 3 minutes to deploy.
### 3. Configure source control access
1. Return to the runner configuration page where your runner should now show as **Online**
2. Configure repository access by selecting a provider (such as GitHub)
3. Enable OAuth or [Personal Access Token (PAT)](https://docs.github.com/en/authentication/keeping-your-account-and-data-secure/creating-a-personal-access-token) access
4. Click **Create stack**
The CloudFormation stack typically takes about 3 minutes to deploy.
### 3. Configure source control access
1. Return to the runner configuration page where your runner should now show as **Online**
2. Configure repository access by selecting a provider (such as GitHub)
3. Enable OAuth or [Personal Access Token (PAT)](https://docs.github.com/en/authentication/keeping-your-account-and-data-secure/creating-a-personal-access-token) access
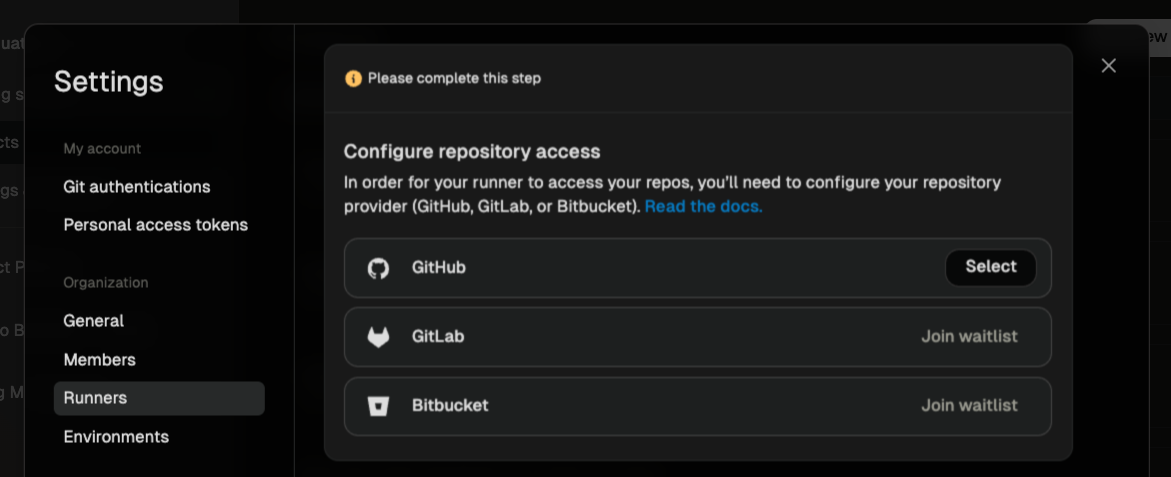 ### 4. Configure environment classes (Optional)
You can configure available environment classes for your runner. An environment class defines the performance profile (CPU, memory) for development environments on this runner.
### 4. Configure environment classes (Optional)
You can configure available environment classes for your runner. An environment class defines the performance profile (CPU, memory) for development environments on this runner.
 ### 5. Create your development environment
1. Click **Create an environment** in the navigation bar
2. Paste a repository URL (public or private)
3. Click **Create environment**
4. Select an environment class from your AWS runner
## Troubleshooting
### Common issues
* **CloudFormation deployment fails**: Ensure you've selected a valid VPC and subnet. The most common error is forgetting to select these required fields.
* **Runner shows as offline**: Check your AWS console to verify the EC2 instances are running correctly.
* **Cannot access private repositories**: Verify your OAuth or PAT configuration has the correct permissions for repository access.
## Next steps
After setting up your AWS runner and creating your first environment:
* Learn more about [projects](/flex/projects/overview)
* See [AWS Runner](/flex/runners/aws) for more detailed information.
# Overview
Source: https://www.gitpod.io/docs/gitpod/getting-started/overview
Learn the different ways to run Gitpod development environments
Gitpod provides flexible options for running your development environments, either locally on your machine or securely in your own cloud infrastructure (VPC) or hardware.
## Deployment Options
Choose the option that best fits your workflow and infrastructure requirements:
| Option | Description | Best for |
| ------------------ | ----------------------------------------------------------- | ---------------------------------------------------------------- |
| **Gitpod Desktop** | Run environments locally with built-in Linux virtualization | Individual developers or teams without cloud infrastructure |
| **AWS Runner** | Run in your own AWS VPC with full control | Teams needing enterprise-grade compute resources and GPU support |
| **Linux Runner** | Run directly on your Linux machine with simple setup | Small teams wanting direct local network access |
## Detailed Comparison
### Gitpod Desktop
* **Infrastructure**: Runs locally on your machine using built-in virtualization
* **Cost**: No additional infrastructure costs
* **Compute Resources**: Limited to your local hardware
* **Collaboration**: Project sharing only available with other Gitpod Desktop users
* [**Get Started with Gitpod Desktop →**](/gitpod/getting-started/create-dev-environment-desktop-app)
### AWS Runner (Bring Your Own Cloud)
* **Infrastructure**: Runs securely in your own AWS VPC
* **Cost**: Pay only for the AWS resources you use (can be covered by AWS free tier)
* **Compute Resources**: Scale up to 896 vCPUs and 12TB RAM with GPU support
* **Collaboration**: Environments can be shared with everyone in your organization
* [**Get Started with AWS Runner →**](/gitpod/getting-started/create-dev-environment-self-hosted-aws-runner)
### Linux Runner (On Your Hardware)
* **Infrastructure**: Runs directly on your Linux machine
* **Cost**: Fixed costs based on your existing hardware
* **Compute Resources**: Support for up to 10 concurrent environments
* **Collaboration**: Direct local network access for your team
* [**Get Started with Linux Runner →**](/gitpod/getting-started/create-dev-environment-linux-runner)
## Next Steps
After selecting your deployment option:
1. [Configure your development environment](/gitpod/getting-started/configure-dev-environment)
2. Set up authentication (via Personal Access Token or OAuth)
3. Configure maintenance and update strategies
# Gitpod Desktop
Source: https://www.gitpod.io/docs/gitpod/gitpod-desktop/overview
Gitpod Desktop is the fastest and easiest way to run and recreate cloud development environments locally. It is currently available for Apple silicon users.
### 5. Create your development environment
1. Click **Create an environment** in the navigation bar
2. Paste a repository URL (public or private)
3. Click **Create environment**
4. Select an environment class from your AWS runner
## Troubleshooting
### Common issues
* **CloudFormation deployment fails**: Ensure you've selected a valid VPC and subnet. The most common error is forgetting to select these required fields.
* **Runner shows as offline**: Check your AWS console to verify the EC2 instances are running correctly.
* **Cannot access private repositories**: Verify your OAuth or PAT configuration has the correct permissions for repository access.
## Next steps
After setting up your AWS runner and creating your first environment:
* Learn more about [projects](/flex/projects/overview)
* See [AWS Runner](/flex/runners/aws) for more detailed information.
# Overview
Source: https://www.gitpod.io/docs/gitpod/getting-started/overview
Learn the different ways to run Gitpod development environments
Gitpod provides flexible options for running your development environments, either locally on your machine or securely in your own cloud infrastructure (VPC) or hardware.
## Deployment Options
Choose the option that best fits your workflow and infrastructure requirements:
| Option | Description | Best for |
| ------------------ | ----------------------------------------------------------- | ---------------------------------------------------------------- |
| **Gitpod Desktop** | Run environments locally with built-in Linux virtualization | Individual developers or teams without cloud infrastructure |
| **AWS Runner** | Run in your own AWS VPC with full control | Teams needing enterprise-grade compute resources and GPU support |
| **Linux Runner** | Run directly on your Linux machine with simple setup | Small teams wanting direct local network access |
## Detailed Comparison
### Gitpod Desktop
* **Infrastructure**: Runs locally on your machine using built-in virtualization
* **Cost**: No additional infrastructure costs
* **Compute Resources**: Limited to your local hardware
* **Collaboration**: Project sharing only available with other Gitpod Desktop users
* [**Get Started with Gitpod Desktop →**](/gitpod/getting-started/create-dev-environment-desktop-app)
### AWS Runner (Bring Your Own Cloud)
* **Infrastructure**: Runs securely in your own AWS VPC
* **Cost**: Pay only for the AWS resources you use (can be covered by AWS free tier)
* **Compute Resources**: Scale up to 896 vCPUs and 12TB RAM with GPU support
* **Collaboration**: Environments can be shared with everyone in your organization
* [**Get Started with AWS Runner →**](/gitpod/getting-started/create-dev-environment-self-hosted-aws-runner)
### Linux Runner (On Your Hardware)
* **Infrastructure**: Runs directly on your Linux machine
* **Cost**: Fixed costs based on your existing hardware
* **Compute Resources**: Support for up to 10 concurrent environments
* **Collaboration**: Direct local network access for your team
* [**Get Started with Linux Runner →**](/gitpod/getting-started/create-dev-environment-linux-runner)
## Next Steps
After selecting your deployment option:
1. [Configure your development environment](/gitpod/getting-started/configure-dev-environment)
2. Set up authentication (via Personal Access Token or OAuth)
3. Configure maintenance and update strategies
# Gitpod Desktop
Source: https://www.gitpod.io/docs/gitpod/gitpod-desktop/overview
Gitpod Desktop is the fastest and easiest way to run and recreate cloud development environments locally. It is currently available for Apple silicon users.
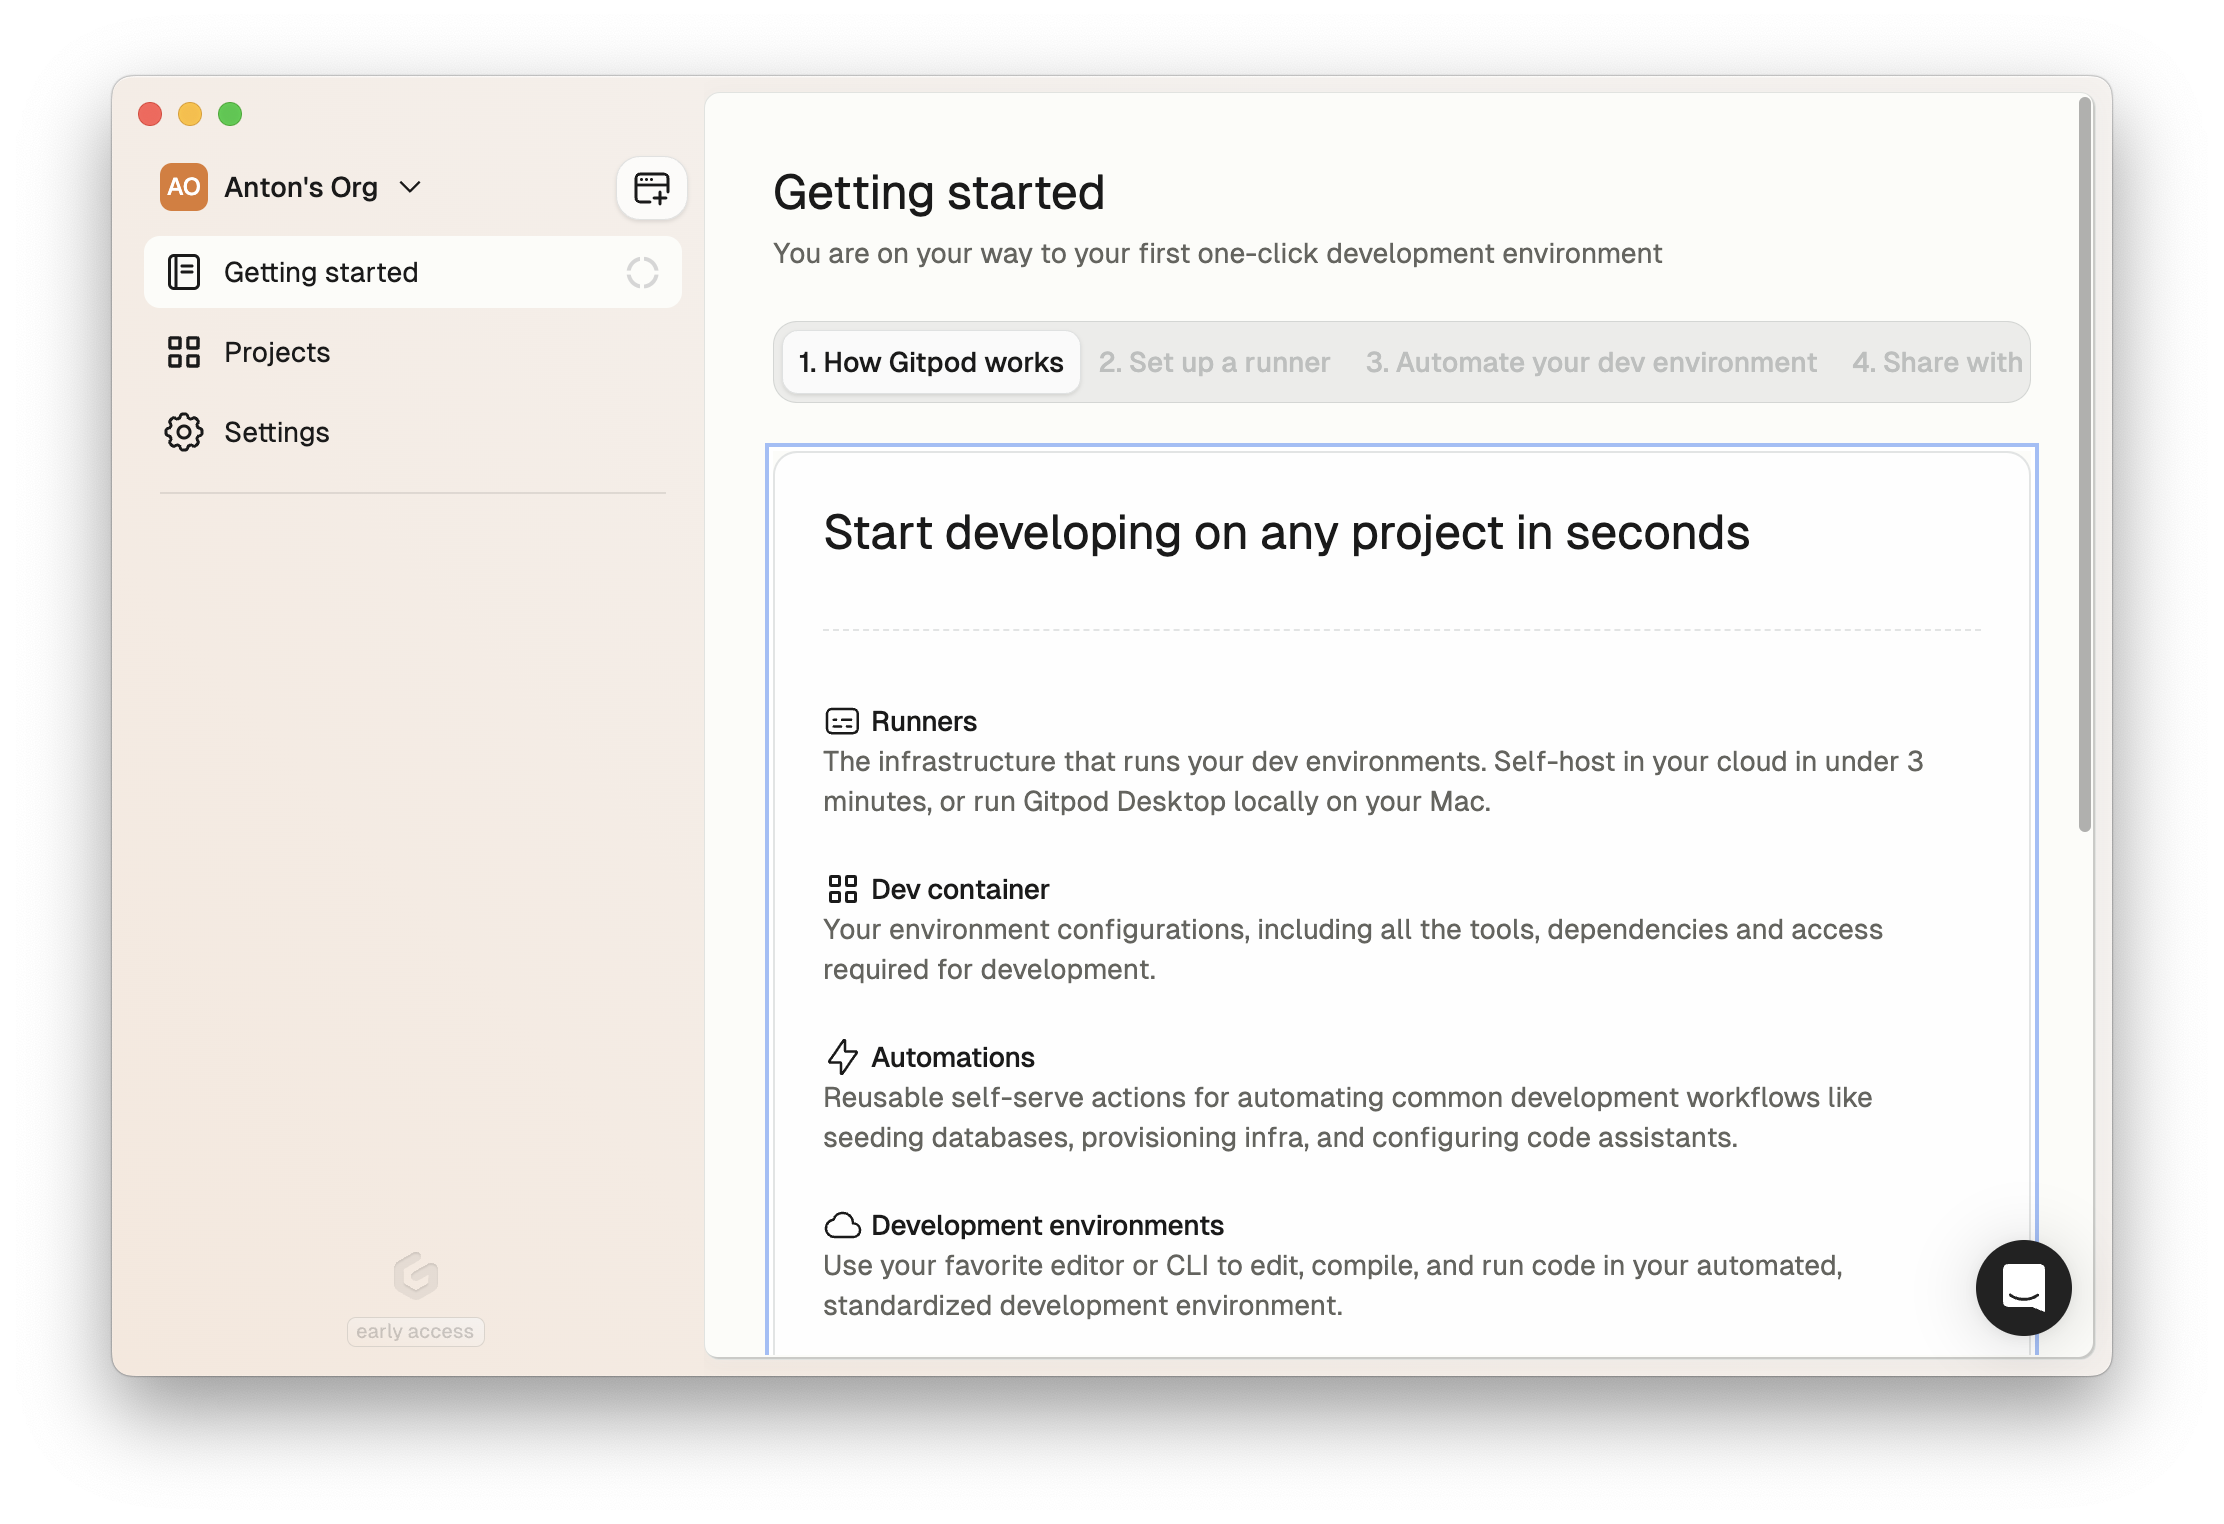 ## Benefits
* Run Dev Containers locally, replacing Docker Desktop for local development optimized for Apple Silicon, providing native-like Linux development without the overhead.
* One-click setup, full workload isolation, and the ability to "break it, forget it" - iterate quickly without fear of polluting your system.
* Leverage your local machine's resources for free
* Easily share your configured environments across your team to benefit from the automation and standardization of cloud development environments on your own hardware.
* Through Automations, get an optimized developer experience to launch environments and common development workflows through Gitpod Automations.
* Stay productive with offline capability and built-in disaster recovery support, seamlessly switching between local and cloud development as needed.
## Setup
### Download
1. Download Gitpod Desktop for Apple Silicon [here](https://www.gitpod.io/gitpod-desktop/download)
2. Open `Gitpod.dmg` and drag `Gitpod.app` into the Applications folder
3. Launch Gitpod Desktop from the Applications folder
You can also find it in the Gitpod dashboard at [app.gitpod.io](https://app.gitpod.io).
### Install Runner
When you first launch Gitpod Desktop, it will guide you through a simple setup process:
1. The app will verify and configure the macOS runner (used to run [environments locally](#local-environments))
2. Wait for the installation to complete
* Note: The "Setting up file system" step may take several minutes
* The progress will show you the current status
## Benefits
* Run Dev Containers locally, replacing Docker Desktop for local development optimized for Apple Silicon, providing native-like Linux development without the overhead.
* One-click setup, full workload isolation, and the ability to "break it, forget it" - iterate quickly without fear of polluting your system.
* Leverage your local machine's resources for free
* Easily share your configured environments across your team to benefit from the automation and standardization of cloud development environments on your own hardware.
* Through Automations, get an optimized developer experience to launch environments and common development workflows through Gitpod Automations.
* Stay productive with offline capability and built-in disaster recovery support, seamlessly switching between local and cloud development as needed.
## Setup
### Download
1. Download Gitpod Desktop for Apple Silicon [here](https://www.gitpod.io/gitpod-desktop/download)
2. Open `Gitpod.dmg` and drag `Gitpod.app` into the Applications folder
3. Launch Gitpod Desktop from the Applications folder
You can also find it in the Gitpod dashboard at [app.gitpod.io](https://app.gitpod.io).
### Install Runner
When you first launch Gitpod Desktop, it will guide you through a simple setup process:
1. The app will verify and configure the macOS runner (used to run [environments locally](#local-environments))
2. Wait for the installation to complete
* Note: The "Setting up file system" step may take several minutes
* The progress will show you the current status
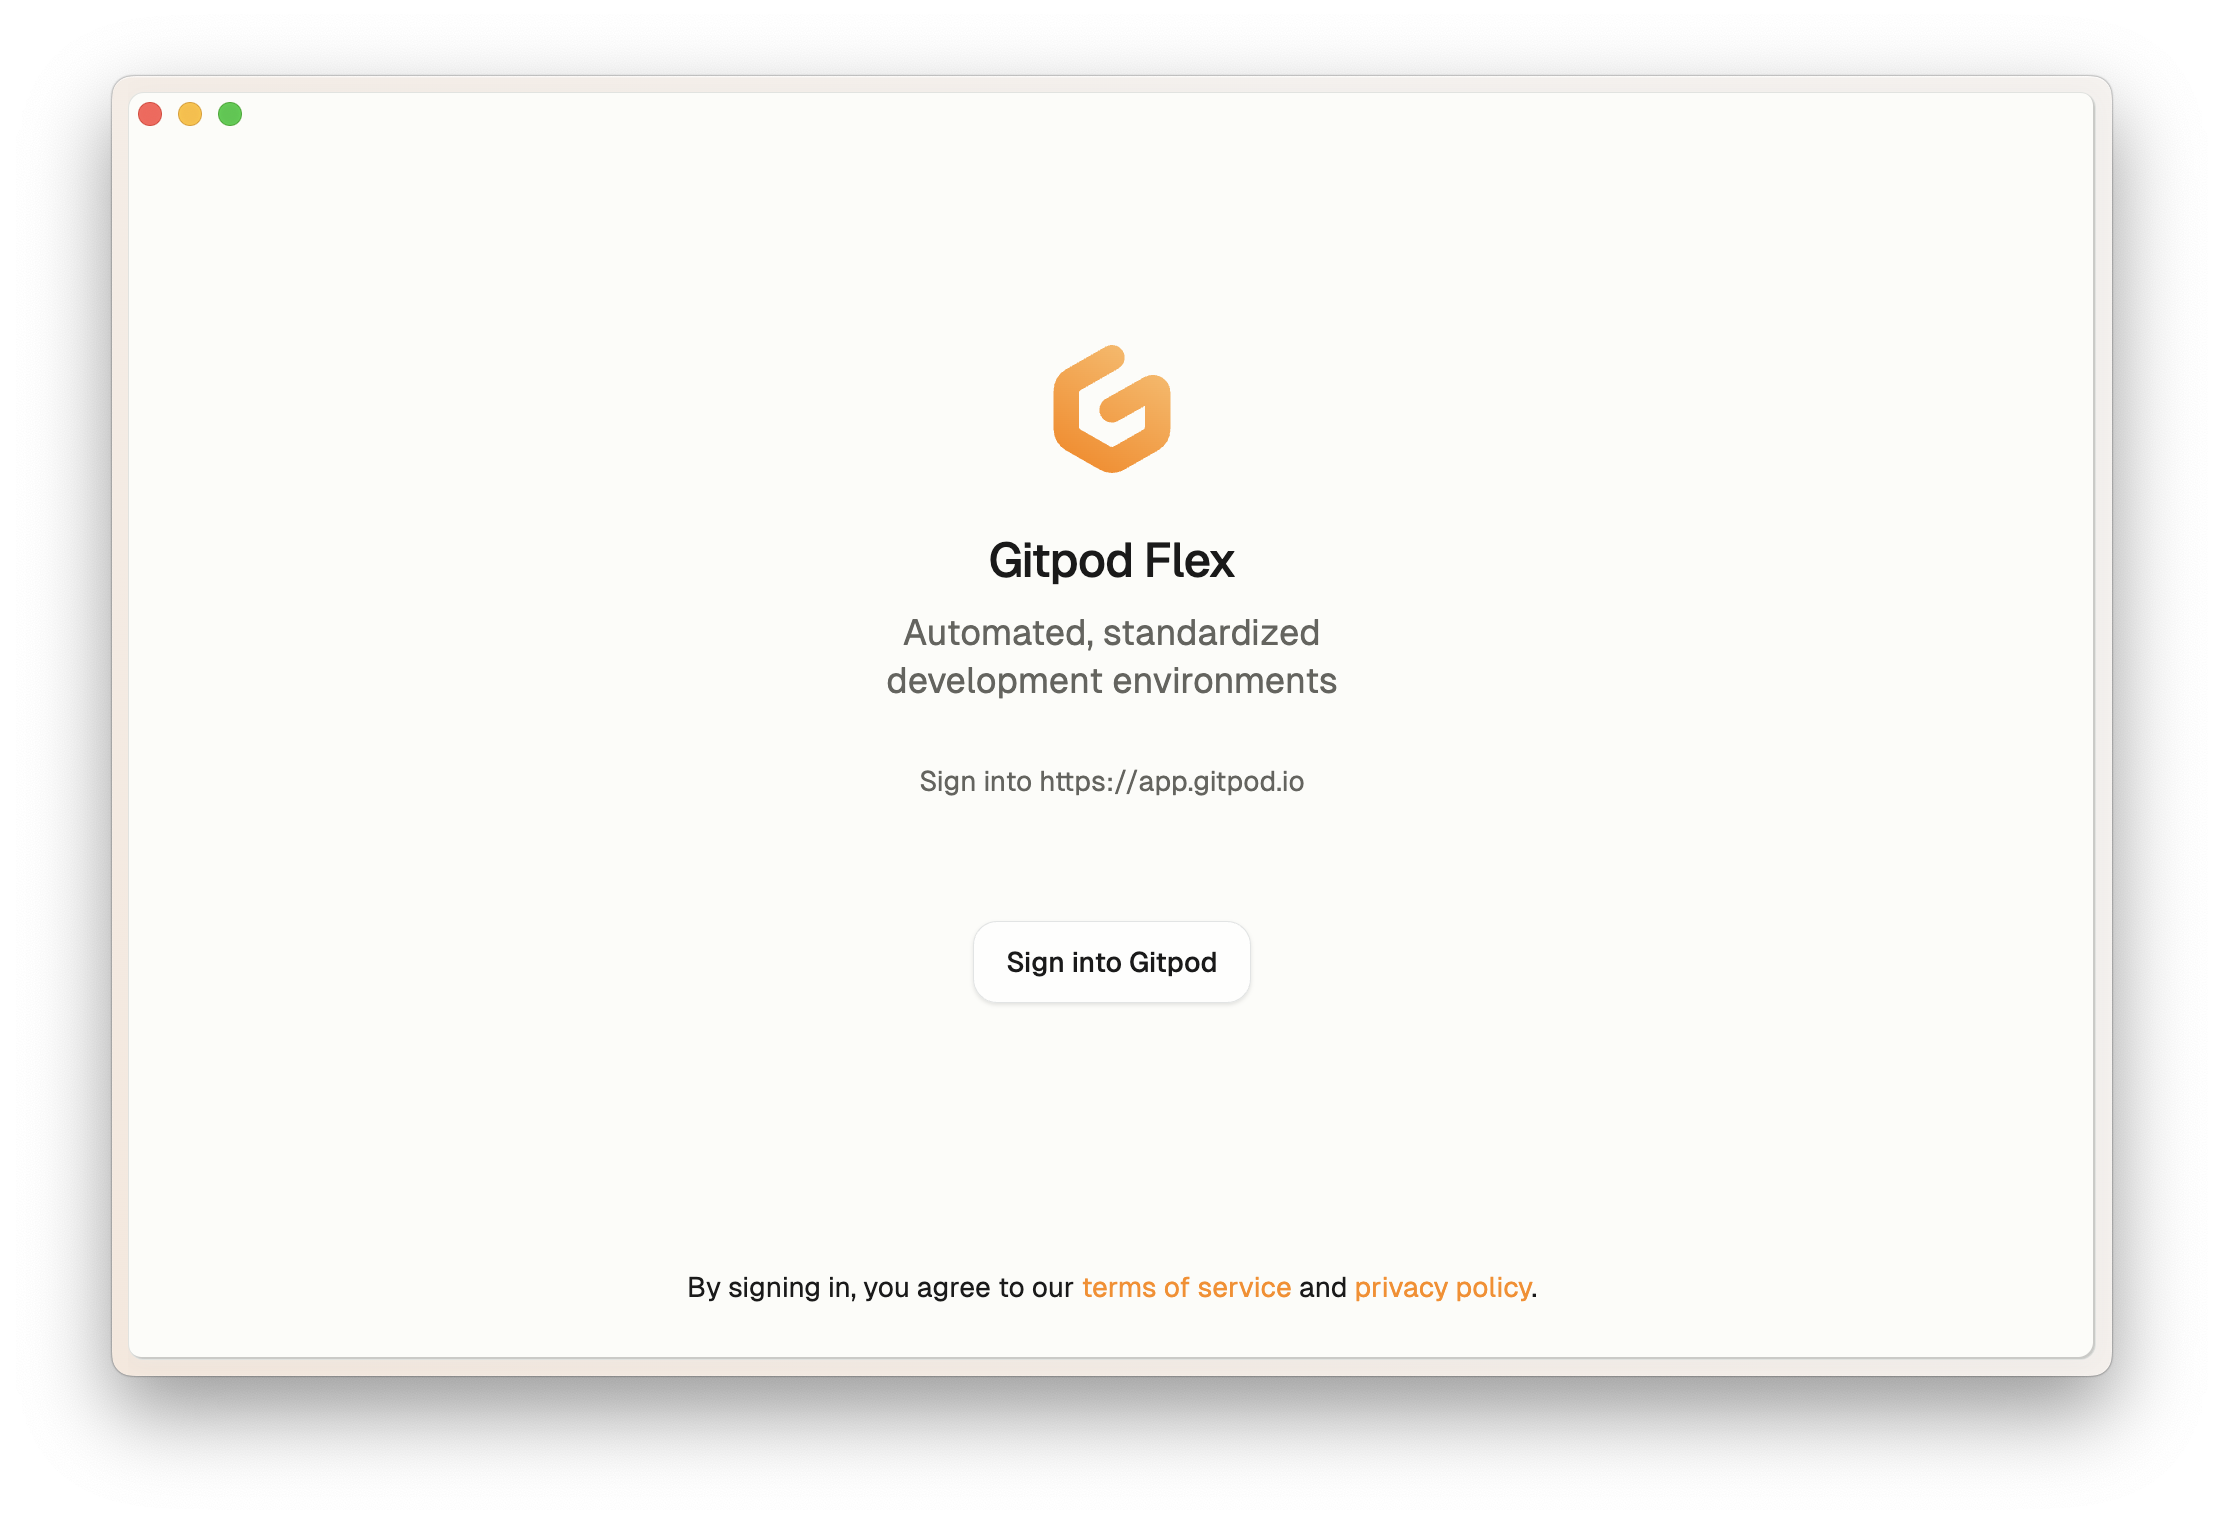 2. Sign in using your Gitpod account credentials.
 3. Once signed in, you can close the browser window and return to Gitpod Desktop.
4. Gitpod Desktop should open or you should see a dialog asking you to open.
3. Once signed in, you can close the browser window and return to Gitpod Desktop.
4. Gitpod Desktop should open or you should see a dialog asking you to open.
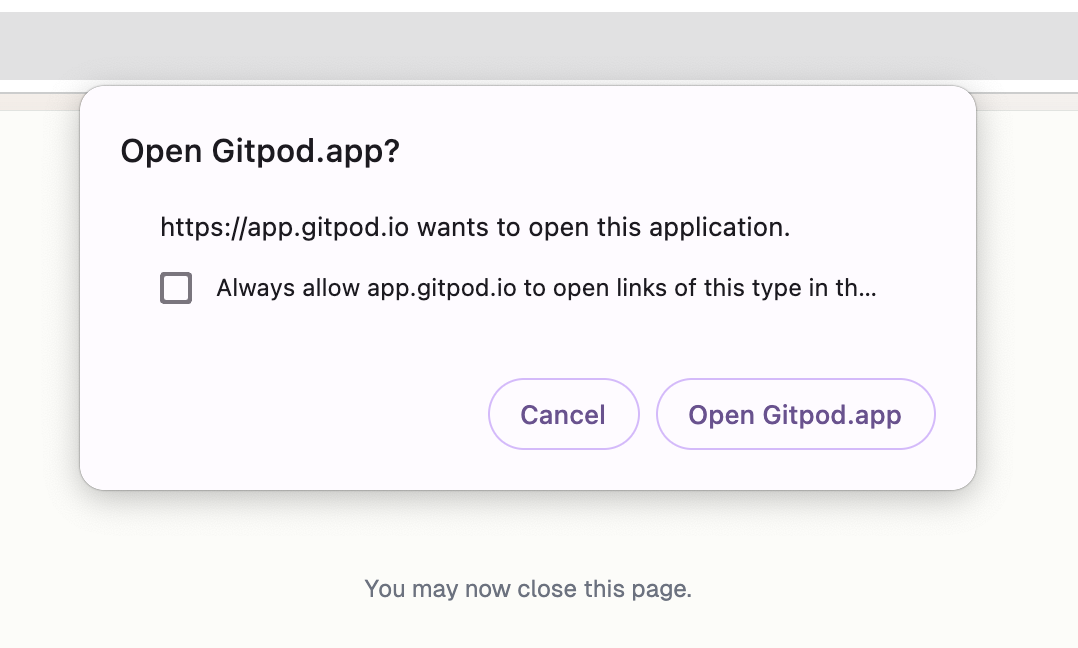
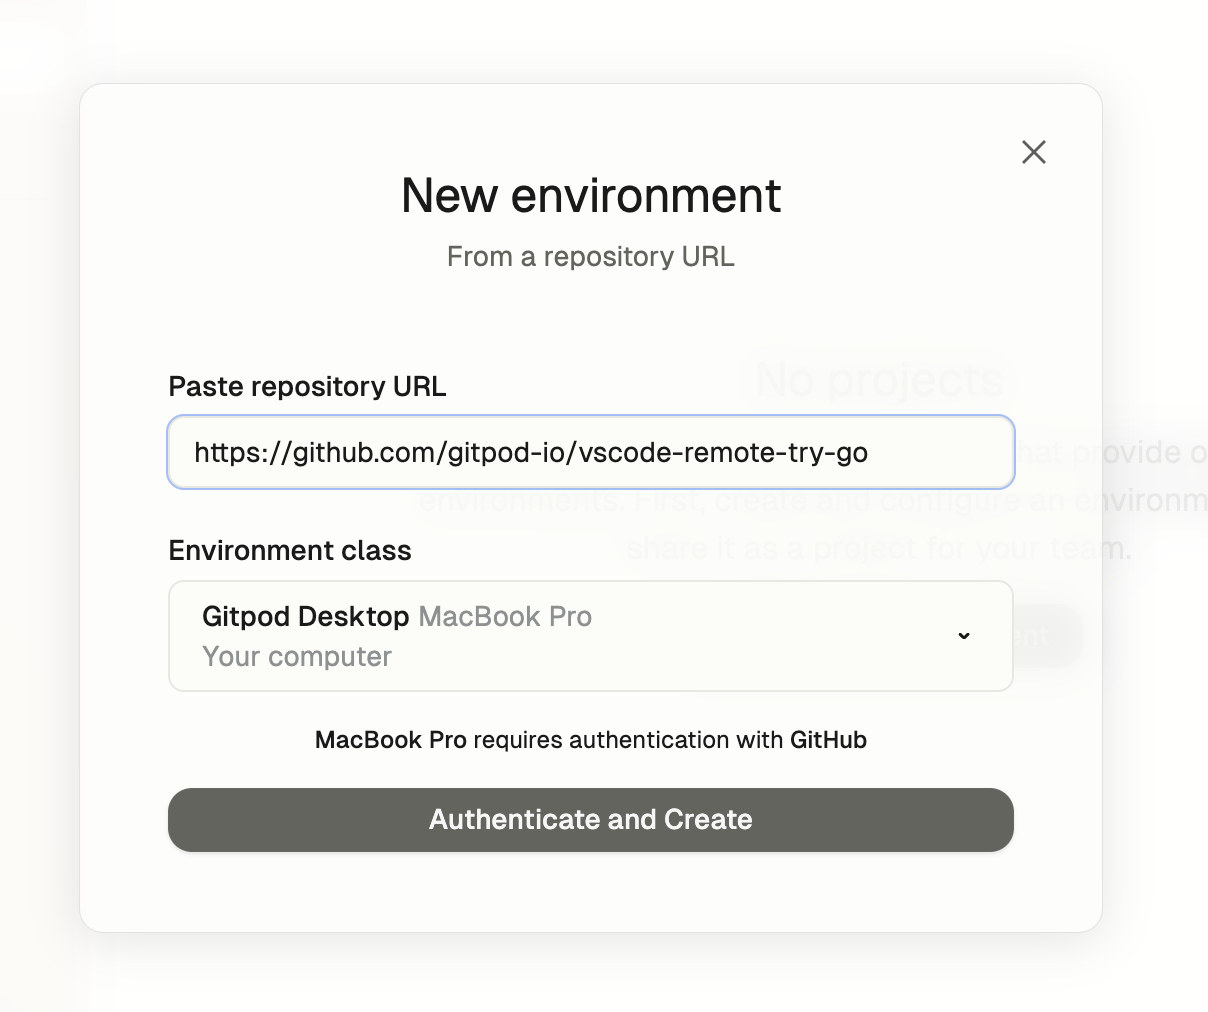 3. **Connect to Source Control:** Gitpod Desktop will initiate a connection to your source control provider (e.g., GitHub). Follow along the instructions to grant access to your repositories.
 4. **Self-Hosted SCM Providers:** If you use a self-hosted source control provider, administrators must configure it in the organization settings. Members can then authenticate using PATs. See [Configuring Repository Access](#configuring-repository-access).
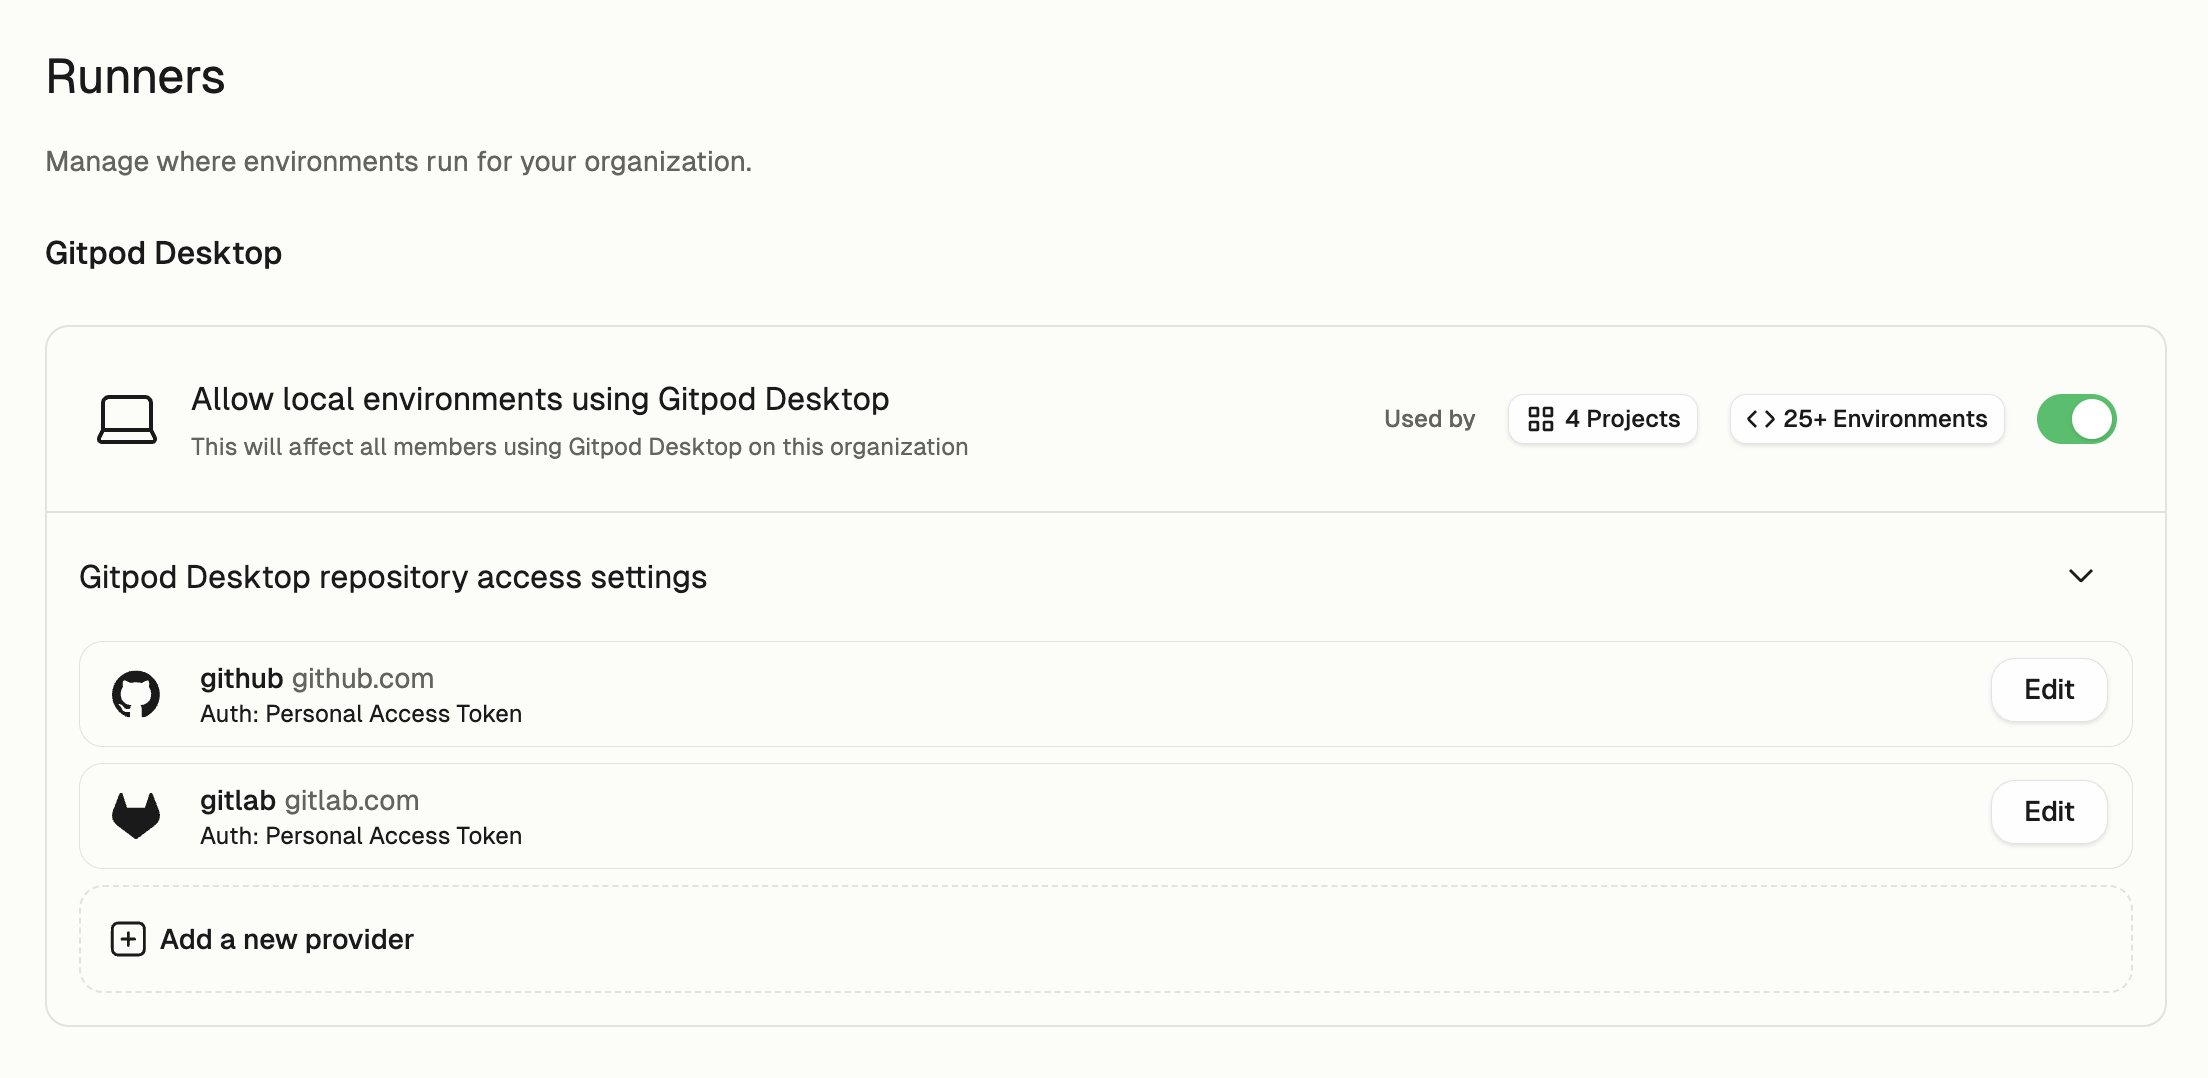 ## Updating
Gitpod Desktop releases new versions weekly, delivering the latest improvements and features. While the application updates automatically, you can manually check for updates by selecting "Gitpod" > "Check for Updates..." from the menu bar.
## Updating
Gitpod Desktop releases new versions weekly, delivering the latest improvements and features. While the application updates automatically, you can manually check for updates by selecting "Gitpod" > "Check for Updates..." from the menu bar.
 After downloading a new version, Gitpod Desktop will prompt you to restart the application to apply the update.
### Checking Your Version
To check your current version, select "Gitpod" > "About Gitpod Desktop" from the menu bar.
Click "Copy" to save the version information to your clipboard, which can be helpful when [seeking support](#report-issue).
After downloading a new version, Gitpod Desktop will prompt you to restart the application to apply the update.
### Checking Your Version
To check your current version, select "Gitpod" > "About Gitpod Desktop" from the menu bar.
Click "Copy" to save the version information to your clipboard, which can be helpful when [seeking support](#report-issue).
 ### Switching to Insiders
 6. Describe what happened, what you did, and what you expected. Upload the logs and diagnostics, and include any relevant screenshots.
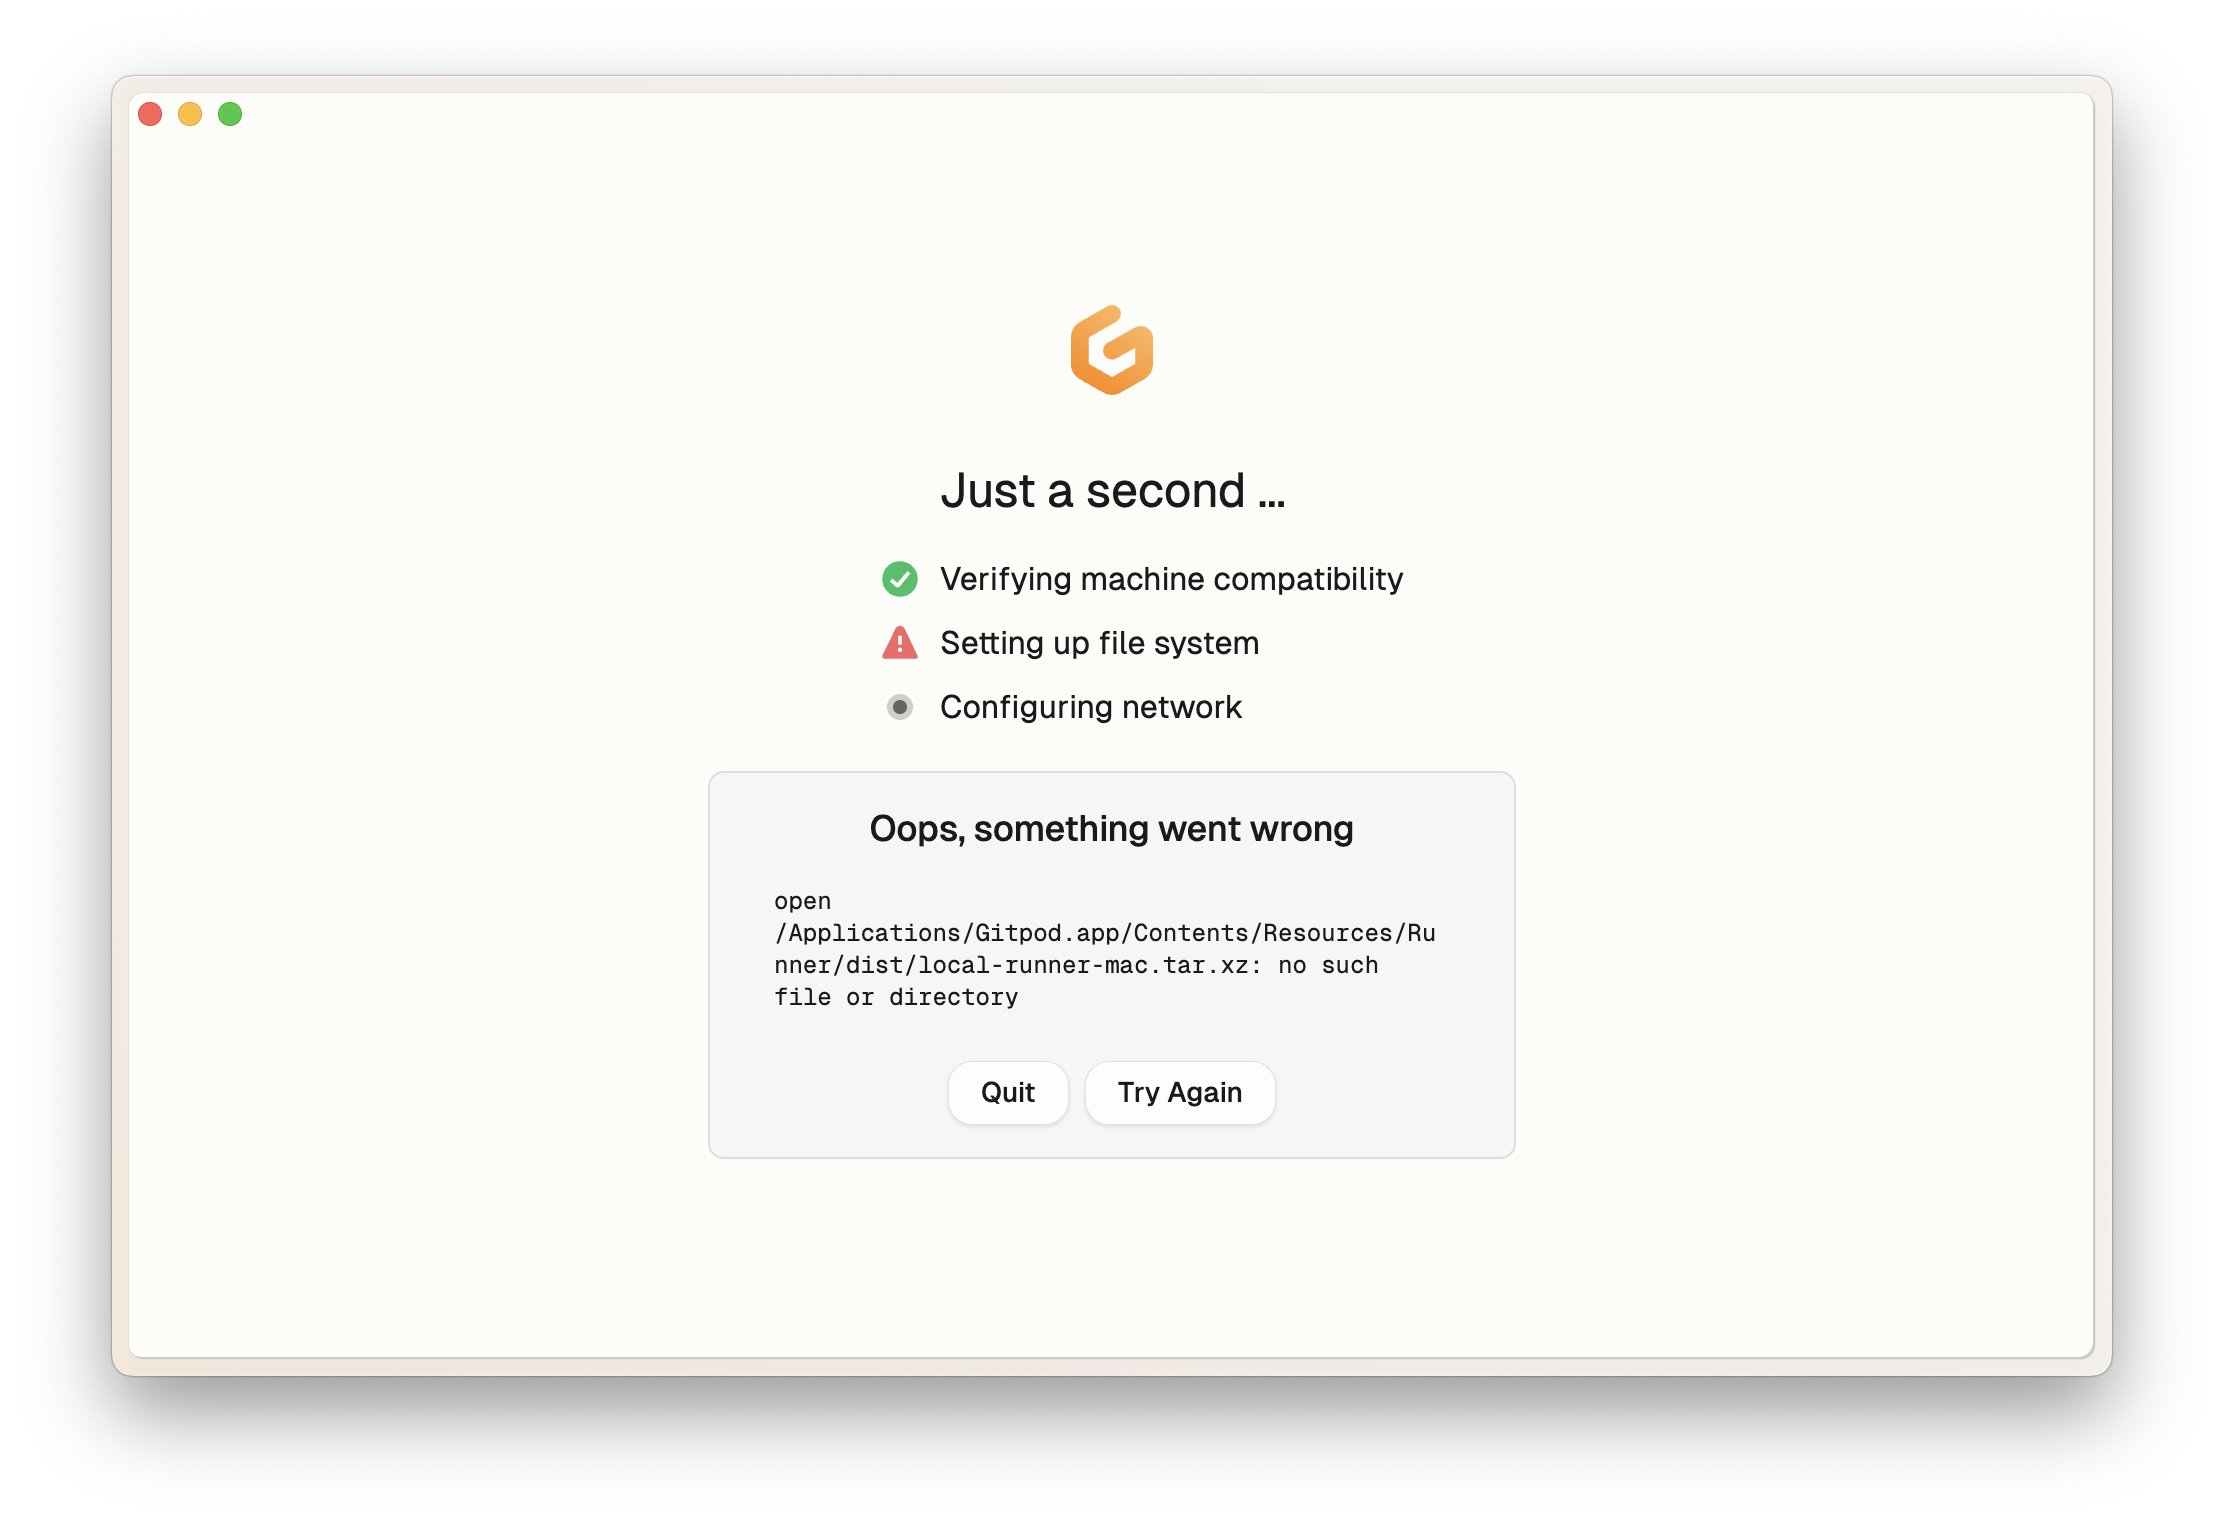 ### Switching Accounts
To switch to a different Gitpod account, follow these steps:
1. Logout from Gitpod Desktop
2. Logout from your current Gitpod account in your default browser
3. Launch Gitpod Desktop and complete the authentication process with your new account credentials
4. If problems continue, [submit an issue report](#report-issue)
### Invalidate Git Authentication
If you're experiencing Git authentication issues, try these steps:
1. Verify if you are using a Personal Access Token (PAT) for runner authentication in `Settings` > `Git Authentication`.
2. If using PAT, invalidate it by clicking `Remove`. Remember to also revoke the PAT in your source control provider, e.g. GitHub.
### Switching Accounts
To switch to a different Gitpod account, follow these steps:
1. Logout from Gitpod Desktop
2. Logout from your current Gitpod account in your default browser
3. Launch Gitpod Desktop and complete the authentication process with your new account credentials
4. If problems continue, [submit an issue report](#report-issue)
### Invalidate Git Authentication
If you're experiencing Git authentication issues, try these steps:
1. Verify if you are using a Personal Access Token (PAT) for runner authentication in `Settings` > `Git Authentication`.
2. If using PAT, invalidate it by clicking `Remove`. Remember to also revoke the PAT in your source control provider, e.g. GitHub.
 3. If not using PAT, verify your Git credentials by attempting to clone the repository on your local machine. Update credentials if authentication fails.
4. Restart your local environment to apply the changes.
### Unexpected Runner Failure
If your runner unexpectedly fails:
1. Check the error message for specific details
2. Restart Gitpod Desktop to attempt automatic recovery
3. If the issue persists, try [resetting the data](#reset-data)
4. If problems continue, [submit an issue report](#report-issue)
3. If not using PAT, verify your Git credentials by attempting to clone the repository on your local machine. Update credentials if authentication fails.
4. Restart your local environment to apply the changes.
### Unexpected Runner Failure
If your runner unexpectedly fails:
1. Check the error message for specific details
2. Restart Gitpod Desktop to attempt automatic recovery
3. If the issue persists, try [resetting the data](#reset-data)
4. If problems continue, [submit an issue report](#report-issue)
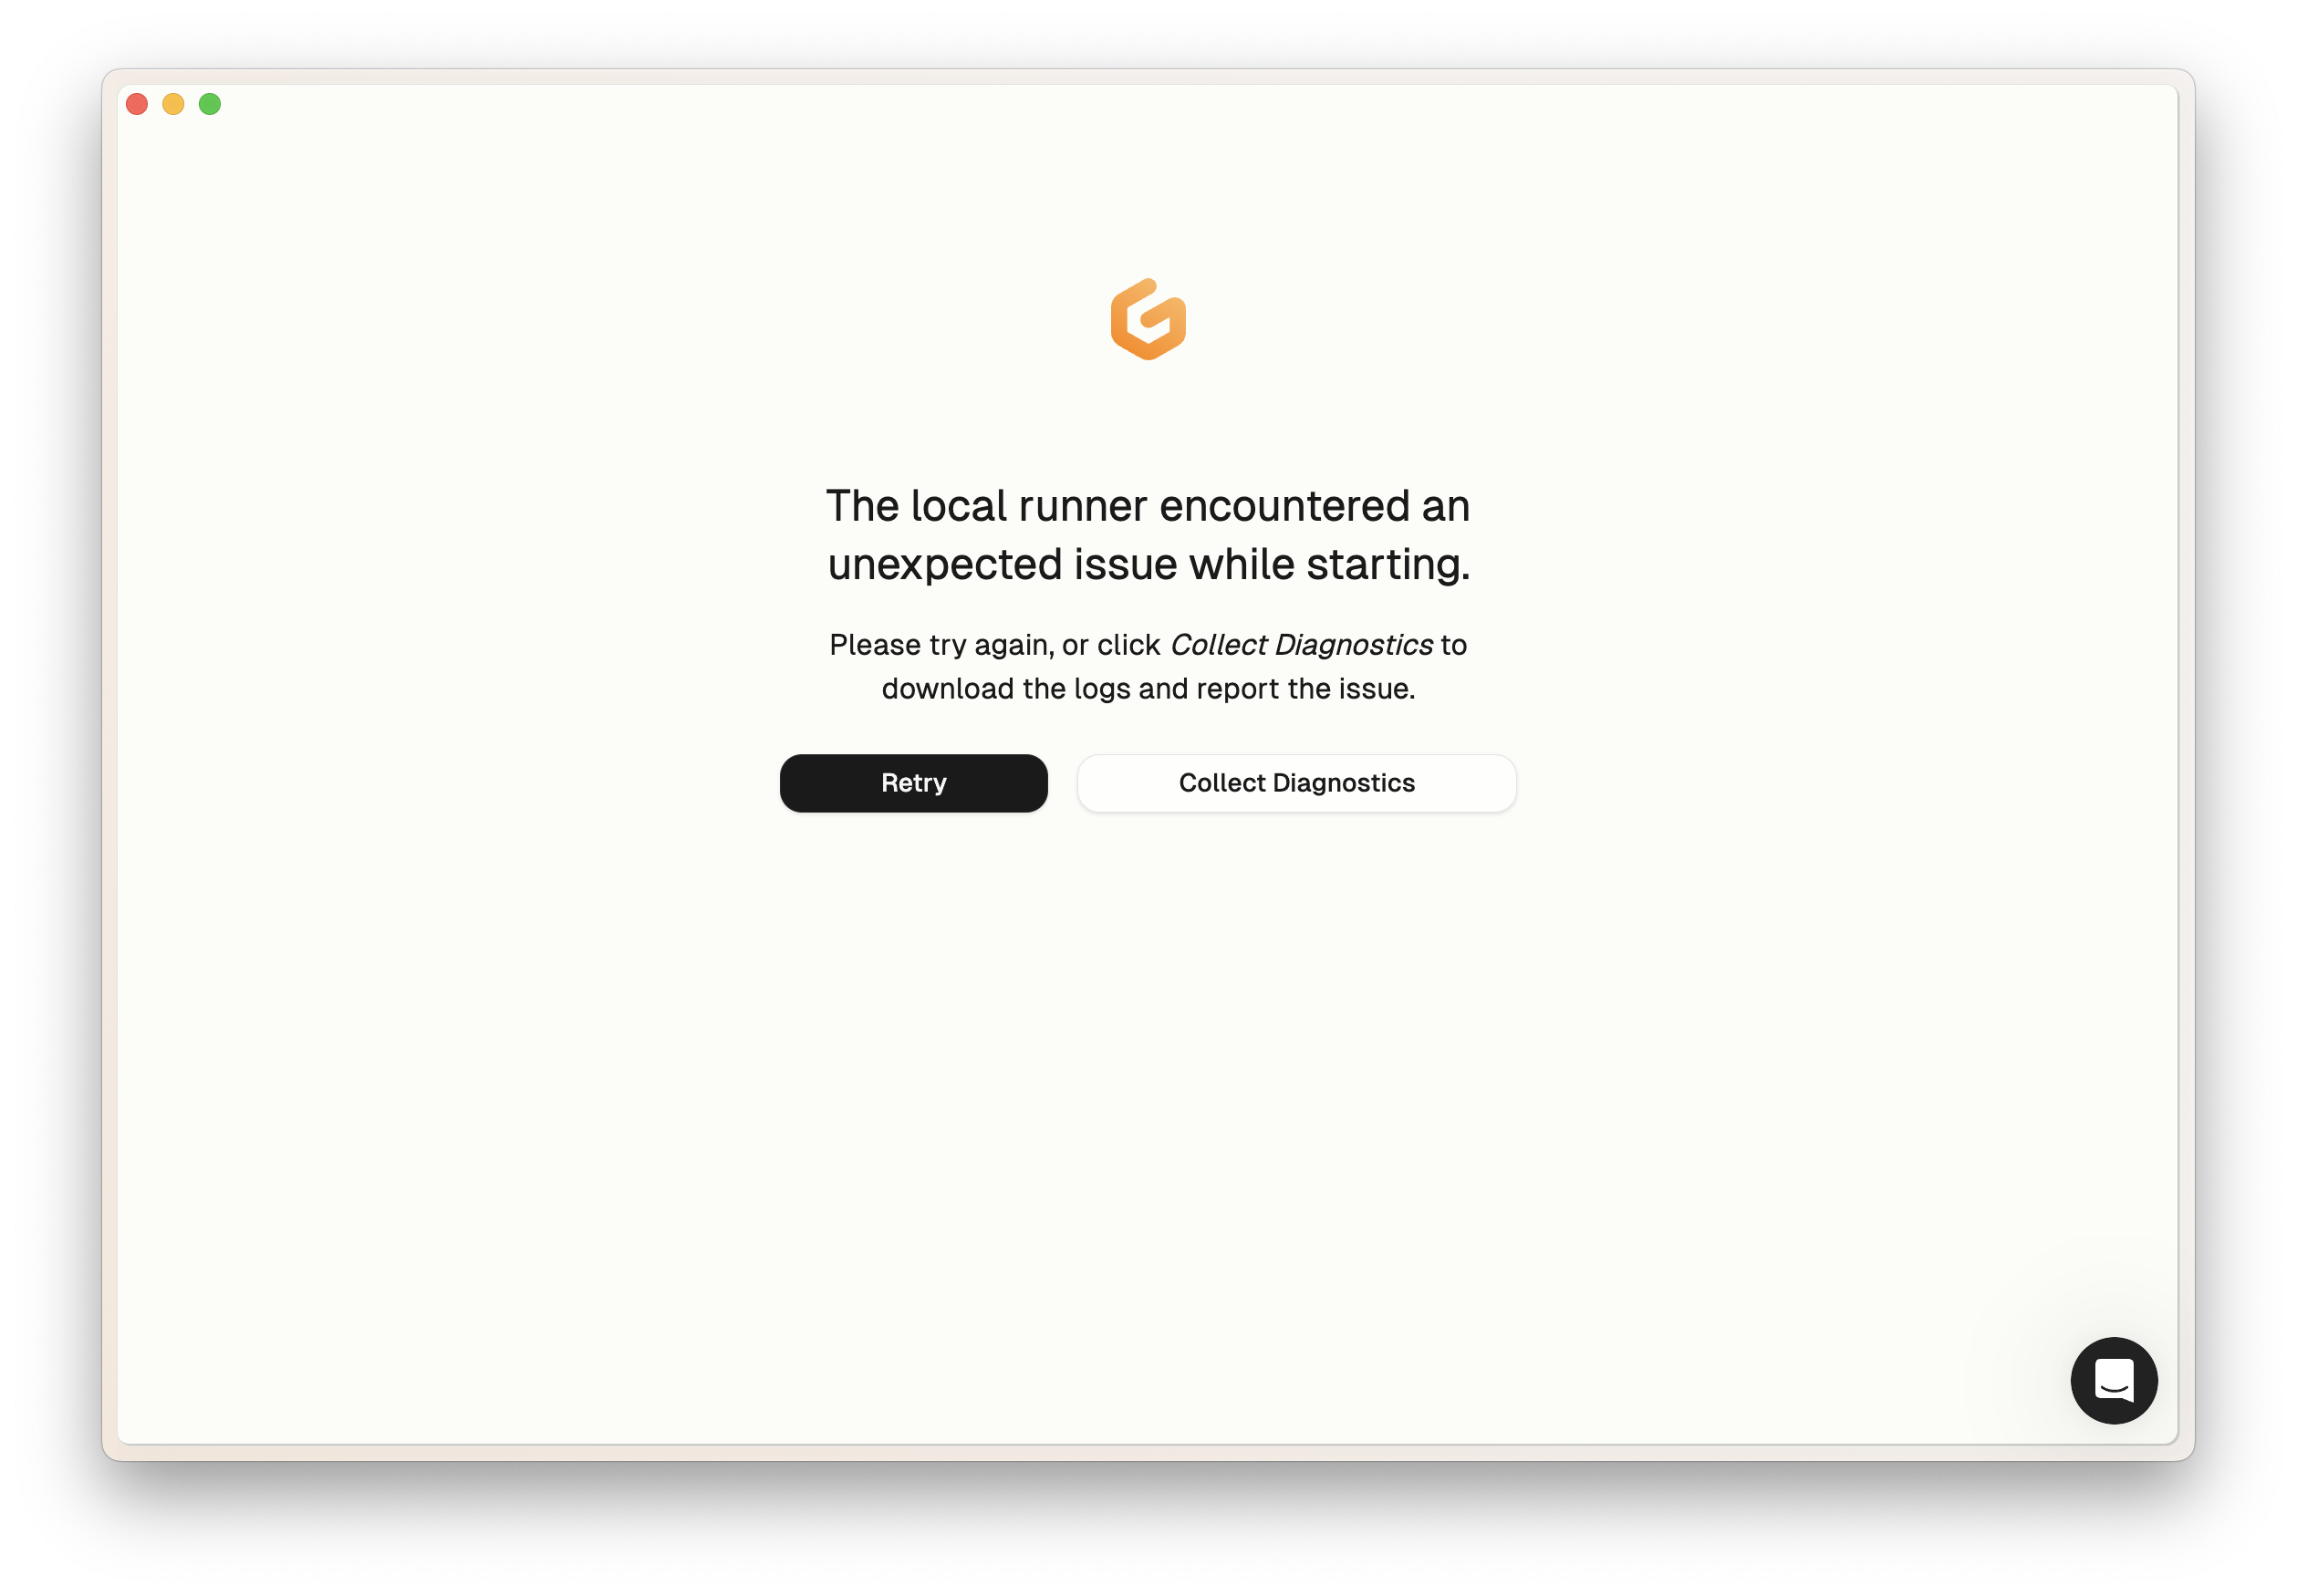 # Browser Extension
Source: https://www.gitpod.io/docs/gitpod/integrations/browser-extension
The browser extension adds a Gitpod button to GitHub, GitLab, Bitbucket and Azure DevOps repository interfaces, whether managed or self-hosted to allow you to quickly create environments.
# Browser Extension
Source: https://www.gitpod.io/docs/gitpod/integrations/browser-extension
The browser extension adds a Gitpod button to GitHub, GitLab, Bitbucket and Azure DevOps repository interfaces, whether managed or self-hosted to allow you to quickly create environments.
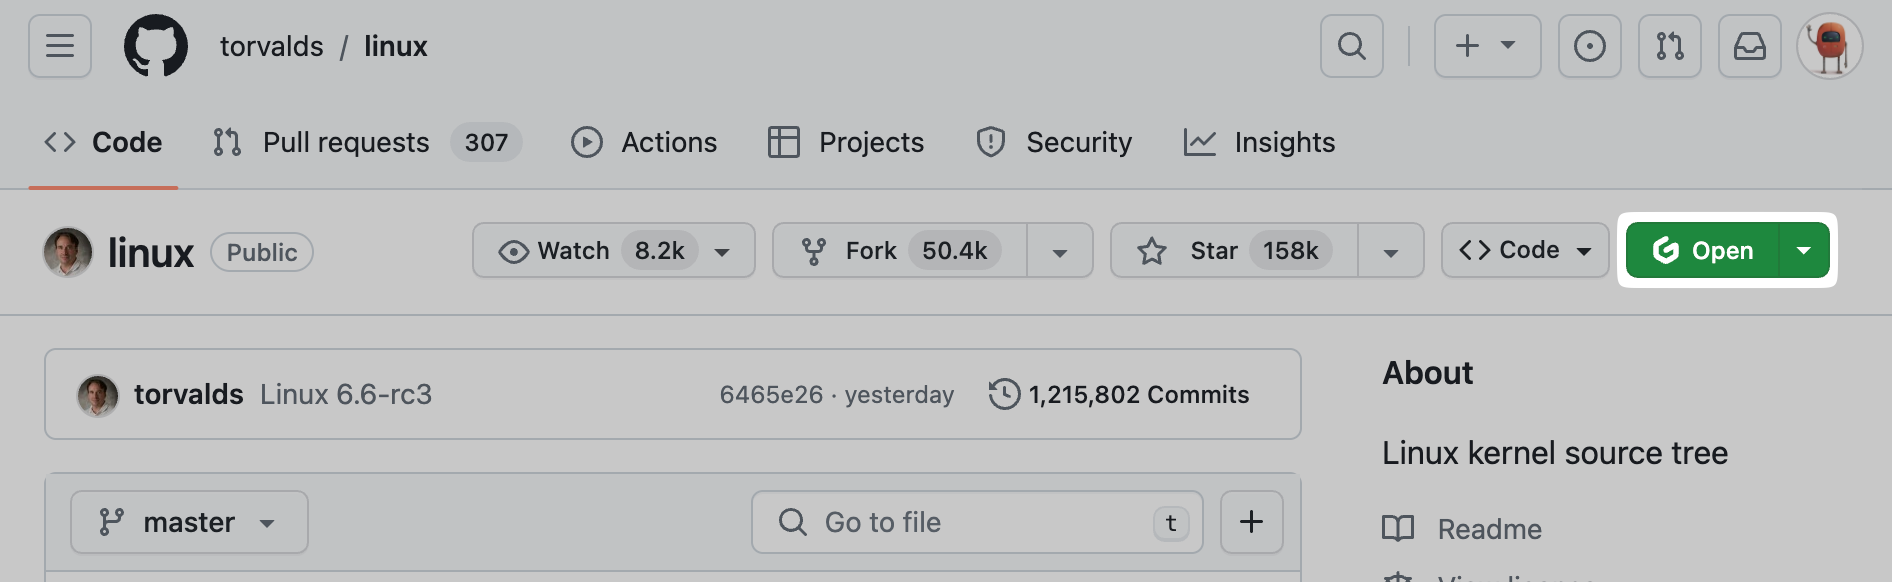 **Caption:** The Gitpod button shown on a GitHub repository, created by the browser
extension
**Caption:** The Gitpod button shown on a GitHub repository, created by the browser
extension
The extension is available for the following browsers: 1. [Chrome](https://chromewebstore.google.com/detail/gitpod/dodmmooeoklaejobgleioelladacbeki) (including Edge, Brave and other Chromium-based browsers) 2. [Firefox](https://addons.mozilla.org/firefox/addon/gitpod/) ## Access the extension settings You can access the extension settings by clicking on the Gitpod icon in the browser toolbar. In the resulting popup you can find a comprehensive view of all possible customization.
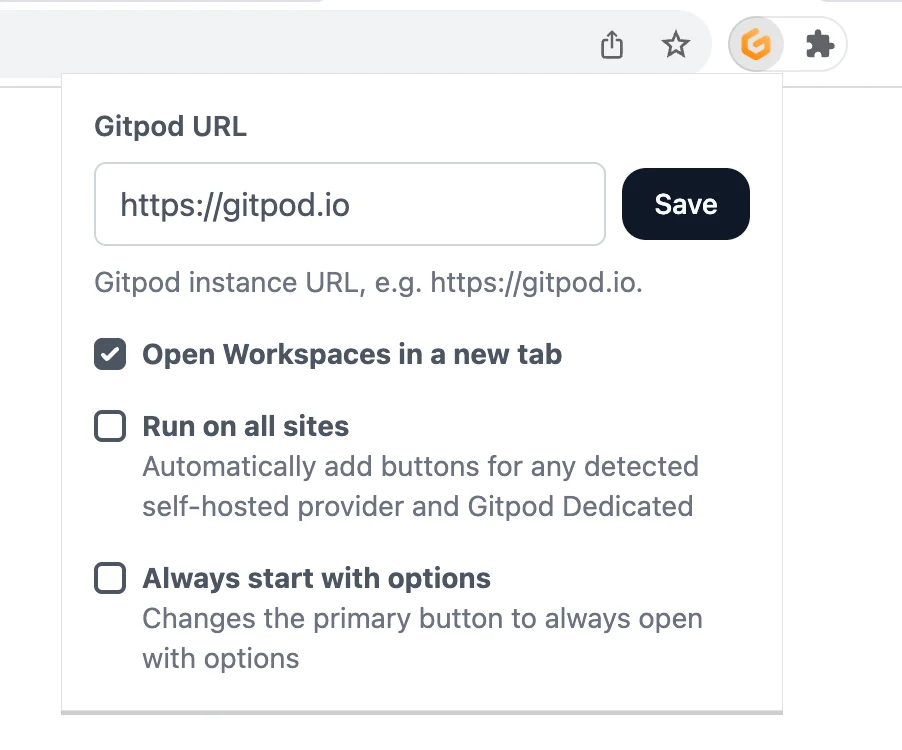 ## Enabling the browser extension on self-hosted SCM providers (e.g. GitLab CE/EE and Bitbucket Datacenter)
By default, the browser extension automatically is automatically enabled for the domains of GitHub (`github.com`), GitLab (`gitlab.com`) and Bitbucket (`bitbucket.org`) and Azure DevOps (`dev.azure.com`). If the `run on all sites` option is disabled, all other domains must be configured manually.
To add a custom SCM domain, open the Gitpod extension's context menu. Opening the context menu can be achieved by either right clicking the extension icon in the browser toolbar or revealing it by clicking on a kebab menu \[Chrome] / cog wheel \[Firefox] in the extensions dropdown.
| Chrome | Firefox |
| ------------------------------------------------------------------------------------------------------------------- | --------------------------------------------------------------------------------------------------------------------- |
| 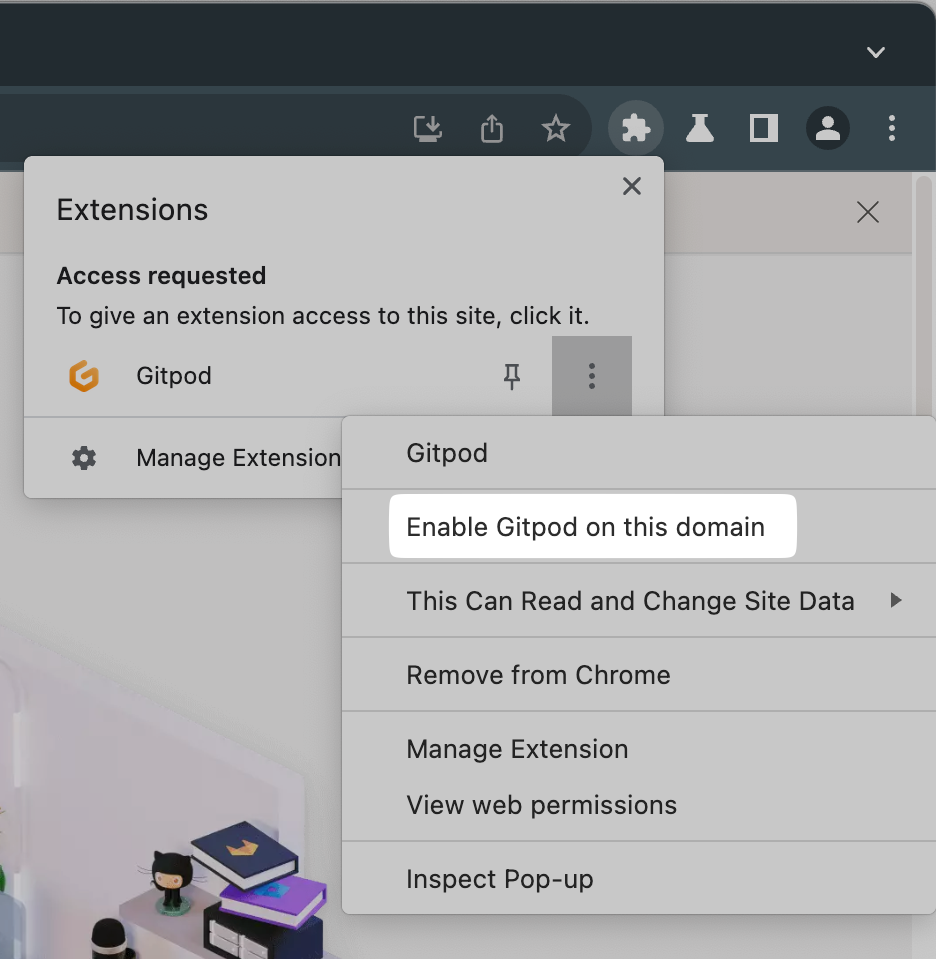 | 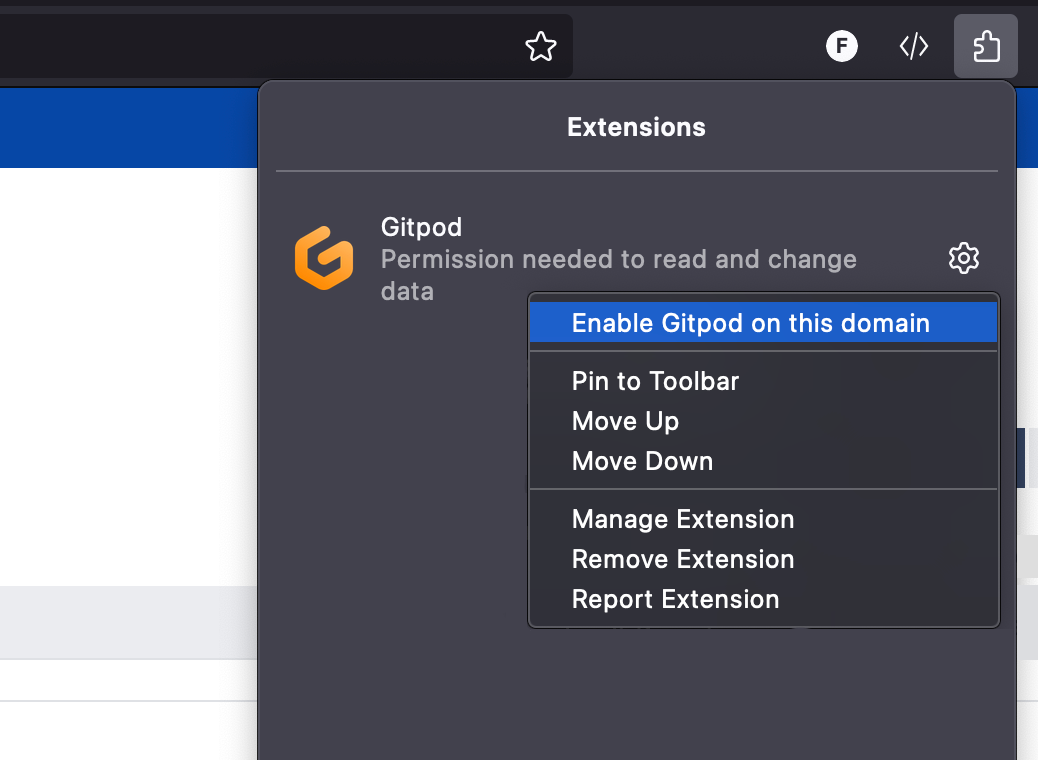 |
## Use a custom Gitpod instance URL
If you are using a custom Gitpod instance (e.g., [Gitpod Enterprise](https://www.gitpod.io/contact/enterprise-self-serve)) you can still use the browser extension by configuring it with your instance URL.
After you've installed the extension, open its options (see chapter [Access the extension settings](#access-the-extension-settings)) and enter your custom Gitpod instance URL. Then, simply click "Save" and approve the browser's request for new permissions.
## Source Code
Gitpod's browser extension is open source, meaning that you can check out its [source code](https://github.com/gitpod-io/browser-extension).
# Gitpod CLI
Source: https://www.gitpod.io/docs/gitpod/integrations/cli
The Gitpod CLI is a powerful tool that allows you to interact with your Gitpod environments and manage your development workflow directly from the terminal. Whether you're starting new environments, managing existing ones, or configuring your workspace, the CLI provides a streamlined interface for all your Gitpod operations.
## Installation
Getting started with the Gitpod CLI is straightforward. You have two options:
### Option 1: Quick Install (UNIX Systems - macOS, Linux)
This one-line installation method works for macOS and Linux systems:
```bash
curl -o gitpod -fsSL "https://releases.gitpod.io/cli/stable/gitpod-$(uname -s | tr '[:upper:]' '[:lower:]')-$(uname -m | sed 's/x86_64/amd64/;s/\(arm64\|aarch64\)/arm64/')" && \
chmod +x gitpod && \
sudo mv gitpod /usr/local/bin
```
### Option 2: Direct Download
Choose the appropriate version for your system:
* macOS: [x86\_64](https://releases.gitpod.io/cli/stable/gitpod-darwin-amd64) | [arm64](https://releases.gitpod.io/cli/stable/gitpod-darwin-arm64)
* Linux: [x86\_64](https://releases.gitpod.io/cli/stable/gitpod-linux-amd64) | [arm64](https://releases.gitpod.io/cli/stable/gitpod-linux-arm64)
* Windows: [x86\_64](https://releases.gitpod.io/cli/stable/gitpod-windows-amd64.exe) | [arm64](https://releases.gitpod.io/cli/stable/gitpod-windows-arm64.exe)
After downloading, you'll need to:
1. Make the binary executable:
```bash
chmod +x gitpod
```
Move it to your PATH:
```bash
sudo mv gitpod /usr/local/bin
```
## Enabling the browser extension on self-hosted SCM providers (e.g. GitLab CE/EE and Bitbucket Datacenter)
By default, the browser extension automatically is automatically enabled for the domains of GitHub (`github.com`), GitLab (`gitlab.com`) and Bitbucket (`bitbucket.org`) and Azure DevOps (`dev.azure.com`). If the `run on all sites` option is disabled, all other domains must be configured manually.
To add a custom SCM domain, open the Gitpod extension's context menu. Opening the context menu can be achieved by either right clicking the extension icon in the browser toolbar or revealing it by clicking on a kebab menu \[Chrome] / cog wheel \[Firefox] in the extensions dropdown.
| Chrome | Firefox |
| ------------------------------------------------------------------------------------------------------------------- | --------------------------------------------------------------------------------------------------------------------- |
|  |  |
## Use a custom Gitpod instance URL
If you are using a custom Gitpod instance (e.g., [Gitpod Enterprise](https://www.gitpod.io/contact/enterprise-self-serve)) you can still use the browser extension by configuring it with your instance URL.
After you've installed the extension, open its options (see chapter [Access the extension settings](#access-the-extension-settings)) and enter your custom Gitpod instance URL. Then, simply click "Save" and approve the browser's request for new permissions.
## Source Code
Gitpod's browser extension is open source, meaning that you can check out its [source code](https://github.com/gitpod-io/browser-extension).
# Gitpod CLI
Source: https://www.gitpod.io/docs/gitpod/integrations/cli
The Gitpod CLI is a powerful tool that allows you to interact with your Gitpod environments and manage your development workflow directly from the terminal. Whether you're starting new environments, managing existing ones, or configuring your workspace, the CLI provides a streamlined interface for all your Gitpod operations.
## Installation
Getting started with the Gitpod CLI is straightforward. You have two options:
### Option 1: Quick Install (UNIX Systems - macOS, Linux)
This one-line installation method works for macOS and Linux systems:
```bash
curl -o gitpod -fsSL "https://releases.gitpod.io/cli/stable/gitpod-$(uname -s | tr '[:upper:]' '[:lower:]')-$(uname -m | sed 's/x86_64/amd64/;s/\(arm64\|aarch64\)/arm64/')" && \
chmod +x gitpod && \
sudo mv gitpod /usr/local/bin
```
### Option 2: Direct Download
Choose the appropriate version for your system:
* macOS: [x86\_64](https://releases.gitpod.io/cli/stable/gitpod-darwin-amd64) | [arm64](https://releases.gitpod.io/cli/stable/gitpod-darwin-arm64)
* Linux: [x86\_64](https://releases.gitpod.io/cli/stable/gitpod-linux-amd64) | [arm64](https://releases.gitpod.io/cli/stable/gitpod-linux-arm64)
* Windows: [x86\_64](https://releases.gitpod.io/cli/stable/gitpod-windows-amd64.exe) | [arm64](https://releases.gitpod.io/cli/stable/gitpod-windows-arm64.exe)
After downloading, you'll need to:
1. Make the binary executable:
```bash
chmod +x gitpod
```
Move it to your PATH:
```bash
sudo mv gitpod /usr/local/bin
```
### 1. **Sign Up at Gitpod** * Go to [app.gitpod.io](https://app.gitpod.io) and sign up for a Gitpod account. * Once logged in, generate a **Personal Access Token** for SDK authentication under your account settings at [Gitpod Personal Access Tokens](https://app.gitpod.io/settings/personal-access-tokens). ### 2. **Install the SDK** You need to install the Gitpod SDK for your preferred language. Here’s how to do it for the three SDKs: * **Python SDK**: ```bash pip install gitpod-sdk ``` * **Node/Typescript SDK**: ```bash npm install @gitpod/sdk ``` * **Go SDK**: ```bash go get github.com/gitpod-io/gitpod-sdk-go ``` ### 3. **Authenticate with Gitpod** Once you’ve installed the SDK, authenticate using your personal access token. You can either set it via the environment variable or explicitly pass it in your code. * **Option 1**: Set the environment variable `GITPOD_API_KEY`: ```bash export GITPOD_API_KEY="your_token_here" ``` * **Option 2**: Authenticate directly in your code: * **For Python SDK**: ```python from gitpod_sdk import Gitpod gitpod = Gitpod(bearer_token="your_token_here") ``` * **For Go SDK**: ```go package main import ( "github.com/gitpod-io/gitpod-sdk-go" ) func main() { gitpod := gitpod.NewGitpod("your_token_here") } ``` * **For Node/Typescript SDK**: ```typescript import { Gitpod } from '@gitpod/sdk'; const gitpod = new Gitpod({ bearerToken: 'your_token_here' }); ``` ### 4. **Run an Example** Once authenticated, you can start experimenting with the SDK by running one of the examples. Here’s an example of how to create an environment and run a command inside it using the Python SDK: ```python import asyncio from gitpod import AsyncGitpod import gitpod.lib as util repo_url = "https://github.com/containerd/containerd" command_to_execute = "go test -v -short ./..." async def execute_command_in_environment(): client = AsyncGitpod() machine_class_id = (await util.find_most_used_environment_class(client)).id create_params = { "machine": {"class": machine_class_id}, "content": {"initializer": {"specs": [{"context_url": {"url": repo_url}}]}} } environment = (await client.environments.create(spec=create_params)).environment await util.wait_for_environment_running(client, environment.id) async for line in await util.run_command(client, environment.id, command_to_execute): print(line) await client.environments.delete(environment_id=environment.id) if __name__ == "__main__": asyncio.run(execute_command_in_environment()) ``` This example demonstrates: * Creating a new environment initialized from a Git repository. * Running a command inside the environment. * Deleting the environment once the task is completed. ## Available Examples Here are the available examples in the SDK repositories, with descriptions of what they demonstrate: ### 1. **Run a Command in an Environment** * **Description**: Demonstrates how to initialize an environment from a Git repository and run a command inside it. * **Location**: [Python SDK Example - Run Command](https://github.com/gitpod-io/gitpod-sdk-python/tree/main/examples/run_command.py) ### 2. **Run a Service in an Environment** * **Description**: Demonstrates how to run a long-lived service (such as a database or message queue) inside a Gitpod environment. * **Location**: [Python SDK Example - Run Service](https://github.com/gitpod-io/gitpod-sdk-python/tree/main/examples/run_service.py) ### 3. **Access the File System in an Environment** * **Description**: Shows how to access and interact with the file system inside a Gitpod environment programmatically. * **Location**: [Python SDK Example - File System Access](https://github.com/gitpod-io/gitpod-sdk-python/tree/main/examples/fs_access.py) ### 4. **Use the Anthropic Tool in a Gitpod Environment** * **Description**: Demonstrates how to use the Anthropic tool within a Gitpod environment and interact with the **Model Context Protocol (MCP)**. * **Location**: [Python SDK Example - Anthropic Tool Use](https://github.com/gitpod-io/gitpod-sdk-python/tree/main/examples/anthropic_tool_use.py) ### 5. **MCP Server Example** * **Description**: Demonstrates the integration of the **Model Context Protocol (MCP)** in a Gitpod environment, used for managing model contexts. * **Location**: [Go SDK Example - MCP Server](https://github.com/gitpod-io/gitpod-sdk-go/tree/main/examples/mcp-server) # Automations Source: https://www.gitpod.io/docs/gitpod/introduction/automations Automations enable programmable tasks and services that integrate directly into your development environment. They let you create self-service actions for various development workflows: * **Setup**: Seed databases, provision infrastructure, or authenticate with cloud accounts * **Operations**: Transform runbooks into one-click self-service actions * **Editor interfaces**: Start servers such as Jupyter notebooks * **Policies**: Execute security or scanning tools * **AI workflows**: Configure AI agents or code assistants
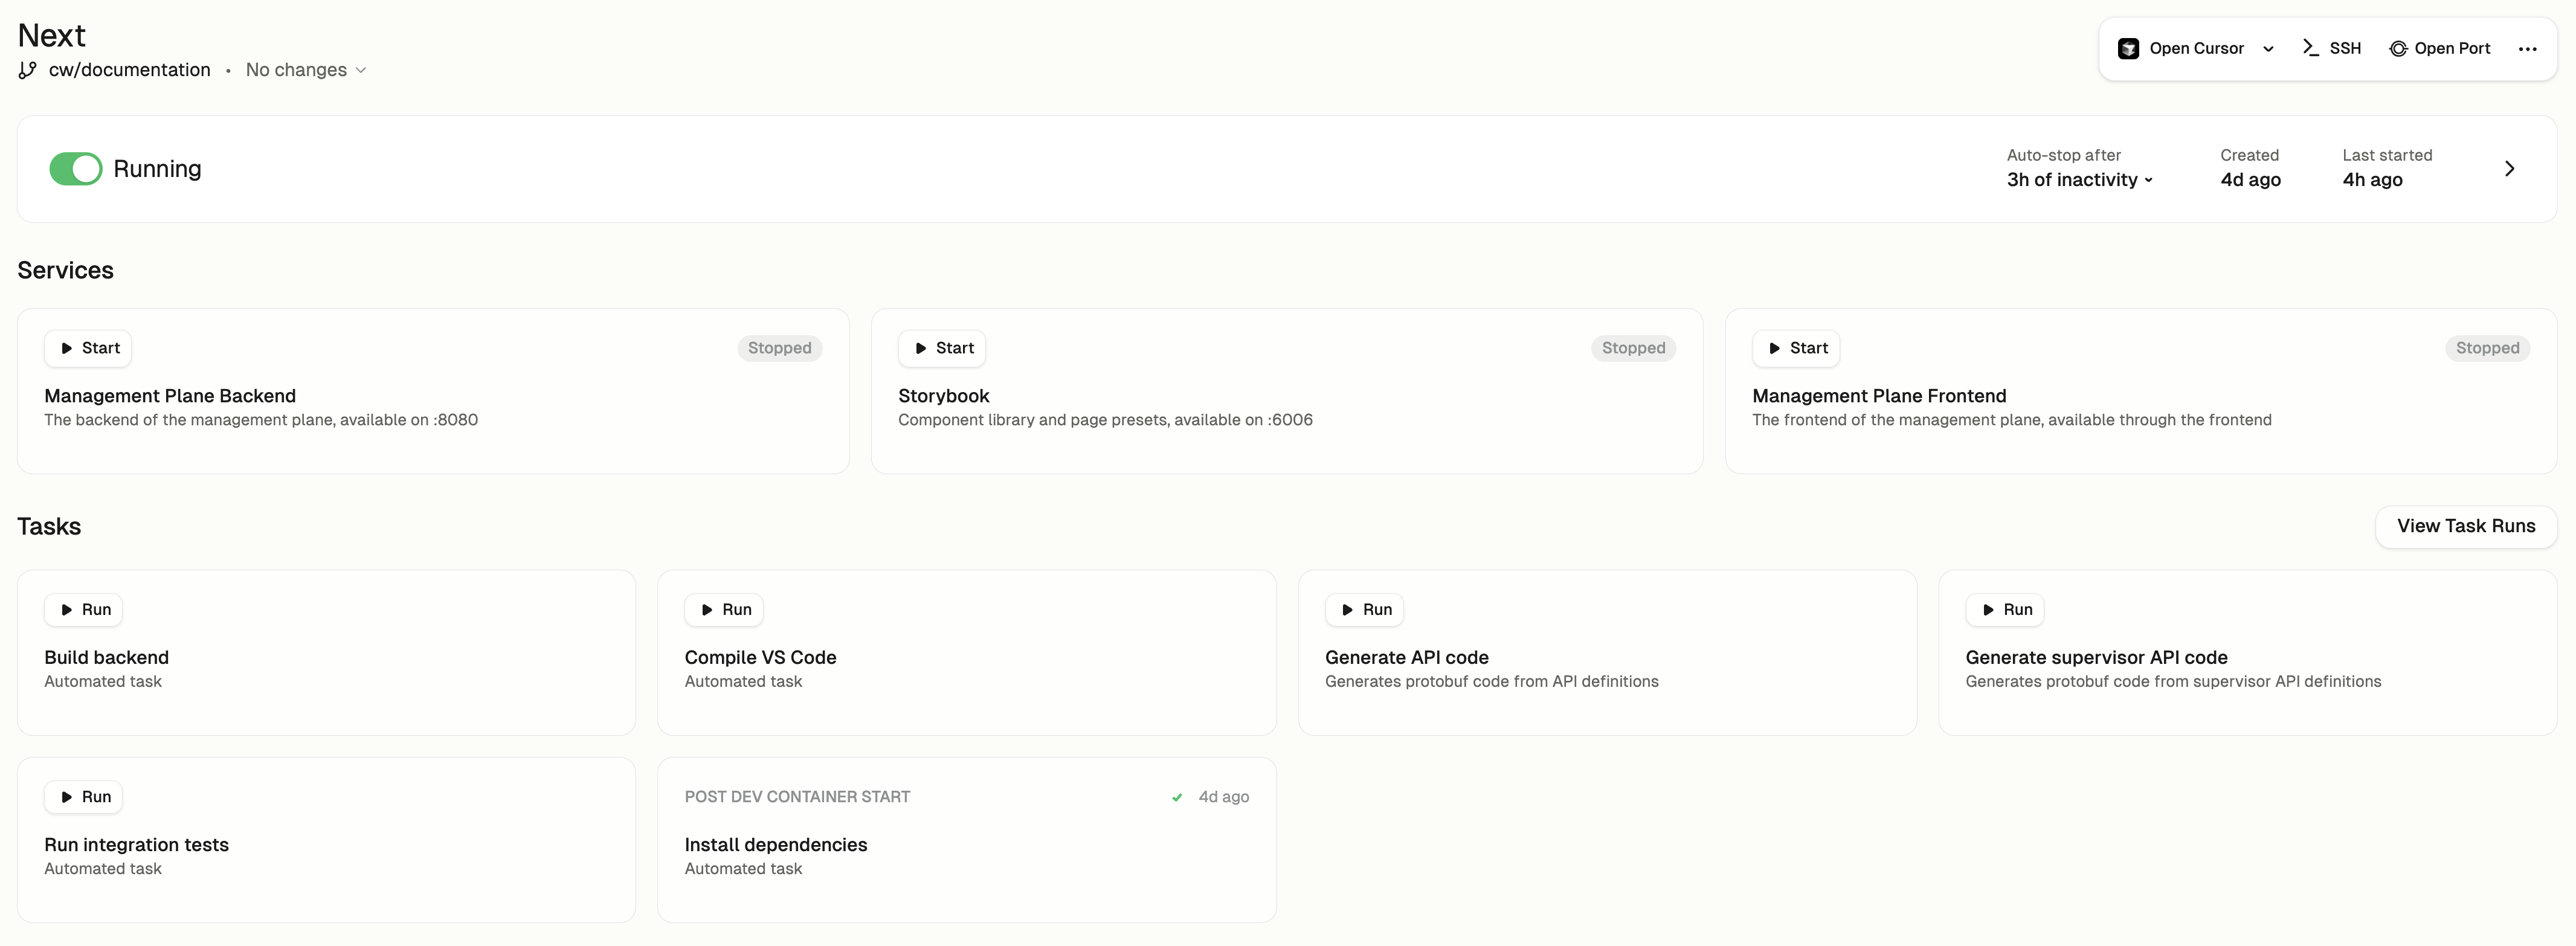 ## Configuration
Automations are defined in a YAML file located at `.gitpod/automations.yaml` in your repository. This file can live alongside your source code, in another repository, or any location accessible from the development environment.
Automations are organized into two categories:
* **Services**: Long-running processes that provide functionality to your environment
* **Tasks**: One-off commands that perform specific actions
## Example Configuration
Here's a simple example of an Automations configuration file:
```yaml
services:
database:
name: PostgreSQL
commands:
start: docker run postgres
tasks:
run-unit-tests:
name: Runs unit tests
command: go test -v ./...
```
## Triggering Automations
Automations can be triggered in three ways:
1. **Manually through the UI**: Click on the automation in the Gitpod interface
2. **Via command line**: Execute automations using the CLI
3. **Automatically**: Trigger based on environment lifecycle events (e.g., when a Dev Container starts)
Each automation type has a corresponding UI element in the Gitpod interface, making them easily discoverable and accessible.
## Access Control
Anyone with access to an environment can create and run automations within that environment. Administrators cannot access other users' environments and therefore cannot create or run automations in those environments.
See the [examples](/flex/configuration/automations/examples) section for more detailed use cases and implementation patterns for Automations.
# Development Containers
Source: https://www.gitpod.io/docs/gitpod/introduction/devcontainer
Development Containers (or Dev Containers) allow you to use a container as a full-featured development environment. It can be used to run an application, separate tools, libraries, or runtimes needed for working with a codebase, and to aid in continuous integration and testing. Dev containers can be run locally or remotely, in a private or public cloud, in a variety of supporting tools and editors.
# Development Containers
## Configuration
Automations are defined in a YAML file located at `.gitpod/automations.yaml` in your repository. This file can live alongside your source code, in another repository, or any location accessible from the development environment.
Automations are organized into two categories:
* **Services**: Long-running processes that provide functionality to your environment
* **Tasks**: One-off commands that perform specific actions
## Example Configuration
Here's a simple example of an Automations configuration file:
```yaml
services:
database:
name: PostgreSQL
commands:
start: docker run postgres
tasks:
run-unit-tests:
name: Runs unit tests
command: go test -v ./...
```
## Triggering Automations
Automations can be triggered in three ways:
1. **Manually through the UI**: Click on the automation in the Gitpod interface
2. **Via command line**: Execute automations using the CLI
3. **Automatically**: Trigger based on environment lifecycle events (e.g., when a Dev Container starts)
Each automation type has a corresponding UI element in the Gitpod interface, making them easily discoverable and accessible.
## Access Control
Anyone with access to an environment can create and run automations within that environment. Administrators cannot access other users' environments and therefore cannot create or run automations in those environments.
See the [examples](/flex/configuration/automations/examples) section for more detailed use cases and implementation patterns for Automations.
# Development Containers
Source: https://www.gitpod.io/docs/gitpod/introduction/devcontainer
Development Containers (or Dev Containers) allow you to use a container as a full-featured development environment. It can be used to run an application, separate tools, libraries, or runtimes needed for working with a codebase, and to aid in continuous integration and testing. Dev containers can be run locally or remotely, in a private or public cloud, in a variety of supporting tools and editors.
# Development Containers
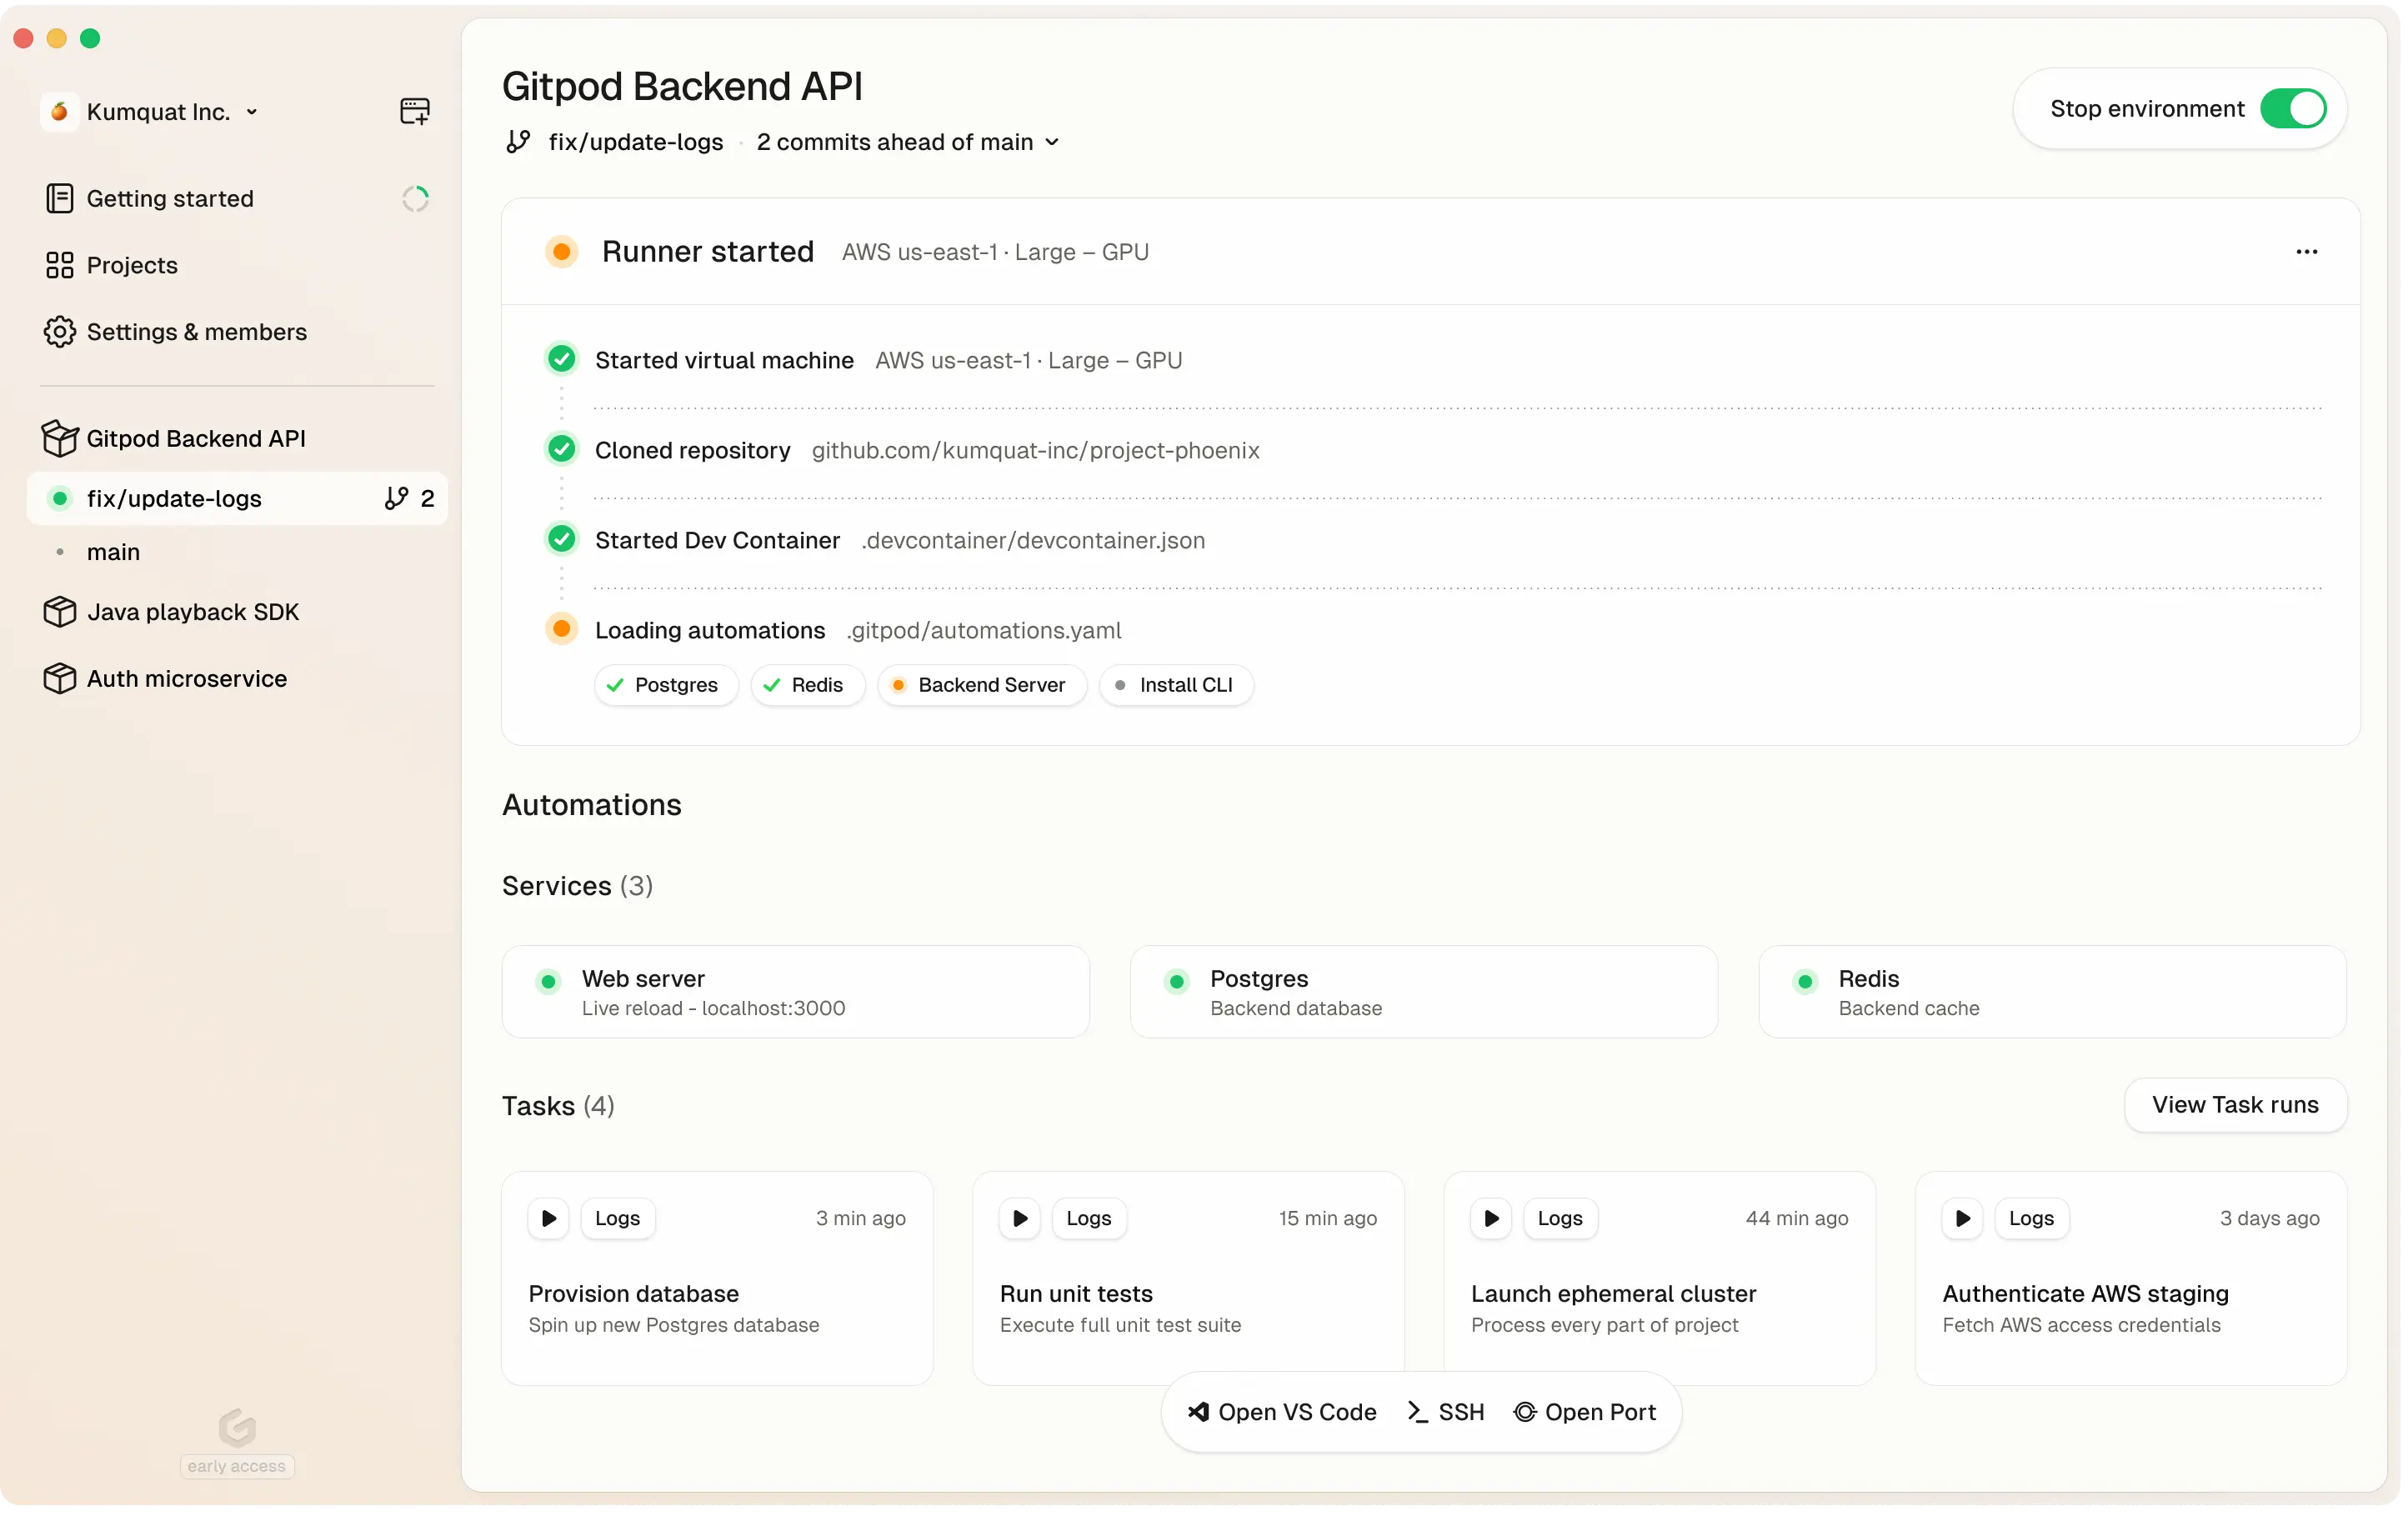 # What is Gitpod?
Gitpod is a **zero-trust platform** that provides automated and standardized development environments **in your own infrastructure**—whether on your local machine, in your cloud account (VPC), or on-prem. It streamlines coding workflows and boosts collaboration by letting teams **spin up secure, preconfigured dev environments** quickly and consistently.
## High-Level Overview
* **Run in Your Cloud or VPC**: Deploy Gitpod in your preferred environment — AWS, on-prem servers, or via a local desktop app.
* **Consistent Environments**: Use Dev Containers to ensure every environment has the same dependencies, tools, and configurations.
* **Automations**: Automate tasks like DB seeding, environment setup, or testing.
* **Zero-Trust Architecture**: Keep code and secrets in your cloud; you control access.
* **Scalable**: Expand across multiple infrastructure footprints or keep it lightweight for smaller teams.
## Key Benefits for CTOs & Engineering Leaders
* **Security & Compliance**
* Gitpod cannot access your source code or credentials, they all remain private and under your control.
* Centralized security policies, single sign-on, and advanced compliance.
* Full audit logs to track environment and user actions.
* **Flexible Cost & Infrastructure**
* Host dev environments where it makes sense—in your private VPC, existing cloud accounts, or local resources.
* Seat-based pricing for predictable budgeting, plus the option to use your own infrastructure investments.
* **Accelerated Onboarding & Collaboration**
* New devs can start coding in minutes—no manual install or environment setup.
* Shared, prebuilt project configurations eliminate "works on my machine" issues.
* Multiple dev environments can run side by side for different tasks.
## Key Benefits for Developers & Engineers
* **Instant, Ready-to-Code Environments**
* Dev Containers handle language runtimes and build tools automatically.
* Automations run tasks (build, test, seed DB) on environment startup.
* **Code From Anywhere**
* Launch an environment on your laptop, or in your VPC with powerful cloud servers.
* Switch seamlessly between local resources and your organization's infrastructure.
* **Reduced Context Switching**
* Keep separate environments for each feature branch or bug fix.
* Easily revert to a clean environment without reinstalling dependencies.
* [Runners](/gitpod/introduction/runners)
* [Dev Container](/gitpod/introduction/devcontainer)
* [Automations](/gitpod/introduction/automations)
* [Zero-trust](/gitpod/introduction/zero-trust)
* [Editor](/gitpod/introduction/editor)
# Runners
Source: https://www.gitpod.io/docs/gitpod/introduction/runners
Runners are flexible orchestrators of remote development environments that operate within your infrastructure. This "bring your own cloud" model provides you with complete control over where your development environments run while Gitpod manages the administration complexity.
## What are Runners?
Runners are responsible for key operational tasks within your infrastructure:
* Environment provisioning and scaling
* Backup management
* Local caching
* Source code management (SCM) integration
* Environment security
While runners operate in your infrastructure, they connect to Gitpod's management plane, which handles user authentication, identity management, and runner coordination. This hybrid approach gives you data control without the operational burden.
## Runner Types
Gitpod offers multiple runner options to fit your infrastructure needs:
1. **AWS Runner**
* Deployed in your AWS account via CloudFormation
* Supports horizontal scaling up to 400 concurrent environments
* Minimal base cost (approximately \$8/month, often covered by AWS free tier)
* Available in any AWS region or availability zone
* Support for GPU-enabled environments
2. **Linux Runner**
* Runs directly on your Linux machine with AMD64/x86\_64 architecture
* Supports up to 10 concurrent environments
* Provides direct local network access
* Requires hardware virtualization support (KVM)
3. **Gitpod Desktop**
* Run Dev Containers locally with built-in Linux virtualization
* No infrastructure costs—everything runs locally
* Currently available for Apple silicon users
## Runner Architecture
Runners work in conjunction with the Gitpod management plane:
* **Management Plane** (hosted by Gitpod): Handles database, SSO, identity management, user management, and runner coordination
* **Runner** (in your infrastructure): Manages environment provisioning, SCM authentication, and SCM context parsing
* **Environments** (created by runners): Provide security boundaries, secrets resolution, and automations execution
## Key Benefits
* **Infrastructure control**: Keep sensitive code and data within your own infrastructure
* **Private networking**: Access internal resources without exposing them to the public internet
* **Geographical flexibility**: Deploy runners close to your team to minimize latency
* **SCM integration**: Connect to private repositories on GitHub, GitLab, Bitbucket, or Azure DevOps
* **Resource optimization**: Use your own cloud resources and leverage committed spend
* **Team sharing**: Runners are shared across developers in your organization
* **Multiple deployment options**: Run as many runners as needed in different regions or availability zones
## Administration
* Runners require admin role in your Gitpod organization to create or modify
* Runners update automatically approximately once per week with no downtime
* Runners can be monitored using Prometheus
* Connection between users and environments is direct, secured with SSH keys
* Each runner can support up to 400 concurrent environments with no limit on total users
Organizations can deploy multiple runners across different regions and even mix runner types to best support global teams, data sovereignty requirements, and specific workloads.
For specific setup instructions, refer to the runner-specific documentation sections:
* [AWS Runner Setup](/flex/runners/aws)
* [Linux Runner Setup](/flex/runners/linux)
* [Gitpod Desktop](/flex/gitpod-desktop)
# Zero-trust environments
Source: https://www.gitpod.io/docs/gitpod/introduction/zero-trust
With Gitpod your source code, secrets, and internal network are isolated within your network perimeter. Gitpod's architecture is deployed in your infrastructure, providing full control over networking setup.
## How zero-trust principles protect your environments
Gitpod's architecture adheres to core zero-trust principles:
* **No implicit trust** — No user, device, or network is automatically trusted, whether inside or outside your architectural perimeter
* **Least privilege access** — Each component only has access to the resources it needs to function
* **Continuous validation** — Every request is authenticated, authorized, and validated before granting or maintaining access
* **Comprehensive identity model** — All actions are tied to specific identities (users, environments, runners, or accounts)
## Architecture that keeps you in control
Gitpod consists of two main components:
* **Management plane** (hosted by Gitpod) — Handles authentication, administrative functions, and policy management
* **Runners** (deployed in your VPC or "bring your own cloud") — Orchestrate development environments while keeping sensitive assets within your network boundaries
# What is Gitpod?
Gitpod is a **zero-trust platform** that provides automated and standardized development environments **in your own infrastructure**—whether on your local machine, in your cloud account (VPC), or on-prem. It streamlines coding workflows and boosts collaboration by letting teams **spin up secure, preconfigured dev environments** quickly and consistently.
## High-Level Overview
* **Run in Your Cloud or VPC**: Deploy Gitpod in your preferred environment — AWS, on-prem servers, or via a local desktop app.
* **Consistent Environments**: Use Dev Containers to ensure every environment has the same dependencies, tools, and configurations.
* **Automations**: Automate tasks like DB seeding, environment setup, or testing.
* **Zero-Trust Architecture**: Keep code and secrets in your cloud; you control access.
* **Scalable**: Expand across multiple infrastructure footprints or keep it lightweight for smaller teams.
## Key Benefits for CTOs & Engineering Leaders
* **Security & Compliance**
* Gitpod cannot access your source code or credentials, they all remain private and under your control.
* Centralized security policies, single sign-on, and advanced compliance.
* Full audit logs to track environment and user actions.
* **Flexible Cost & Infrastructure**
* Host dev environments where it makes sense—in your private VPC, existing cloud accounts, or local resources.
* Seat-based pricing for predictable budgeting, plus the option to use your own infrastructure investments.
* **Accelerated Onboarding & Collaboration**
* New devs can start coding in minutes—no manual install or environment setup.
* Shared, prebuilt project configurations eliminate "works on my machine" issues.
* Multiple dev environments can run side by side for different tasks.
## Key Benefits for Developers & Engineers
* **Instant, Ready-to-Code Environments**
* Dev Containers handle language runtimes and build tools automatically.
* Automations run tasks (build, test, seed DB) on environment startup.
* **Code From Anywhere**
* Launch an environment on your laptop, or in your VPC with powerful cloud servers.
* Switch seamlessly between local resources and your organization's infrastructure.
* **Reduced Context Switching**
* Keep separate environments for each feature branch or bug fix.
* Easily revert to a clean environment without reinstalling dependencies.
* [Runners](/gitpod/introduction/runners)
* [Dev Container](/gitpod/introduction/devcontainer)
* [Automations](/gitpod/introduction/automations)
* [Zero-trust](/gitpod/introduction/zero-trust)
* [Editor](/gitpod/introduction/editor)
# Runners
Source: https://www.gitpod.io/docs/gitpod/introduction/runners
Runners are flexible orchestrators of remote development environments that operate within your infrastructure. This "bring your own cloud" model provides you with complete control over where your development environments run while Gitpod manages the administration complexity.
## What are Runners?
Runners are responsible for key operational tasks within your infrastructure:
* Environment provisioning and scaling
* Backup management
* Local caching
* Source code management (SCM) integration
* Environment security
While runners operate in your infrastructure, they connect to Gitpod's management plane, which handles user authentication, identity management, and runner coordination. This hybrid approach gives you data control without the operational burden.
## Runner Types
Gitpod offers multiple runner options to fit your infrastructure needs:
1. **AWS Runner**
* Deployed in your AWS account via CloudFormation
* Supports horizontal scaling up to 400 concurrent environments
* Minimal base cost (approximately \$8/month, often covered by AWS free tier)
* Available in any AWS region or availability zone
* Support for GPU-enabled environments
2. **Linux Runner**
* Runs directly on your Linux machine with AMD64/x86\_64 architecture
* Supports up to 10 concurrent environments
* Provides direct local network access
* Requires hardware virtualization support (KVM)
3. **Gitpod Desktop**
* Run Dev Containers locally with built-in Linux virtualization
* No infrastructure costs—everything runs locally
* Currently available for Apple silicon users
## Runner Architecture
Runners work in conjunction with the Gitpod management plane:
* **Management Plane** (hosted by Gitpod): Handles database, SSO, identity management, user management, and runner coordination
* **Runner** (in your infrastructure): Manages environment provisioning, SCM authentication, and SCM context parsing
* **Environments** (created by runners): Provide security boundaries, secrets resolution, and automations execution
## Key Benefits
* **Infrastructure control**: Keep sensitive code and data within your own infrastructure
* **Private networking**: Access internal resources without exposing them to the public internet
* **Geographical flexibility**: Deploy runners close to your team to minimize latency
* **SCM integration**: Connect to private repositories on GitHub, GitLab, Bitbucket, or Azure DevOps
* **Resource optimization**: Use your own cloud resources and leverage committed spend
* **Team sharing**: Runners are shared across developers in your organization
* **Multiple deployment options**: Run as many runners as needed in different regions or availability zones
## Administration
* Runners require admin role in your Gitpod organization to create or modify
* Runners update automatically approximately once per week with no downtime
* Runners can be monitored using Prometheus
* Connection between users and environments is direct, secured with SSH keys
* Each runner can support up to 400 concurrent environments with no limit on total users
Organizations can deploy multiple runners across different regions and even mix runner types to best support global teams, data sovereignty requirements, and specific workloads.
For specific setup instructions, refer to the runner-specific documentation sections:
* [AWS Runner Setup](/flex/runners/aws)
* [Linux Runner Setup](/flex/runners/linux)
* [Gitpod Desktop](/flex/gitpod-desktop)
# Zero-trust environments
Source: https://www.gitpod.io/docs/gitpod/introduction/zero-trust
With Gitpod your source code, secrets, and internal network are isolated within your network perimeter. Gitpod's architecture is deployed in your infrastructure, providing full control over networking setup.
## How zero-trust principles protect your environments
Gitpod's architecture adheres to core zero-trust principles:
* **No implicit trust** — No user, device, or network is automatically trusted, whether inside or outside your architectural perimeter
* **Least privilege access** — Each component only has access to the resources it needs to function
* **Continuous validation** — Every request is authenticated, authorized, and validated before granting or maintaining access
* **Comprehensive identity model** — All actions are tied to specific identities (users, environments, runners, or accounts)
## Architecture that keeps you in control
Gitpod consists of two main components:
* **Management plane** (hosted by Gitpod) — Handles authentication, administrative functions, and policy management
* **Runners** (deployed in your VPC or "bring your own cloud") — Orchestrate development environments while keeping sensitive assets within your network boundaries
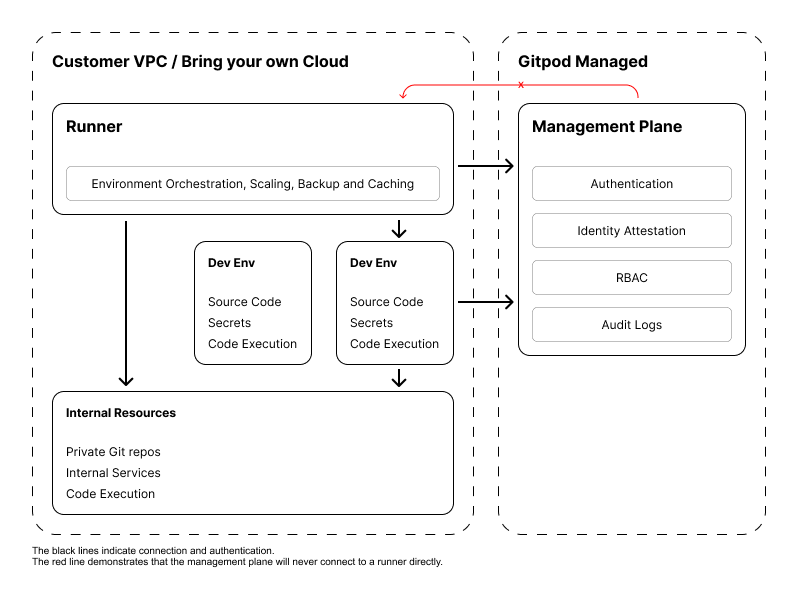 {/*
{/*