Configure your Gitpod Instance
Setting up an NFS share for your workspaces
Note: This step is optional and only required when you want your workspaces to have access to an NFS share.
Creating the NFS share
- Use the AWS management console and select the account where your Gitpod installation is hosted.
- Select the EFS Managed File Storage for EC2 service
- Select Create file system
- Select the VPC of your Gitpod installation
- Click the Customize button
- In Step 2 Network access ensure that the Mount targets specify your Pod subnets, in the availability zones for which you deployed Gitpod. The pod subnets should be CGNAT ranges.
- This requires you to create and specify a security group which allows inbound NFS (TCP 2049)
- Create the NFS share
How to use your NFS share from your workspace
- Ensure you’ve followed steps from above.
- Create a folder in your workspace like so,
sudo mkdir /efs.- Avoid mounting NFS within
/workspace. It is not compatible.
- Avoid mounting NFS within
- Mount the share to
/efsin your workspace.- Click the Attach button on the overview page of your EFS file system, copy the command for the NFS client.
- Adjust the copied command, such
efsat the end is replaced with/efs.
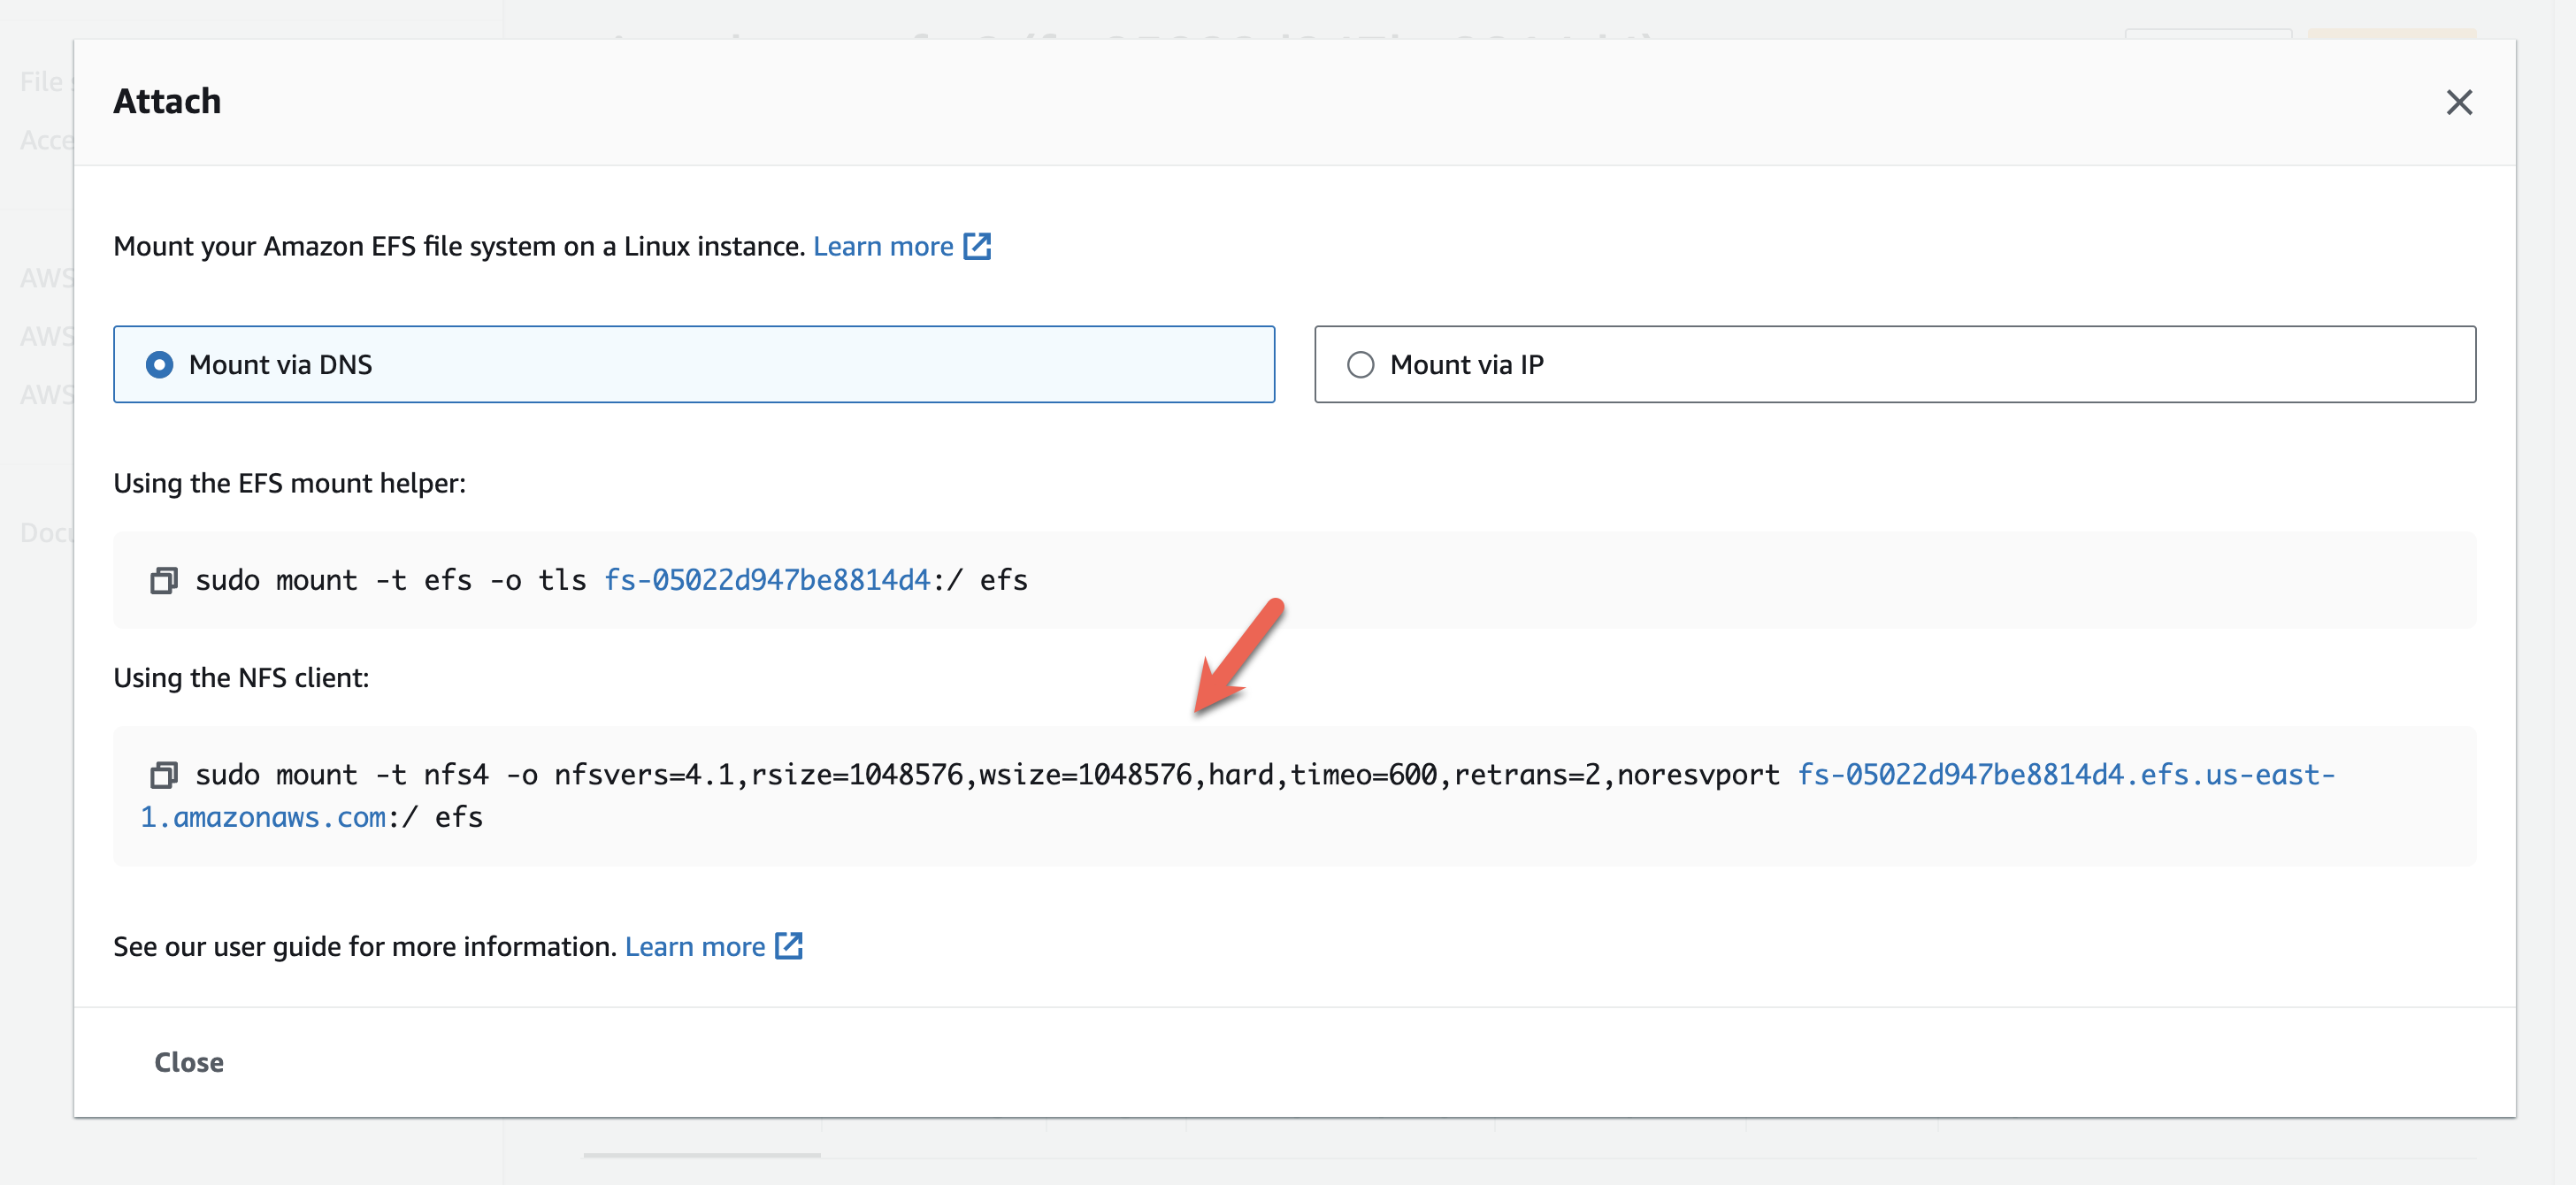
NFS Mount Command
How to map users for NFS shares
This set of steps is necessary if you wish to alter how users are mapped. There are a few prerequisites:- Create an NFS share as described above
- Setup an EFS Access Point with the the desired properties
- This’ll ensure file creation is done as a specific user and group.
- Add efs-utils to the workspace image.
- This’ll ensure that from your workspace, you can use NFS via the EFS Access Point.
Setup the EFS Access Point
Create an EFS Access Point in your AWS console and define the desired properties.Update your custom dockerfile
Add the following to your custom Dockerfile, this supportsefs-utils in your workspace image.
Mount the NFS share
Create a mount for the EFS Access Point like so: Note: Ignore the warning
Could not start amazon-efs-mount-watchdog, unrecognized init system "supervisor" after doing the mount. supervisor is our component responsible for initializing your workspace. Suggestion: Run
sudo amazon-efs-mount-watchdog &, after creating the mount to the EFS Access Point. Why? As background, when you mount to an EFS Access Point, an efs-proxy process is started in your workspace. If it crashes, the watchdog will restart the efs-proxy. If efs-proxy is not running, you will be unable to use the mount, which is why the watchdog is helpful. Limitation: Docker Compose lacks a plugin for mounting with EFS Access Points. So, you’ll need to establish the mount before starting your containers, if using Docker Compose.