Source Control
GitLab
Source control integrations can be configured for both Self-Hosted Runners and Gitpod Desktop. You can set up a GitLab integration during runner creation or in the runner settings. Self-hosted GitLab instances are supported by changing the Host during setup.
Configuring GitLab Access
You can skip this step if someone has already set up the runner for you and SCM
integration with GitLab has already been configured. In that case, you can go
directly to Authorizing GitLab Access. This step
allows administrators to configure what authorization methods (OAuth, PATs) and
SCM providers (GitHub, GitLab, Bitbucket, Azure DevOps) will be available for
authorization.
Self-Hosted Runners
For self-hosted runners (like AWS), GitLab integration is configured during runner creation or in the runner settings. There are two ways to integrate with GitLab. Both can be used simultaneously:- OAuth App (Recommended): Using an OAuth app allows users to sign in more quickly. You’ll need to set up an OAuth app within Gitpod.
- Personal Access Token (PAT): Each user will need to create a Personal Access Token. They will be provided with a deep link to do so on their first environment creation.
Using OAuth
- Go to Settings > Runners and select the runner for which you want to configure OAuth.
- Navigate to the “Configure repository access” section and click “Add a new provider”.
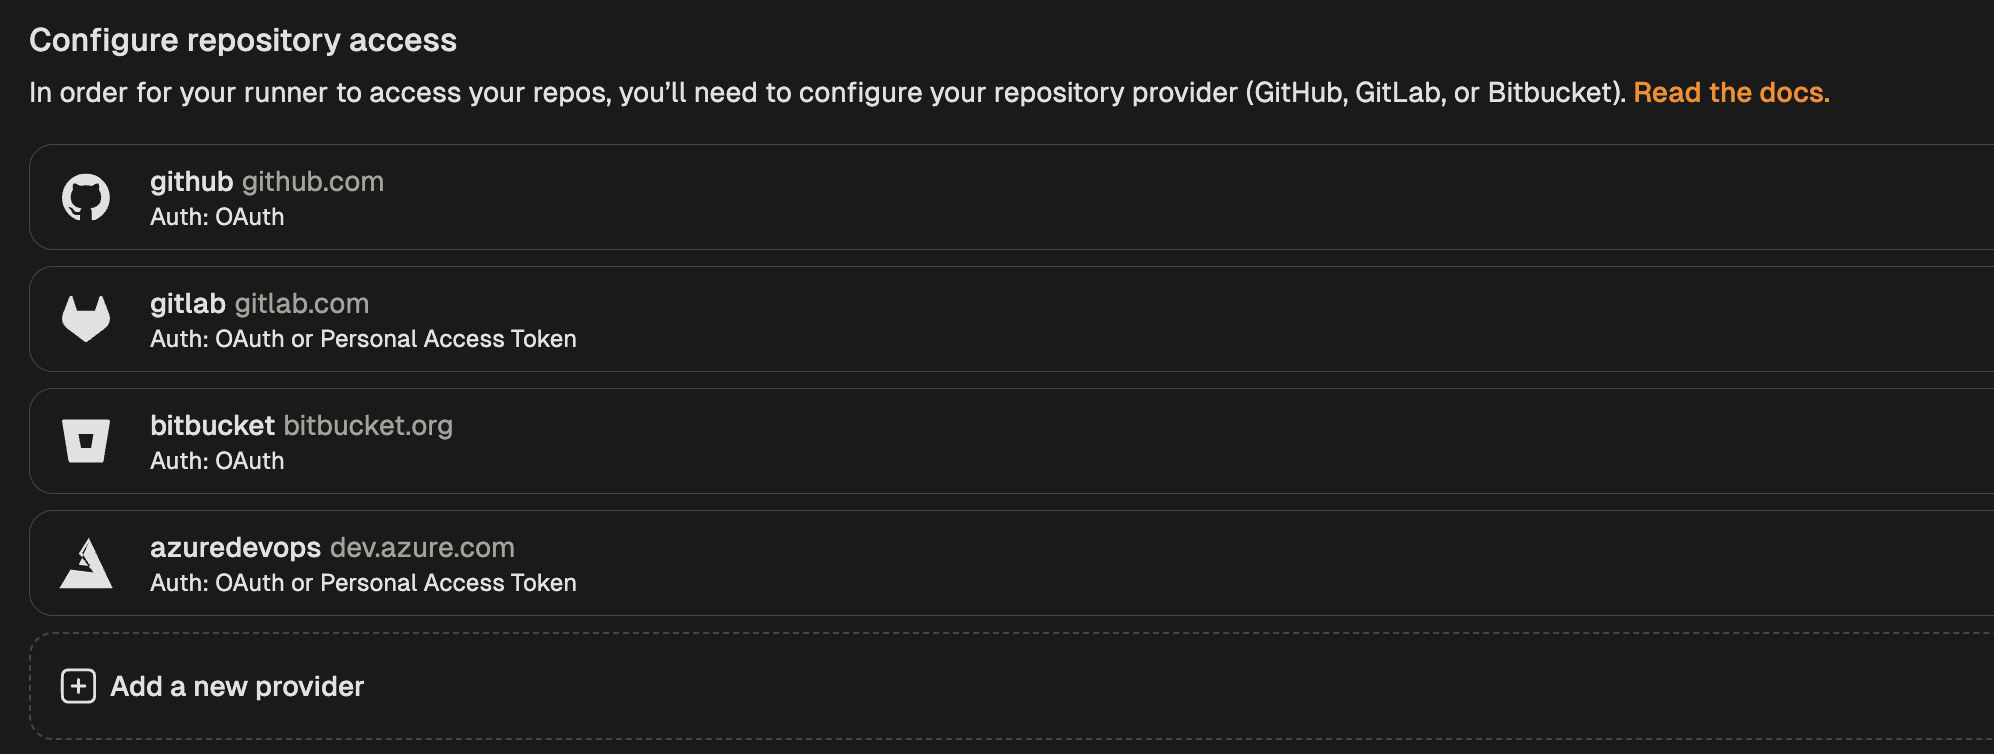
Add new provider
- Select GitLab from the list of providers.
- In the modal that opens, toggle “Enable OAuth”.
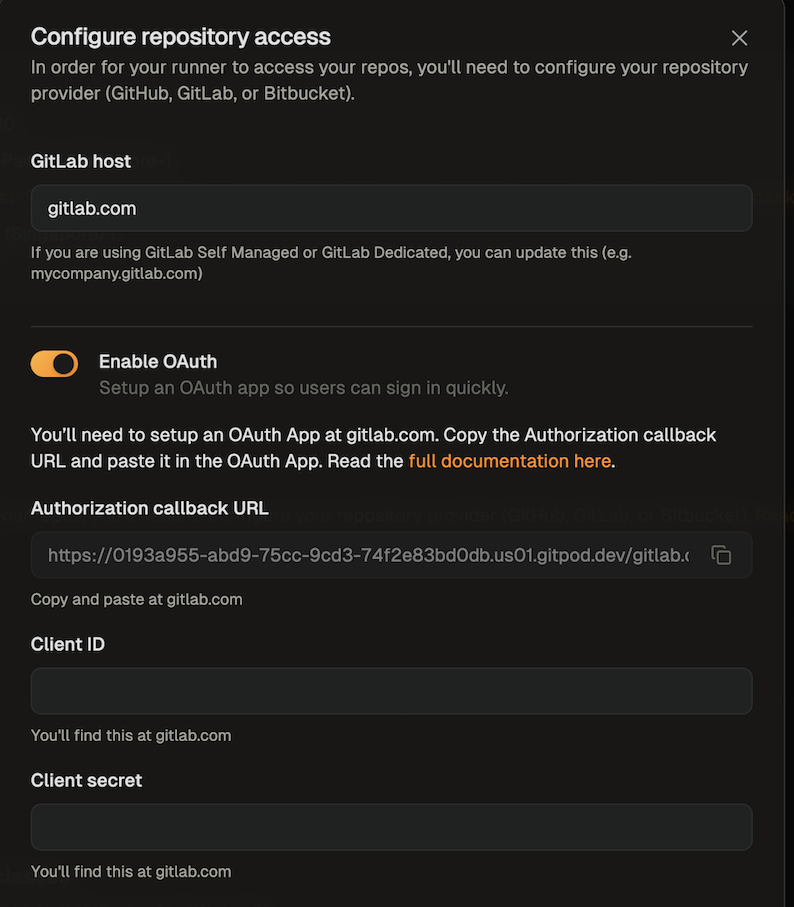
Enable GitLab OAuth
- Follow the instructions in GitLab’s docs to create an OAuth app.
- The app name can be any name you like
- You can get the callback URL from the SCM configuration dialog
- Select the required scopes
- The api scope is required so that the context url can be parsed
- The read_repository scope is required so that your environment can clone the repository
- The read_user scope is required so that the git author name and git author email can be set in the environment
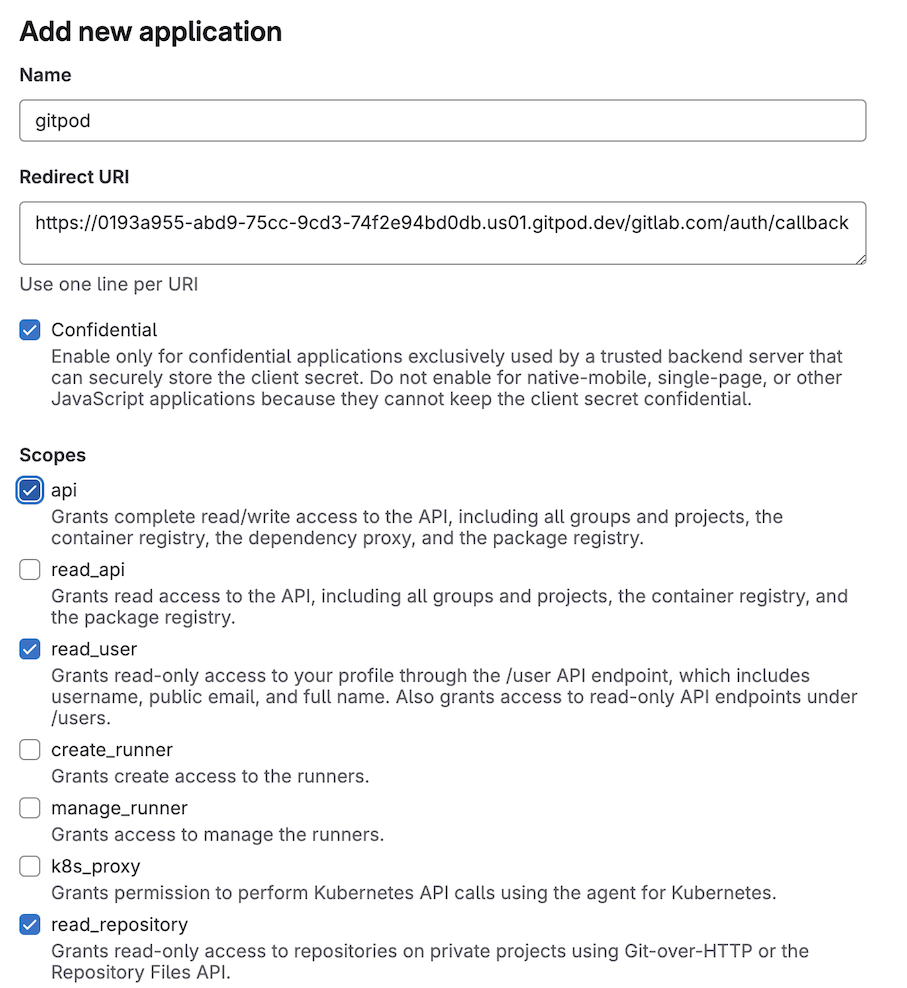
Configure GitLab OAuth
- After creating the OAuth app, provide the Client ID and Client Secret in the runner configuration dialog. The client secret will be encrypted with the runner’s public key, ensuring only the runner can read it.
- Save your changes
Using Personal Access Tokens (PATs)
- Go to Settings > Runners and select the runner for which you want to configure the PAT.
- Navigate to the “Configure repository access” section and click “Add a new provider”.
Add new provider
- Select GitLab from the list of providers.
- In the modal that opens, toggle “Enable Personal Access Token”.
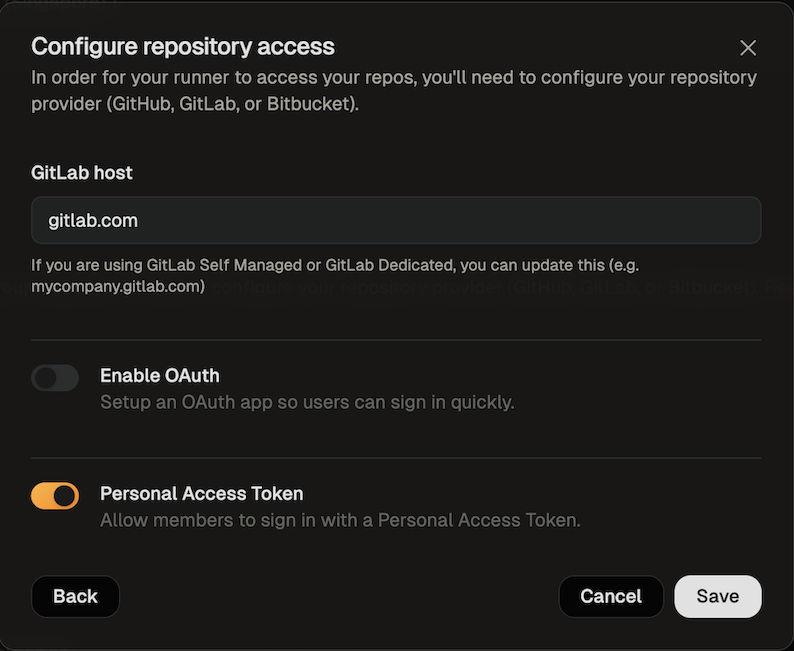
Enable GitLab PAT
- Save your changes
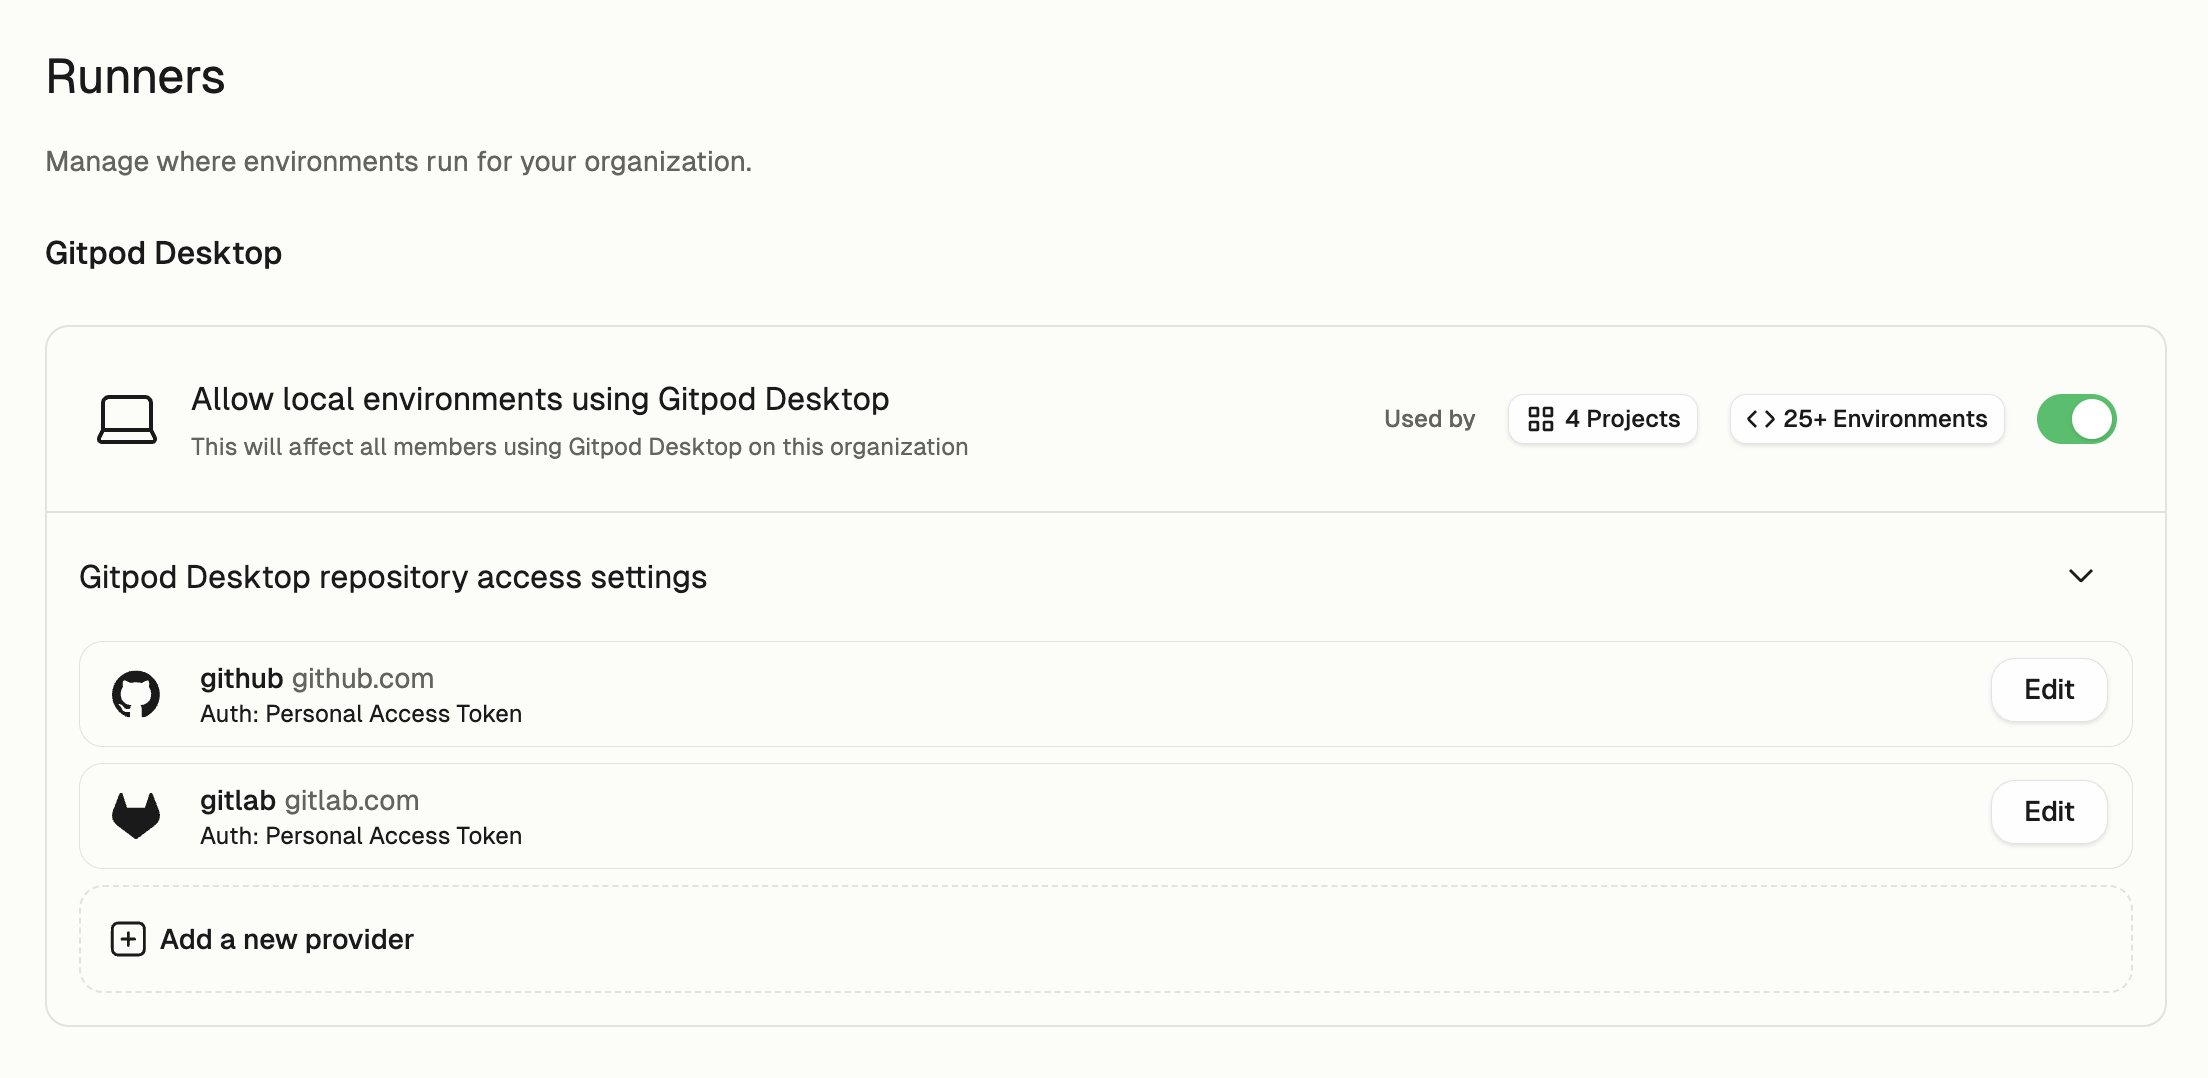
Gitpod Desktop
For Gitpod Desktop, GitLab authentication is managed through organization settings:- Organization administrators configure GitLab access in Settings -> Runners -> Gitpod Desktop
gitlab.comis configured by default- For self-hosted GitLab instances:
- Administrators must add the custom host in the settings
- Users cannot authenticate with these hosts until they are configured
- Users authenticate using Personal Access Tokens:
- Gitpod checks for existing Git credentials first on the user’s machine (using the git credential manager)
- If none exist, users are prompted to provide a PAT during environment creation
- Tokens can be managed under Settings -> Git Authentications
Desktop Settings
Authorizing GitLab Access
Using OAuth
-
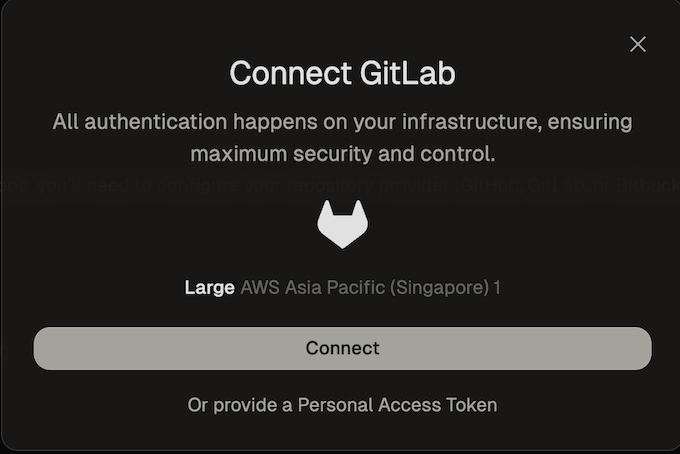
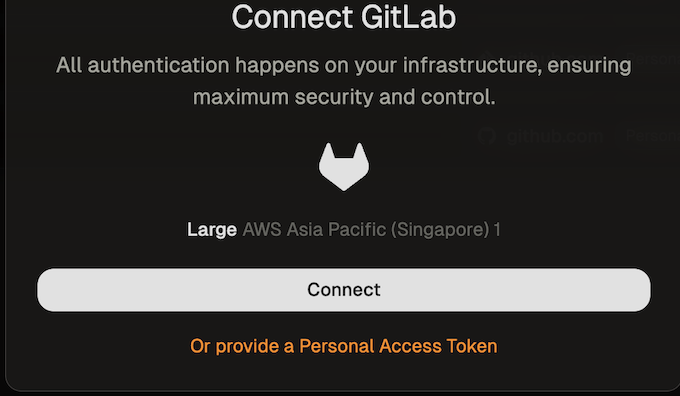
When creating your first environment, you will be asked to authorize the new application. To use OAuth press the Connect button.
A new window will open that directs you to GitLab to authorize the OAuth app. The requested scopes are api, read_repository and read_user.
Connect GitLab OAuth
- The api scope is required so that the context url can be parsed
- The read_repository scope is required so that your environment can clone the repository
- The read_user scope is required so that the git author name and git author email can be set in the environment

Authorize GitLab OAuth
-
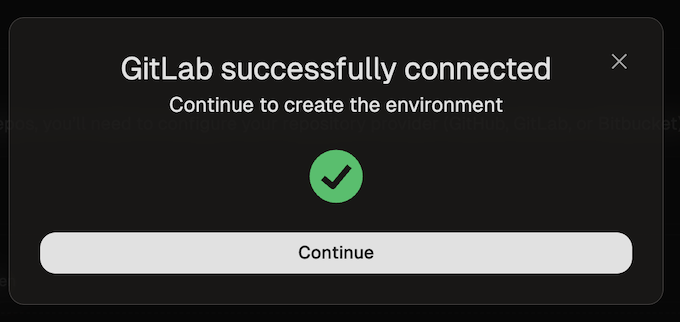
After you have authorized Gitpod, you can close the window. After a few seconds the you should get a confirmation that GitLab is now connected.
Connect GitLab OAuth
Using Personal Access Tokens (PATs)
-
When creating your first environment, you will be asked to authorize the new application. Select Provide a Personal Access Token.
Connect GitLab PAT
- Click the link provided on the screen to access the configuration dialog for creating a GitLab token.
- The name of the token and all required scopes are pre-set.
- By default, the token is valid for 30 days, but you can change the duration if needed.
-
After creating the token, return to the dialog and paste the token.
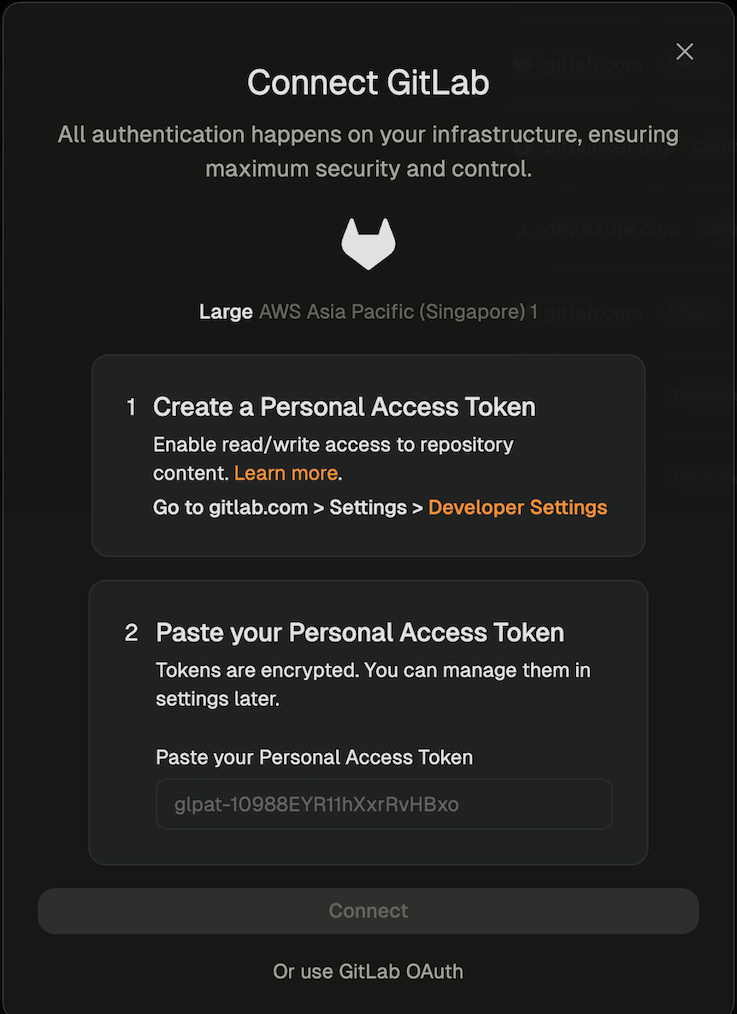
Set GitLab PAT
- The environment will now be created using the provided token.