Microsoft Entra ID
You can set up Single Sign-on (SSO) with Microsoft Entra ID for your team.
This section helps you to create an OIDC application with Microsoft Entra ID. The Client ID, Client Secret, and Issuer URL of this OIDC application are required to setup SSO in Gitpod. See the Step-by-step guide for the general instructions.
Prerequisites
As prerequisites you will need the following:
- Access to Microsoft Entra admin center
Create an OIDC application
-
On the Microsoft Entra admin center, navigate to Identity > Applications
-
Select
New Registration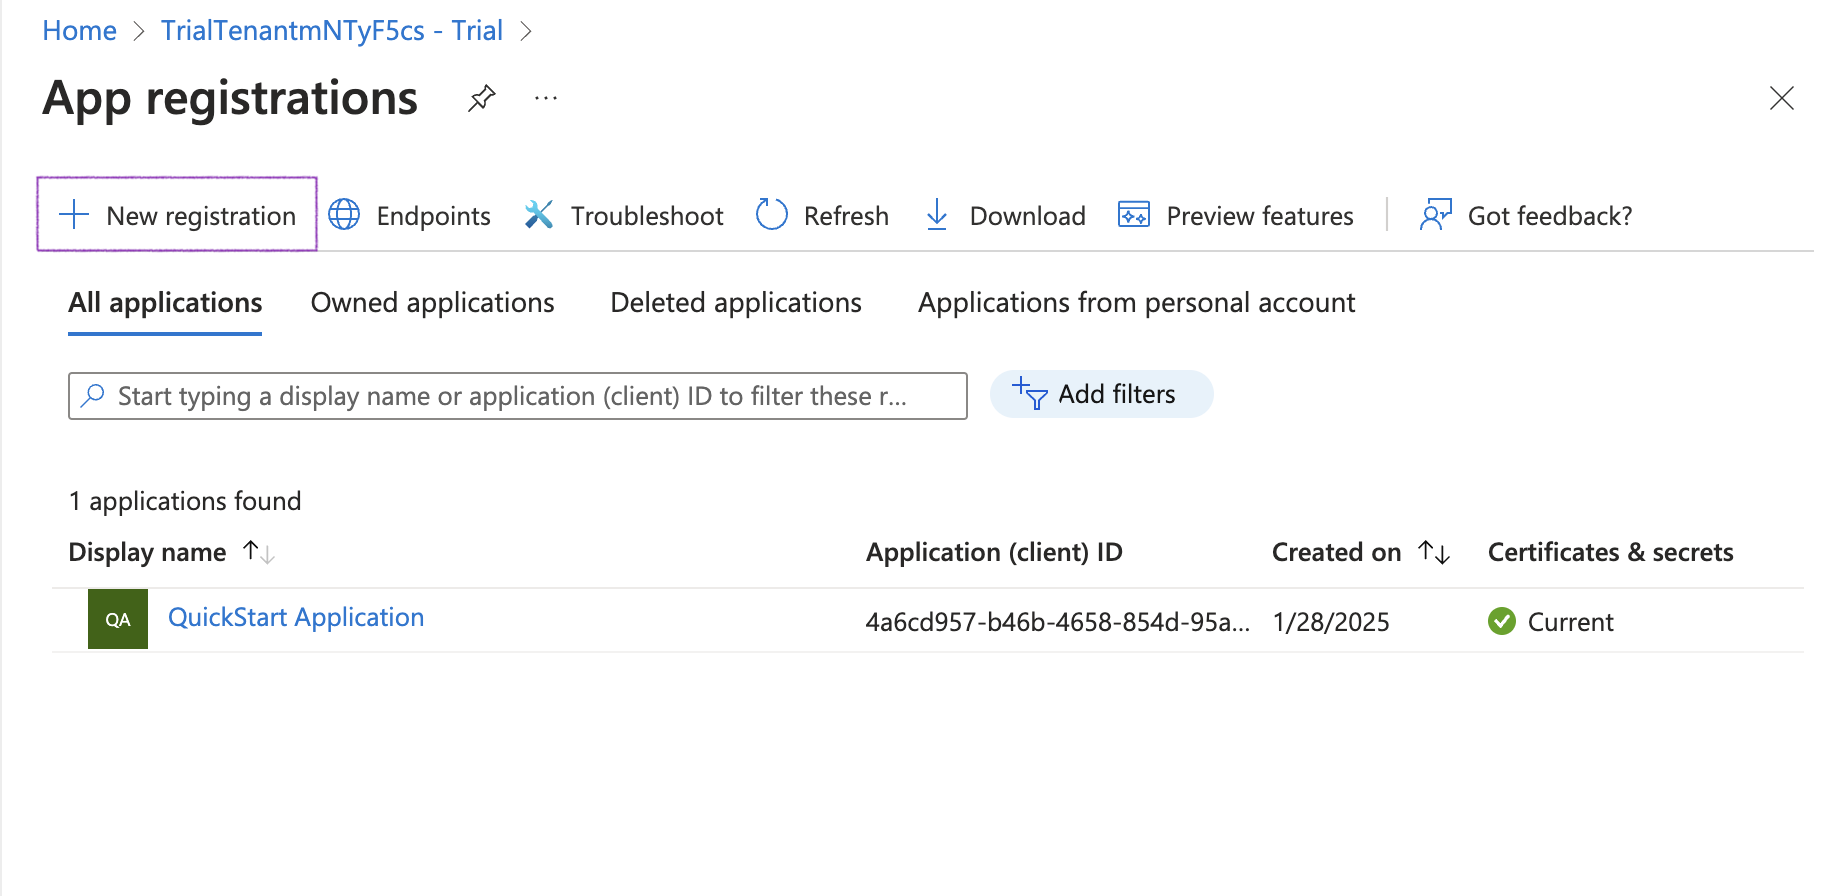
New Registration
-
Specify General Settings
-
App name, e.g.
Gitpod -
Platform:
Web -
Redirect URI:
https://app.gitpod.io/auth/oidc/callback -
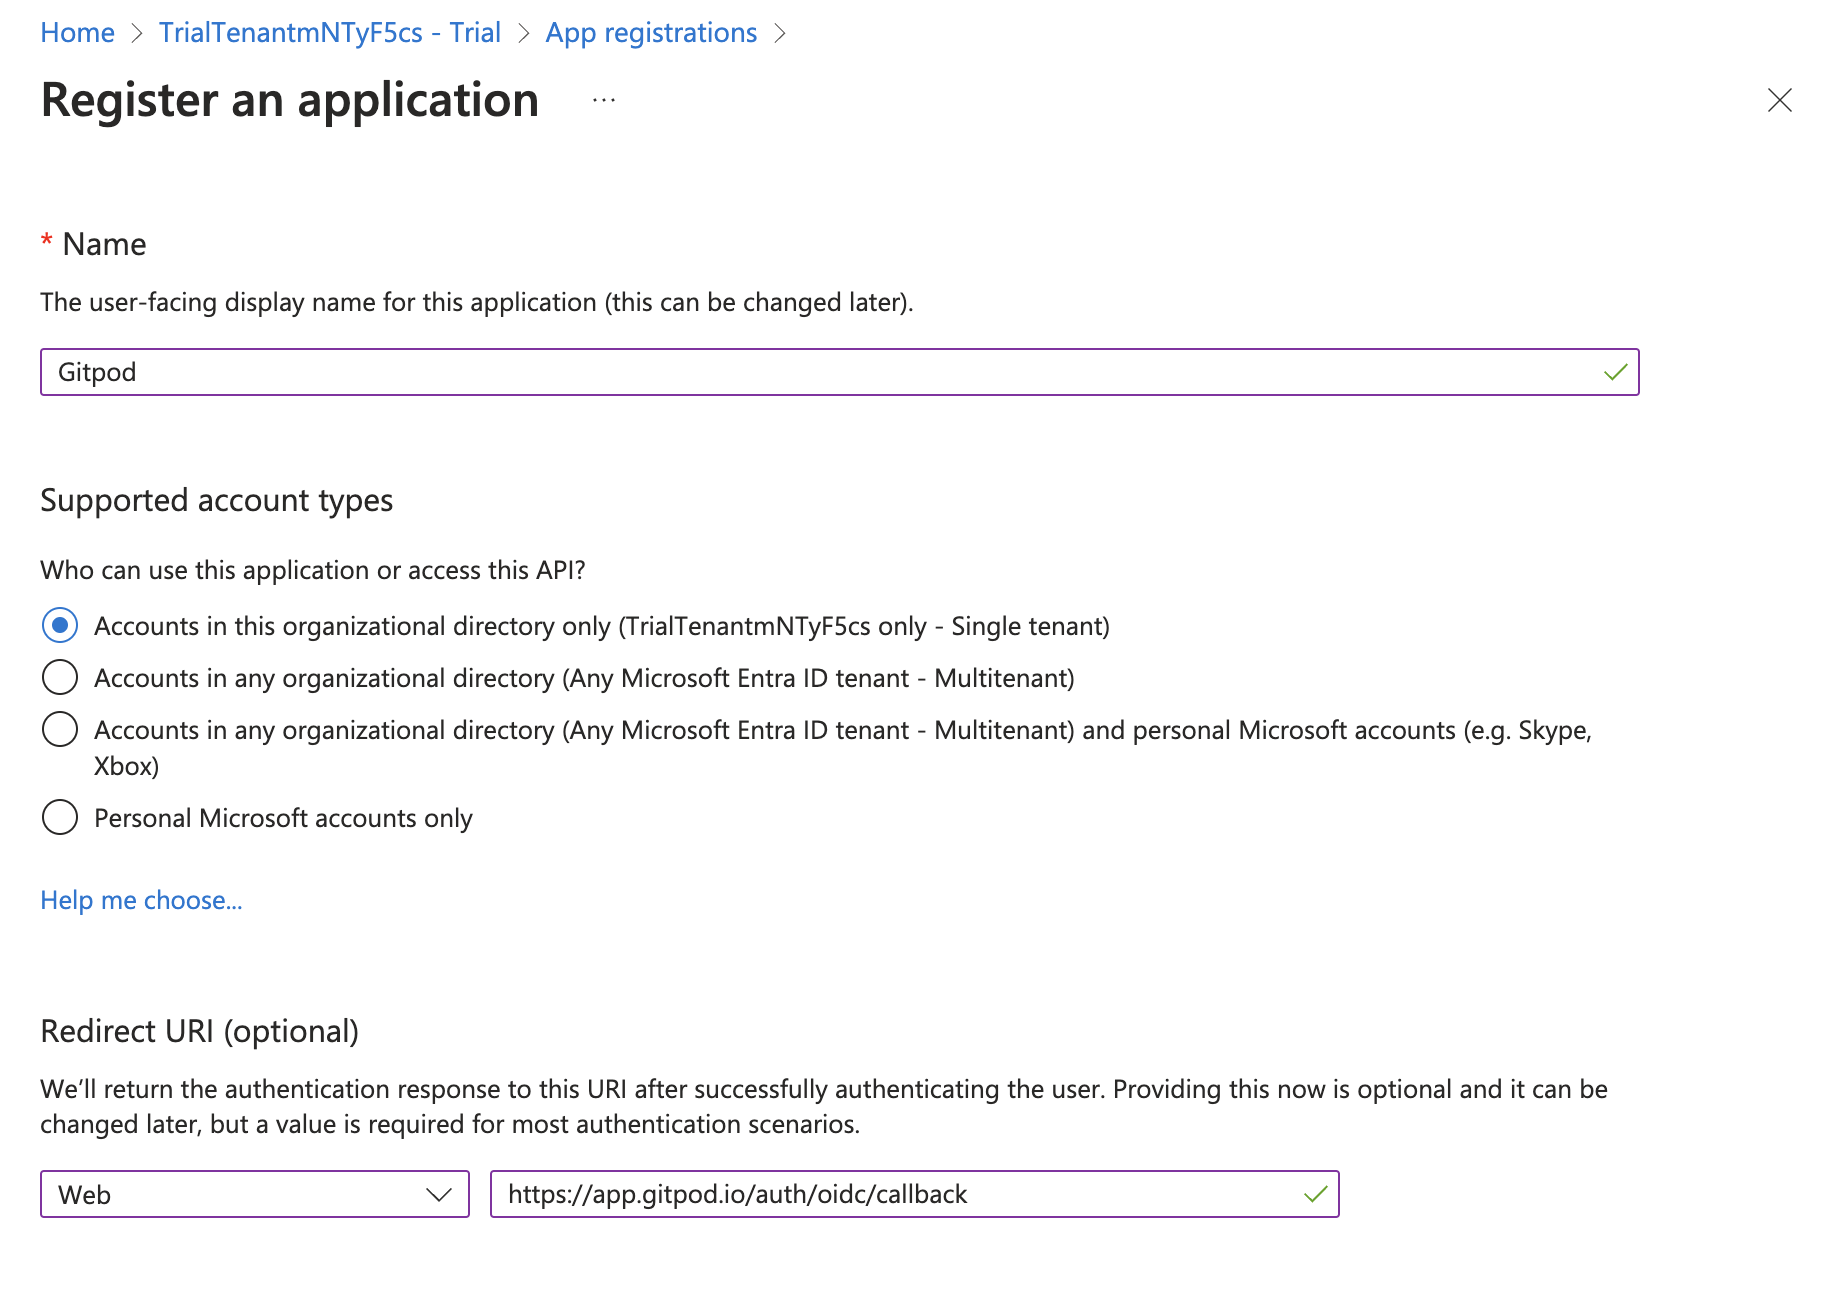
Register Application
-
-
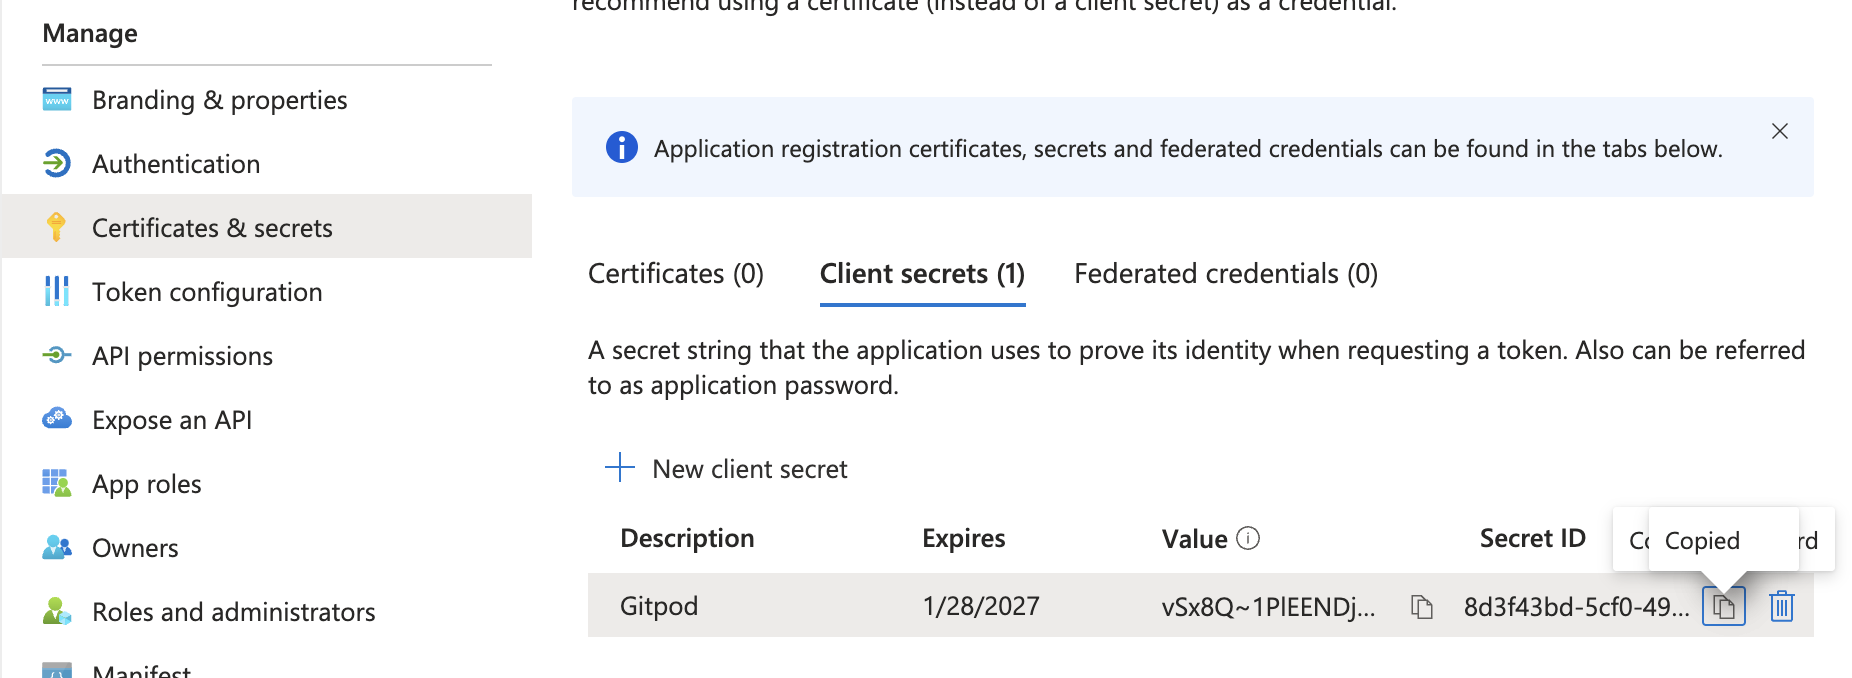
Obtain Client Secret from the Certificates & secrets page
-
Once the application is registered, navigate to the subpage Certificates & secrets to create and obtain a new client secret.
-
Click the New client secret button
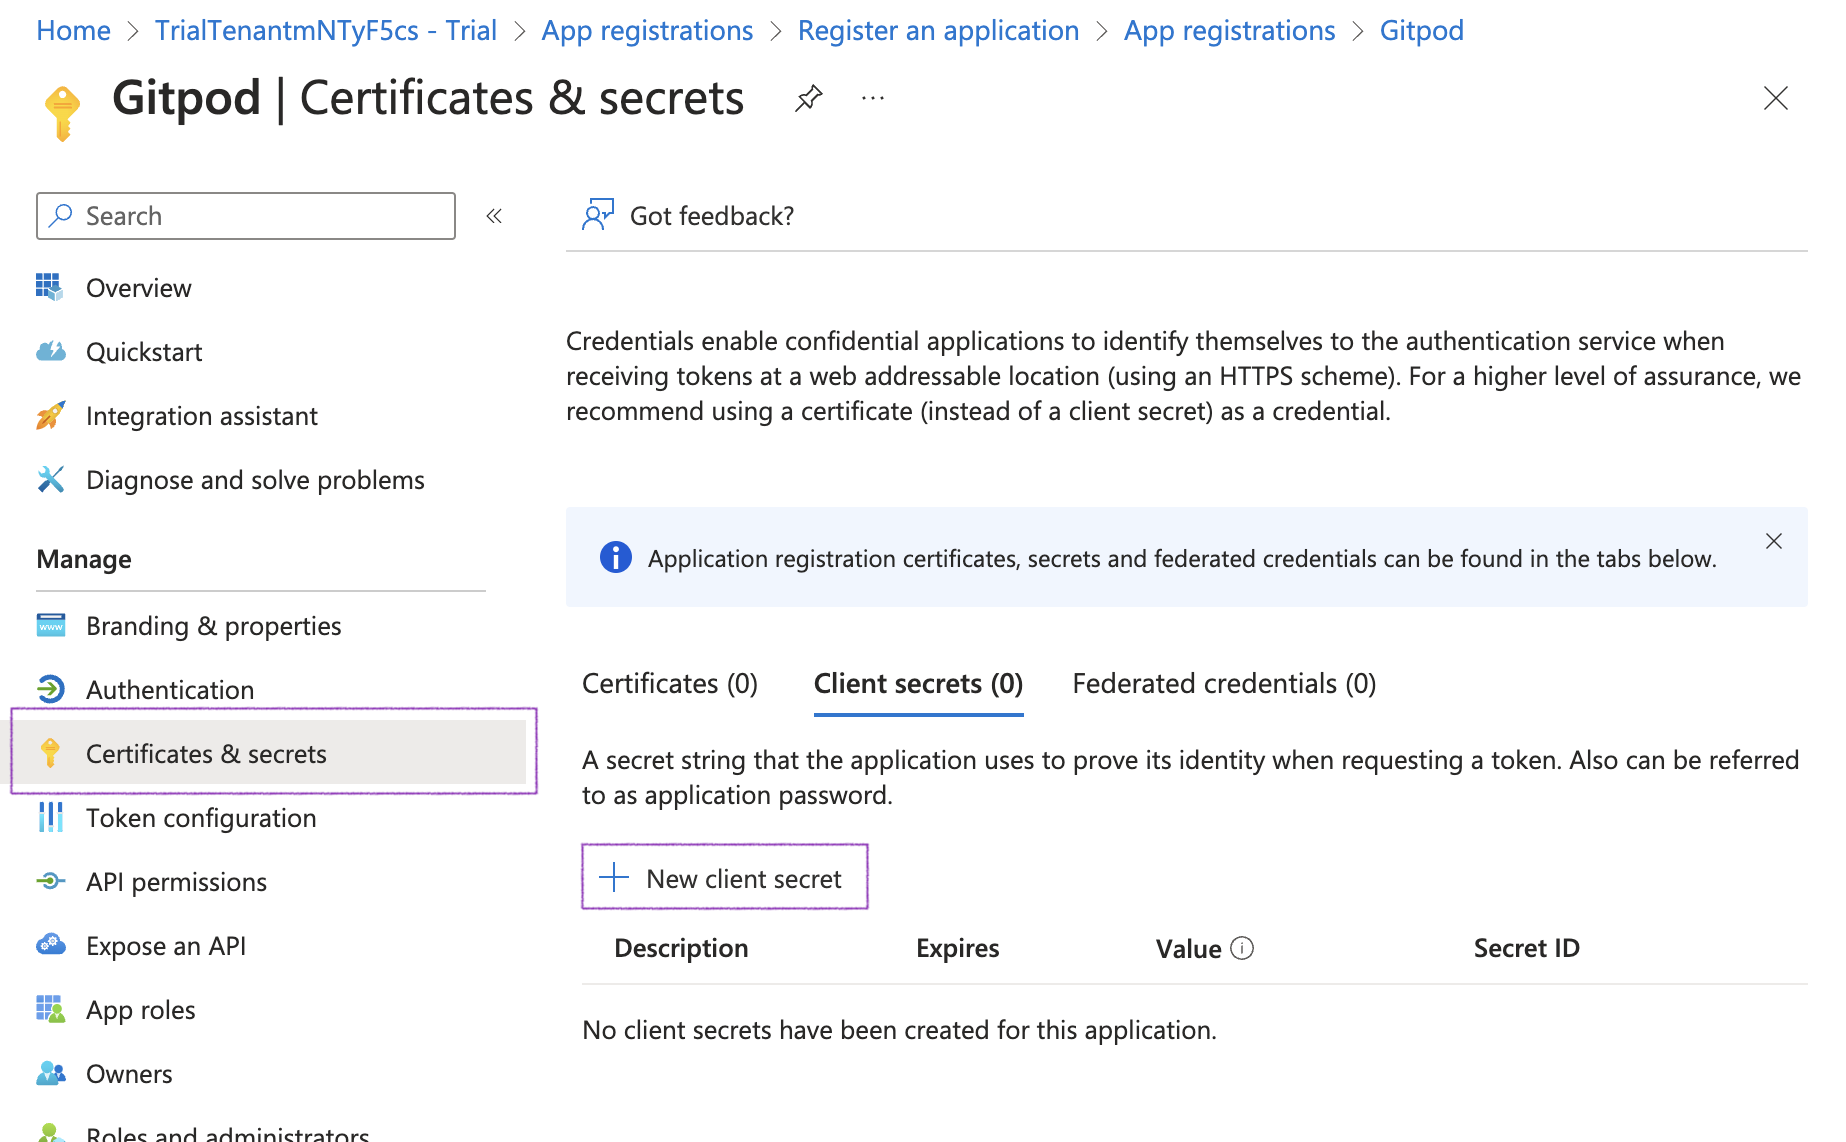
New client secret
-
Adjust the expiry of the client secret
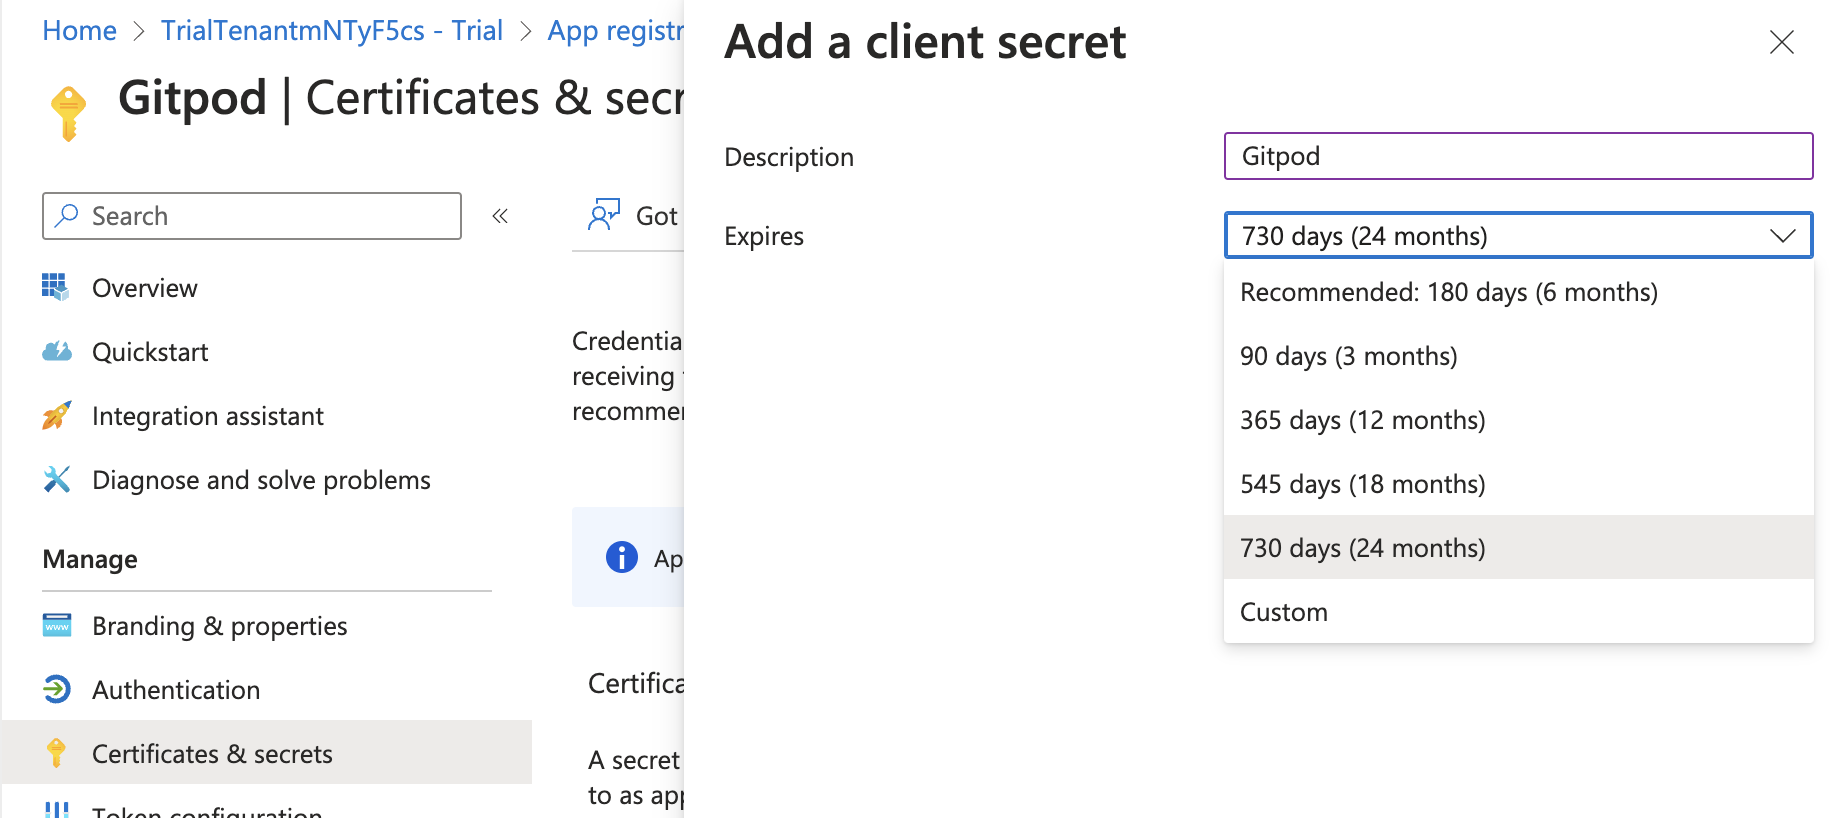
Client secret expiry
-
Then copy the value of the client secret to be pasted in Gitpod’s SSO setup
Client secret expiry
-
-
-
Configure OIDC Scopes
-
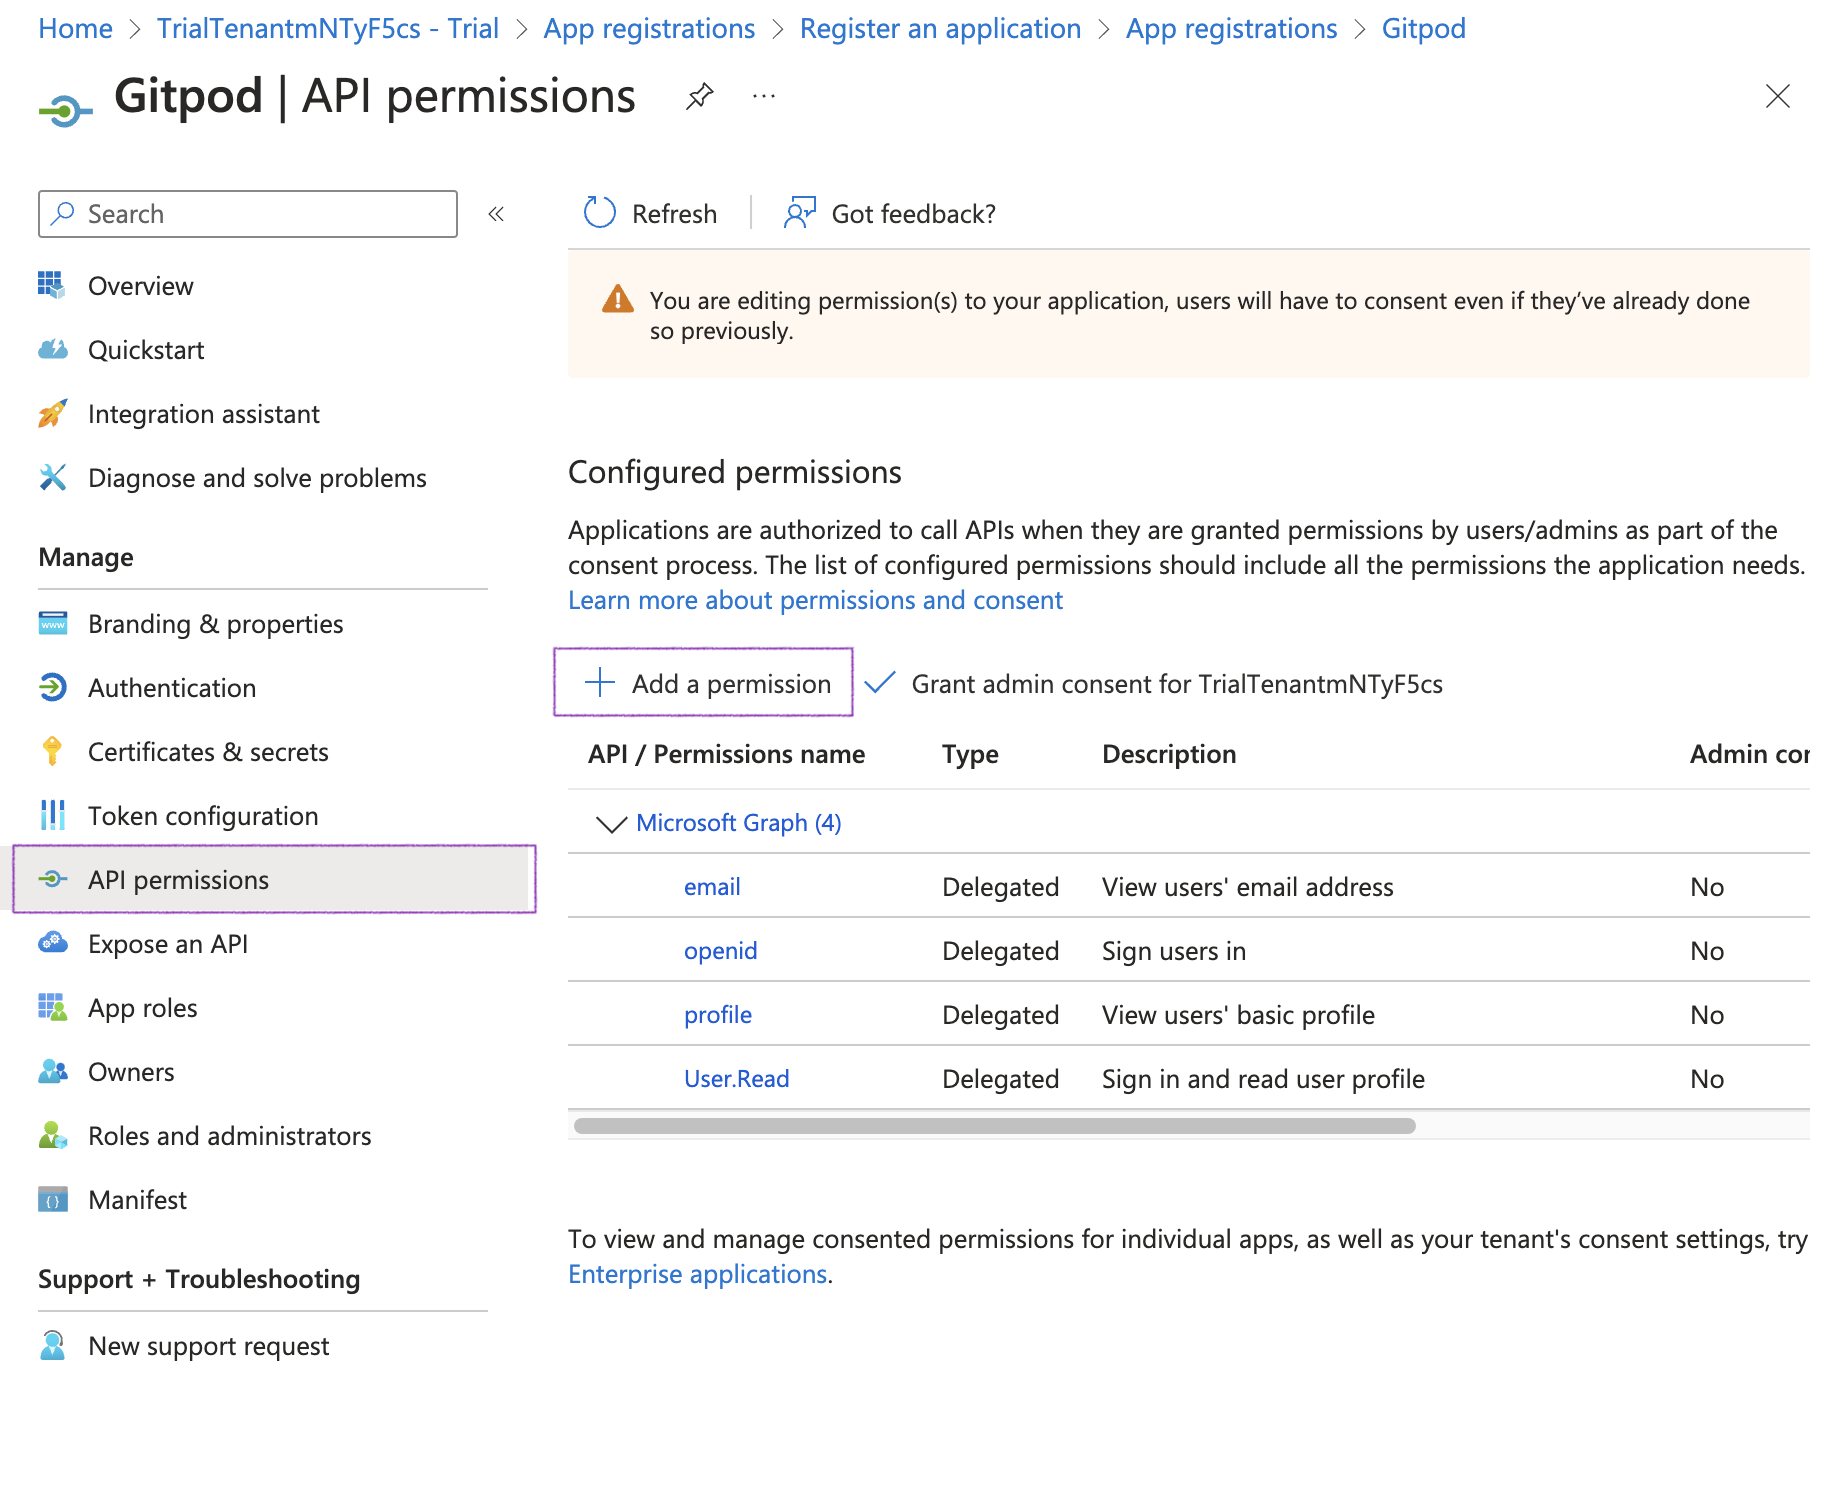
The default selection of OIDC scopes in Microsoft Entra ID doesn’t meet the requirements for Gitpod. Please navigate to API permissions > Add a permission to make the necessary changes.
Add a permission
-
Select Delegated permissions and OpenId, then ensure to enable the following scopes:
-
email -
openid -
profile -
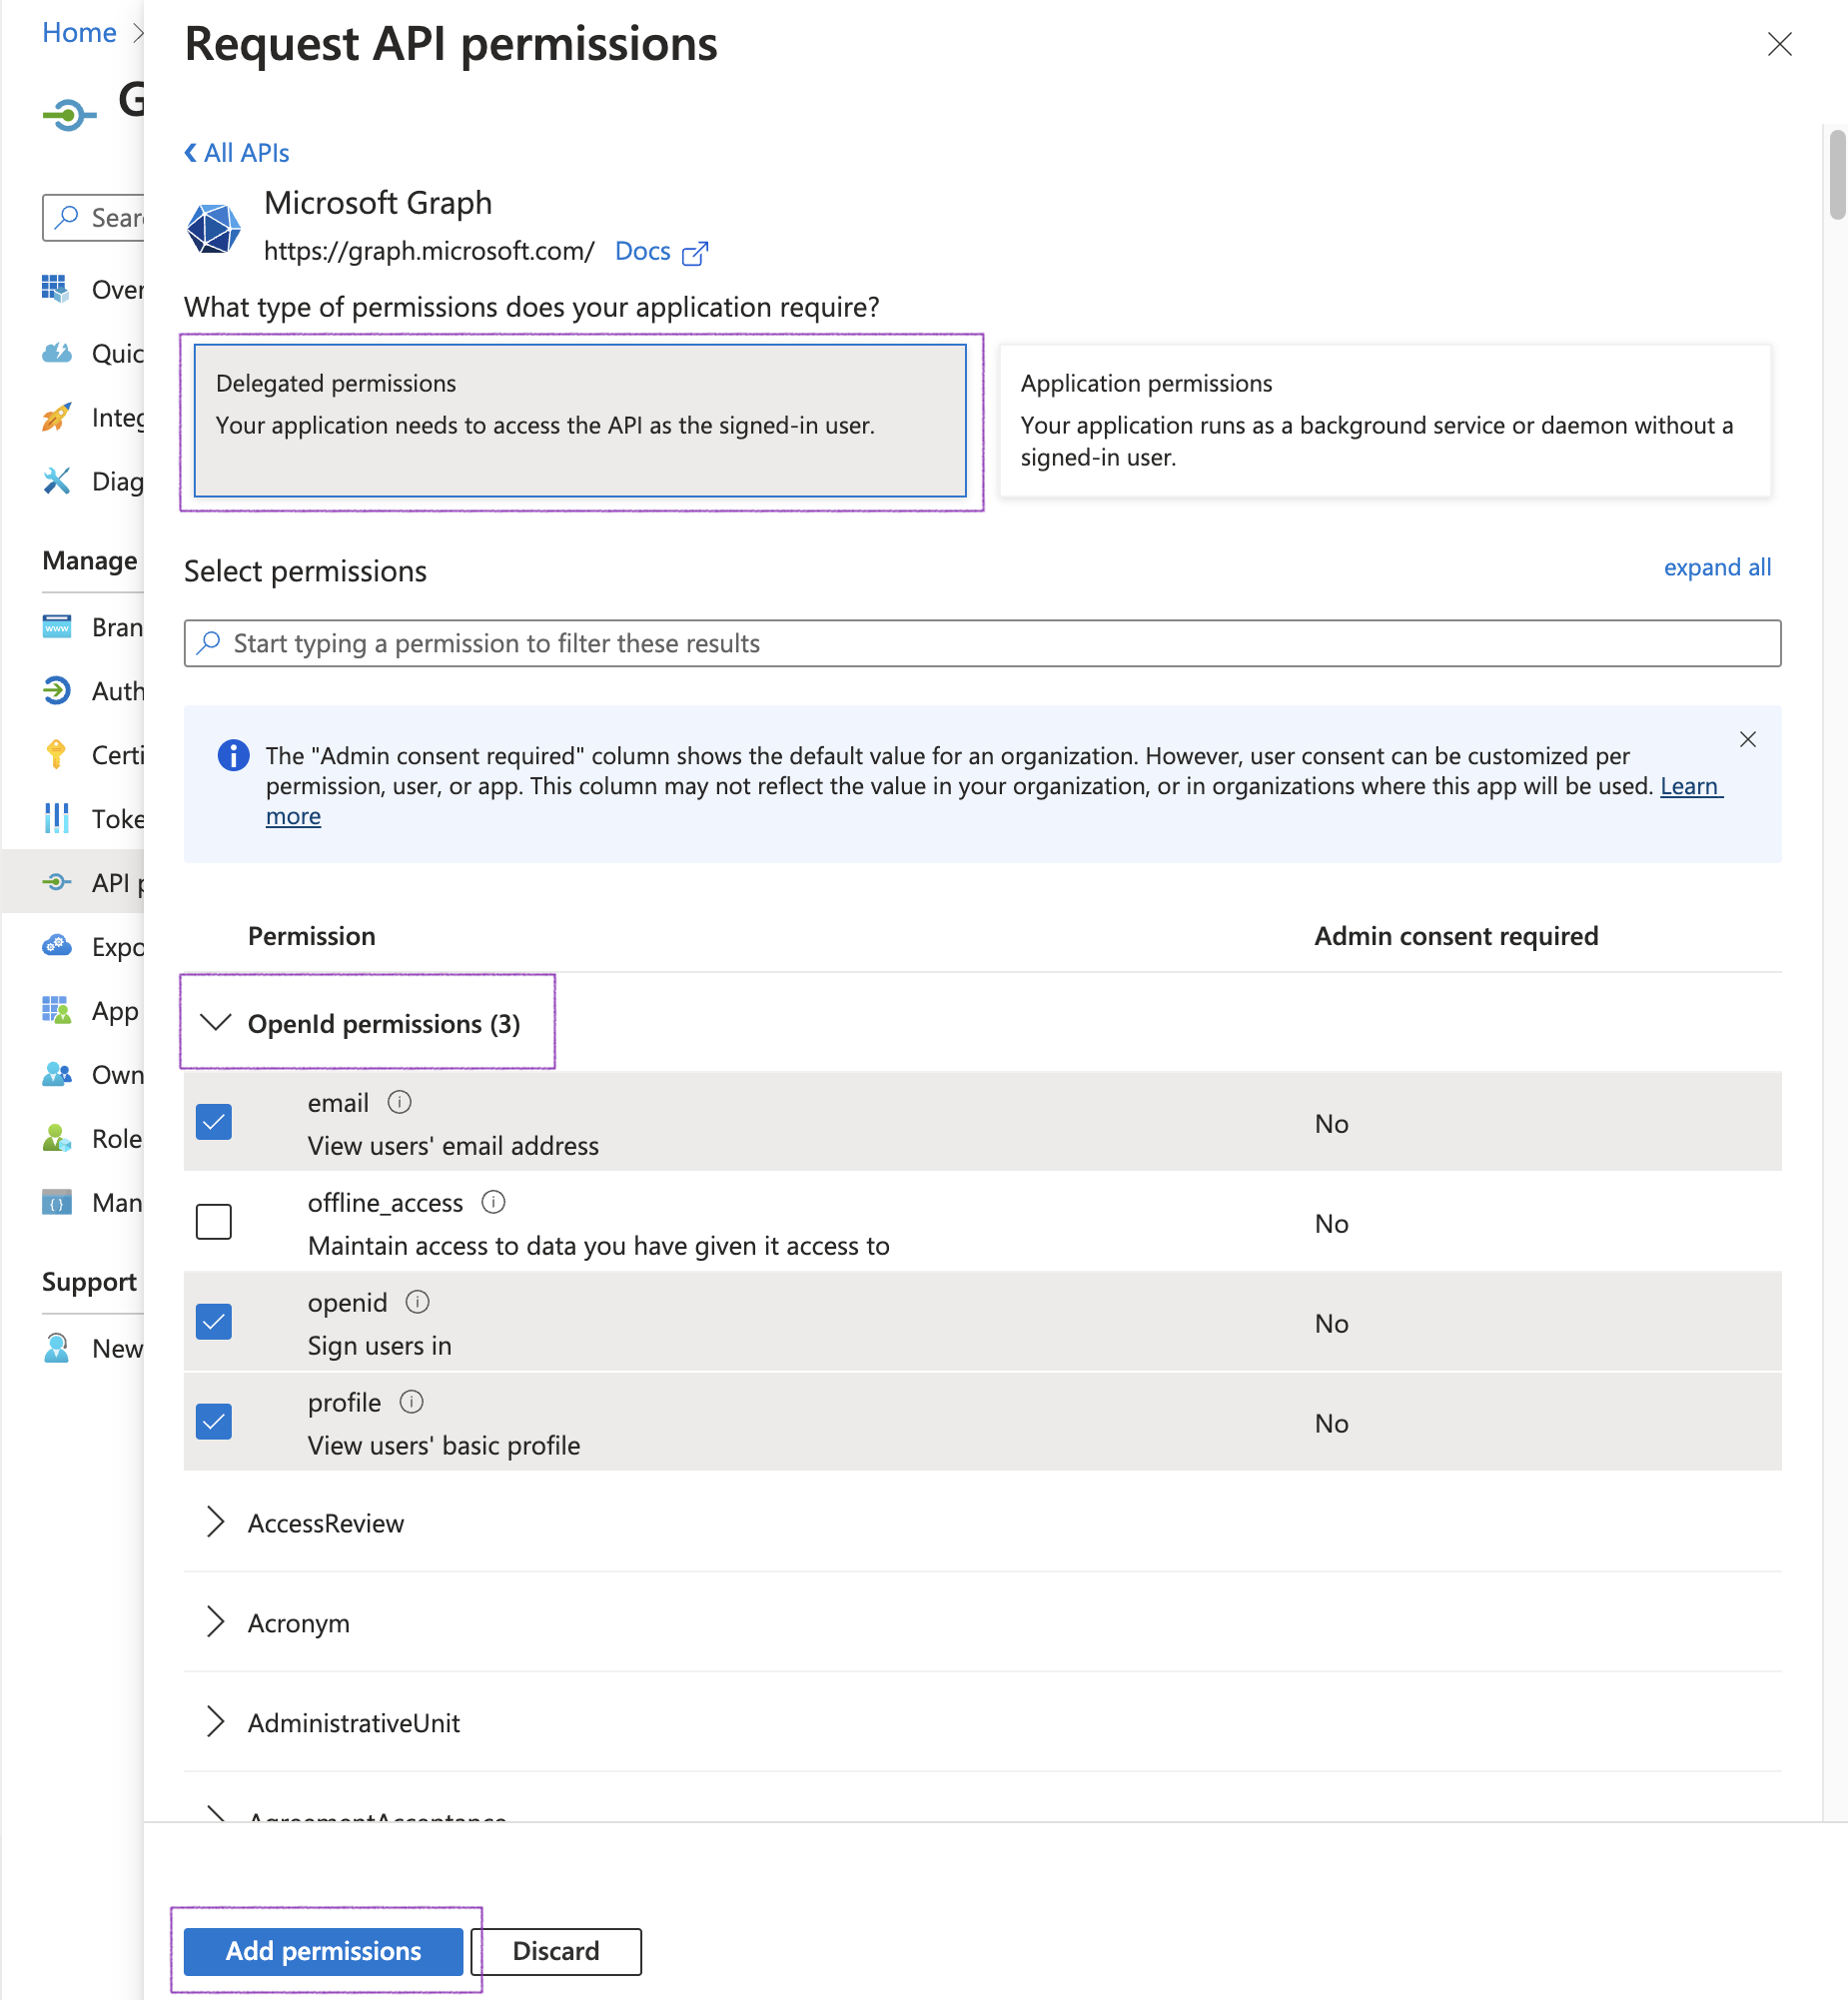
OpenID Scopes
-
-
-
Although the
emailclaim is part of the standard OIDC specification, depending on the setup, Microsoft Entra ID does not include it by default in ID tokens. Under Manage, select Token configuration and fix this:-
Click Add optional claim
-
Add the
emailscope -

Add email scope
-
-
-
Obtain Issuer URL from Endpoints tab
-
Navigate to the Overview page and select Endpoints
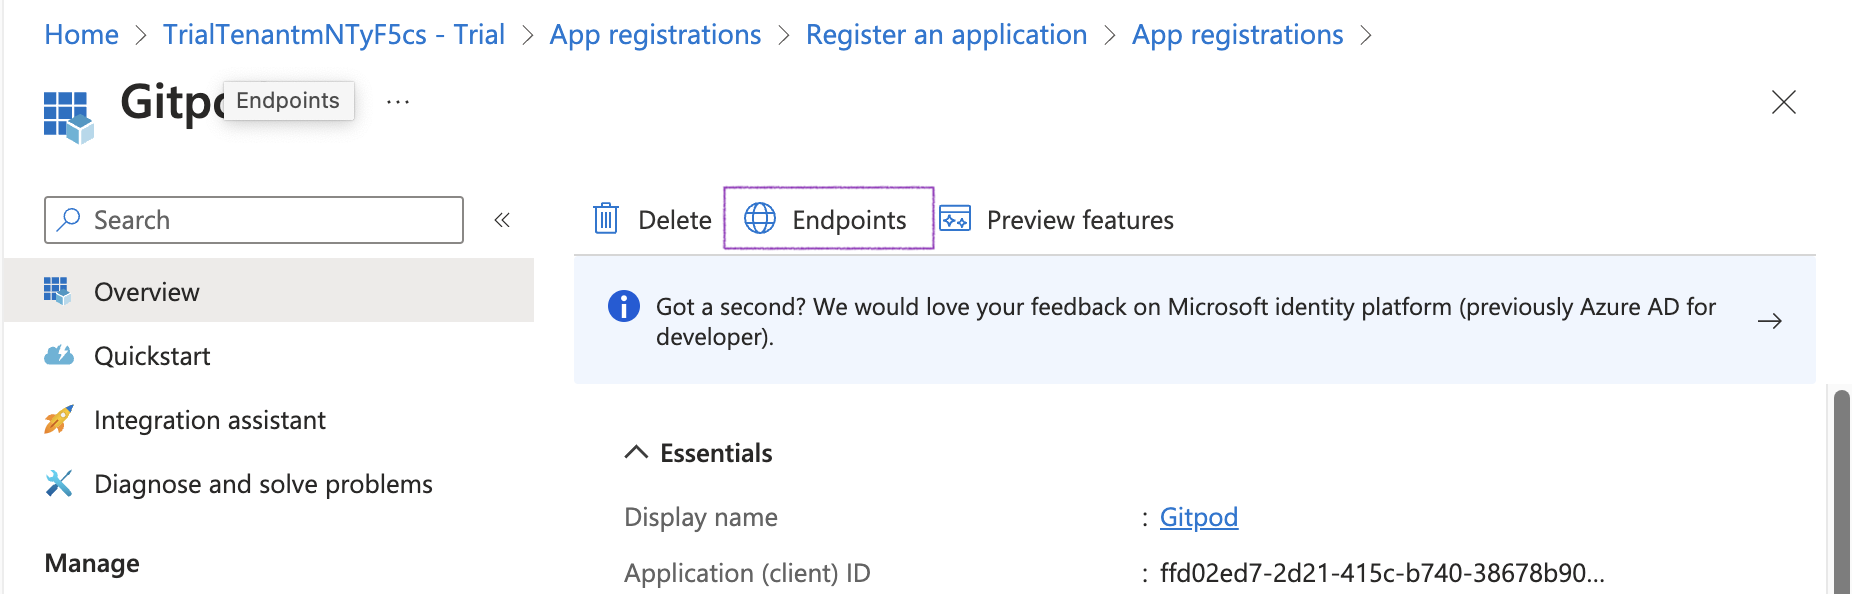
Endpoints tag
-
Copy the Authority URL to be used as Issuer URL in Gitpod’s SSO setup
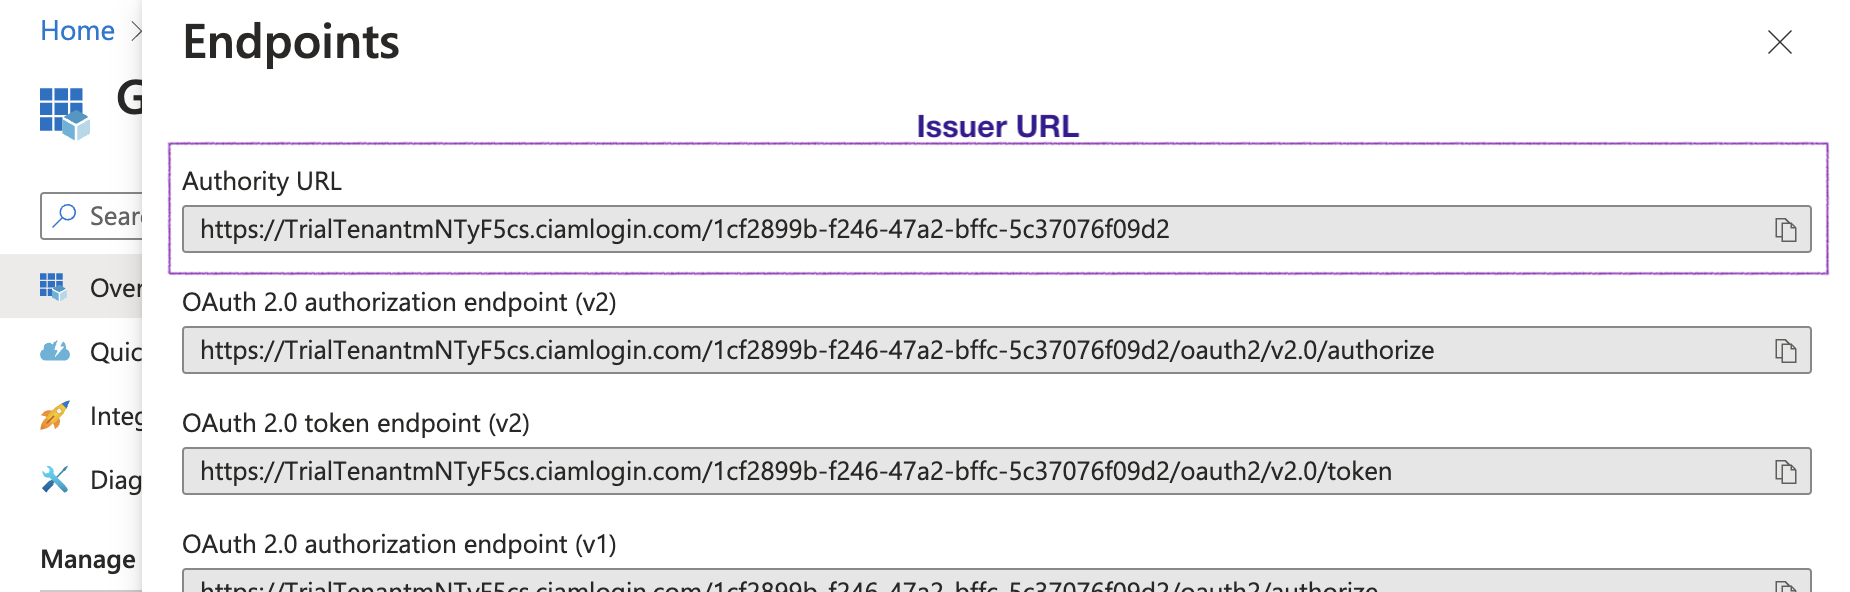
Endpoints tag
Note: Validate the Issuer URL by checking the OIDC Discovery location. In some configurations, the Issuer URL needs to be adjusted.
-
If the Authority URL reads like
https://login.microsoftonline.com/{tenant}/v2.0, the OIDC Discovery location ishttps://login.microsoftonline.com/{tenant}/v2.0/.well-known/openid-configuration. Open this URL in your browser and check theissuerfield. -
Check the
issuerfield in the OIDC Discovery output and ensure this matches the Authority URL (Issuer URL). If not, e.g. if it reads likehttps://sts.windows.net/{tenant}, please try again with{authority_url}/v2.0/.well-known/openid-configurationand use{authority_url}/v2.0as Issuer URL in Gitpod’s SSO setup.
-
-
-
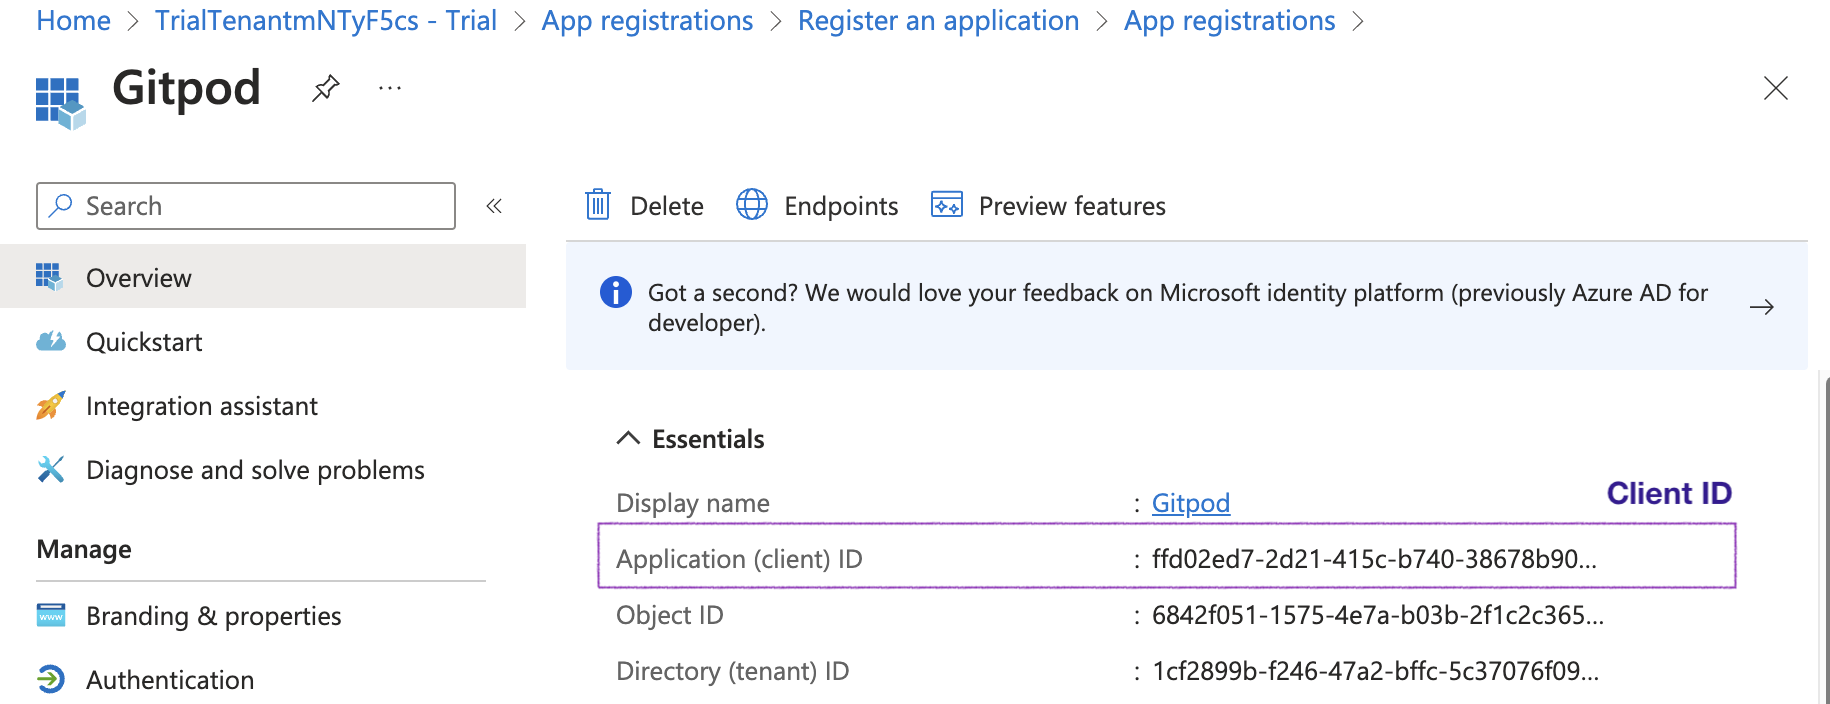
Obtain the Client ID from the Overview page
-
Navigate to the Overview page and copy the Application (client) ID value to be used as Client ID in Gitpod’s SSO setup
Client ID
-
-
Continue with the SSO configuration in Gitpod: Clicking Save & Test