Single Sign-on
Overview
Single Sign-on for your organization in Gitpod
This section helps you, as an Organization Admin, set up and manage Single Sign-On (SSO) for your team. You’ll learn how to enable SSO, control access, and troubleshoot common issues to keep your team logging in smoothly and securely.

Overview
Single Sign-On (SSO) lets your team log in to your organization using their existing session with an external Identity Provider (IdP), such as Okta or Azure AD, through OpenID Connect (OIDC). This simplifies user authentication, enhances security, and streamlines access management across your organization.Setup Single Sign-on for the organization
Prerequisites
This is what you will need to have in order to enable SSO:- Admin-level access to your organization settings.
- Domain/DNS admin privileges so you can add a DNS TXT record. This TXT record is used by Gitpod to verify ownership of the domain associated with your organization.
-
Access to an Identity Provider (e.g. Google, Gitlab, Okta, Microsoft Entra ID) that supports OpenID Connect (OIDC).
- You’ll need to create an OIDC application with your Identity Provider and obtain the Client ID, Client Secret, and Issuer URL.
Step-by-step guide to set up SSO
To begin setting up Single Sign-On, navigate to Organization Settings and choose Log in and security from the left-hand menu. Next, click on the Setup button.Log in and security
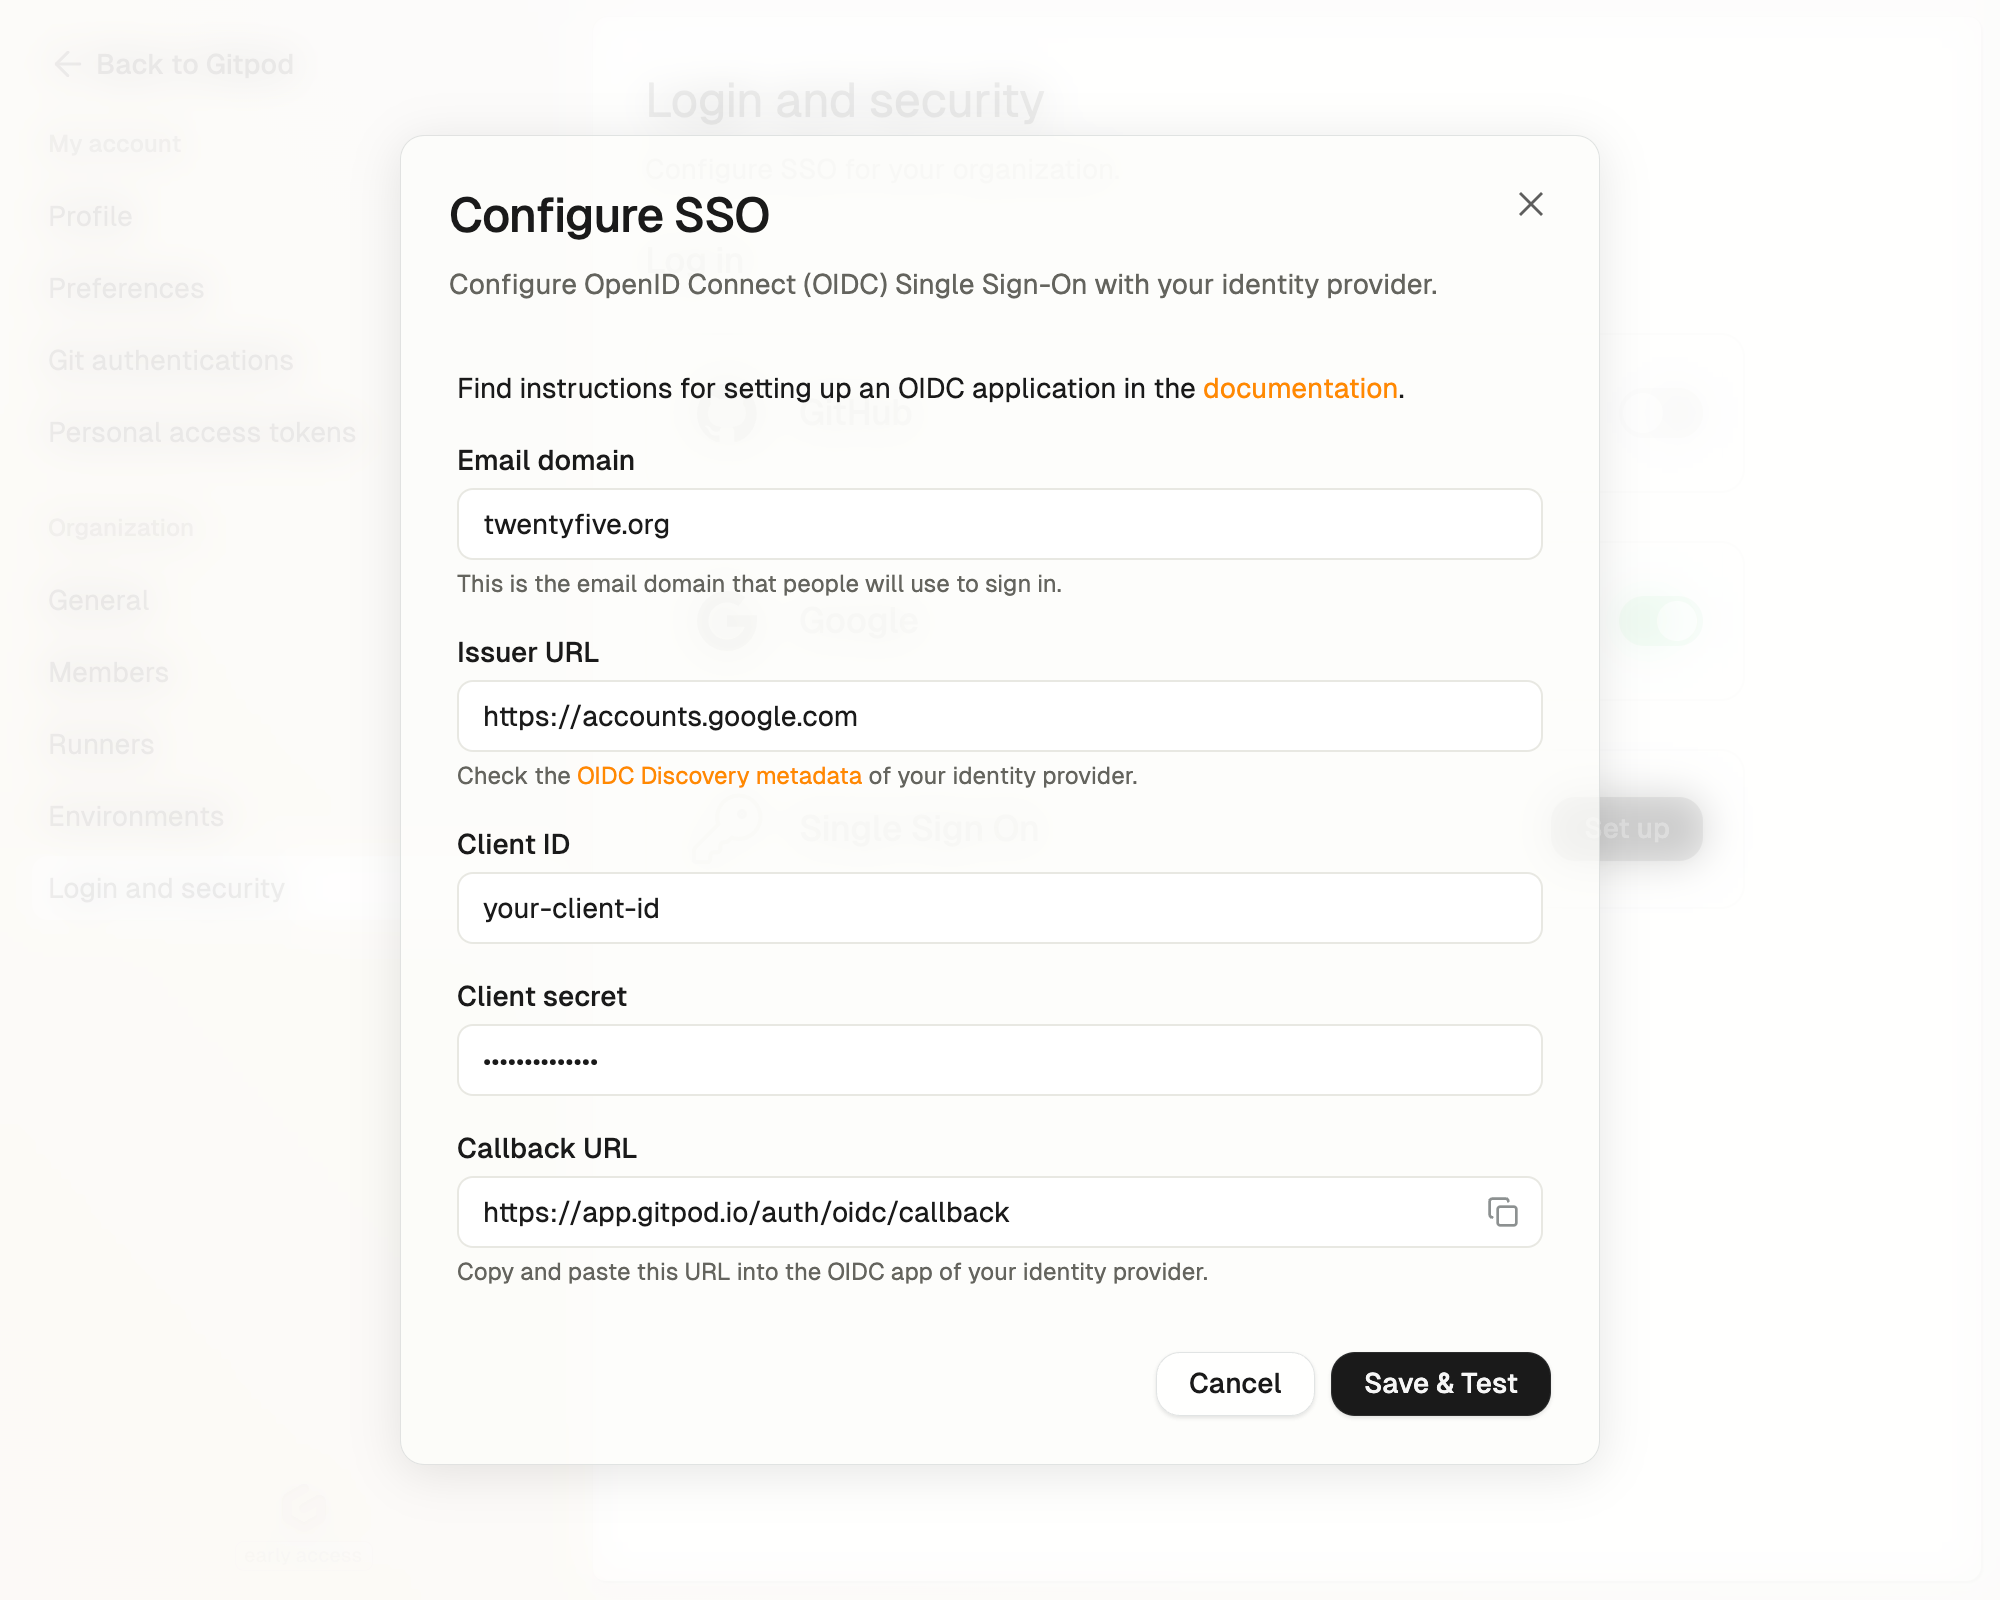
Step 1. Configure SSO
Let’s first configure how Gitpod will connect with your Identity Provider. Enter your organization’s email domain. This is important because your team members will use their email addresses from this domain when they sign in. Now, it’s time to set up the connection with your Identity Provider. We’ve created detailed guides for the most popular providers to make this easier for you: After following the guide for your provider, you’ll need three important pieces of information to complete the form:- Client ID: The identifier for your OIDC application.
- Client Secret: Secret key for authenticating with the IdP.
- Issuer URL: Endpoint of the OIDC server.
Setup SSO
Testing your configuration
Before rolling this out to your team, let’s make sure everything is working properly: Test the OIDC application by clicking Test & Continue- The authentication flow with your Identity Provider should open in a new browser window.
-
Please verify the authentication flow works for you before inviting your team to use the SSO login.
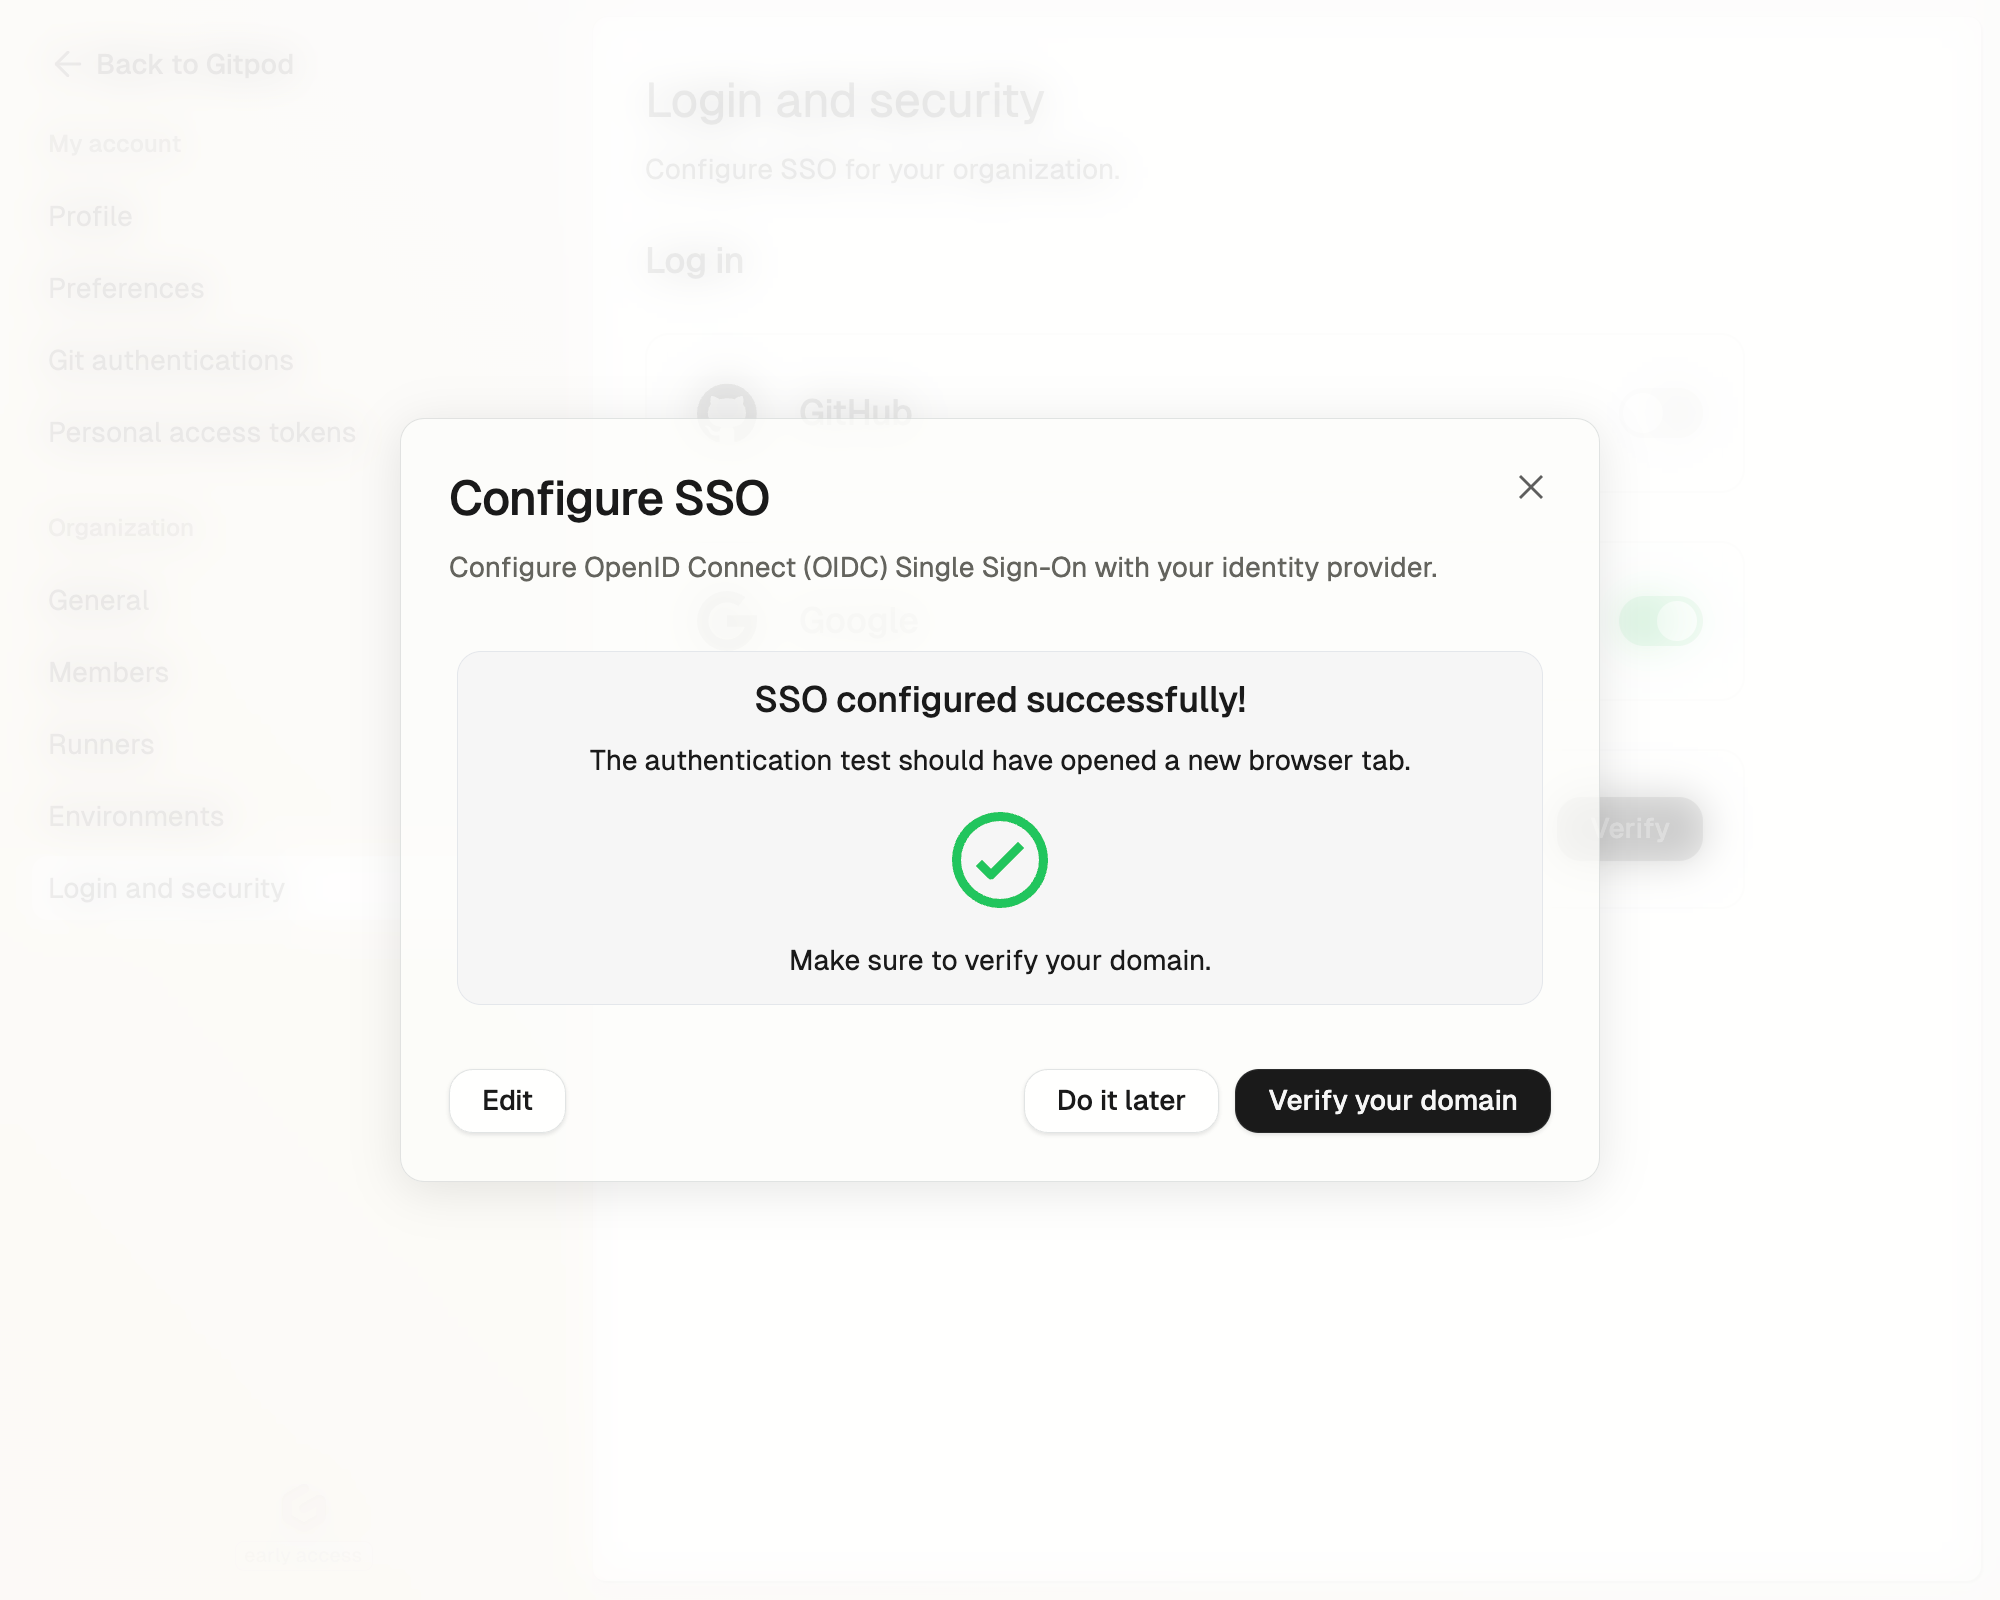
Test the OIDC application
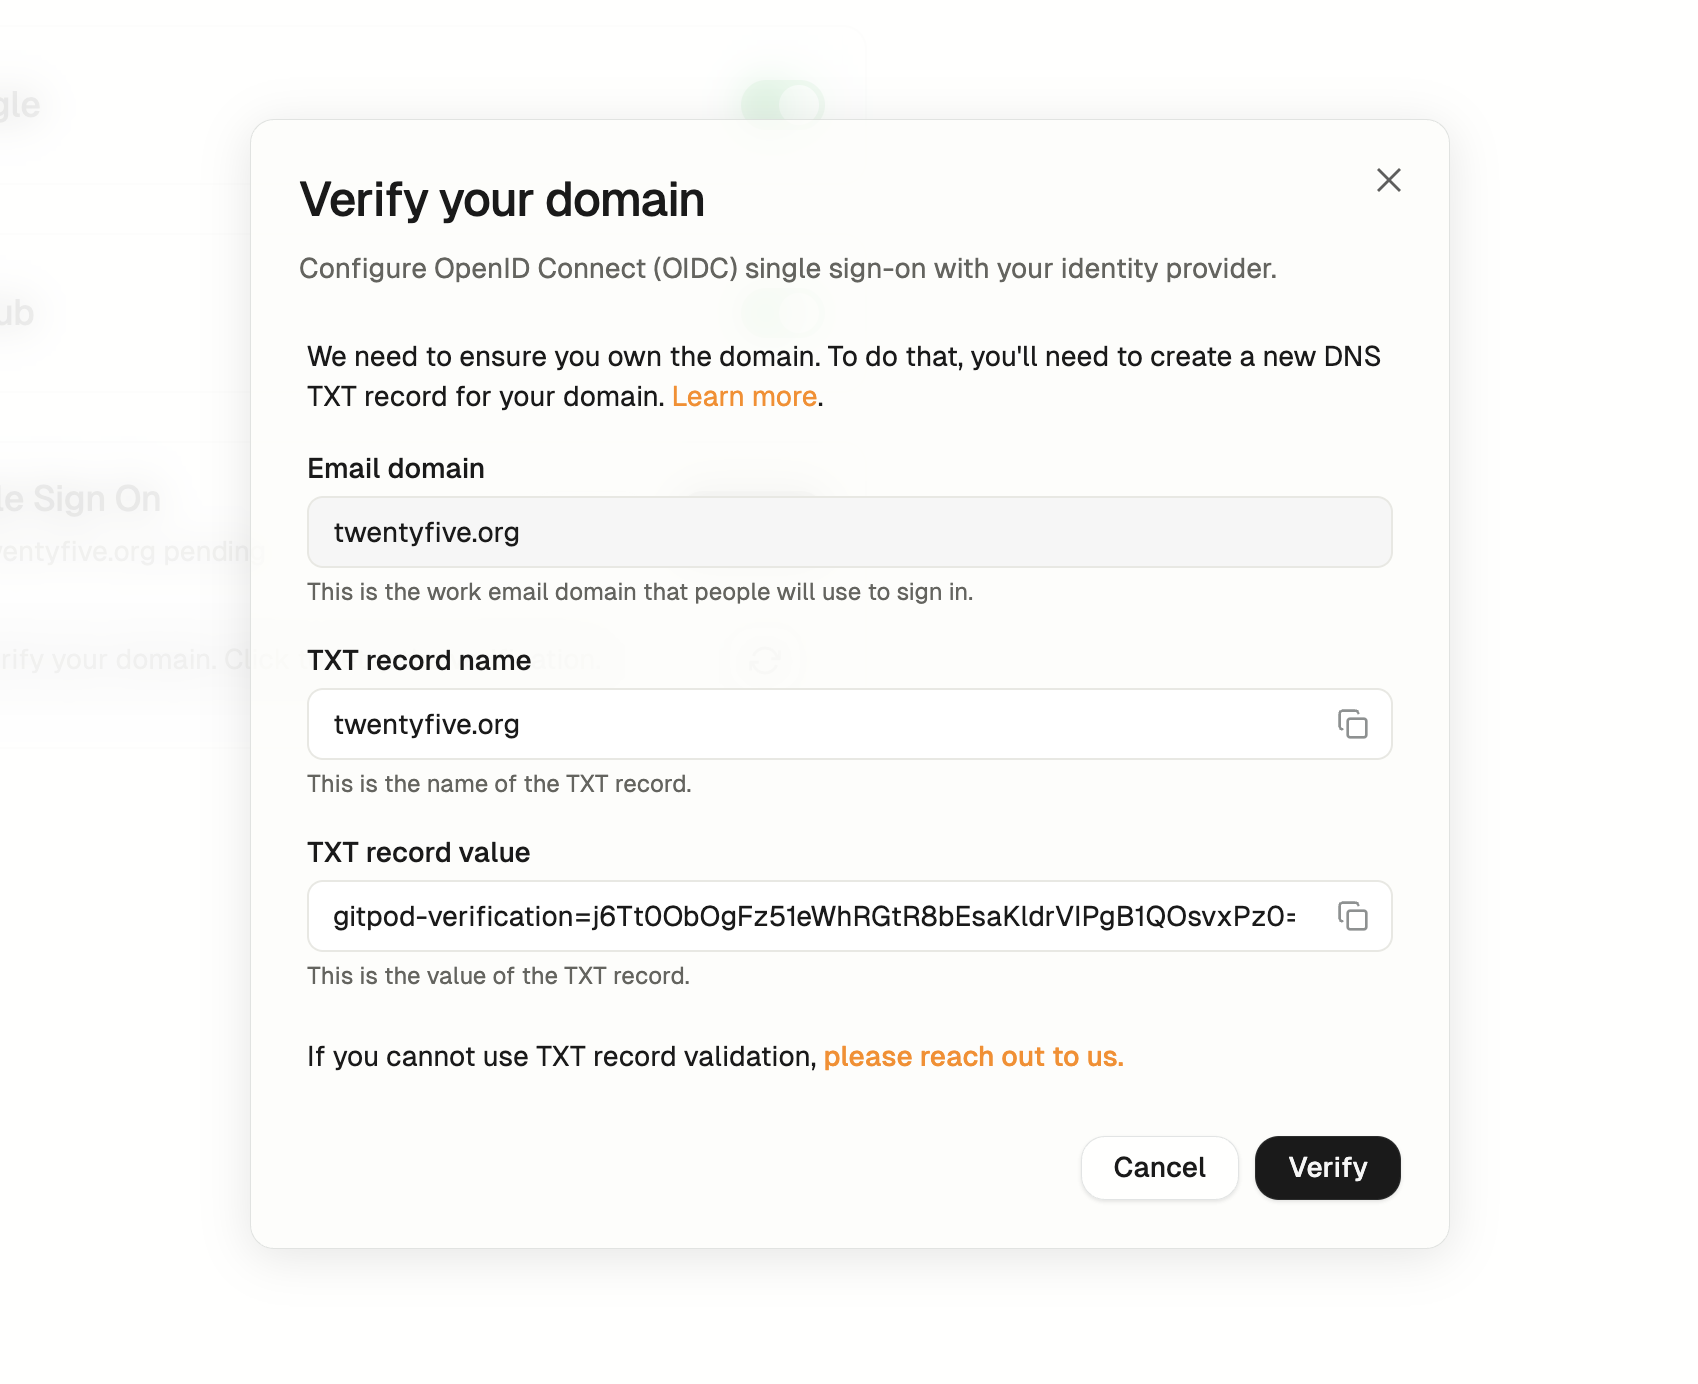
Step 2. Verify your domain
In the second step, you’ll need to verify your organization’s email domain. This is done by adding a TXT record to your domain’s DNS settings. Copy the name and value for the TXT record from this view.Verify your domain
Please note that your email domain must be verified before the Sign in with SSO option can be used on the Login screen.
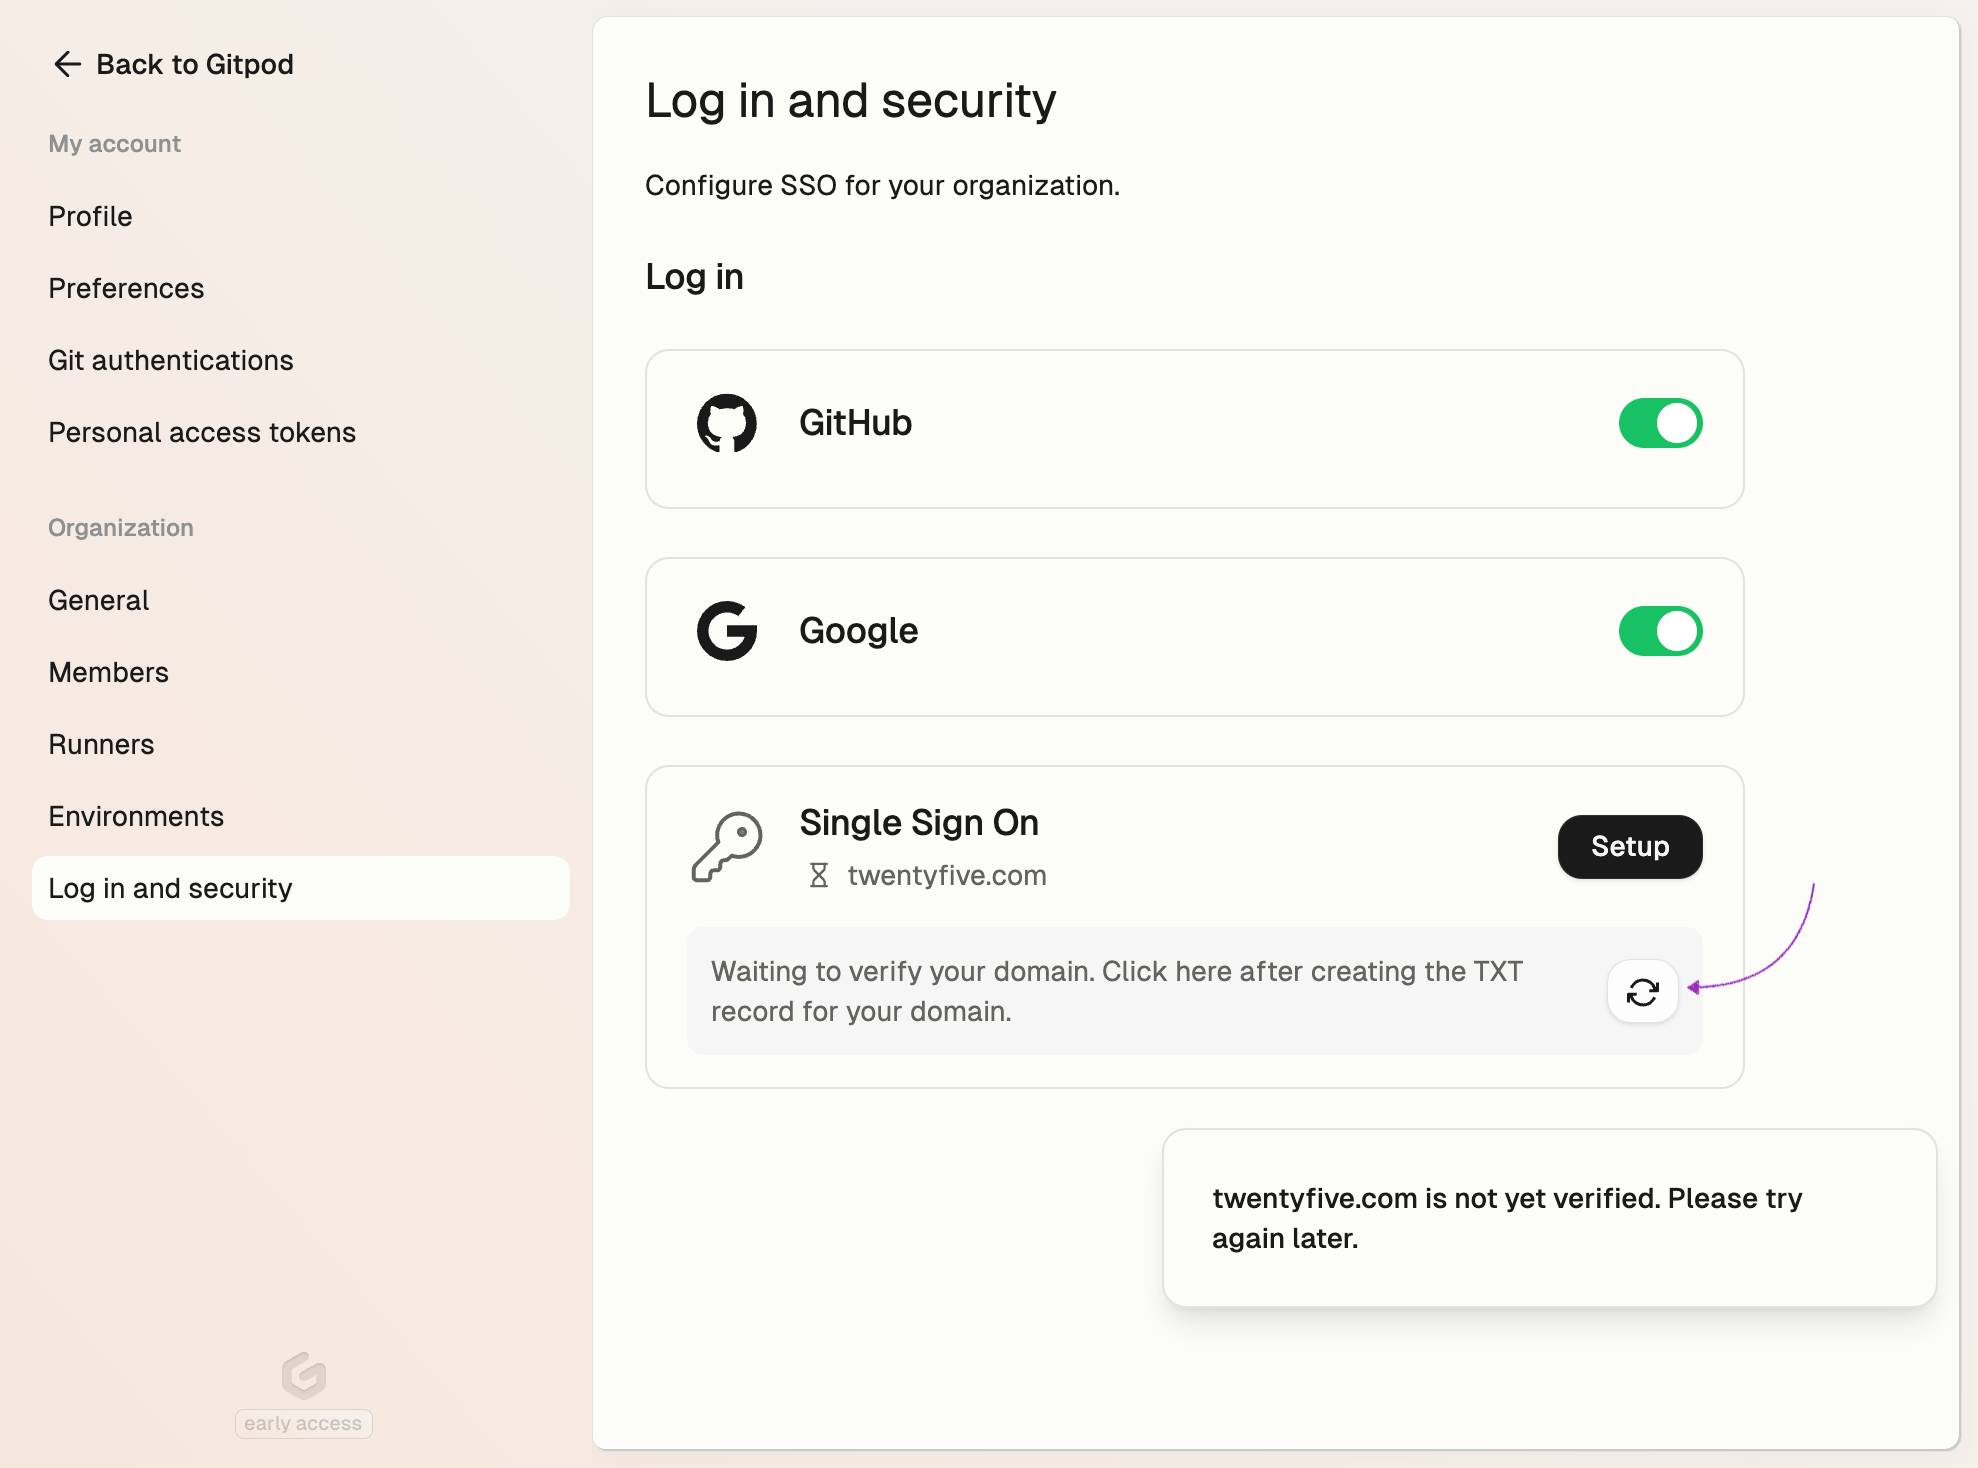
Check the status of your domain
Click Verify to check the status of your domain verification and return to the overview page. A delay in DNS updates is expected, so no worries! You’ll find the verification status on the Log in and security page. Once you’ve added the TXT record for your email domain, simply click the refresh button to update the status.Check domain status
Problems and solutions
While setting up SSO, some issues may arise due to misconfigurations or external factors. These can include problems with your Identity Provider settings, incorrect credentials, or network issues. To help you navigate these challenges, we’ve included an FAQ section below with solutions to common problems.-
Error: The redirect URI included is not valid.
-
Make sure to paste the correct redirect URI into the OIDC application with your Identity Provider, e.g.
https://app.gitpod.io/auth/oidc/callback.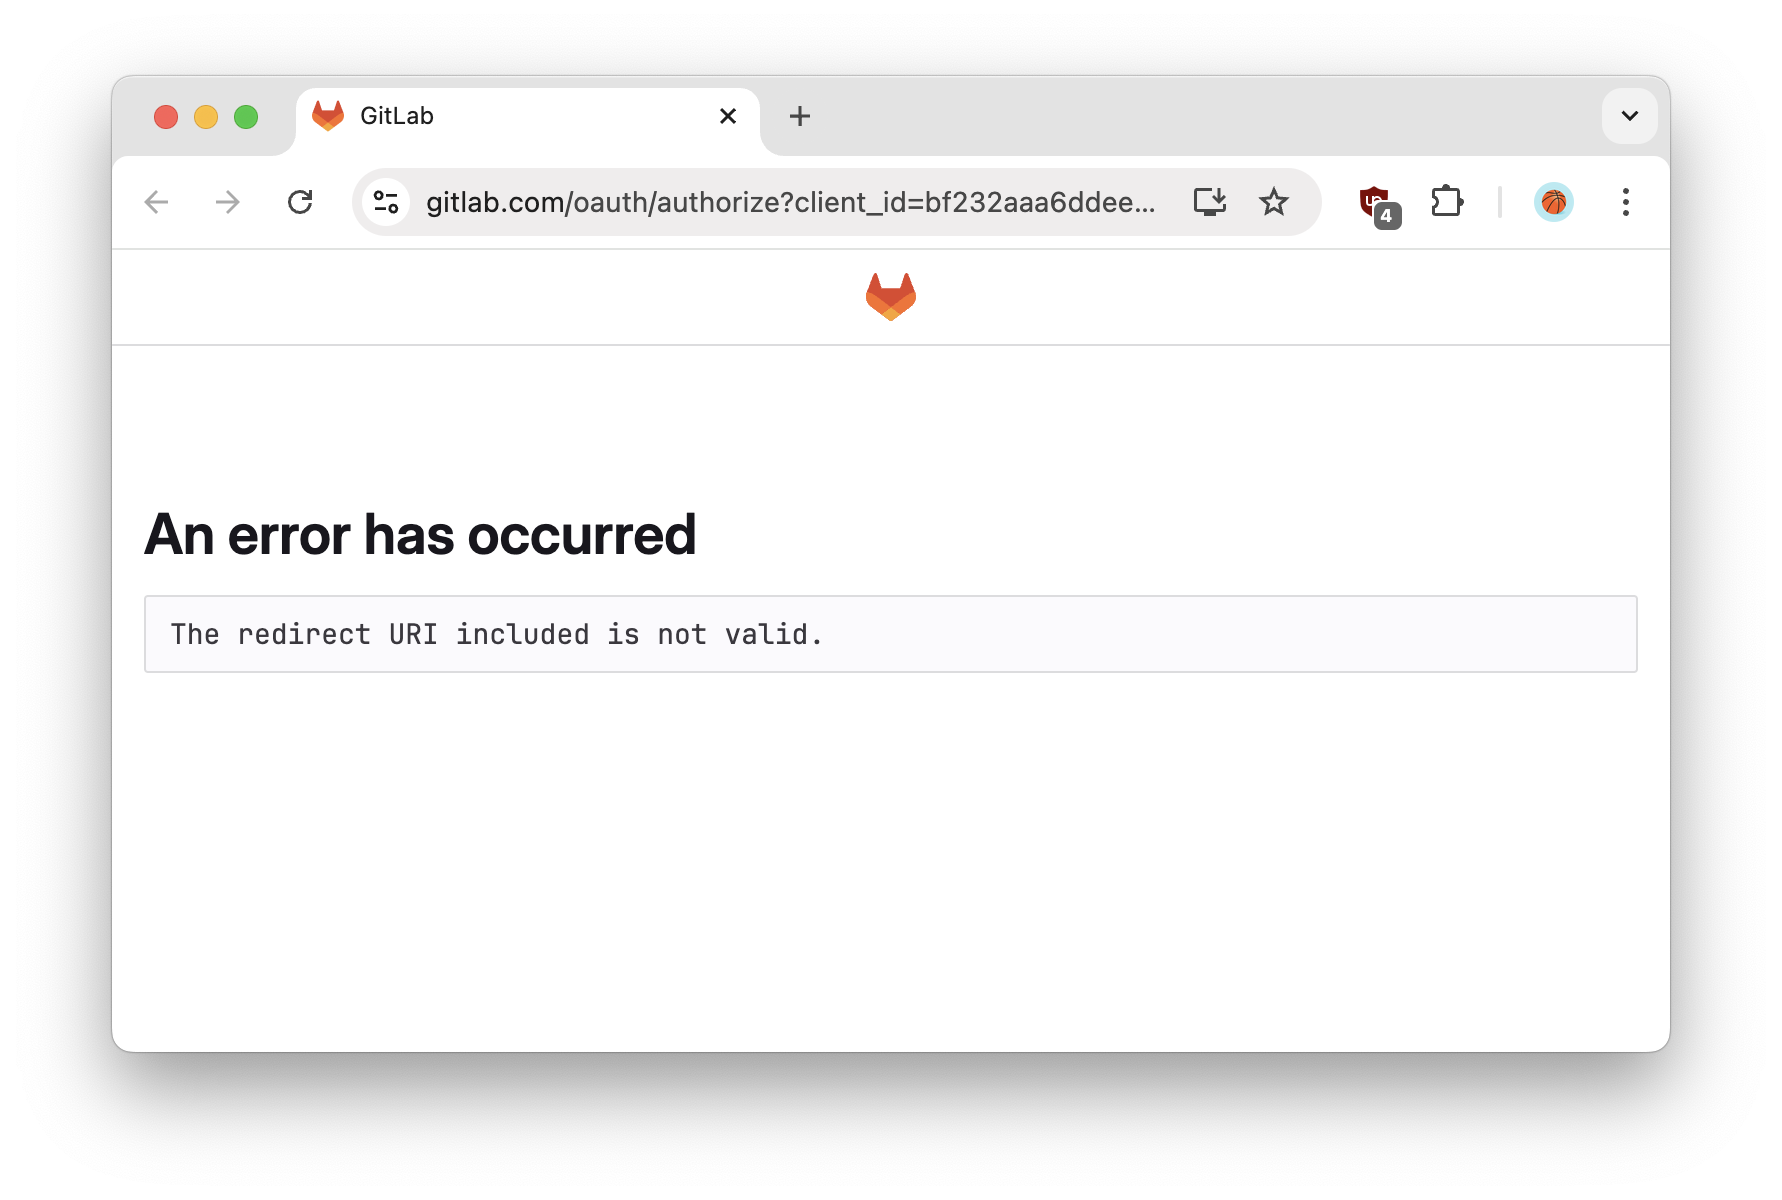
Invite URL error
-
Make sure to paste the correct redirect URI into the OIDC application with your Identity Provider, e.g.
-
Error: no such host
- Make sure to paste the correct Issuer URL, e.g.
https://dev-16686455.okta.com. You can also verify the URL by appending the OIDC Discovery path/.well-known/openid-configurationand open the resulting URL in you browser, e.g.https://dev-16686455.okta.com/.well-known/openid-configuration
- Make sure to paste the correct Issuer URL, e.g.
Log in with Single Sign-on
Use your email address
Once you’ve finished setting up SSO for your organization, you’ll need to log out before heading back to the Login page.-
Click the Continue with SSO button to sign in using your new SSO setup.
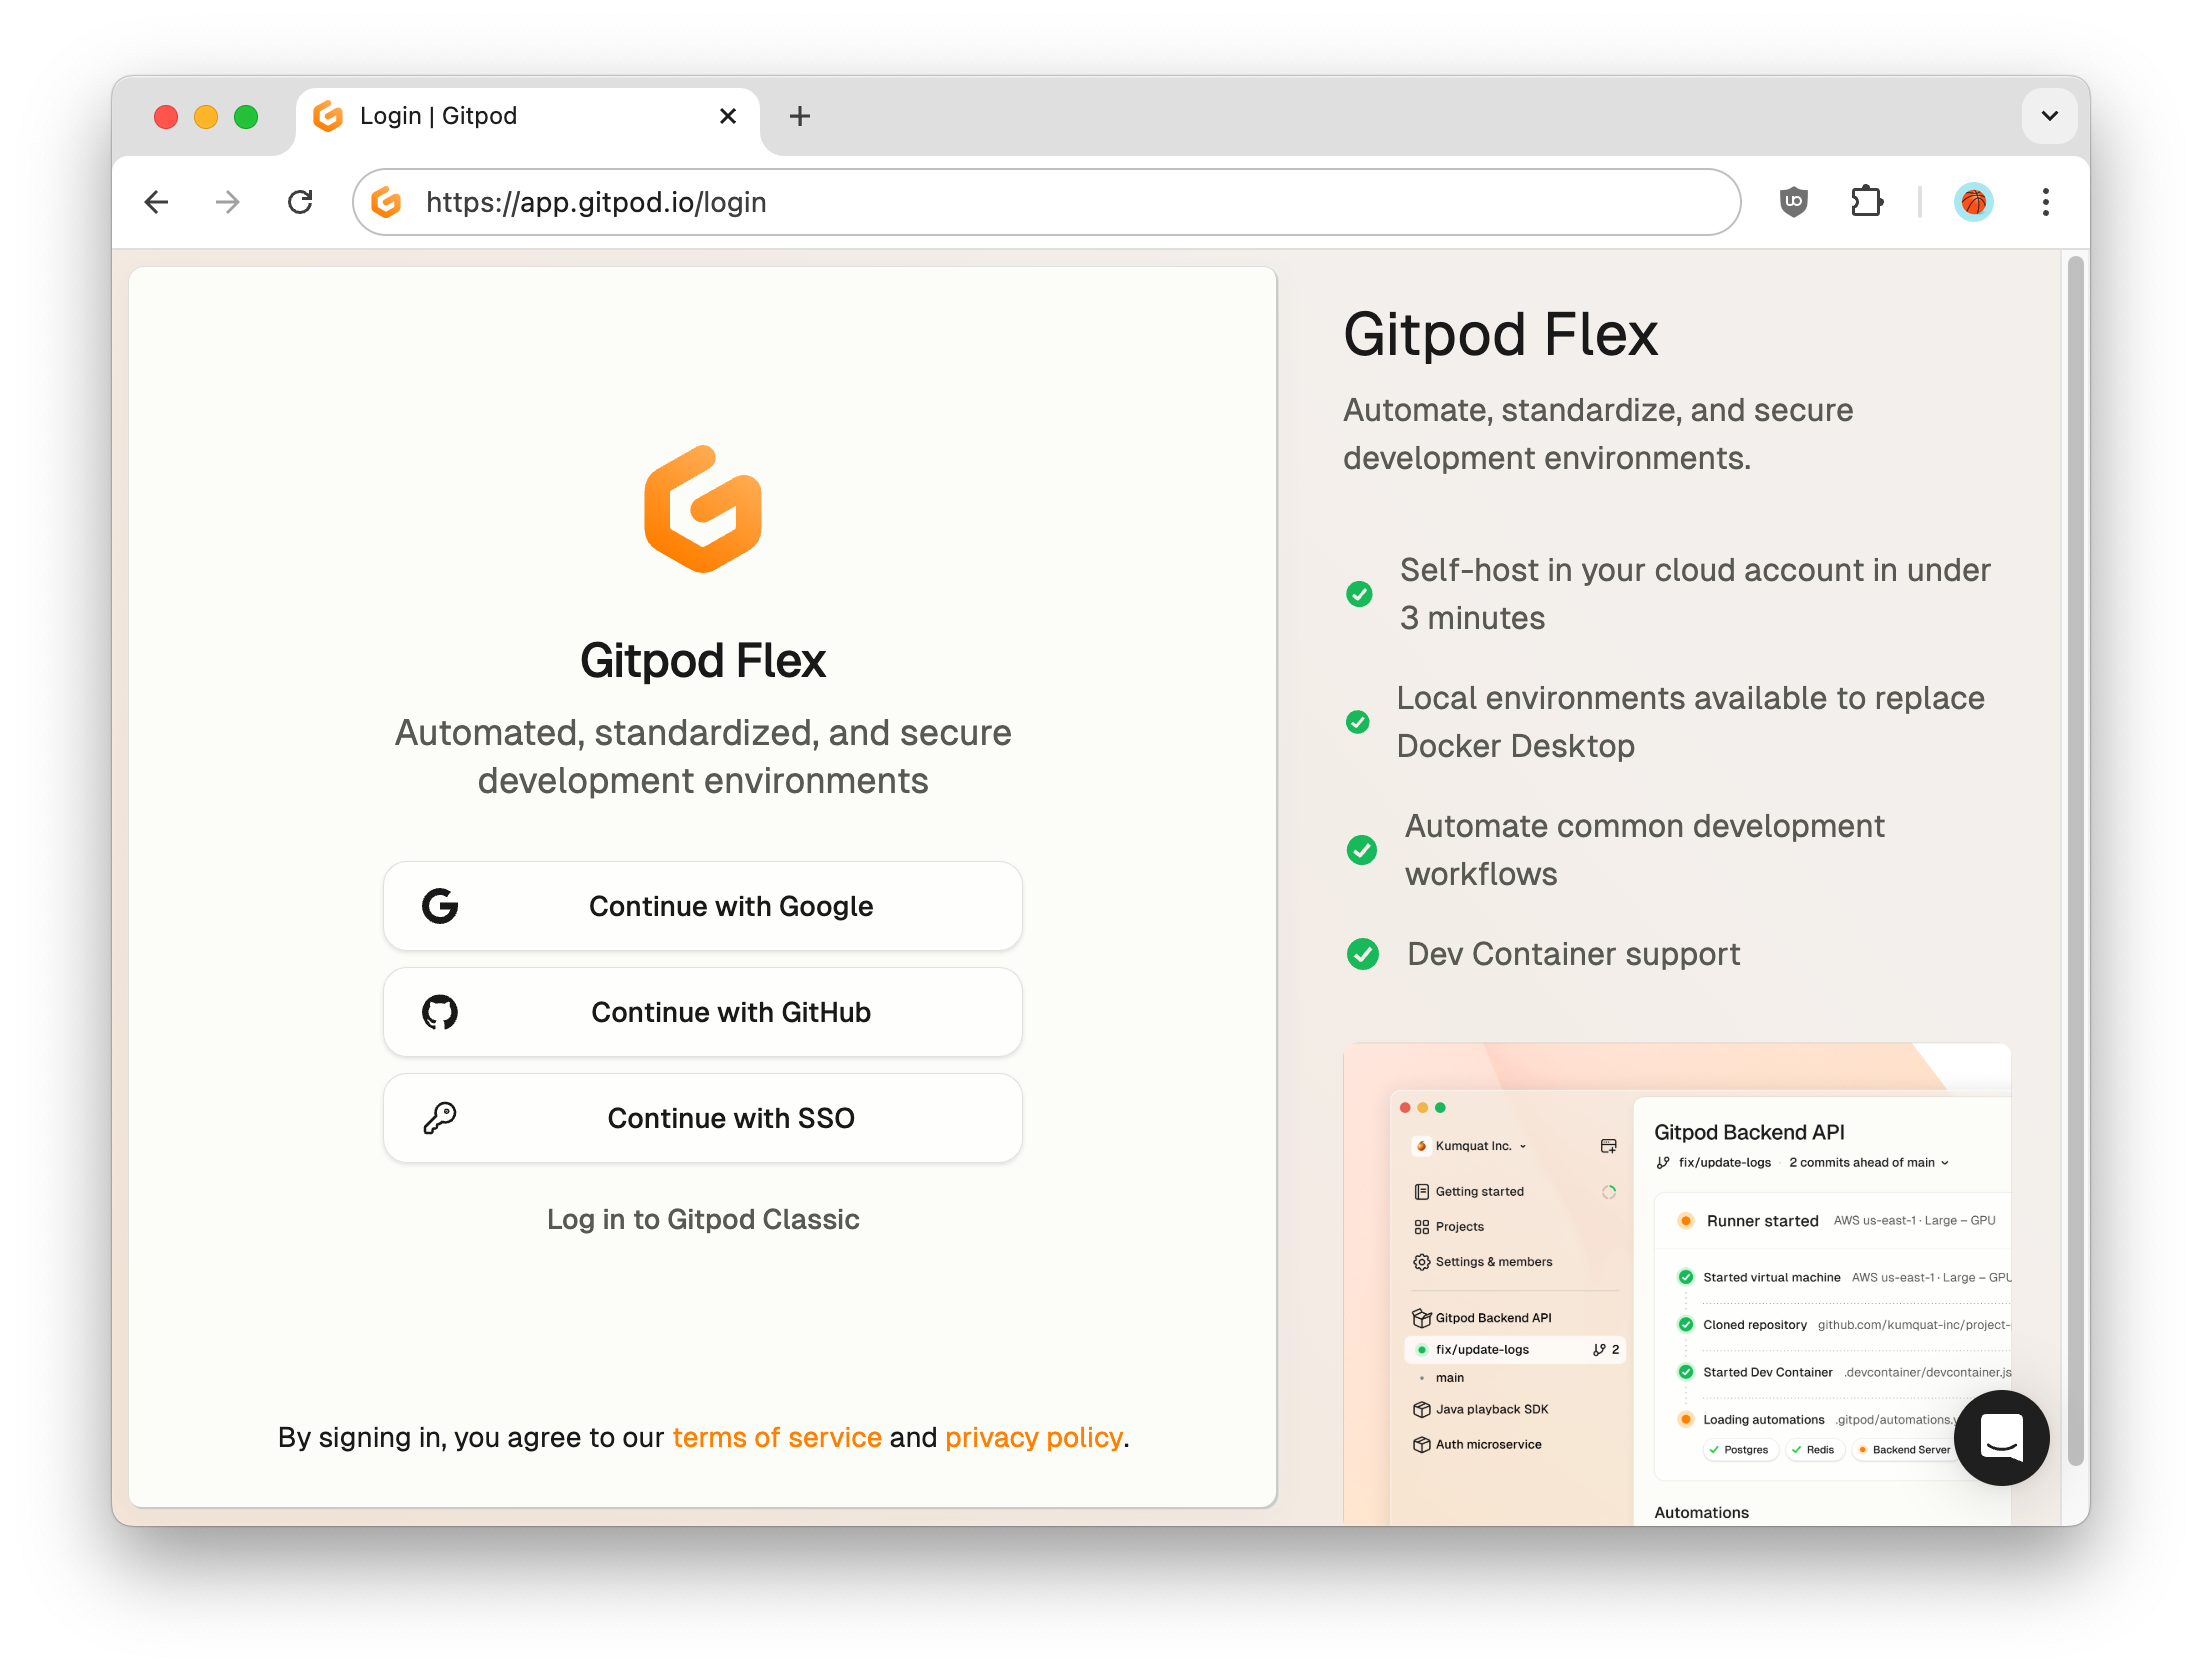
Login page
-
Now enter your email address and click Continue. The domain of your email address must match the domain of your SSO configuration.
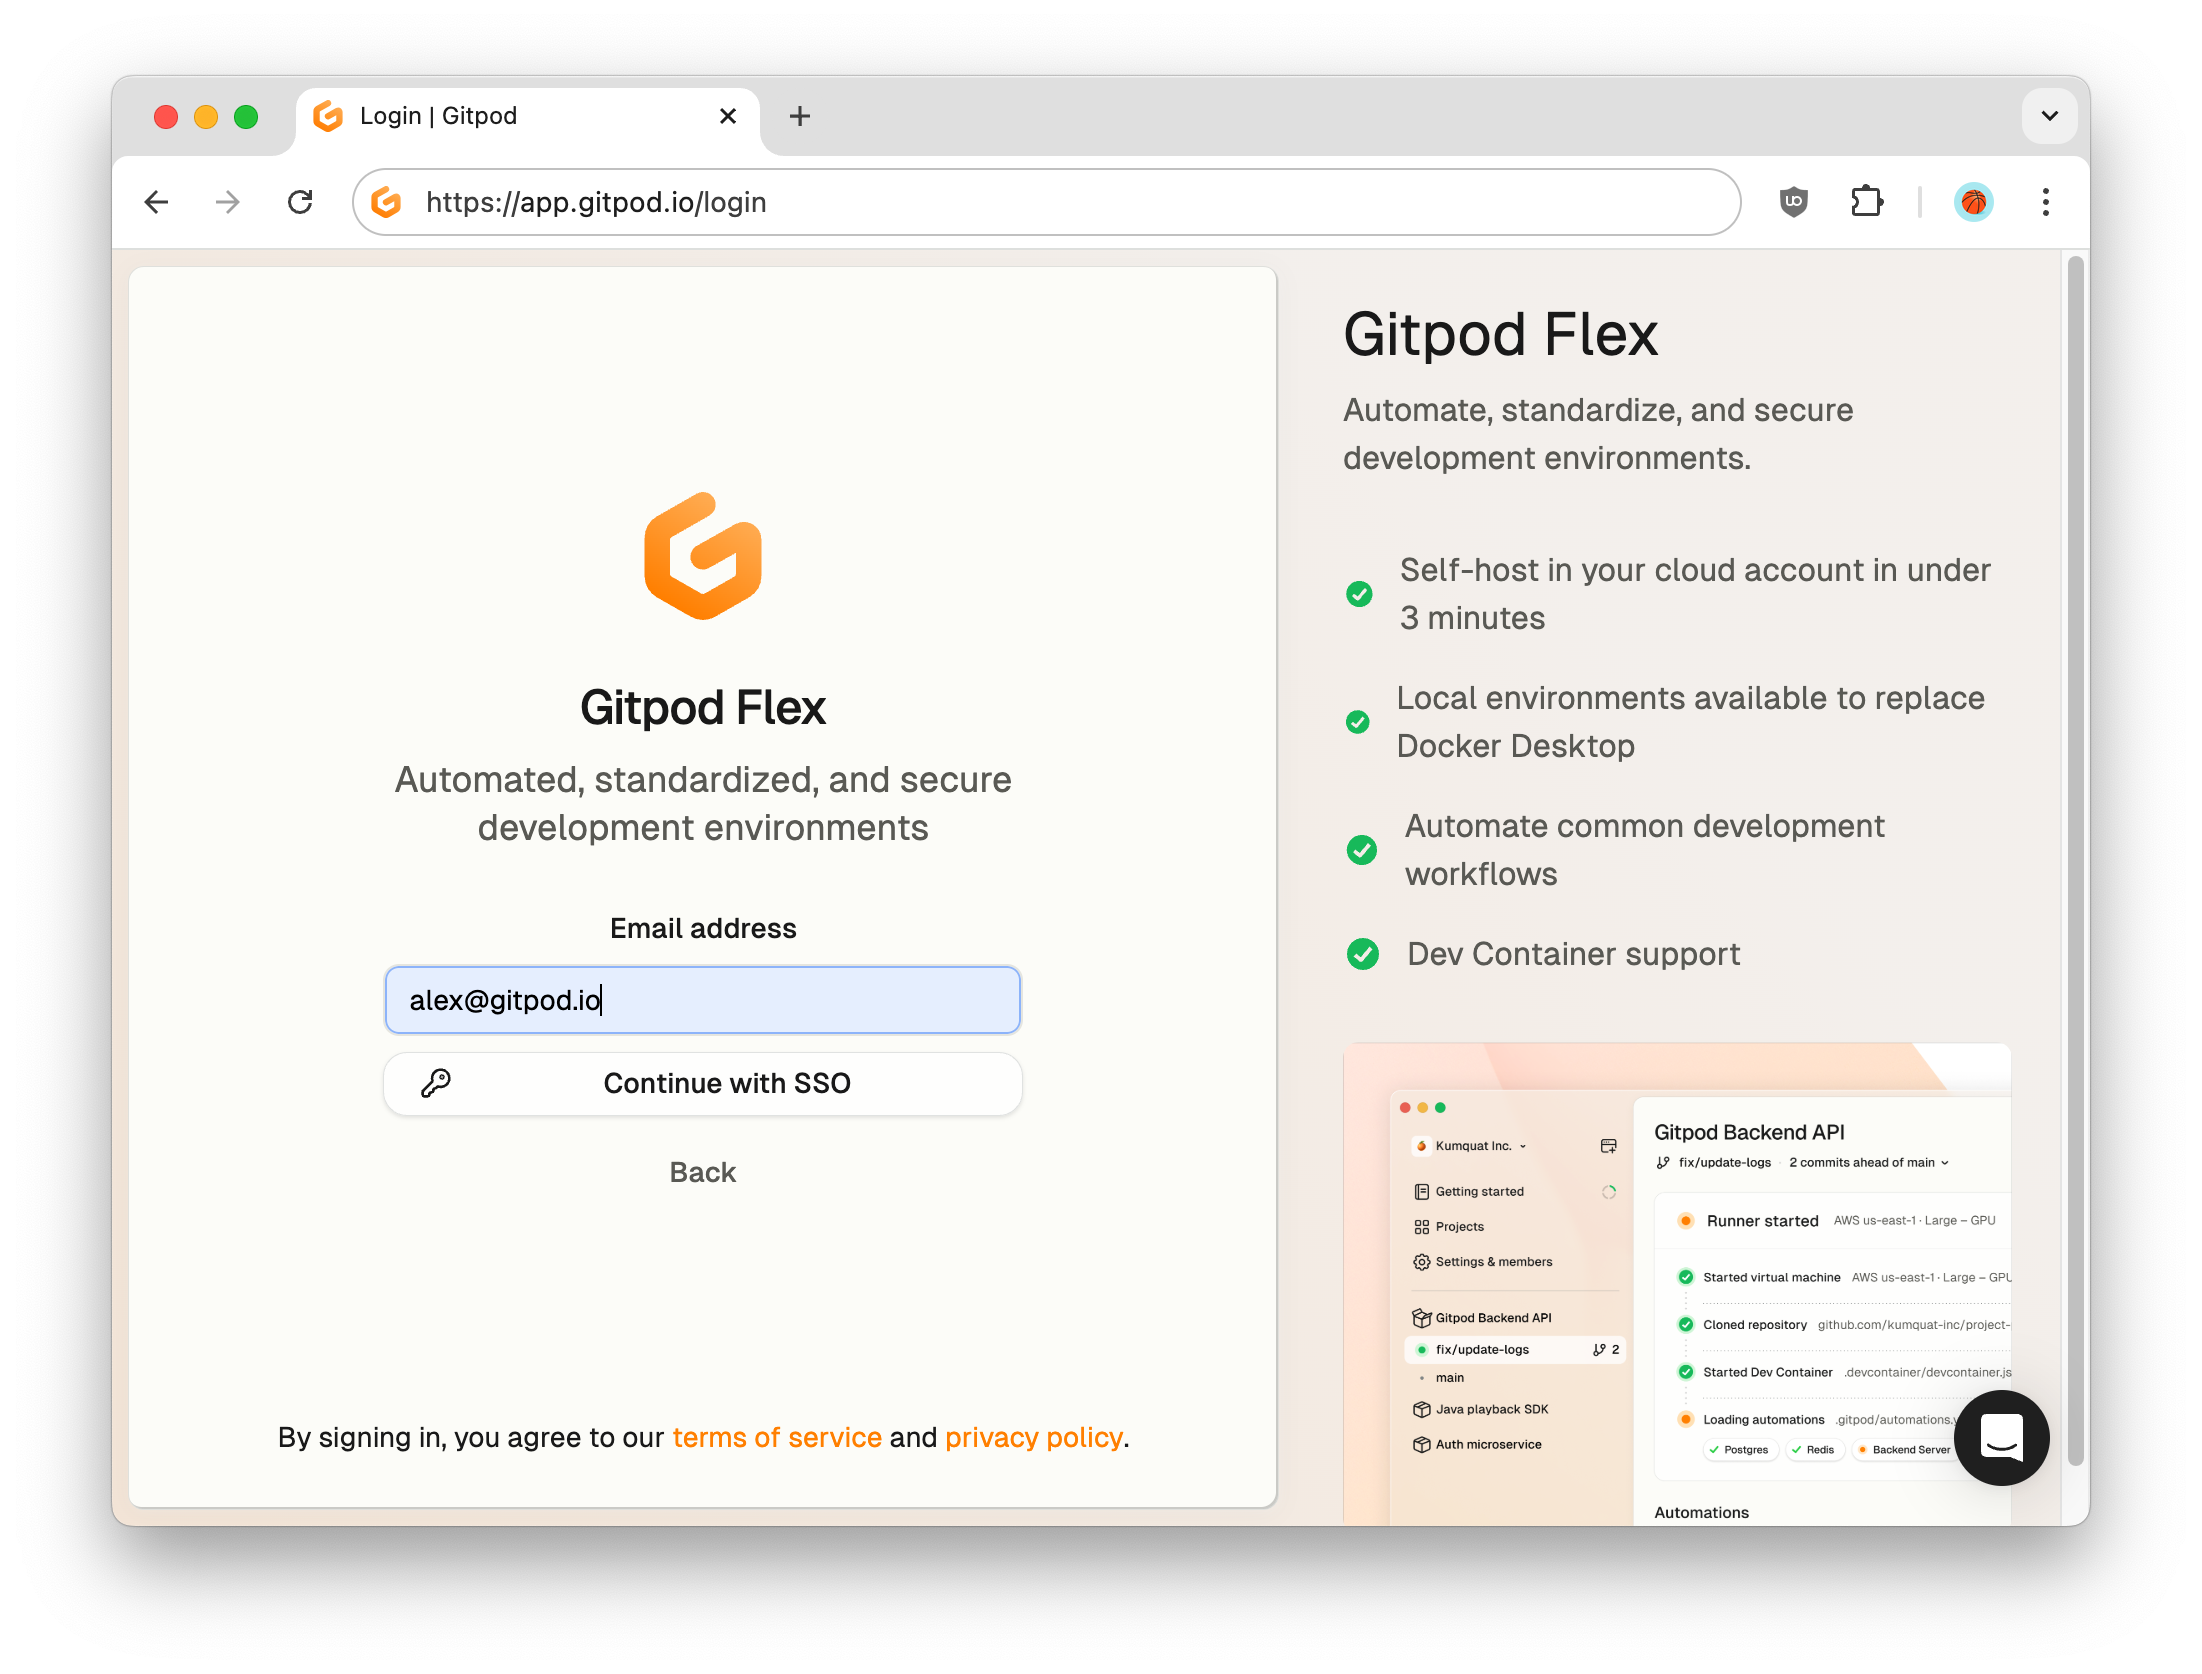
Email address
Use the invite link
-
Go to
Settings > Members > Invite membersand copy the invite link for your domain. -
When you open the invite link while not logged in, you will only see the active login providers.
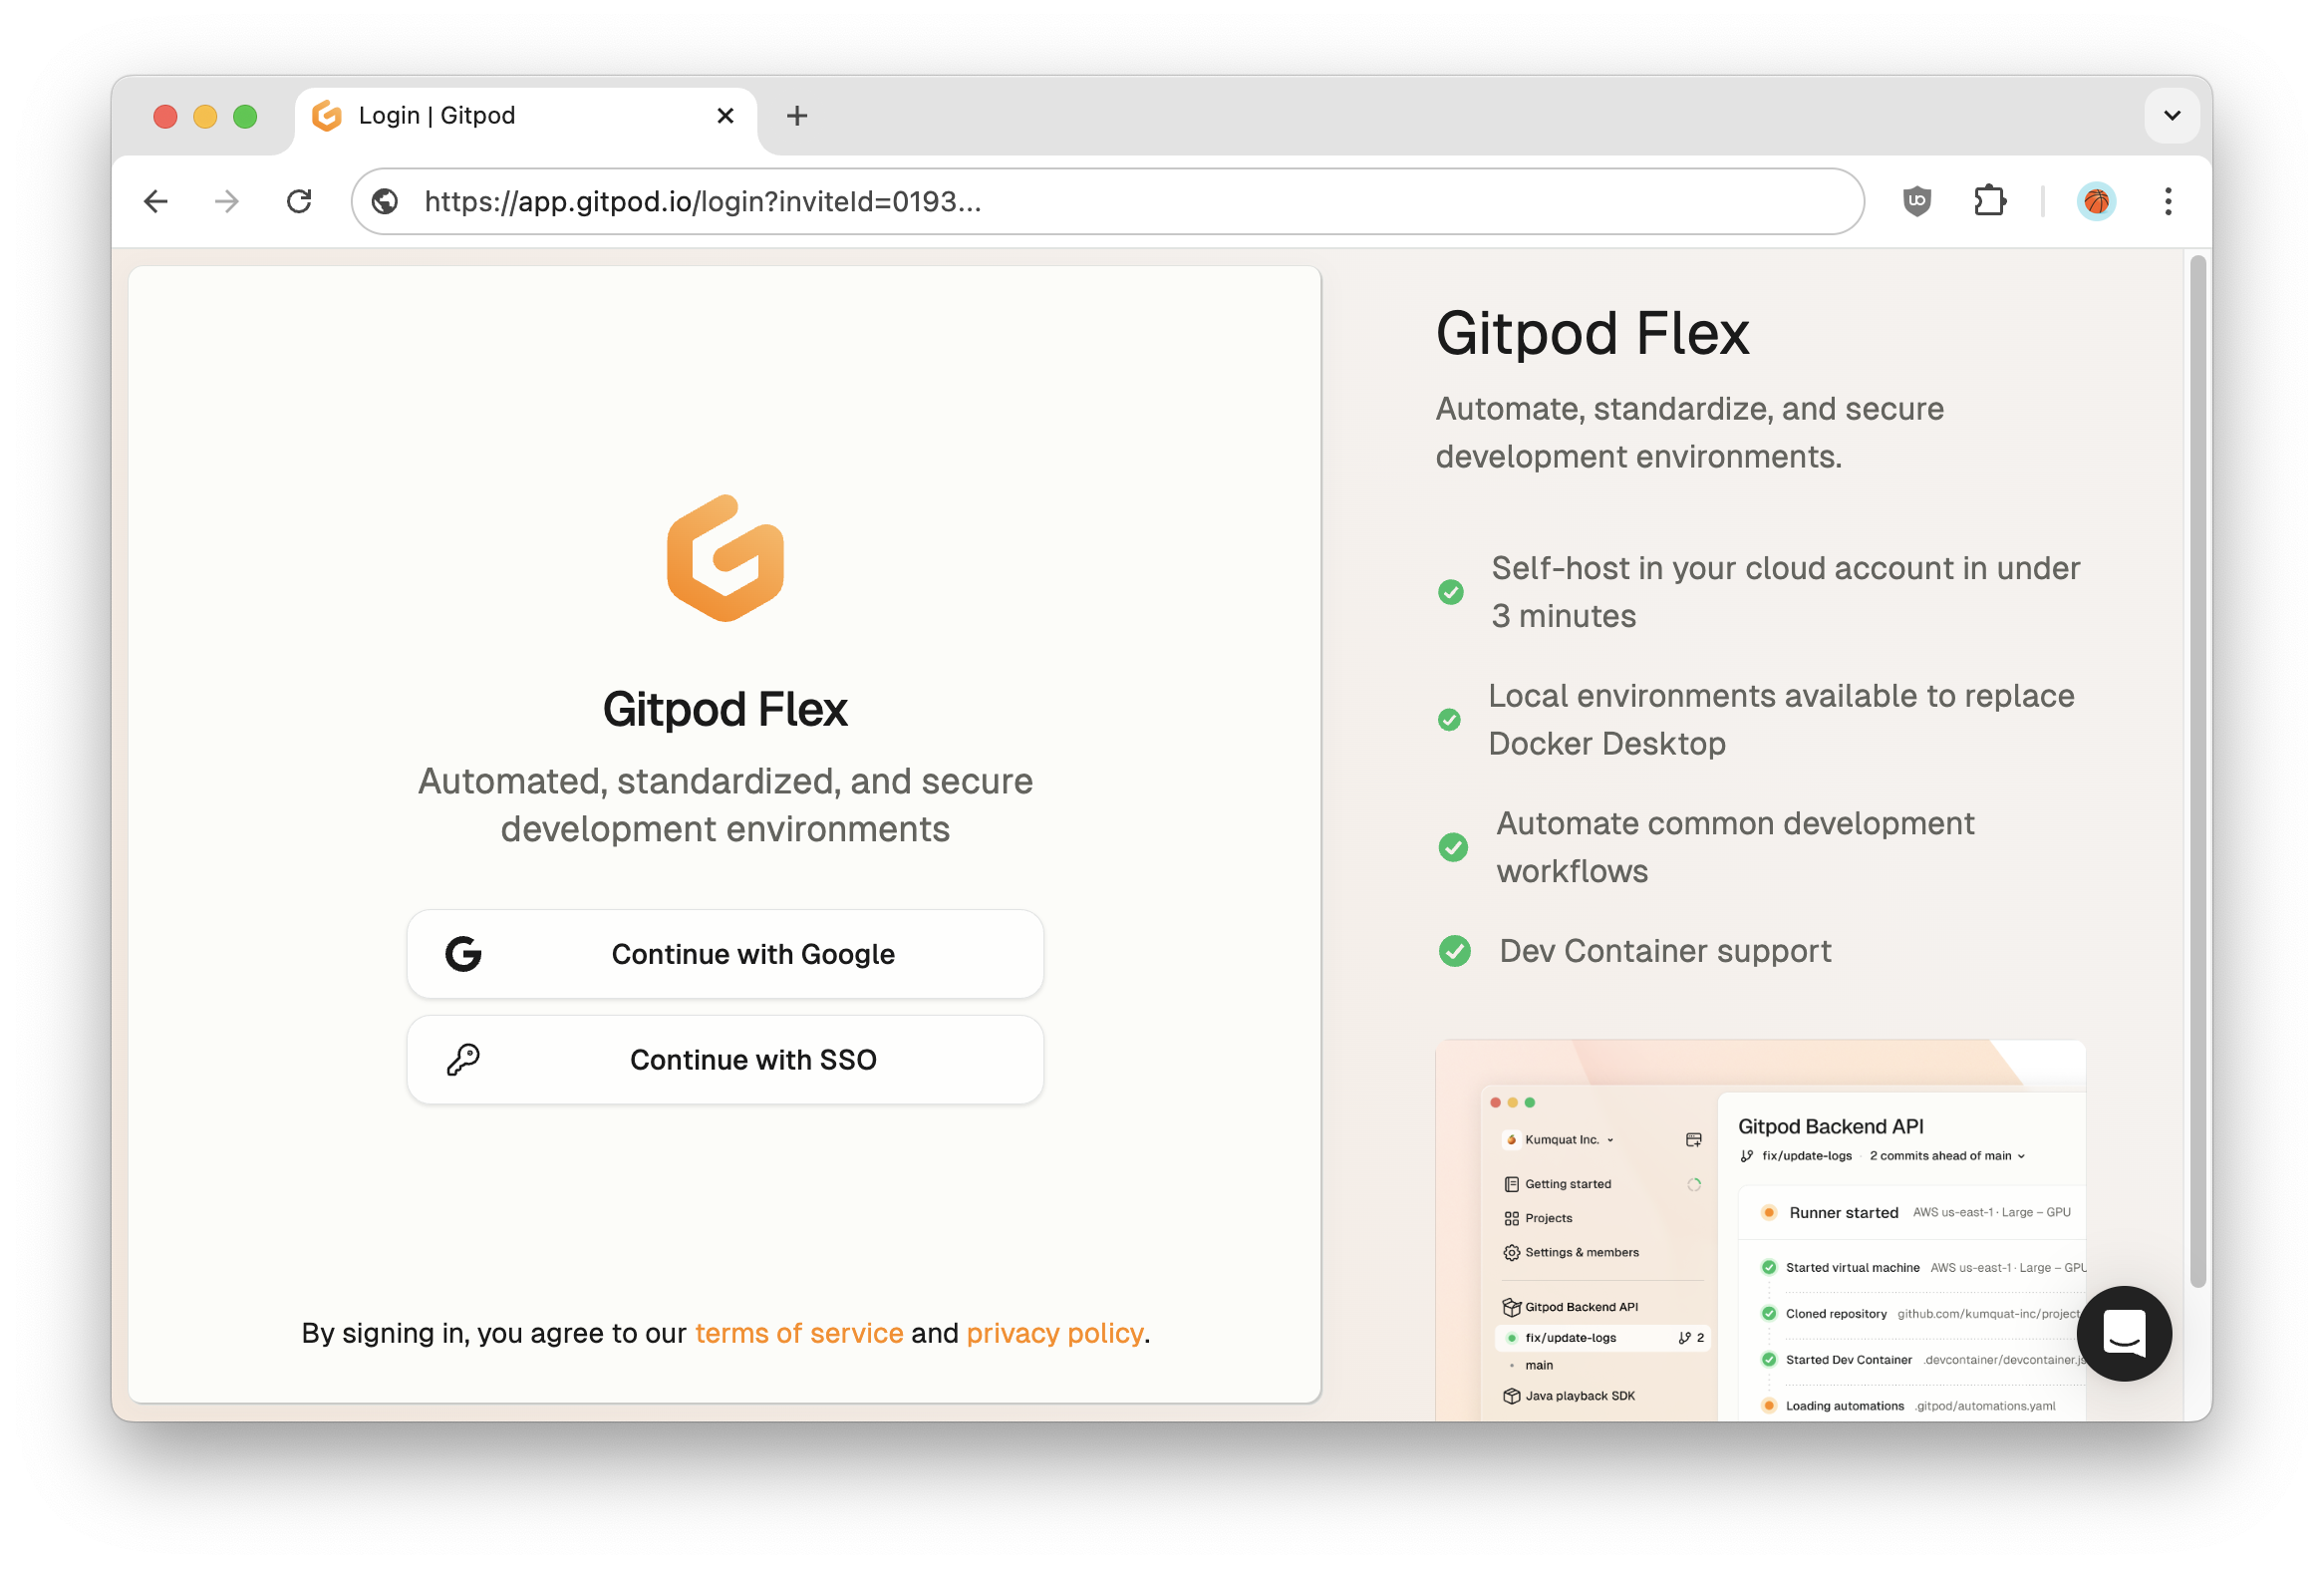
Login on invite link
Managing Single Sign-on Access
Only Organization Admins are allowed to configure, modify, or disable SSO settings. Regular members will not have access to these options.SSO enabled
Deactivating login providers
A deactivated login provider can not be used to join your organization. The existing login sessions are not affected by this setting. If you need to deactivate a login provider:- Go to Settings > Log In and Security.
- Click the toggle switch next to the login provider and confirm the action.
To protect you from losing access to your organization, the one remaining login provider cannot be deactivated.