Single Sign-on
GitLab
You can set up Single Sign-on (SSO) with Gitlab SaaS or a self-hosted Gitlab for your team.
This section helps you to create an OIDC application with Gitlab. The Client ID, Client Secret, and Issuer URL of this OIDC application are required to setup SSO in Gitpod. See the Step-by-step guide for the general instructions.
Prerequisites
As prerequisites you will need the following:- If you are setting up SSO with a self-hosted GitLab, make sure you have Admin permissions on that Gitlab installation, or work together with the administrator.
- If you are setting up SSO with GitLab SaaS (gitlab.com), it is advised to create the OIDC application in a group, so please make sure you have Group Admin permissions on that group.
Create an OIDC application
The OIDC application allows you to integrate with Gitpod.- Navigate to Groups > My Awesome Group > Settings > Applications (for SaaS) or Admin Area > Application (for self-hosted).
-
Click the Add new application button.
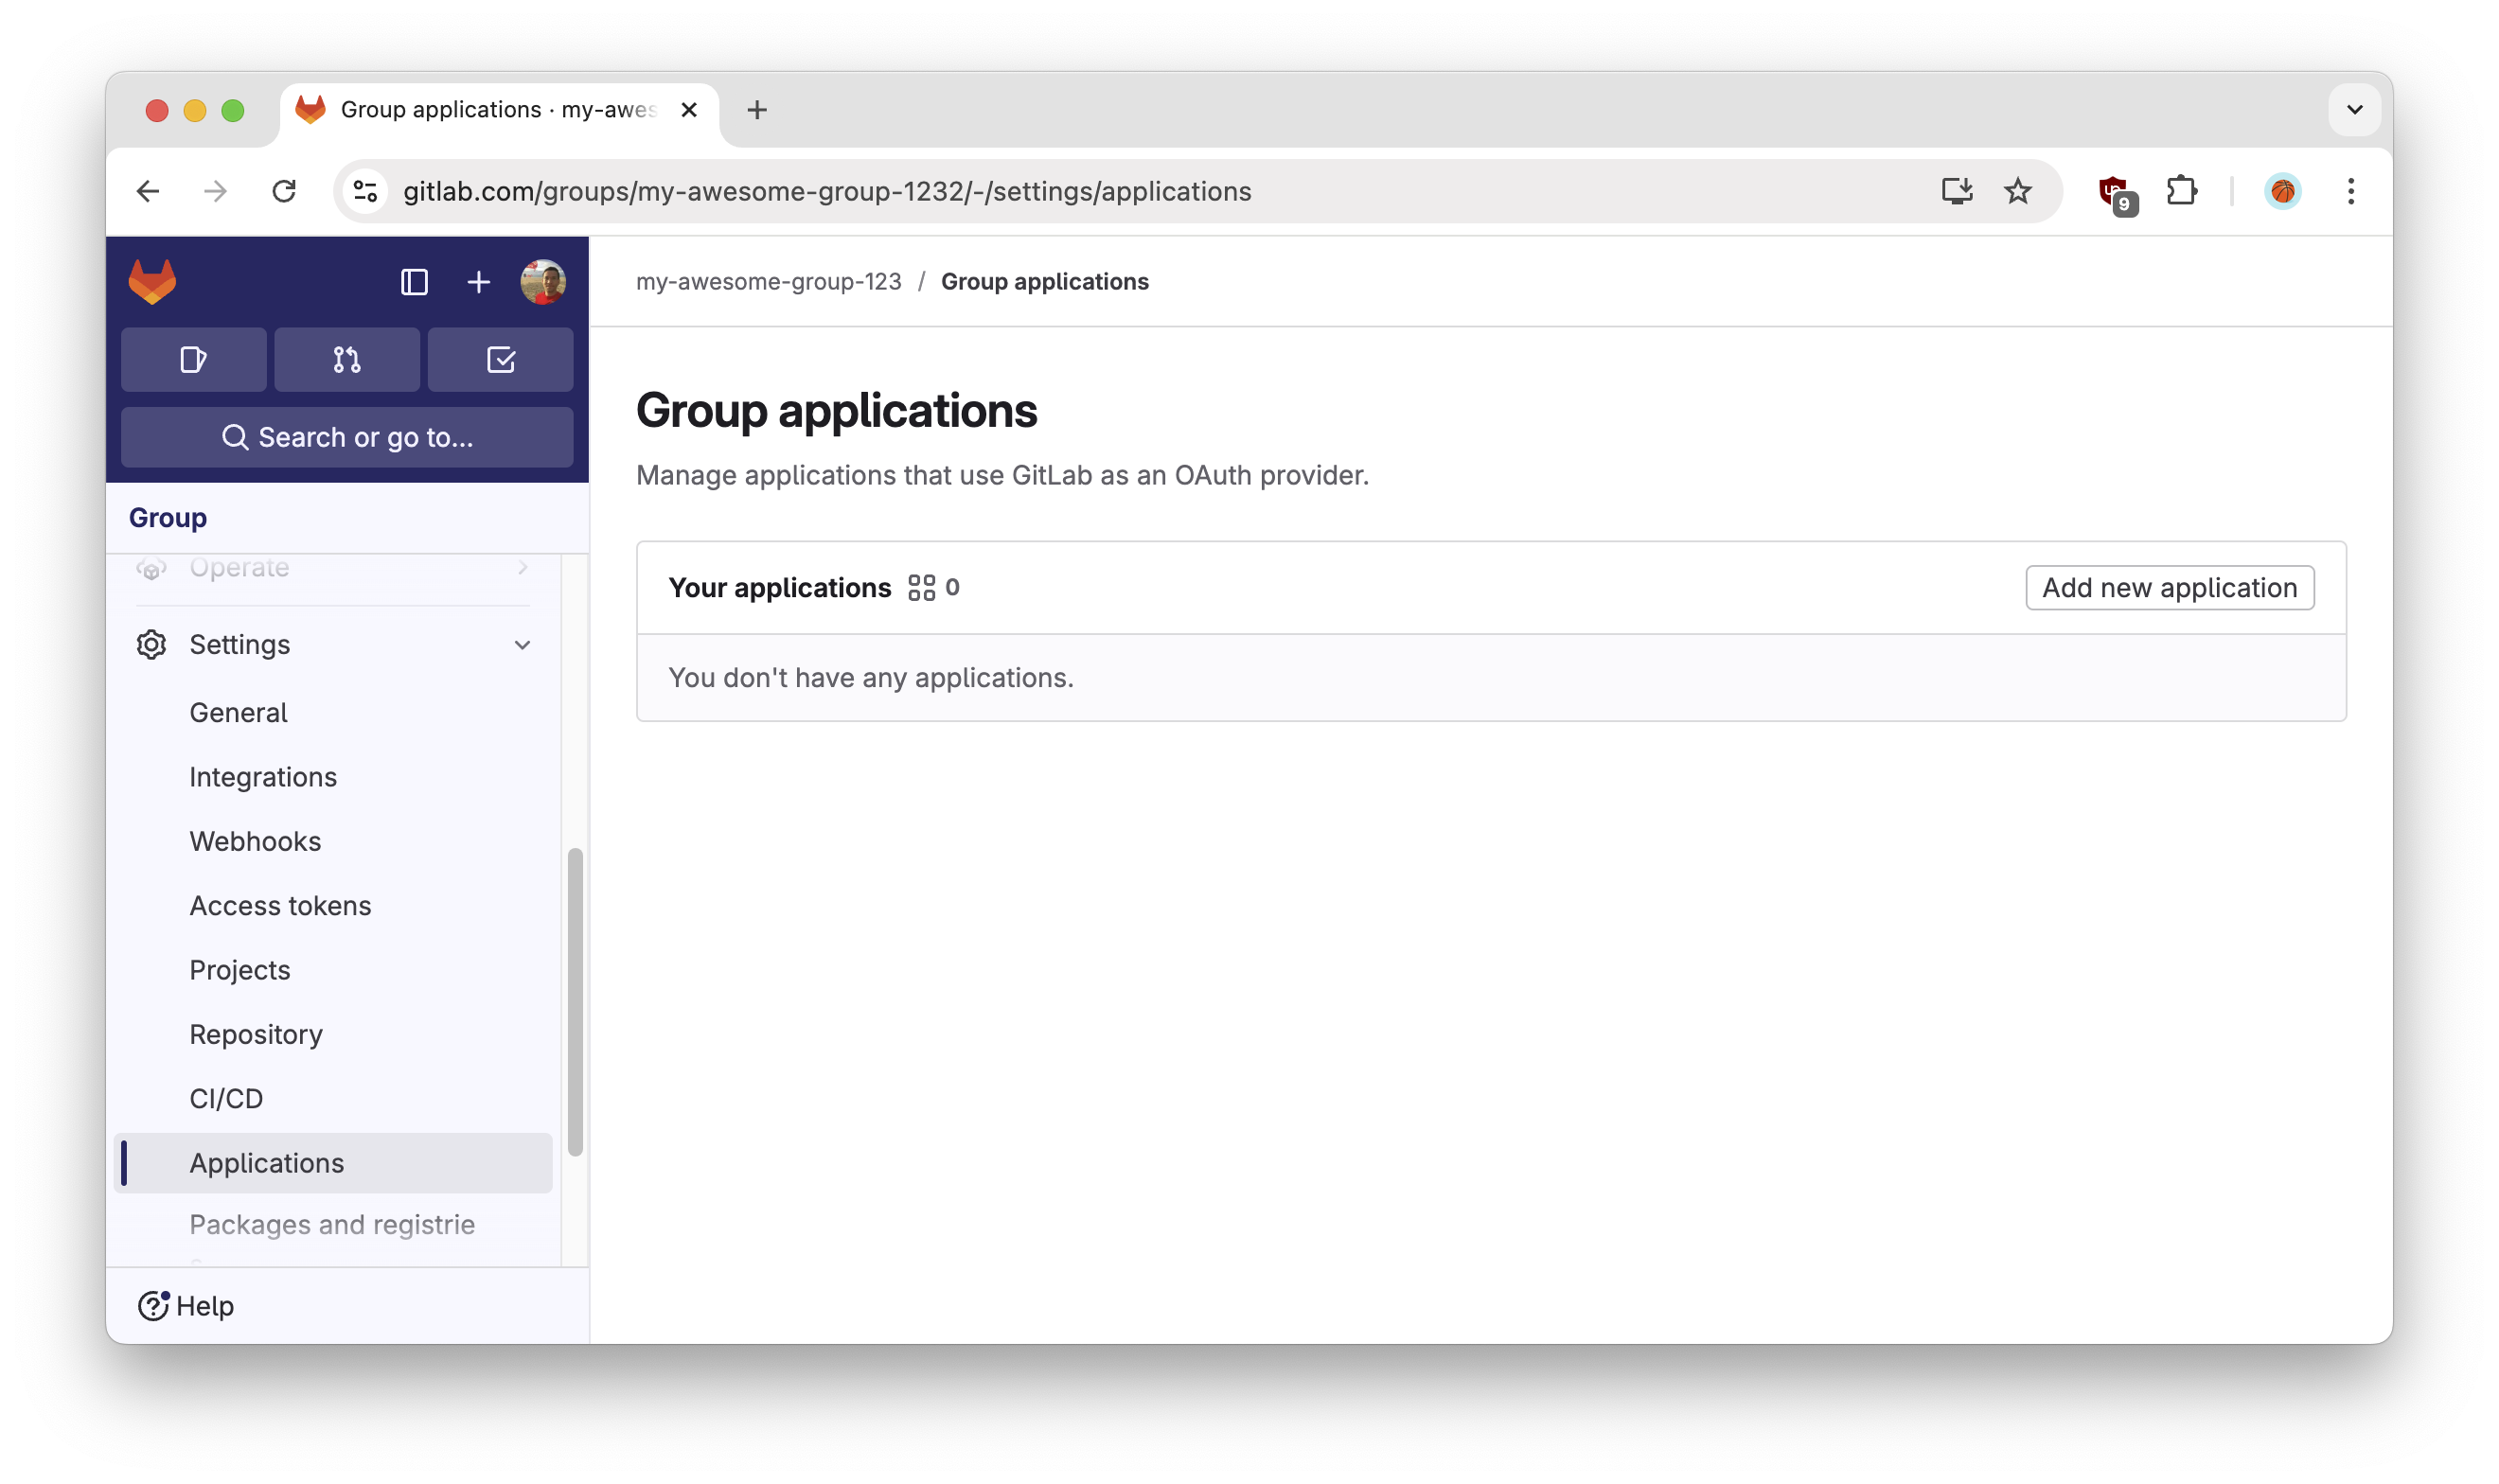
Gitlab - Add new application
-
Configure the OIDC application by filling out the form:
- Name: Gitpod
-
Redirect URI:
https://app.gitpod.io/auth/oidc/callback -
Confidential:
Yes -
Scopes:
read_useropenidprofileemail
Save Applicationbutton.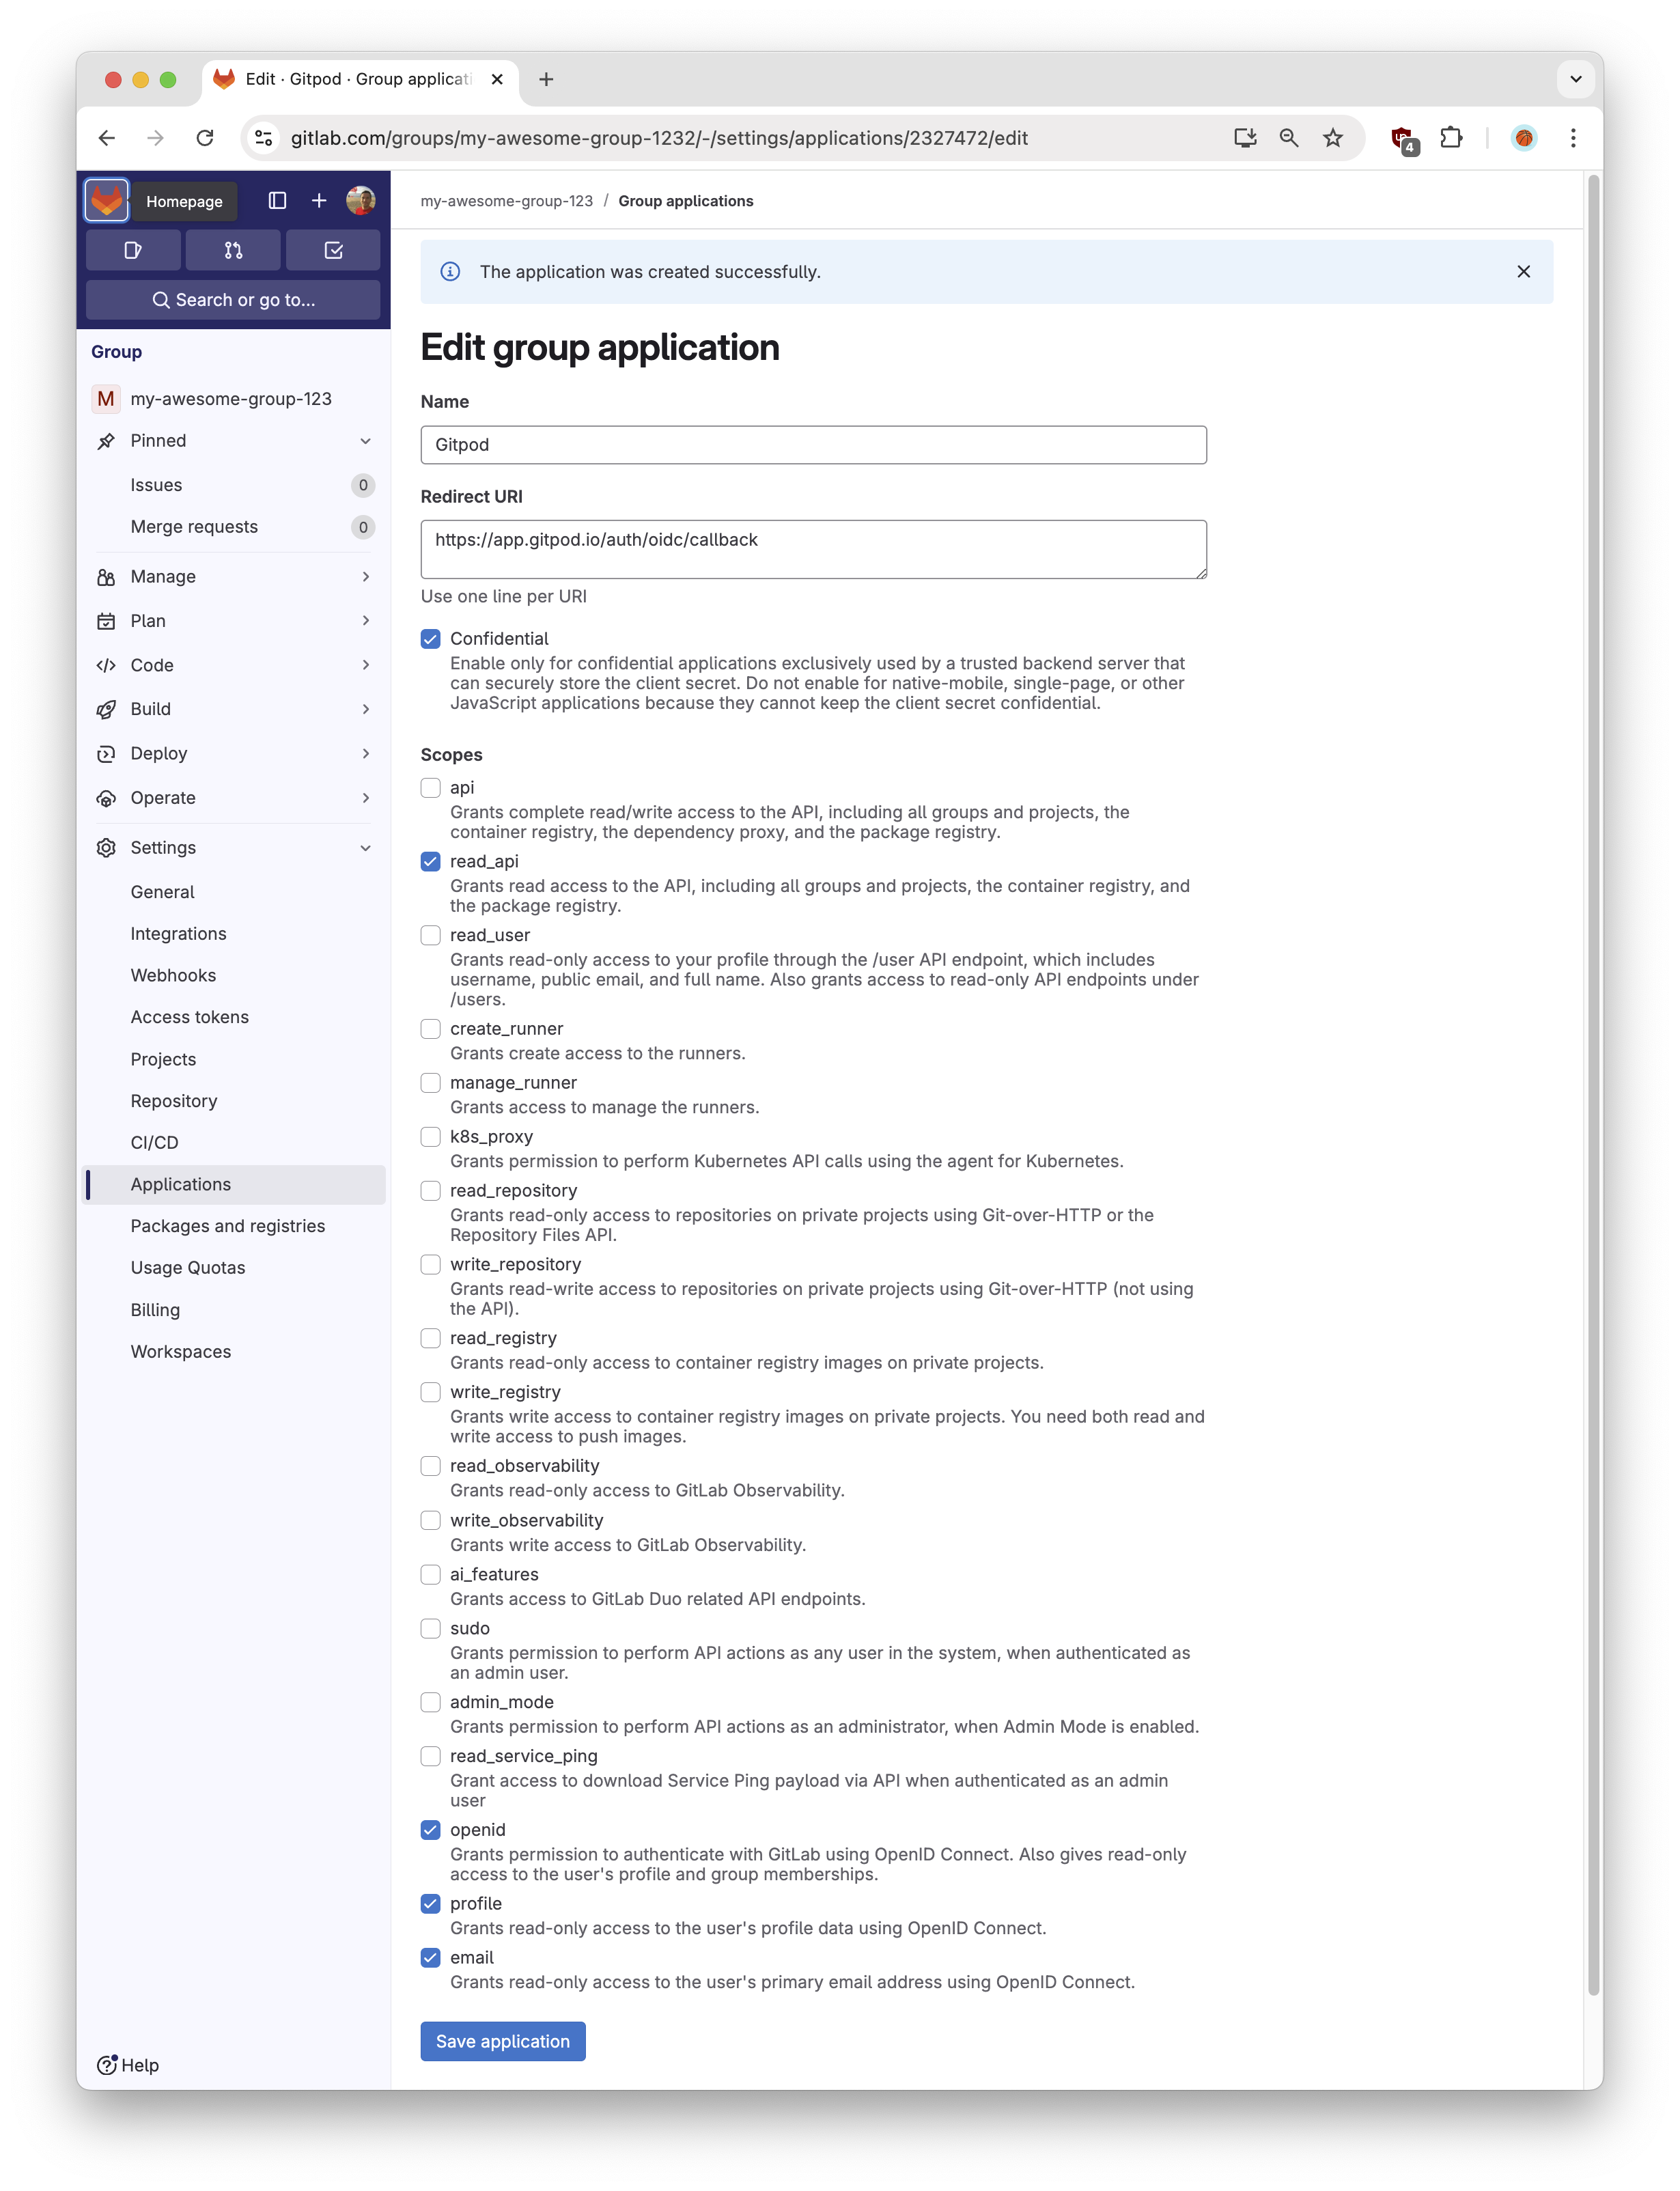
Gitlab - Appplication scopes
-
Obtain the Client ID & Client Secret from the following confirmation screen, which you’ll need for the Gitpod SSO configuration in the following step. This is how to interpret the information:
- Application ID: Client ID
- Secret: Client Secret
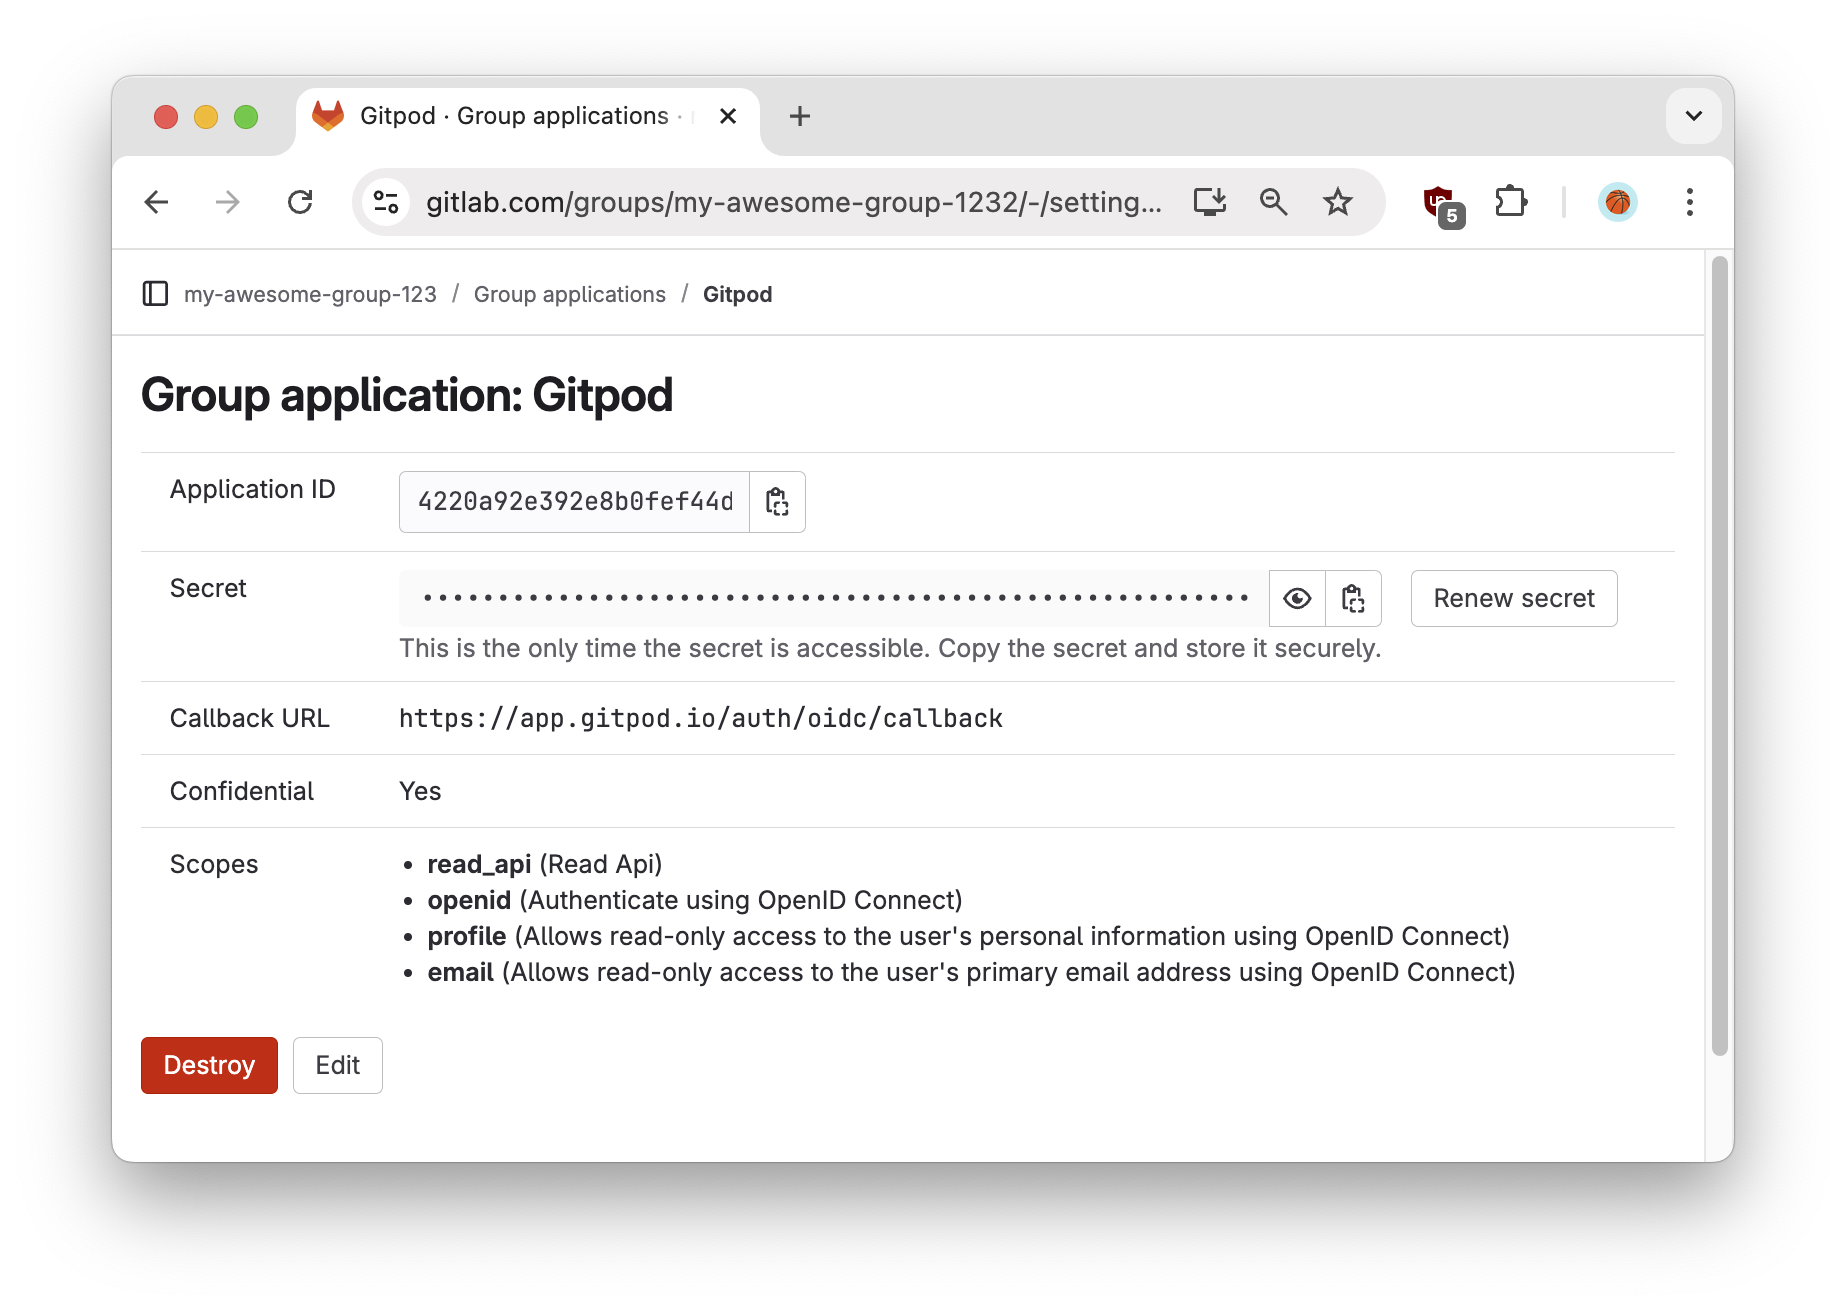
Gitlab - Appplication secret
-
Which Issuer URL to use?
-
For self-hosted Gitlab:
https://your-gitlab-installation.org -
For Gitlab Saas:
https://gitlab.com
-
For self-hosted Gitlab:
- Continue with the SSO configuration in Gitpod: Clicking Save & Test