Enterprise AWS Runner
Setup
Enterprise Runner is exclusively available to customers on the Enterprise tier. If you’re an Enterprise customer, contact your Gitpod account manager for more information.
Prerequisites
Before starting the deployment, ensure you have:- Admin access to the Gitpod organization
- AWS Account with appropriate permissions to create CloudFormation stacks
- VPC and Subnets configured in your AWS account
- SSL/TLS Certificate provisioned in AWS Certificate Manager (ACM) with both root domain and wildcard subdomain SANs
- Domain Name that you control and can modify DNS records for
- Permissions to deploy CloudFormation stacks with IAM resources
Create Enterprise Runner in Gitpod
Go to Settings -> Runners, and press Setup a new runner: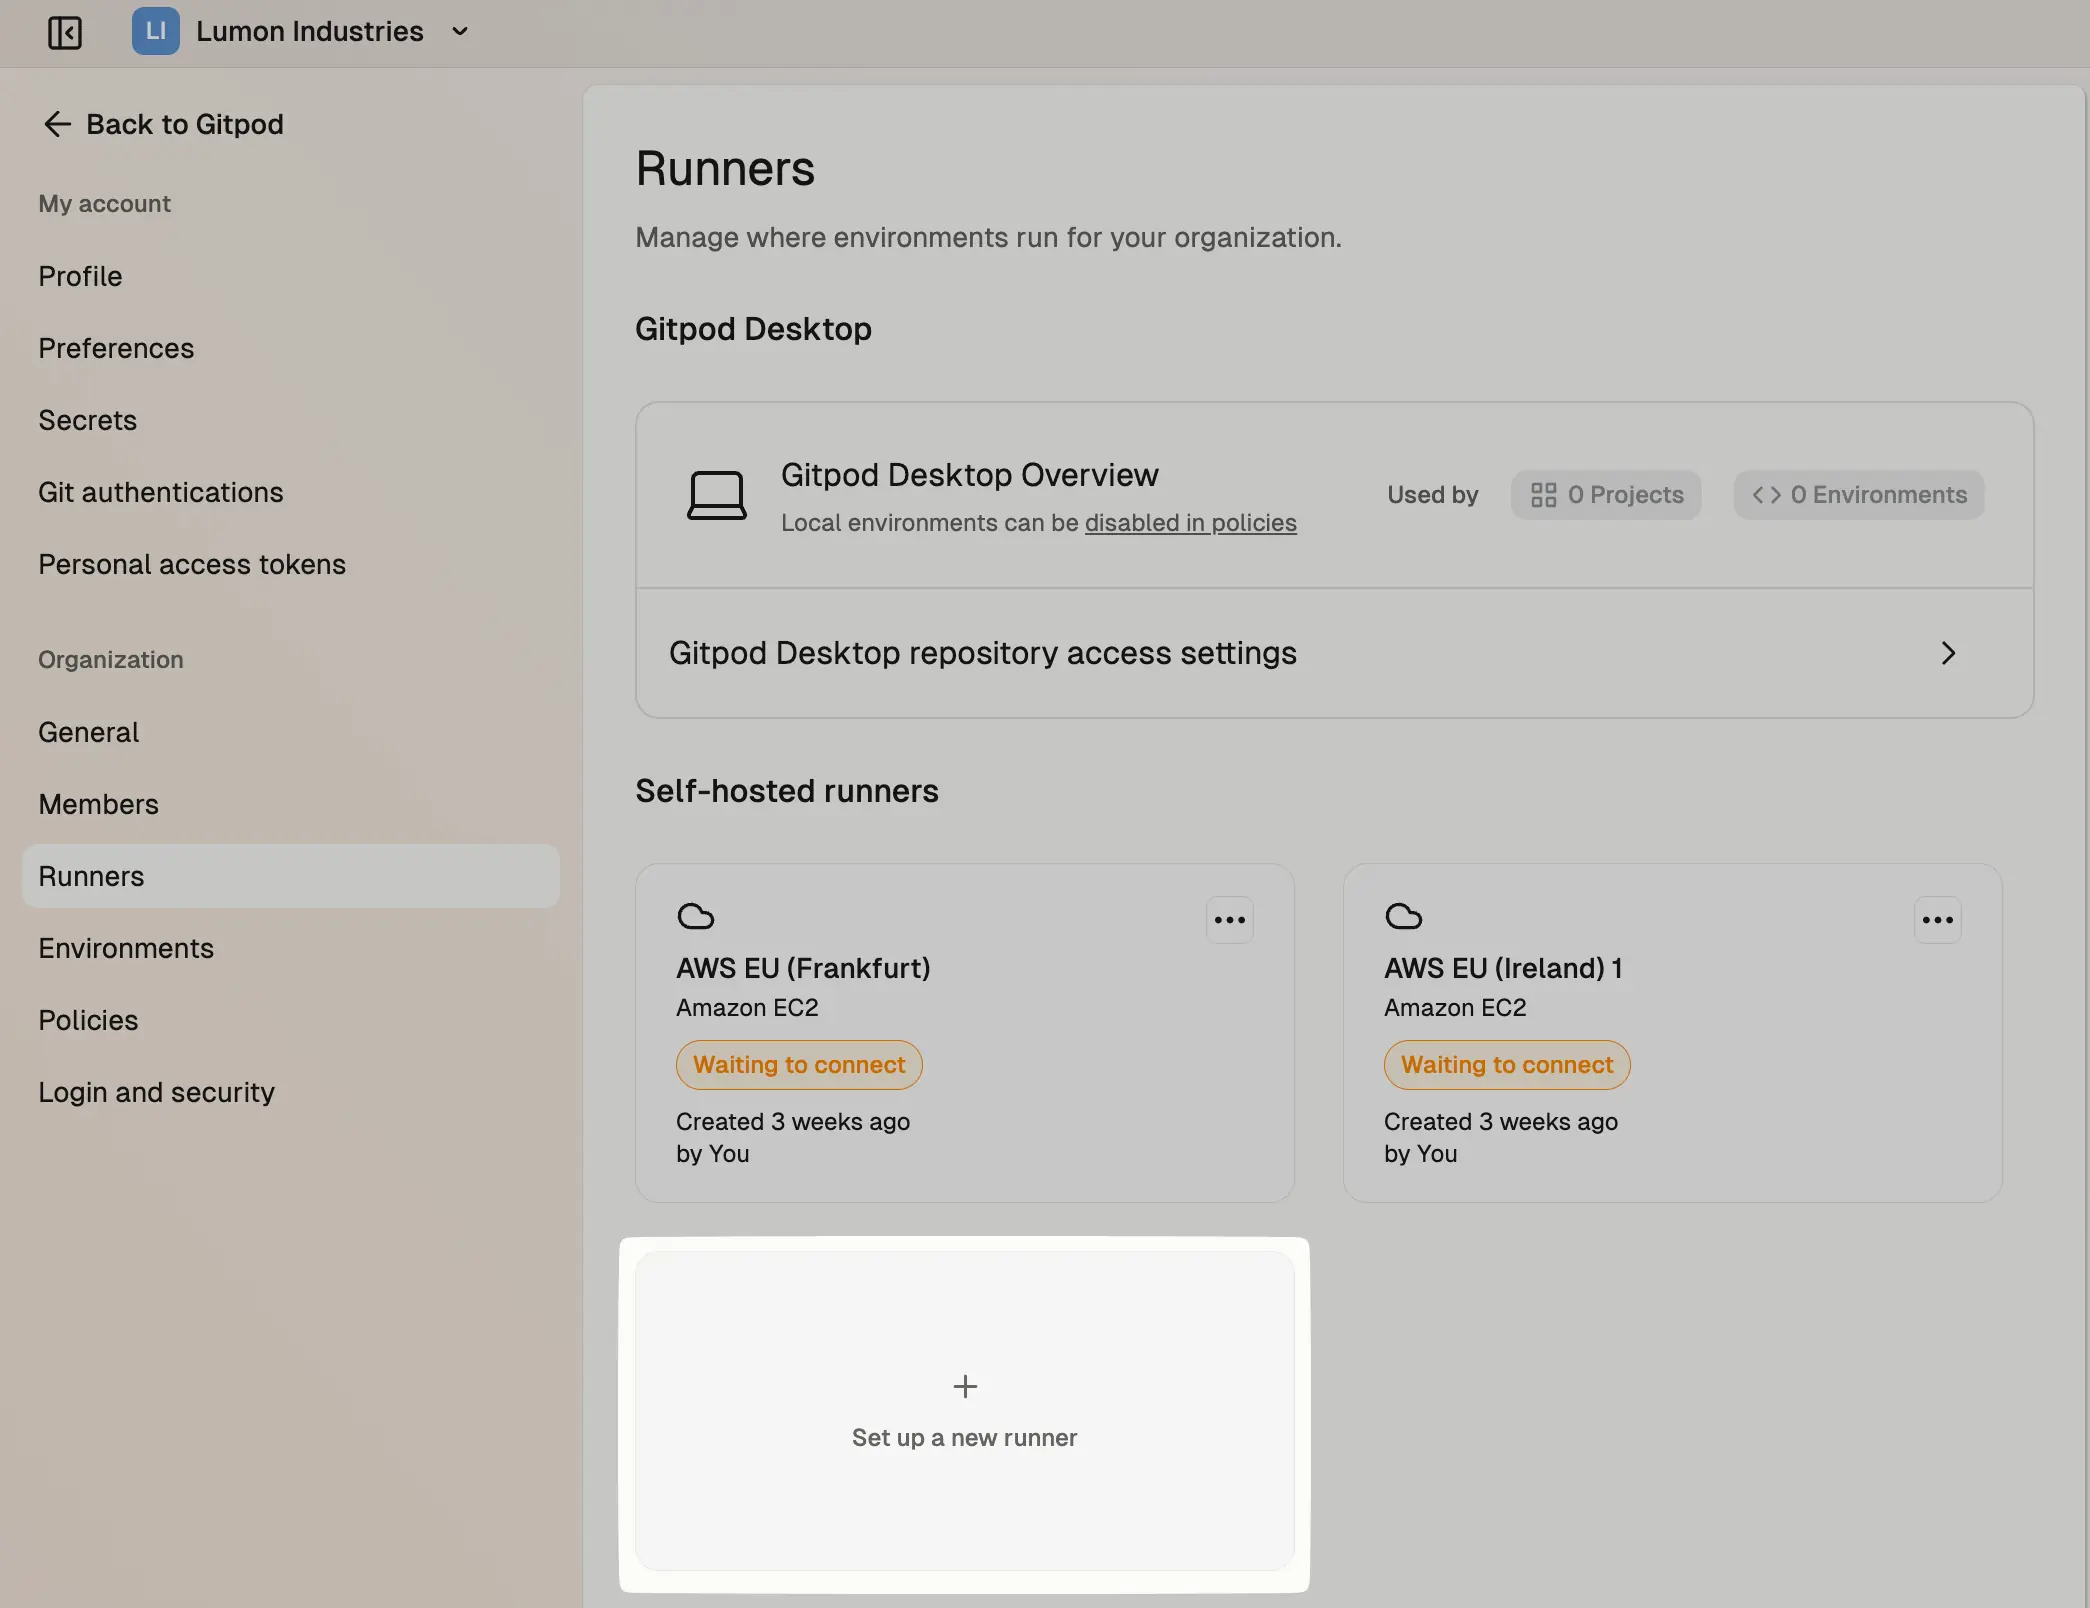
Runners in settings

Provider selection
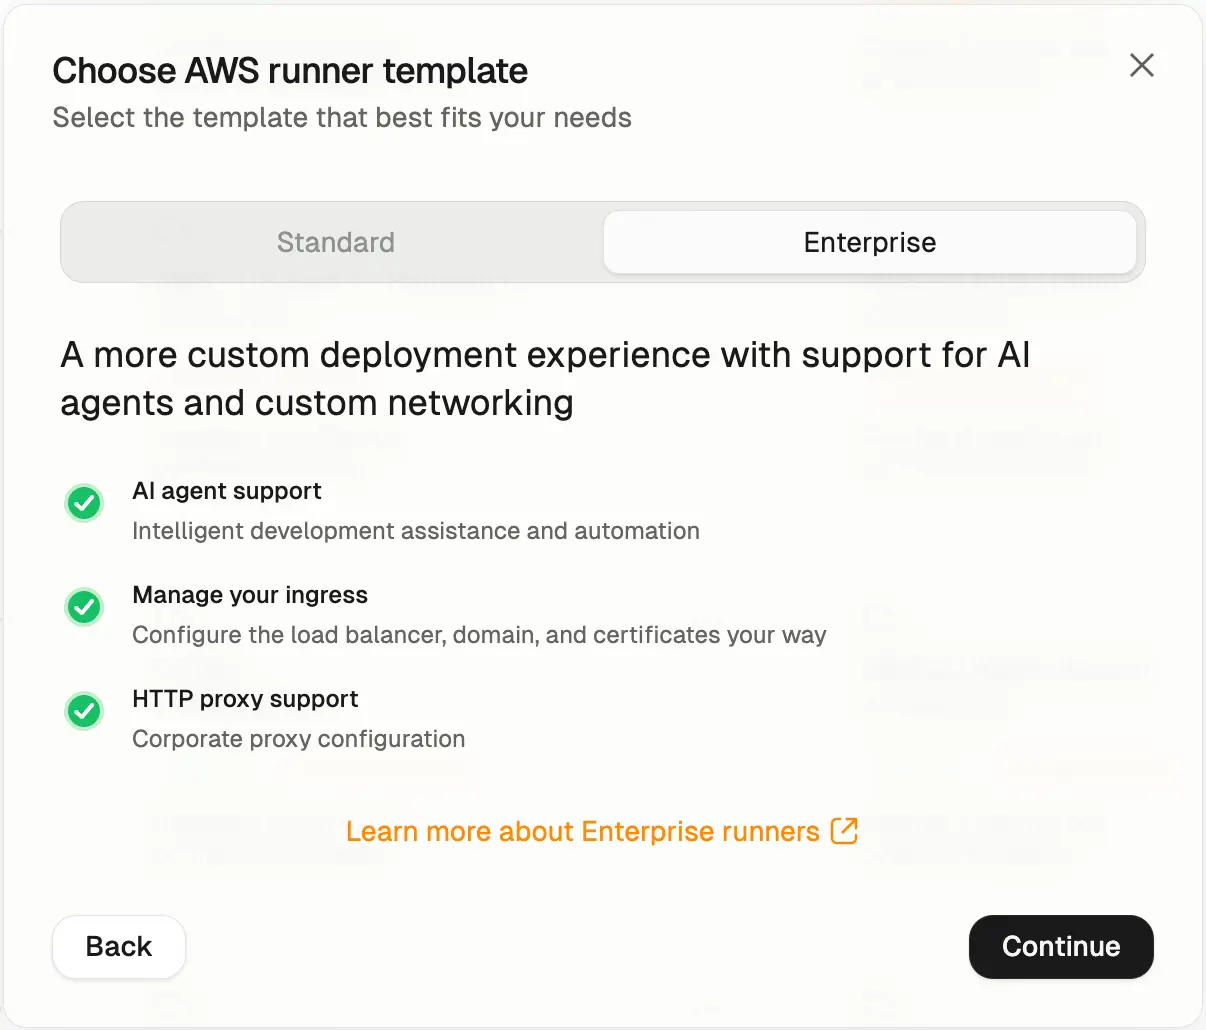
CloudFormation Template selection
Runners are regional, and can only launch Environments in the AWS region
they are deployed in. For multi-region support we recommend setting up
multiple Runners in different regions. The region cannot be changed once
deployed.
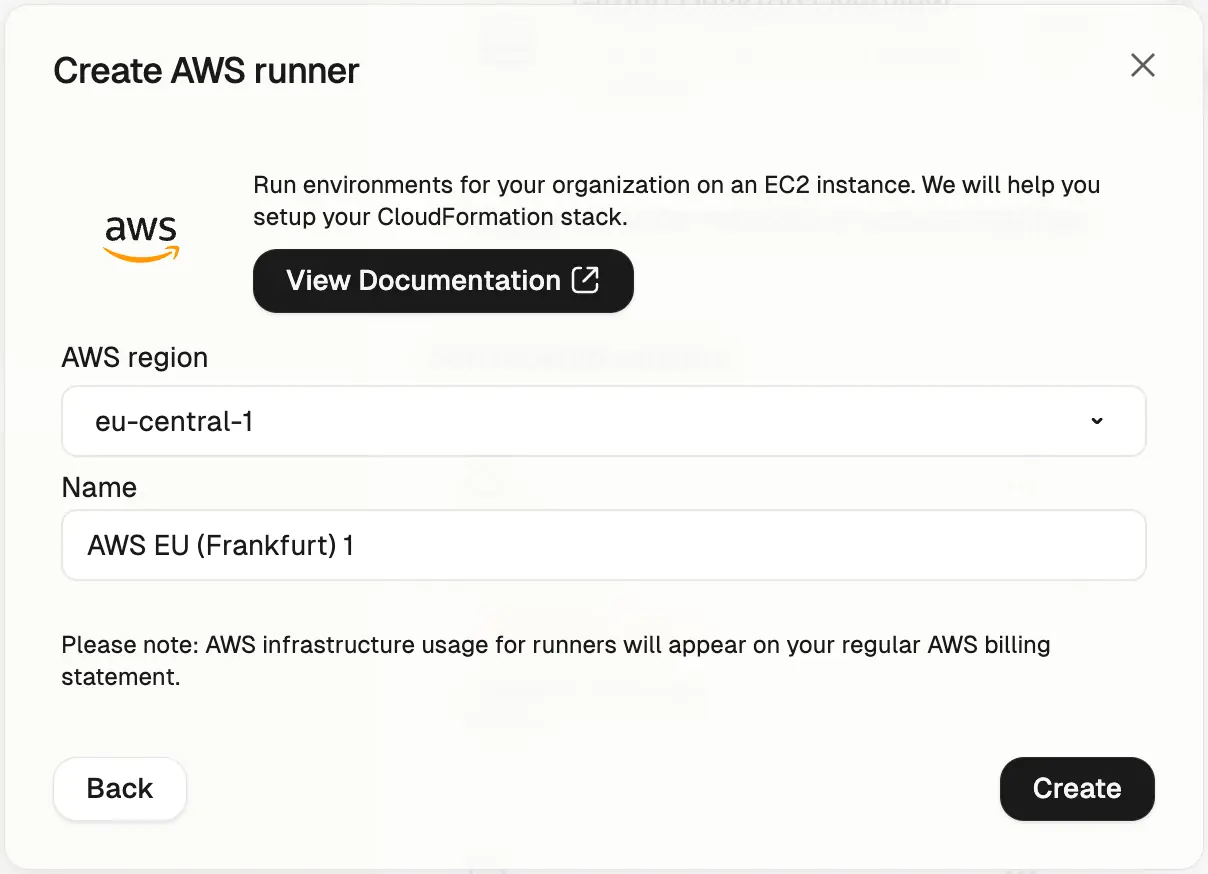
Add an AWS Runner
Runner details
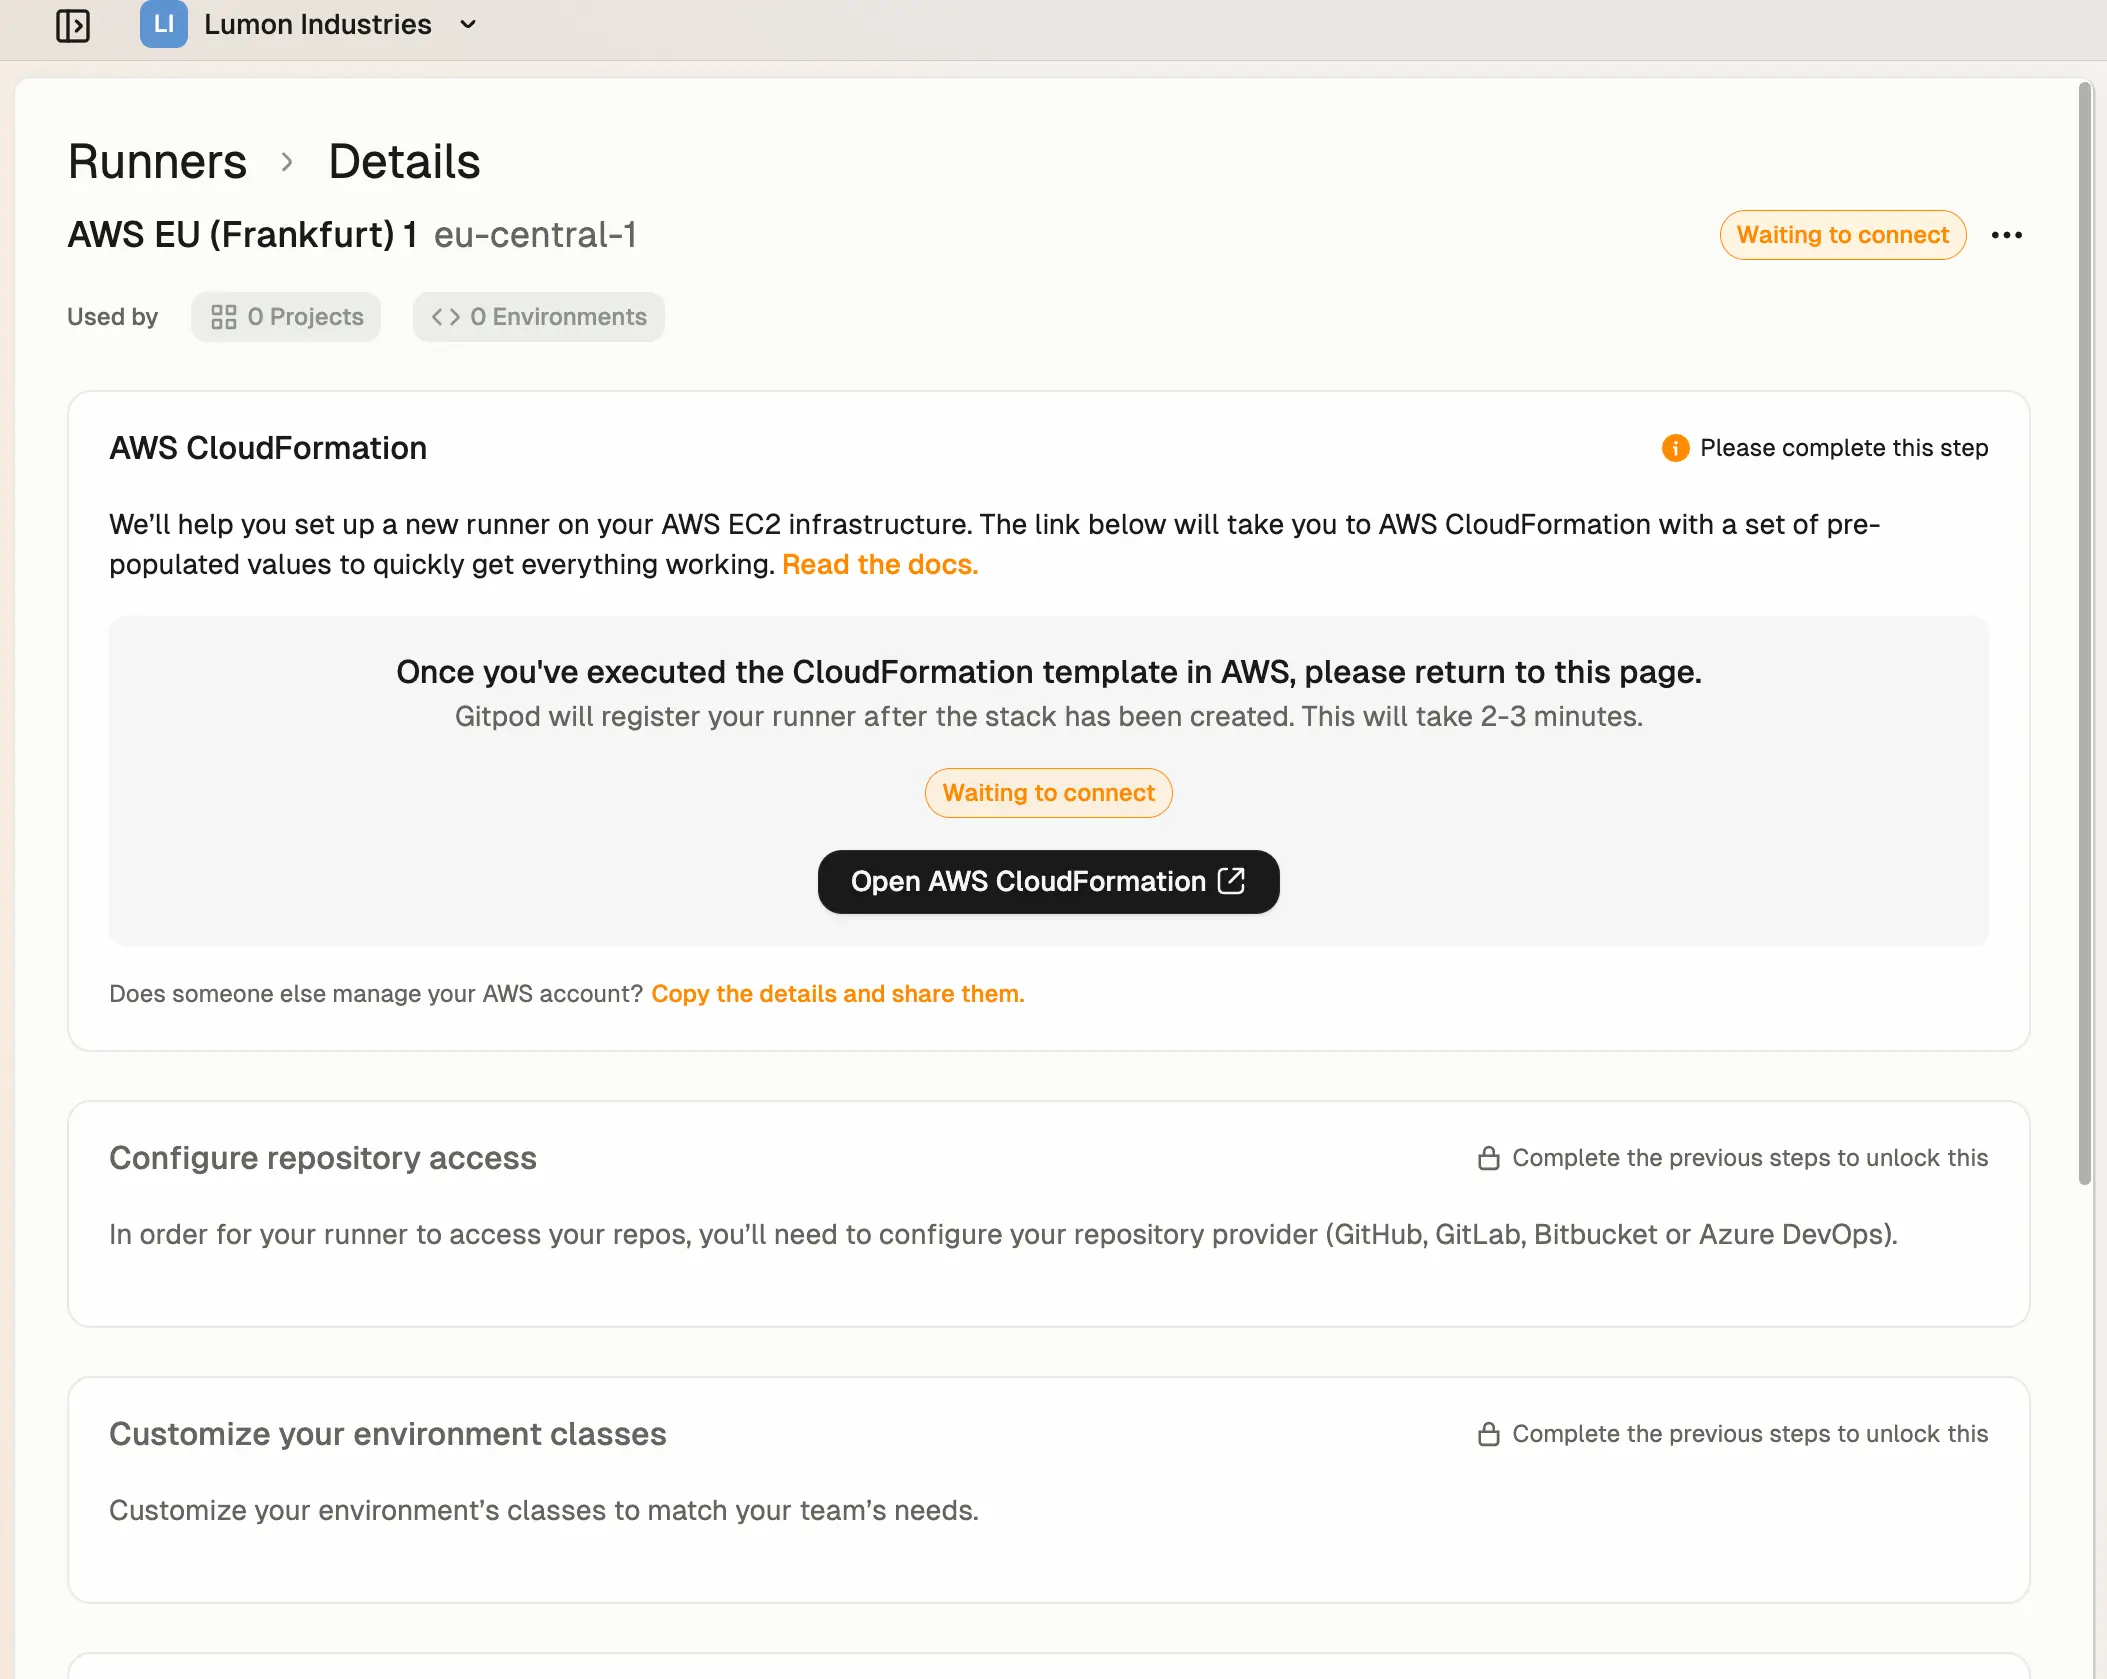
CloudFormation Template Deployment
Next, ensure you are signed into the right AWS account in the AWS console, and then press Open AWS CloudFormation to start deploying the Runner into your AWS account. This will link you to the AWS console to create the CloudFormation stack: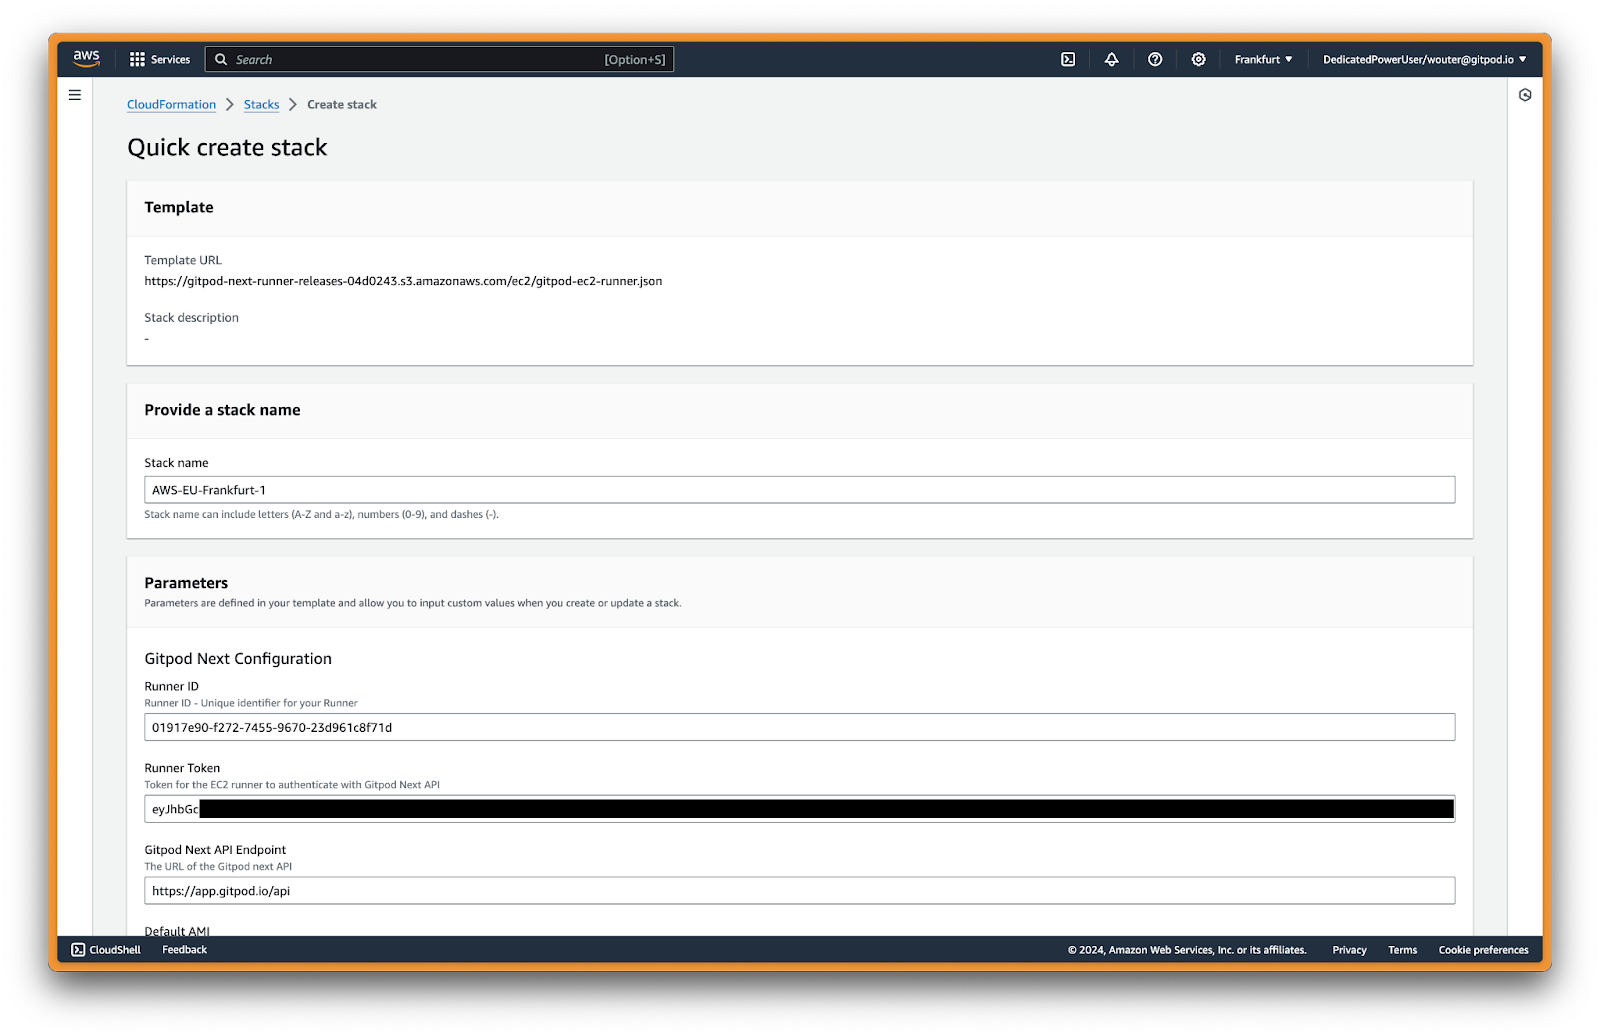
Create stack in AWS
Gitpod Configuration
Core authentication and API connection settings for your Gitpod Runner.| Parameter | Description | Required |
|---|---|---|
| Runner ID | Unique identifier for your Runner (auto-generated by Gitpod) | ✅ Yes |
| Exchange Token | Authentication token for the EC2 Runner (auto-generated by Gitpod) | ✅ Yes |
| API Endpoint | URL of the Gitpod API (auto-generated by Gitpod) | ✅ Yes |
Network Configuration (Mandatory)
VPC and subnet settings for deploying the Runner infrastructure.| Parameter | Description | Example Value | Required |
|---|---|---|---|
| VPC | The VPC where the Runner will be deployed | vpc-12345abcd | ✅ Yes |
| Availability Zones | AZs for high availability (select 2-3) | us-east-1a, us-east-1b | ✅ Yes |
| EC2 Instances Subnet | Private subnets for EC2 instances (can be non-routable from internal network). Should match the number of AZs | subnet-123abc, subnet-456def | ✅ Yes |
| Loadbalance Subnets | Subnets for load balancer with CIDR ranges routable from your internal network. Should match the number of AZs | subnet-123abc, subnet-456def | ✅ Yes |
- Select 2-3 Availability Zones for high availability
- EC2 subnets: Use private subnets, must be sufficiently large for your expected workload
- Load balancer subnets: Must have CIDR ranges routable from your internal network for user access
- Ensure connectivity from user locations via VPN, Direct Connect, or Transit Gateway
DNS Configuration
Domain name, SSL certificate, and load balancer visibility settings.| Parameter | Description | Example Value | Required |
|---|---|---|---|
| Load Balancer Visibility | Choose between internal or internet-facing | internal | ✅ Yes |
| Domain Name | Your domain name for Gitpod access | yourdomain.com | ✅ Yes |
| Certificate ARN | ARN of your SSL certificate from ACM | arn:aws:acm:us-east-1:123456789012:certificate/abc123... | ✅ Yes |
- internal: Load balancer is only accessible from within your VPC (recommended for private deployments)
- internet-facing: Load balancer is accessible from the internet (only if using public subnets)
Network Configuration (Optional)
Configure additional network settings for enterprise security requirements.| Parameter | Description | Example Value | Required |
|---|---|---|---|
| Custom Security Group for Load Balancer | Security group to attach to the load balancer for traffic control | sg-abcdef123 | ❌ Optional |
| HTTP Proxy | HTTP proxy server URL | http://proxy.company.com:8080 | ❌ Optional |
| HTTPS Proxy | HTTPS proxy server URL | https://proxy.company.com:8080 | ❌ Optional |
| No Proxy | Comma-separated list of hosts to bypass proxy | .internal,169.254.0.0/16,... | ⚠️ Required if proxy configured |
| Custom CA Certificate | Custom certificate authority from SSM/Secrets Manager | {{resolve:ssm:/gitpod/ca-cert}} | ❌ Optional |
- If not provided: An automatic security group will be created that allows all traffic (0.0.0.0/0) to ports 80 and 443
- If provided: You can specify a custom security group to narrow down the allowed traffic sources for enhanced security
.internal, 169.254.0.0/16, app.gitpod.io, and .amazonaws.com.
Proxy Update Behavior:
- Runner infrastructure: Changes take effect immediately after CloudFormation update
- Component-specific timing:
- Content initialization: Effective after environment restart
- Devcontainer: Effective after rebuild
- Docker in Docker: Effective after container recreation
Custom CA certificates work in runner, content init (SCM), and docker pull operations. However, they are not supported in devcontainer and devcontainer image build phases - you must add CA certificates to your images for these use cases.
Review and Deploy
- Review Configuration
- Verify all parameters are correctly set
- Review the resource summary
- Acknowledge Capabilities
- Check the box acknowledging that CloudFormation will create IAM resources
- This is required for the stack to create necessary service roles
- Create Stack
- Click “Create stack” to begin deployment
- Monitor the deployment progress in the Events tab
The CloudFormation stack deployment typically takes 20-25 minutes.
Monitoring Deployment
- Stack Status
- Monitor the stack status on the CloudFormation dashboard
- Any errors will be displayed in the Events tab
- Event Monitoring
- Click on the “Events” tab to see real-time deployment progress
Post-Deployment DNS Configuration
Retrieve Load Balancer DNS Name
After successful deployment:- Navigate to Outputs Tab
- Click on your stack name
- Go to the “Outputs” tab
- Locate DNS Names
- Find the output value: LoadBalancerDNS:
internal-LoadBa-XXXXX-123456789.us-east-1.elb.amazonaws.com
- Find the output value: LoadBalancerDNS:
Configure DNS Records
Create DNS records in your domain registry or DNS provider for the exact domain name you specified in the CloudFormation parameters.AWS Route 53
If you’re using AWS Route 53 to manage your domain, use alias records for the most AWS-native configuration:-
Navigate to Route 53 Console
- Open the AWS Route 53 Console
- Select your hosted zone
-
Create Alias Records
- Click “Create record”
- Toggle the Alias switch to enable alias functionality
- Configure the following records:
| Type | Name | Alias Target |
|---|---|---|
| A | yourdomain.com | Select “Alias to Network Load Balancer” → Choose your region → Select your load balancer |
| A | *.yourdomain.com | Select “Alias to Network Load Balancer” → Choose your region → Select your load balancer |
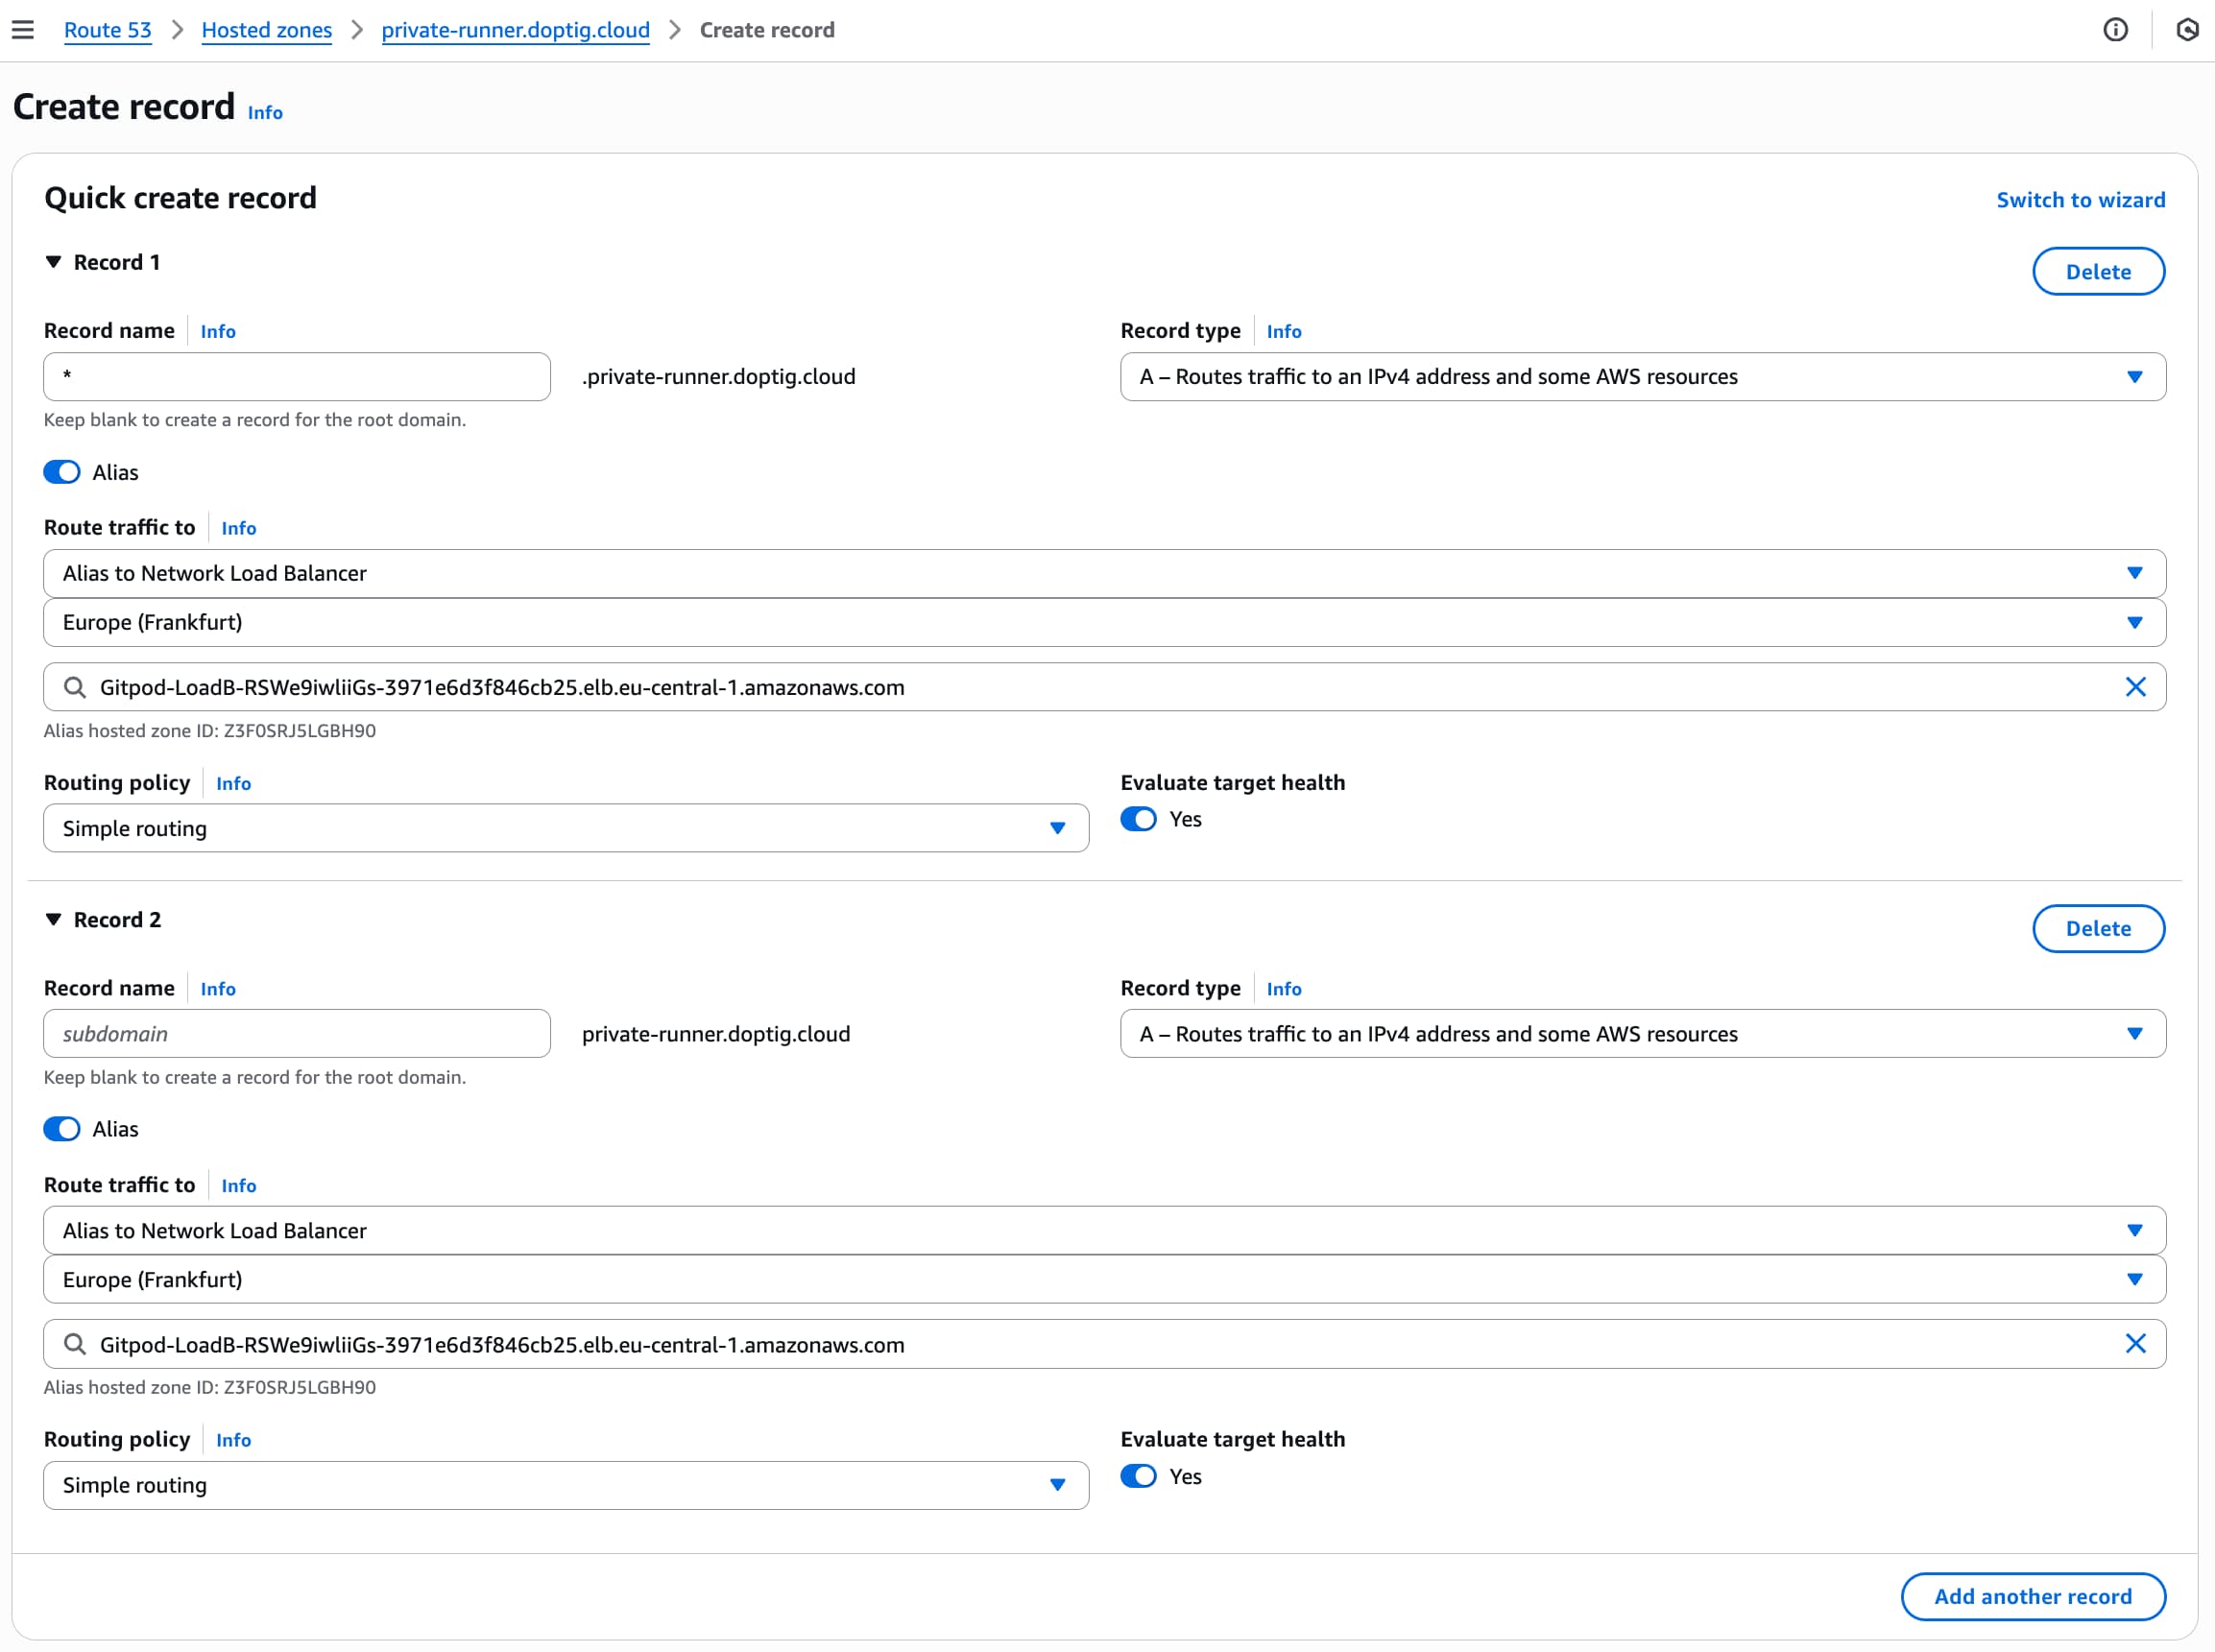
Route 53 Create Alias Records for Network Load Balancer
- No additional charges for alias queries
- Automatic health checking
- Better performance with shorter resolution times
- AWS-native integration with load balancers
Standard DNS Providers (CNAME Records)
For other DNS providers or if you prefer CNAME records:| Type | Name | Value | TTL |
|---|---|---|---|
| CNAME | yourdomain.com | internal-LoadBa-XXXXX-123456789.us-east-1.elb.amazonaws.com | 300 |
| CNAME | *.yourdomain.com | internal-LoadBa-XXXXX-123456789.us-east-1.elb.amazonaws.com | 300 |
yourdomain.com as your domain name parameter, configure:
⚠️ Important: Replace
yourdomain.com with the exact domain name you entered in the CloudFormation parameters.- DNS changes typically propagate within 5-60 minutes
- You can verify DNS resolution using tools like
nslookupordig - Test both the root domain and a wildcard subdomain
Verification and Testing
- Internal Network Test
- Verify that the load balancer is accessible from within your VPC
- Test from an EC2 instance in the same VPC:
curl -k https://yourdomain.com/_health
- DNS Resolution Test
Important Stack Outputs
After deployment, the following outputs provide important information for integration:| Output Name | Description | Usage |
|---|---|---|
| LoadBalancerDNS | Network Load Balancer DNS name | Point your DNS records here |
| EnvironmentRoleArn | EC2 Environment Role ARN | Used by Gitpod Environments for all operations |
| InstanceProfileNameOutput | EC2 Instance Profile | Attached to Runner EC2 instances |
Private VPC Endpoints (Optional)
For enhanced security, you can connect to Gitpod’s management plane using AWS PrivateLink instead of traversing the public internet.Cost consideration: VPC endpoints incur additional AWS charges (~$7.20/month per endpoint per AZ plus data processing fees). See AWS PrivateLink pricing for details.
us-east-1 region specific: When creating VPC endpoints in the us-east-1 region, disable cross-region support. This is due to availability zone mapping differences between AWS accounts that can prevent endpoint creation. The endpoint only needs to exist in one AZ within your VPC - clients in other AZs can still reach it via DNS.
Creating the VPC Endpoint
Create an Interface VPC Endpoint to connect privately to Gitpod’s management plane.Before you begin: You’ll need your VPC ID, subnet IDs, and security group ID. You can find these in the AWS VPC Console or from your CloudFormation stack outputs.Important: Your VPC must have both DNS hostnames and DNS resolution enabled for private DNS names to work properly. You can check and enable these in the VPC Console under Actions → Edit VPC settings.
Using AWS CLI
Using AWS PowerShell
Using AWS Management Console
-
Navigate to VPC Console
- Open the AWS VPC Console
- Select “Endpoints” from the left navigation
-
Create Endpoint
- Click “Create endpoint”
- Name tag (optional): Enter a descriptive name like
gitpod-management-plane - Service type: Select “Endpoint services that use NLBs and GWLBs”
-
Service Settings
- Service name: Enter
com.amazonaws.vpce.us-east-1.vpce-svc-08de744d433e60ff2 - Enable Cross Region endpoint: Check this box to connect across regions (Note: For us-east-1 region, leave this unchecked)
- Region: Select us-east-1 as the region
- Click “Verify service” to confirm the service is available
- Service name: Enter
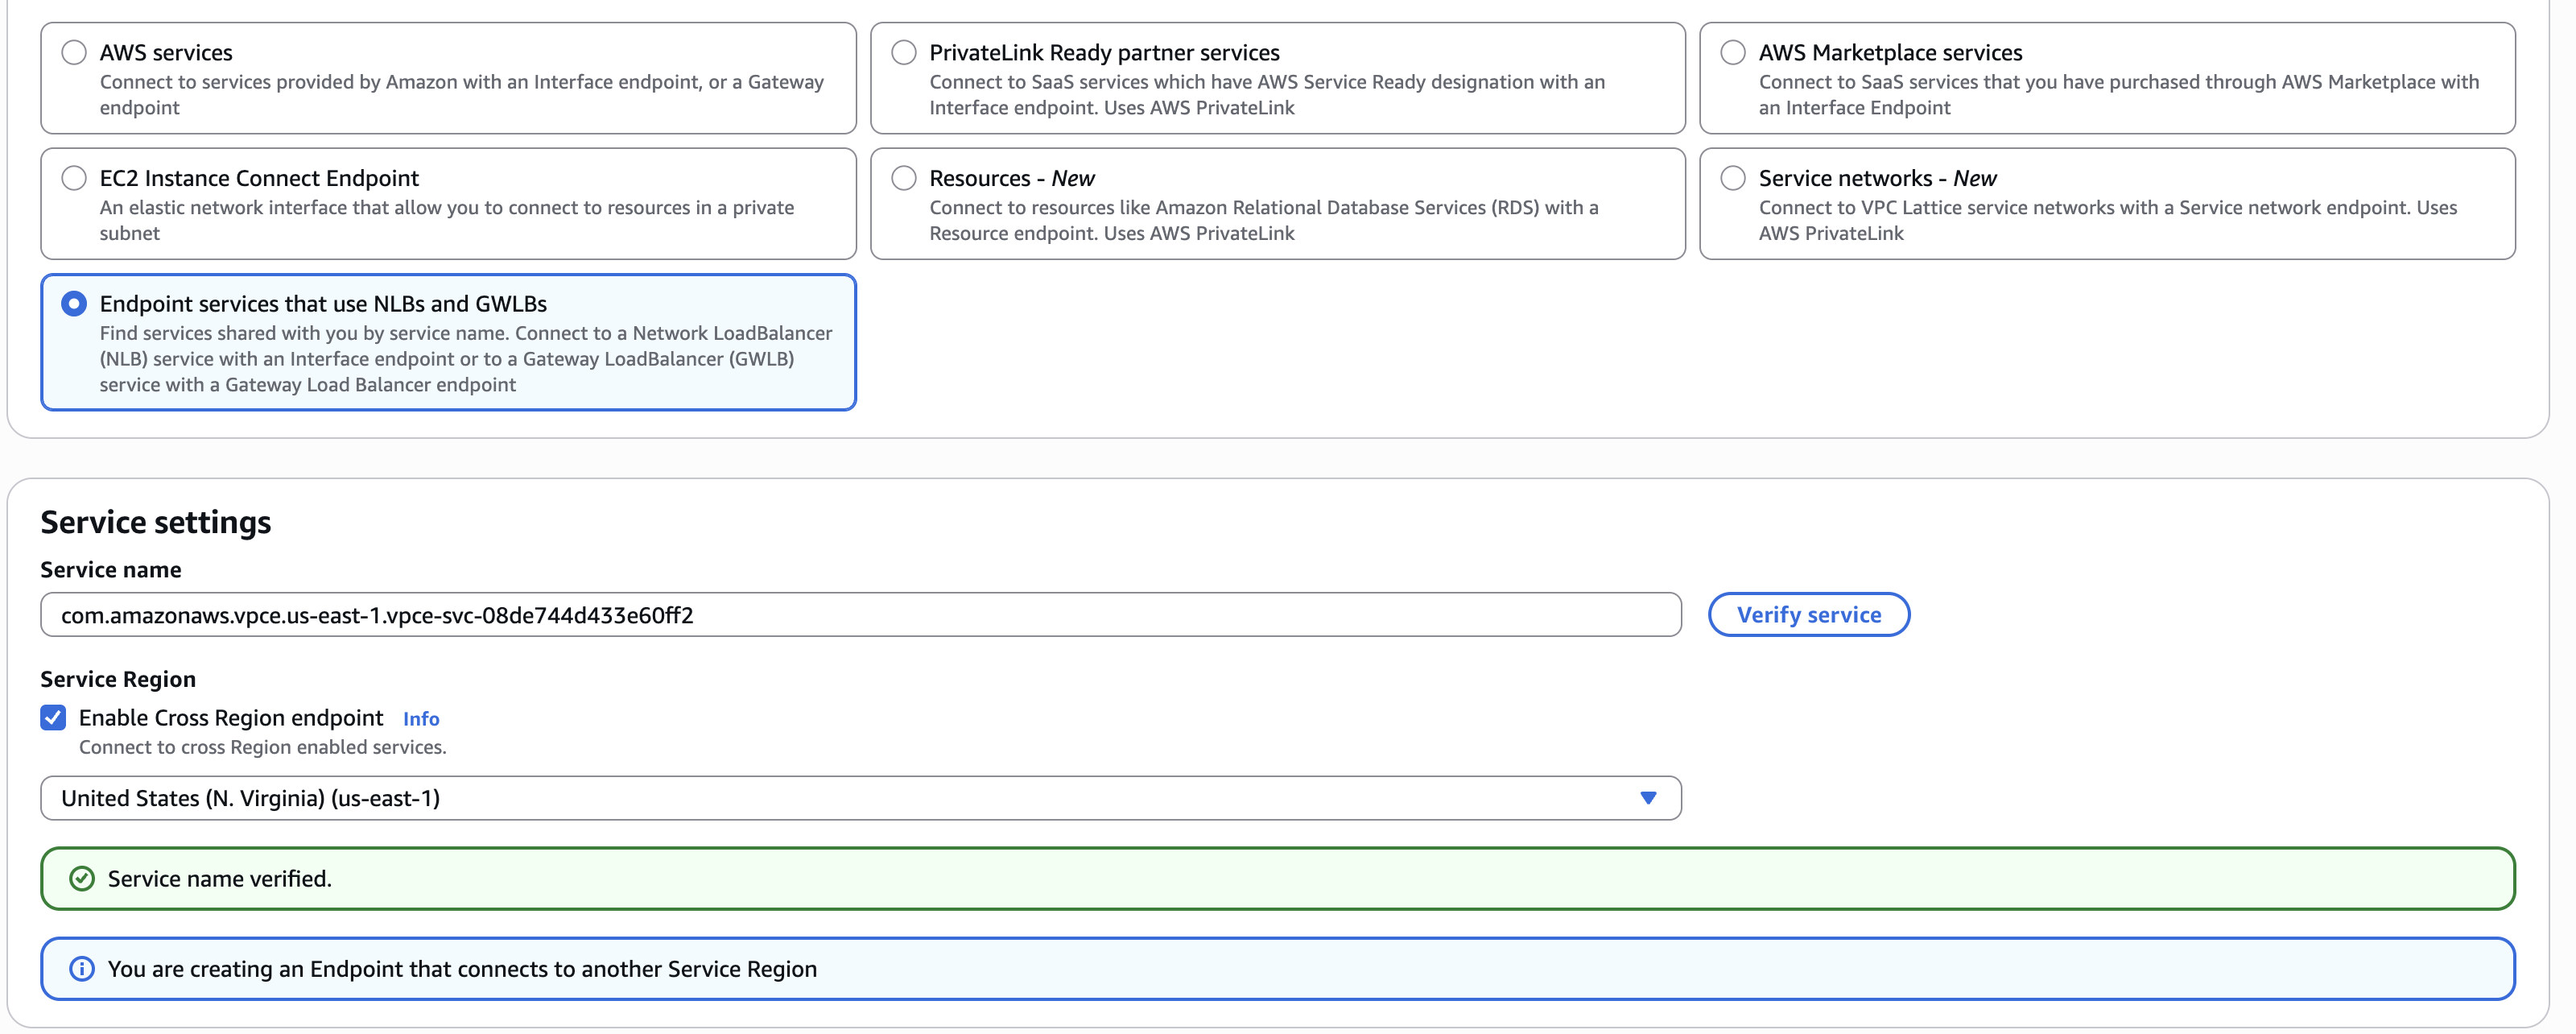
VPC Endpoint Service Settings - Enable Cross Region Support
- Network Settings
- VPC: Select the same VPC where your runner is deployed
- Enable DNS name: Check this box to enable private DNS names (this allows
app.gitpod.ioto resolve to the endpoint) - Subnets: Choose private subnets in available AZs (can be the same subnets as your EC2 runner instances)
- Security groups: Select or create a security group that allows HTTPS traffic (port 443, inbound). Include the runner security group and the security group for environment access (you can find these in the Output section of the Runner Cloud Formation template).
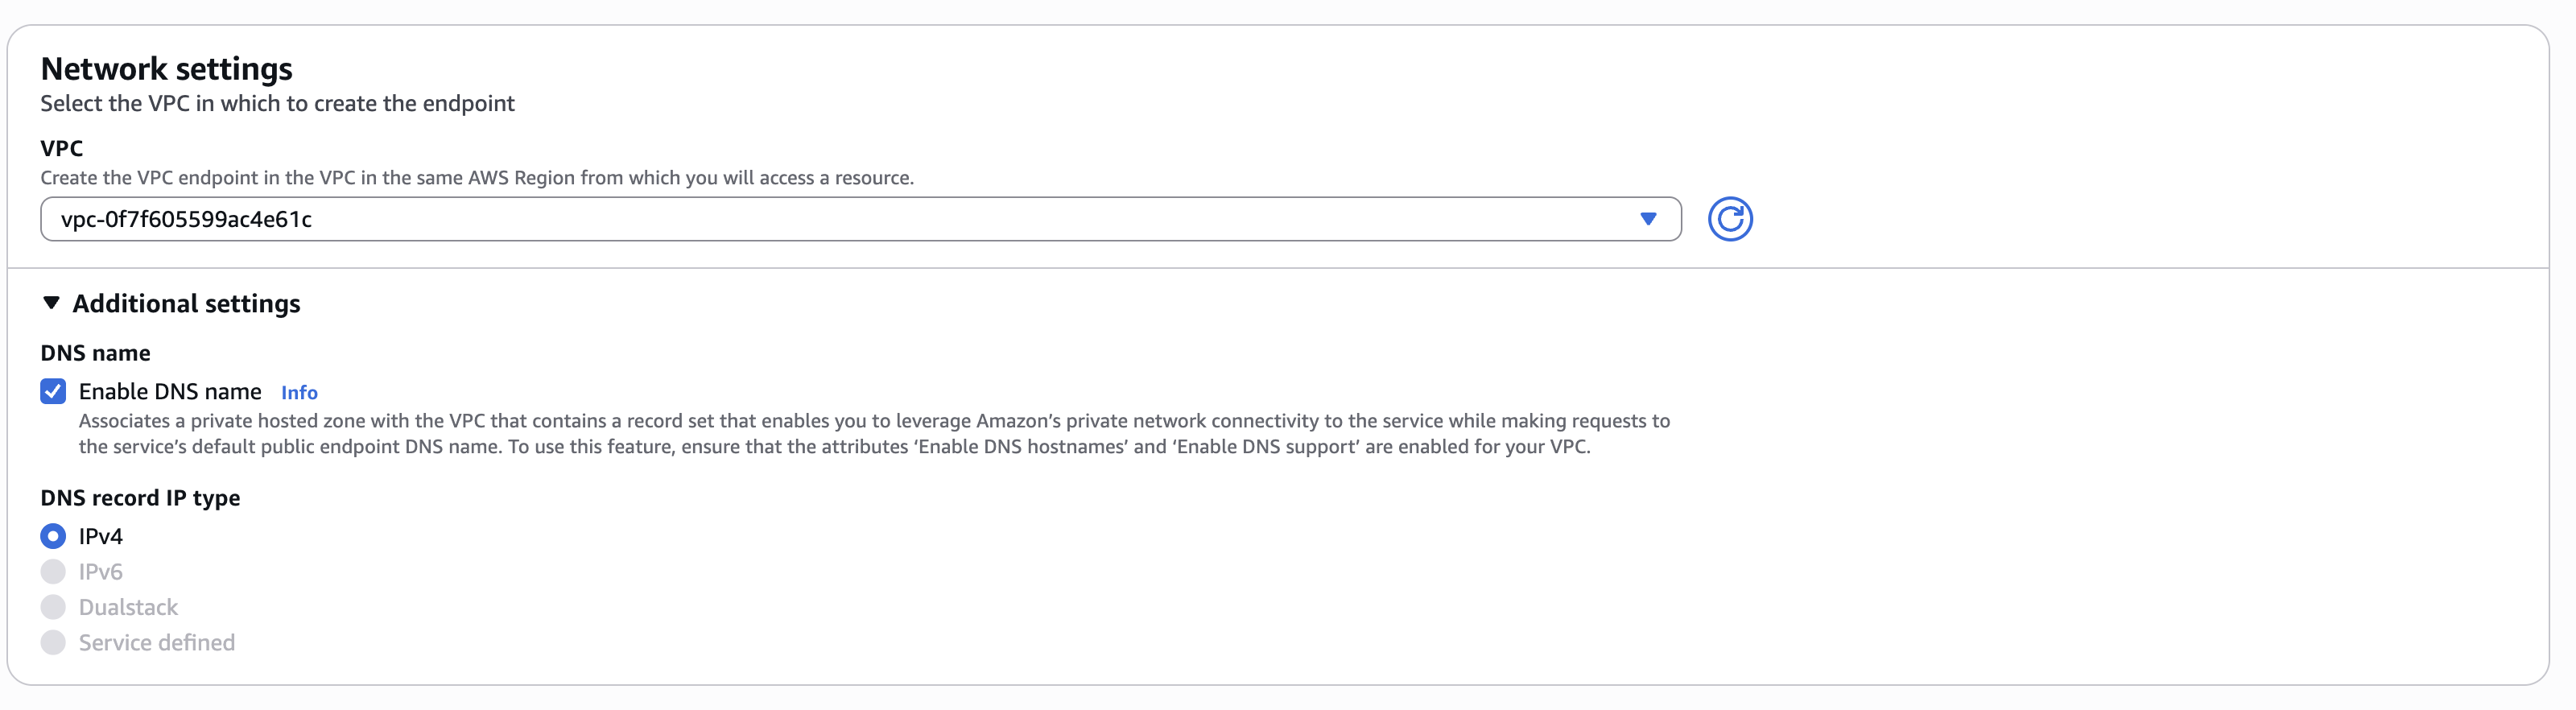
VPC Endpoint Network Settings - Enable DNS Names
- Create and Verify
- Click “Create endpoint”
- Wait for the endpoint status to become “Available”
Security Group Configuration
Your VPC endpoint security group needs these rules: Inbound Rules:- Type: HTTPS (443)
- Source: Your runner subnets CIDR or the security group attached to your runner instances
- Description: Allow runner access to Gitpod management plane
- Type: All traffic
- Destination: 0.0.0.0/0 (or keep the default outbound rule)
Verification
After creating the VPC endpoint:- Check endpoint status in the VPC console
- Verify private DNS resolution in your VPC:
This should resolve to private IP addresses within your VPC
- Confirm private connectivity in Gitpod dashboard:
- Navigate to Settings → Runners in your Gitpod dashboard
- Check your runner details - the Connection type should show as “Private”
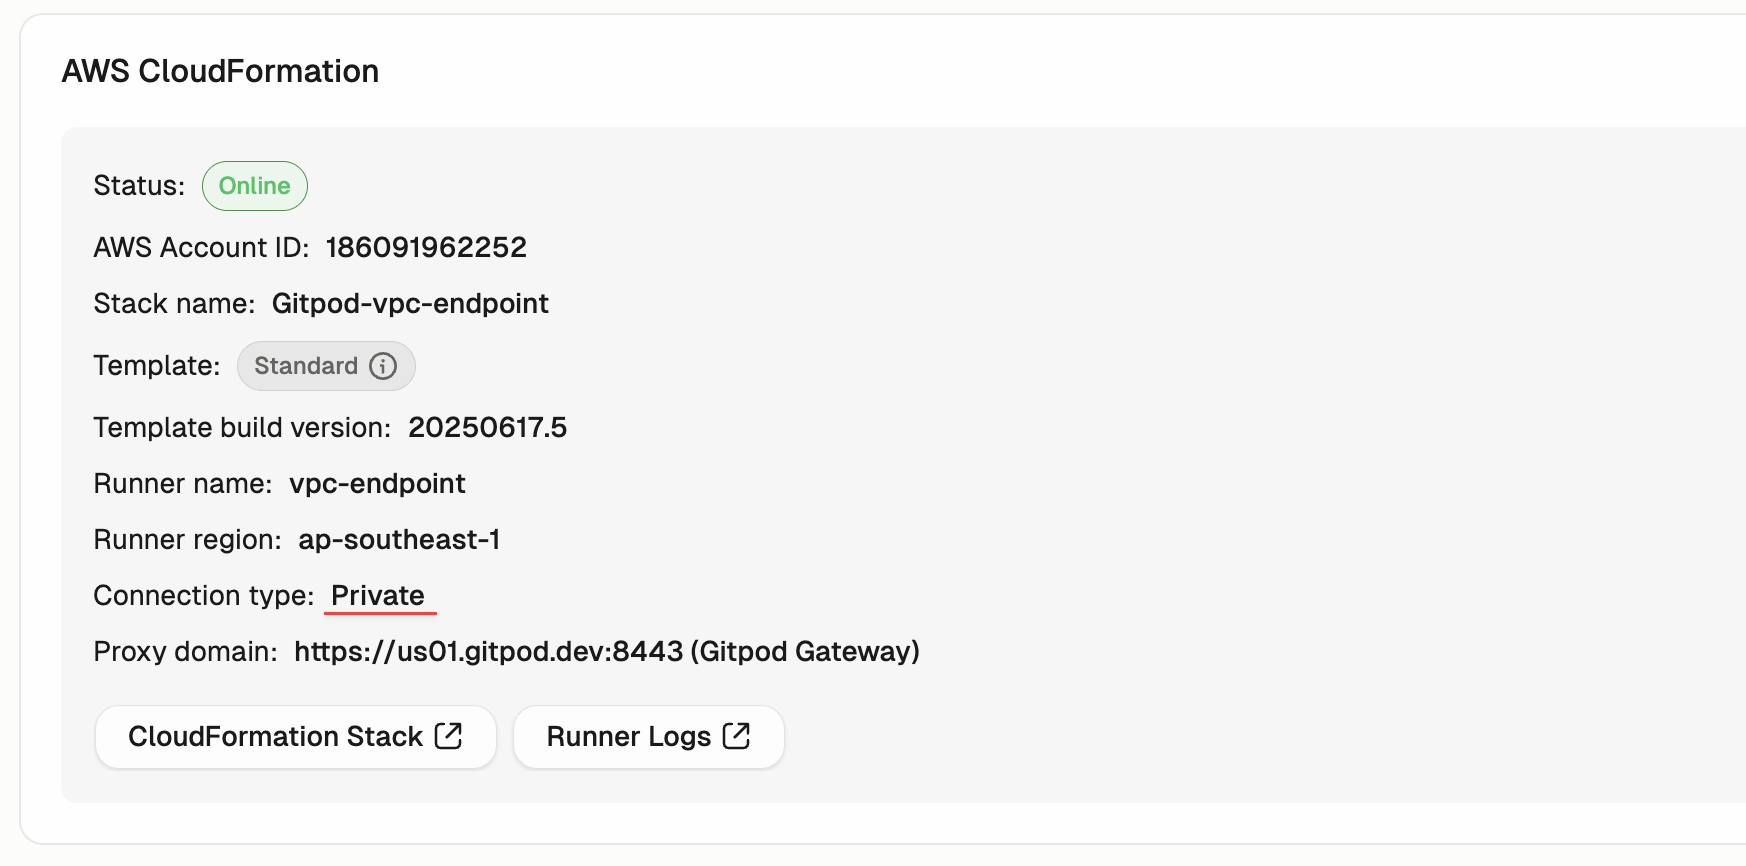
Runner Dashboard showing Private Connection Type
With private DNS enabled,
app.gitpod.io will automatically resolve to your VPC endpoint’s private IP addresses, providing seamless private connectivity.