Faster workspace creation with GitHub Actions
Previously, we showed you how to create preview environments using the new Gitpod CLI, making workspace creation automated through GitLab CI/CD.
In this guide, we shift our focus to GitHub. We’ll walk you through simplifying the process of starting new feature development, automatically preparing a CDE whenever a new branch is created through the GitHub user interface, following a predefined naming pattern.
By the end of this guide, you’ll have a better idea of how to use the Gitpod CLI in GitHub Actions, inspiring you to create your own workflows.
Get Started
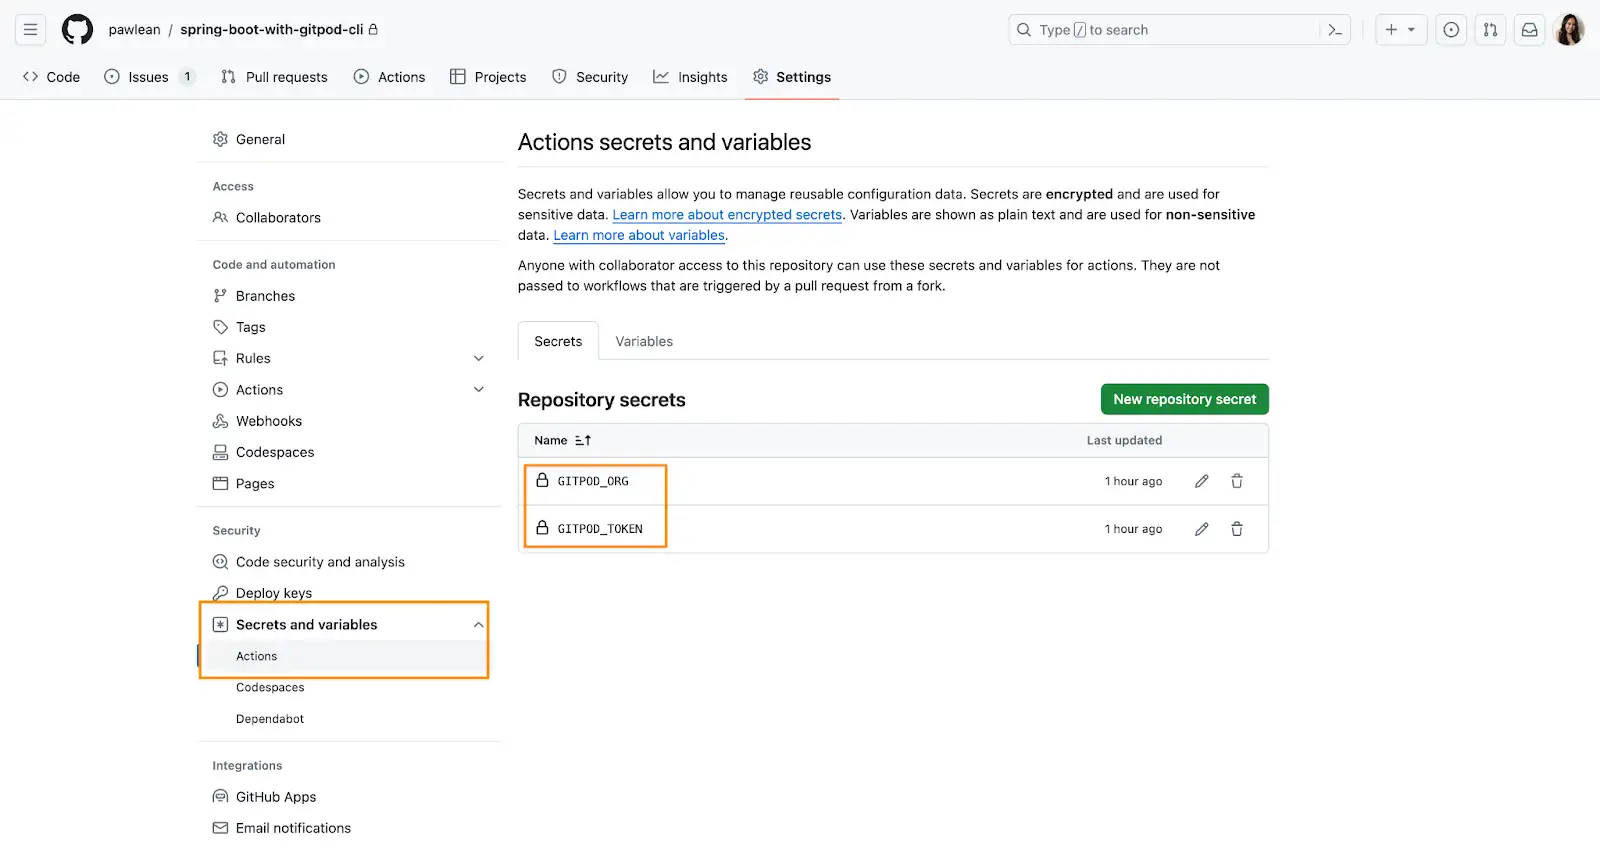
Before diving in, you need to set up your GitHub repository with two essential Action secrets: GITPOD_TOKEN and GITPOD_ORG . These secrets will enable the GitHub Action to interact securely with Gitpod.
- First, create a
GITPOD_TOKENfrom the user settings. This token is acting on behalf of the authorized user who created the token. Learn more about access tokens. - Second, you will need your organization ID, which is an alphanumeric UUID string you can find in your organization settings, or get by running
gitpod org listusing Gitpod CLI in your terminal.
Remember, these secrets are sensitive and should be handled with care. Store them in your repository’s settings under ‘Secrets’ to keep them secure.
Create GitHub Action
In the gitpod-workspace-creation action below:
- Checkout the code
- Install the Gitpod CLI
- Create a workspace for new branches with specific pattern

 yml
ymlname: Gitpod Workspace on New Branch
on:
create:
branches:
- 'dev/\*\*'
jobs:
gitpod-workspace-creation:
runs-on: ubuntu-latest
environment:
name: Workspace
url: https://gitpod.io/start/#${{ env.WORKSPACE_URL }}
steps:
- name: Checkout code
uses: actions/checkout@v2
- name: Setup Gitpod CLI
run: |
wget -O gitpod https://gitpod.io/static/bin/gitpod-cli-linux-amd64
chmod +x gitpod
./gitpod login --token ${{ secrets.GITPOD_TOKEN }} --org ${{ secrets.GITPOD_ORG }}
- name: Create a Gitpod workspace for the new branch
run: |
branchName=${GITHUB_REF#refs/heads/}
repoFullName=${{ github.repository }}
WORKSPACE_URL=$(./gitpod ws create github.com/$repoFullName/tree/$branchName --dont-wait)
echo "branchName=$BRANCH_NAME" >> $GITHUB_ENV
echo "WORKSPACE_URL=$WORKSPACE_URL" >> $GITHUB_ENVTest the workflow
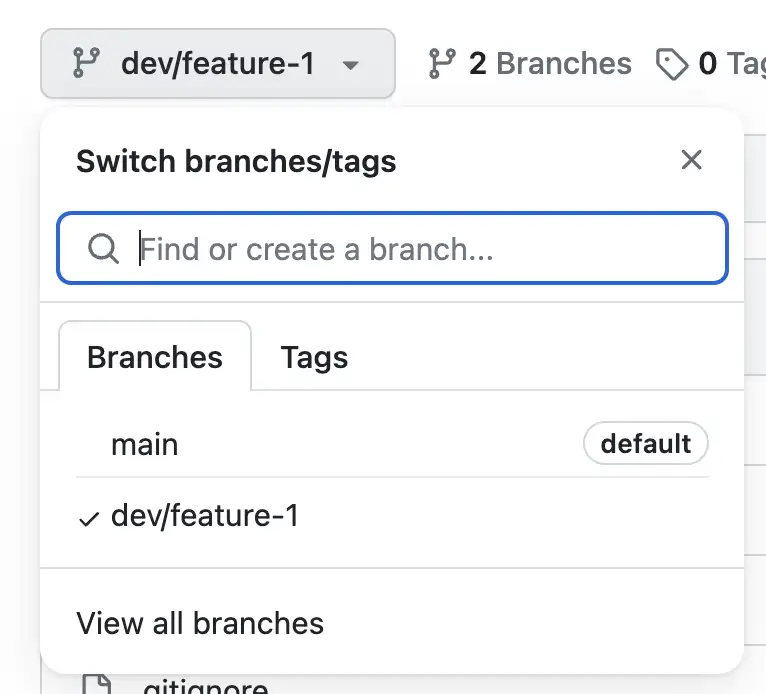
Now, let’s create a new branch using the pattern described earlier.
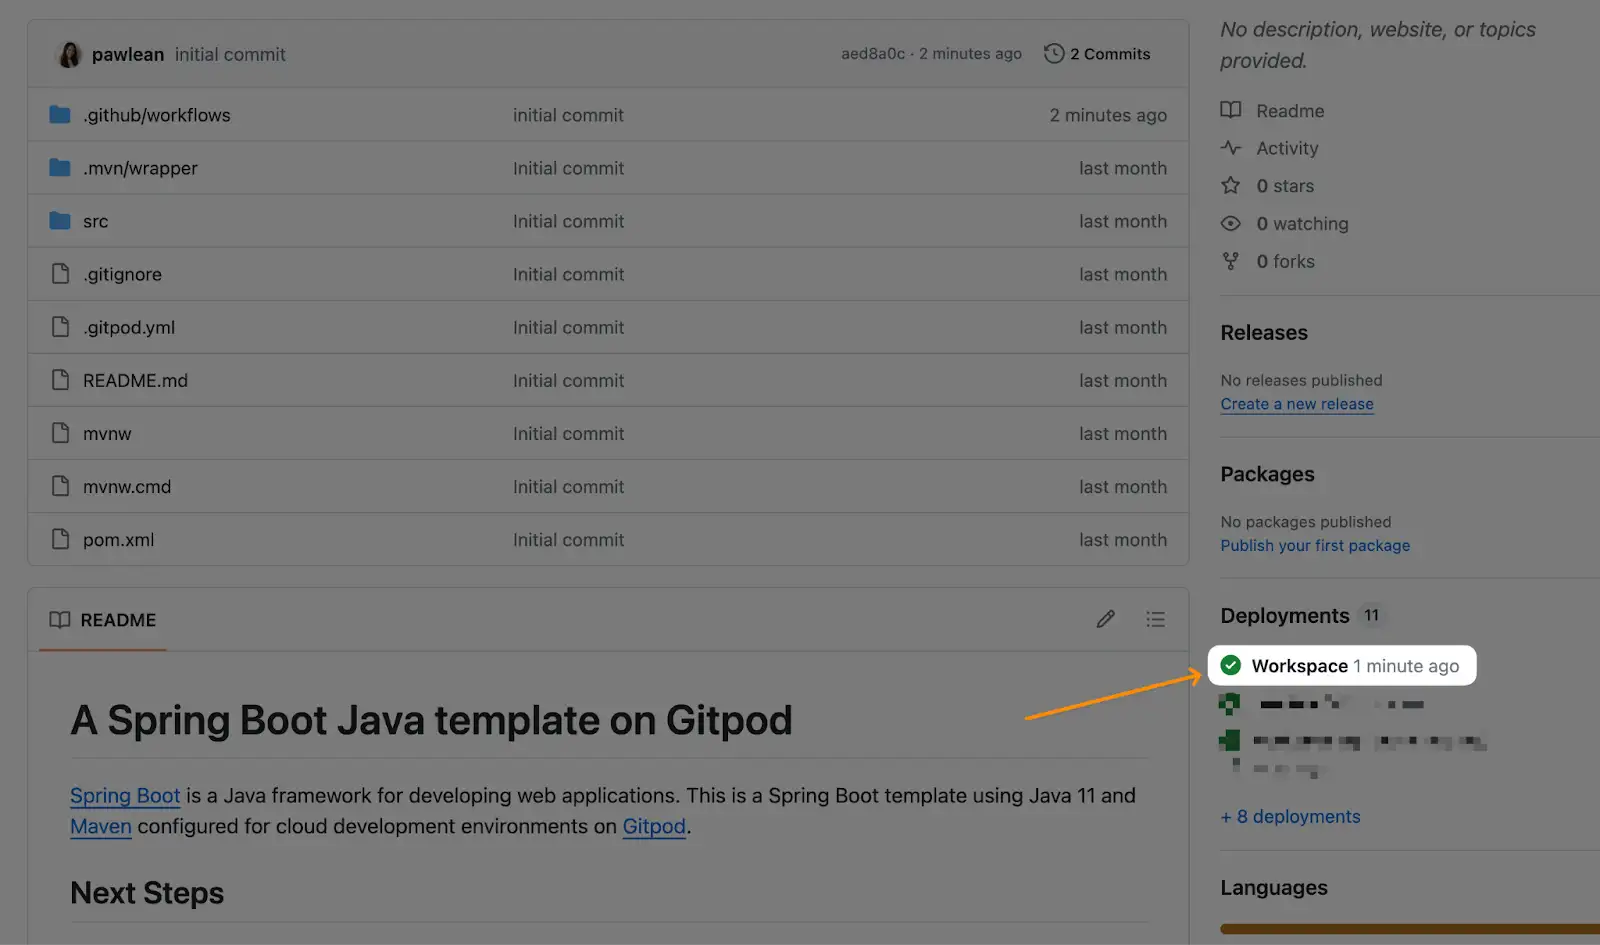
Time to code
Navigate to ‘Deployments’ to find the newly created ‘Workspace’ deployment. Click on ‘Active deployments’, then open your workspace. The workspace will be ready and running by the time you access it.
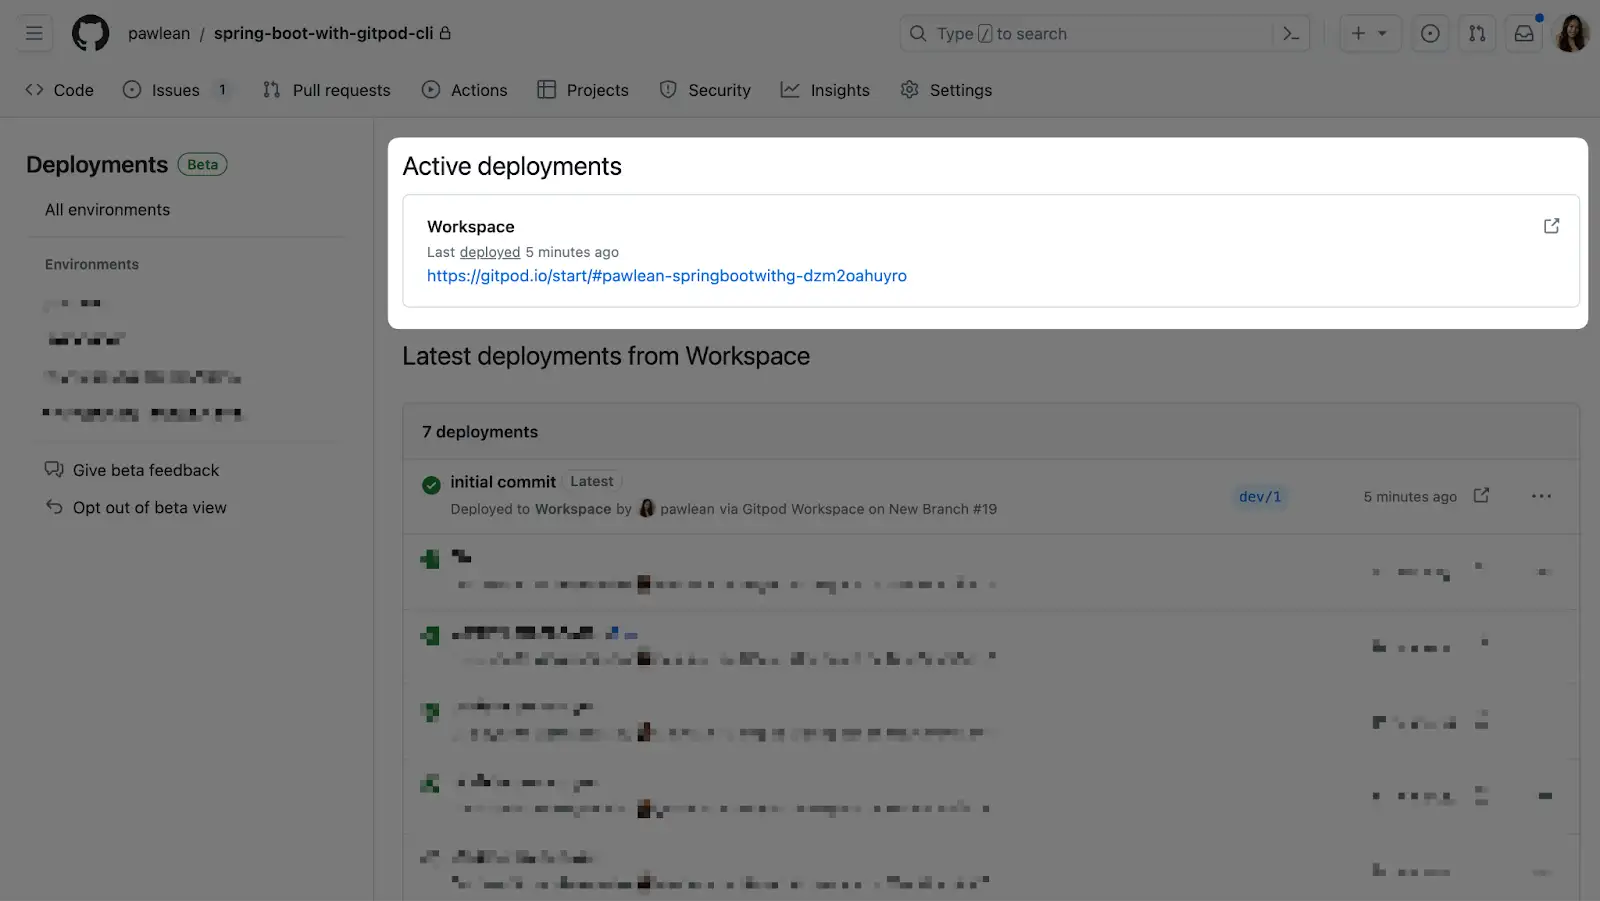
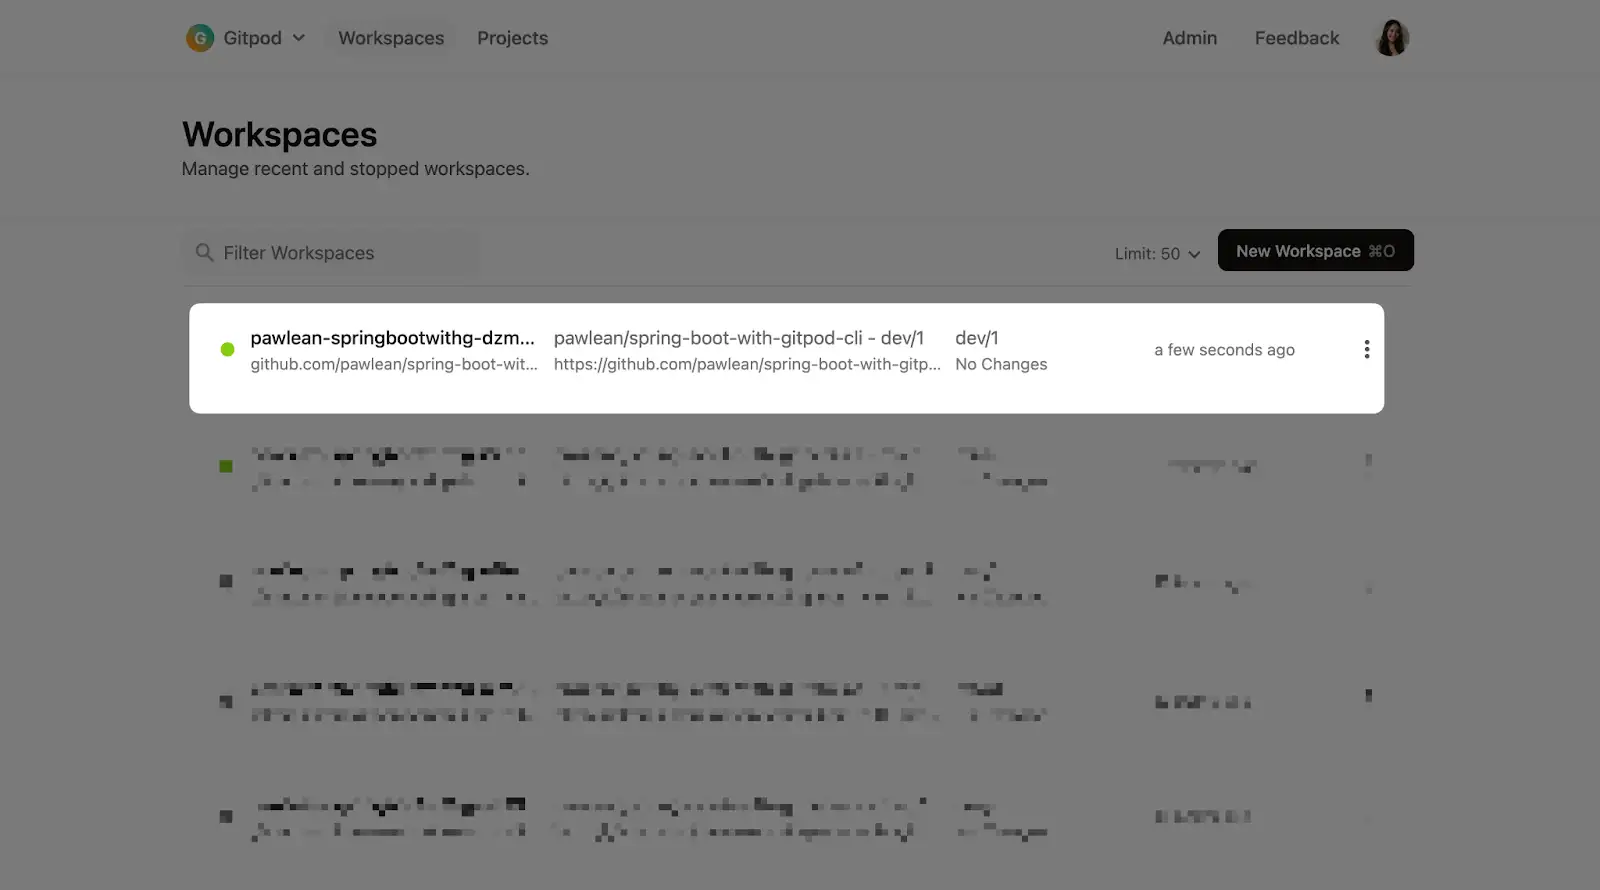
You can verify the running workspace for your specified branch directly on the Gitpod dashboard.
To see this in action, check out my example repo here.
What will you build?
This guide offers just a glimpse into the potential of integrating the Gitpod CLI within your GitHub Actions workflows. Here are a few more ideas:
- Create a workspace when you add a specific label to an issue or pull request–this could help spin up ephemeral development environments for community contributors.
- Extract workspace metadata for analyzing productivity and usage.
- Clean up workspaces automatically with a scheduled cron job.
Share with us what you build! Try out the CLI today.
