Build Projects in a Gitpod Ephemeral Dev Environment — The Ultimate Guide
Gitpod is a remote development platform. Gitpod workspaces are ephemeral and only live for as long as you work on a task. While ephemeral workspaces are a very powerful feature, they’re also likely new to you, which is why you’re here. In this guide, we’ll walk you through what ephemerality means for a development environment in the cloud and how Gitpod enables you to work in this totally new way of working. Welcome to the future!
First up, what is ephemerality? Rather than having a single static environment (like your local machine), Gitpod users are encouraged to codify their dev environment as code (more on how to do this later!). With your project codified, you’ll be able to spin up a new workspace, start coding and throw away the workspace when you’re done.
Let me give you a few examples where ephemerality shines :
- Always start from a clean slate - If you break something in your environment, rather than waste time trying to figure out exactly which environment variable or configuration you accidentally updated, throw away the workspace and start a new working workspace.
- Work on many workspaces at once - Let’s say you’re working on a feature while simultaneously supporting reviewing a colleague’s code. Rather than having to update your local environment to swap between, you can create a new parallel workspace and code in two (or more!) workspaces simultaneously.
Gitpod ensures when you open a new workspace, all the correct tools & packages are in place, any servers or processes are running, and more. We will also dig into neat features of Gitpod, such as ‘Prebuilds’, which install dependencies ahead of time so that when you open a new workspace, you don’t have to wait for anything to install.
This guide will focus on topics and concepts that can help you set up an ephemeral dev environment on Gitpod:
- Configuring your dev environment with code
- Faster startup by enabling prebuilds
- Persisting environment variables and files
Sound good? Let’s dive in and learn how to configure your development environment with Gitpod.
Configuring your dev environment with code
To start any project, you typically need to install the dependencies and tools required to run the project. This setup process can become tedious and error-prone if you repeatedly set up your dev environment. If you’re working on ephemeral environments, you want to be able to throw away an environment and start a new one, so you don’t want to have a single barrier to simply creating a new workspace.
In Gitpod, you can configure your dev environment as code with .gitpod.yml and an optional .gitpod.Dockerfile file. Gitpod can be configured to install all the tools and dependencies you need to start your project. Since both these configuration files are committed to version control, you get all of the benefits of source control, such as viewing the history and authors of files. With this configuration, your dev environment remains consistent throughout the organization.
Configuring your project with a .gitpod.yml
The .gitpod.yml file prepares your dev environment by automating setup like dependency installation and specifying which application ports to open on workspace start. Every time you open your project or a repository in a new workspace, all the configured tasks are executed. The .gitpod.yml file lives at the root of your project. For example:

 yml
yml# Commands to start on workspace startup
tasks:
- init: yarn install
command: yarn build
# Ports to expose on workspace startup
ports:
- port: 8000
onOpen: open-previewYou can read more about .gitpod.yml in docs: config gitpod file
Setting up your first .gitpod.yml ⚡️
- Open your repo in a new Gitpod workspace. The simplest way is by appending the entire repo URL (including the protocol) to
gitpod.io/#, e.g.gitpod.io/#https://github.com/gitpod-io/gitpod - Create a
.gitpod.ymlin the root directory of your project, e.g.touch .gitpod.ymlTip: Instead of manually creating the
gitpod.yml, typegp initin the terminal of your Gitpod workspace. (gpis a CLI for Gitpod included in all Gitpod workspaces) - For Gitpod to detect configuration changes, push and commit your
gitpod.yml. - Now open your project in a new workspace by prefixing your repo URL with
gitpod.io/#{your-repository-url}or using the Gitpod extension.
You can read more about .gitpod.yml in the configure documentation. For information about the .gitpod.yml file properties, see the .gitpod.yml reference documentation.
Configure your developer environment based on a Dockerfile
In addition to supplying commands via the .gitpod.yml, you can also configure a Dockerfile. Using Docker can be helpful if you already have a Dockerfile for your application, are familiar with the format, or want to leverage the many benefits of the Dockerfile format, such as improved caching and performance. Gitpod workspaces, by default, start with an image called workspace-full (more on this soon), or you can configure a custom Dockerfile.
Gitpod default Docker image
By default, Gitpod uses workspace-full for Gitpod workspaces. workspace-full comes pre-installed with Docker, Nix, Go, Java, Node.js, C/C++, Python, Ruby, Rust, and PHP, as well as tools such as Homebrew, Tailscale, Nginx, and several more.
Gitpod provides some premade and optimized workspace images for various programming languages and tools. You can select an image by adding it to your .gitpod.yml file.
For example, if you want to use Java 17, specify the following in your .gitpod.yml file.
ymlimage: gitpod/workspace-java-17To avoid unexpected breaking changes, we suggest that you explicitly pin your workspace image. For Gitpod images, we recommend using a time-stamped image tag for maximum reproducibility. For example,
image: gitpod/workspace-full:2022-08-17-18-37-55(taken from the tags panel on this dockerhub page)
Bring your own Dockerfile
Suppose one of the premade workspace images doesn’t fit your needs, or you want to extend an image with additional configuration, such as a specific service or programming language. In that case, you can bring your own (Docker) image to Gitpod.
- You can configure a custom Dockerfile by adding a reference to the Dockerfile location to use in your
.gitpod.yml. We recommend the.gitpod.Dockerfilenaming convention.
ymlimage:
file: .gitpod.Dockerfile- Next, create a
.gitpod.Dockerfilefile at the root of your project. - You can start using the lightweight base image gitpod/workspace-base for your custom Docker image. The
workspace-baseimage has some default tooling, whereasgitpod/workspace-fullalready has a lot of pre-installed installed tools. - Start adding the commands you need for your dev environment.
Read more about how to configure a custom Dockerfile.
Faster startup by enabling prebuilds
When working on your local machine, you typically have a single environment to configure and work on simultaneously. You manually install dependencies and system configurations when switching branches or projects. With Gitpod, you can have many concurrent workspaces. Rather than doing tasks like dependency installation when you swap the branch, you can start a new workspace based on your latest development environment image.
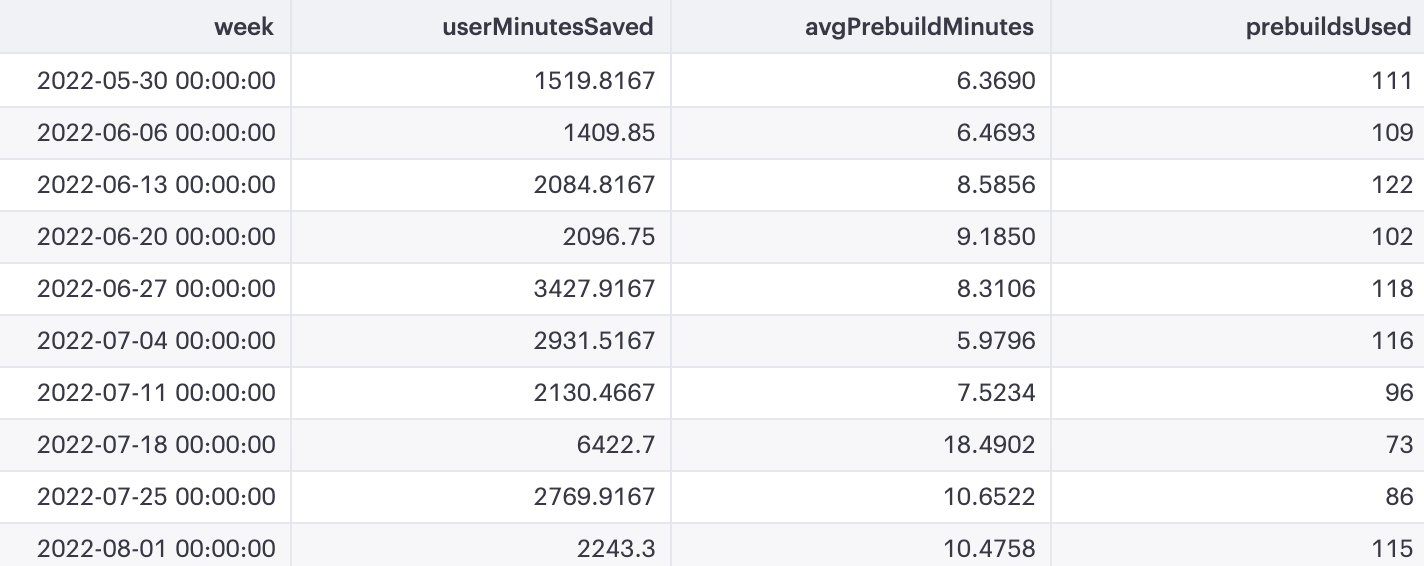
Every time you create a new ephemeral workspace, a lot of time can be saved by using a Prebuild. Prebuilds allow you to configure asynchronous builds of your workspace image when it’s updated or changed. This is a very similar approach to how Continuous Integration tools work. When collaborating with peers and working on the same branch, configuring a Prebuild can be helpful as Gitpod triggers it whenever there is a commit to the repository.
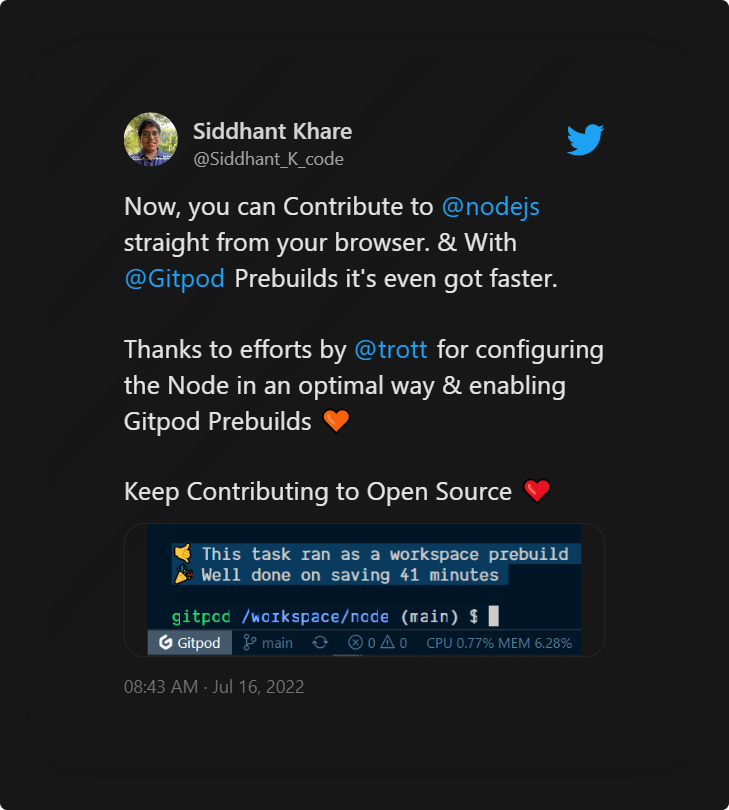
For example, the .gitpod.yml saves 41 minutes of installation and building time for the Node.js repo that would otherwise have to be run on your machine. In Gitpod, the workspace image is prebuilt, so all you have to do is start a new workspace.
How to get started with Prebuilds
Prebuilds work for GitHub, Gitlab and Bitbucket repositories (see our Prebuilds documentation for more). To give you a real example, though, let’s take a look at how you can enable Prebuilds for GitHub:
- To enable Gitpod Prebuilds for a repository, you must install the Gitpod GitHub App for your repository.
- Click ‘Configure’ and choose the repository where you wish to install the Gitpod App.
- The GitHub app will create the prebuild for every merged commit (on the particular branch), or you can configure it for every PR, and Gitpod will store the prebuilt image. With Prebuilds, whenever a new workspace is created, Gitpod will load the previously built image.
By default, Gitpod prepares prebuilt workspaces for all changes on the default branch and pull/merge requests from the same repository. Here is an example where Dropwizard has enabled the Prebuilds. The GitHub prebuilds section in the .gitpod.yml file configures the specific conditions when prebuilds should be run.
ymlGitHub:
prebuilds:
# enable for the default branch
master: true
# enable for all branches in this repo
branches: true
# enable for pull requests coming from this repo
pullRequests: true
# enable for pull requests coming from forks
pullRequestsFromForks: true
# add a check to pull requests
addCheck: true
# add a "Review in Gitpod" button as a comment to pull requests
addComment: false
# add a "Review in Gitpod" button to the pull request's description
addBadge: falseImportant: Prebuilds only save the workspace directory. Any file changes made outside of
/workspacefile hierarchy frominittasks will be lost on workspace start when prebuilds are enabled.
You can read more about prebuilds in the following doc.
Persisting environment variables and files
Every time you start a project, you require API keys, secrets like database passwords or sensitive information that can’t be committed to the version control system. These are usually added as environment variables that are used to configure a value in your code. When working with an ephemeral workspace, you will have to set up everything again for each new task. We will discuss a few ways with which we can persist these environment variables across Gitpod workspaces.
Configure environment variables in Gitpod
You can configure persistent environment variables in your Gitpod Account settings.
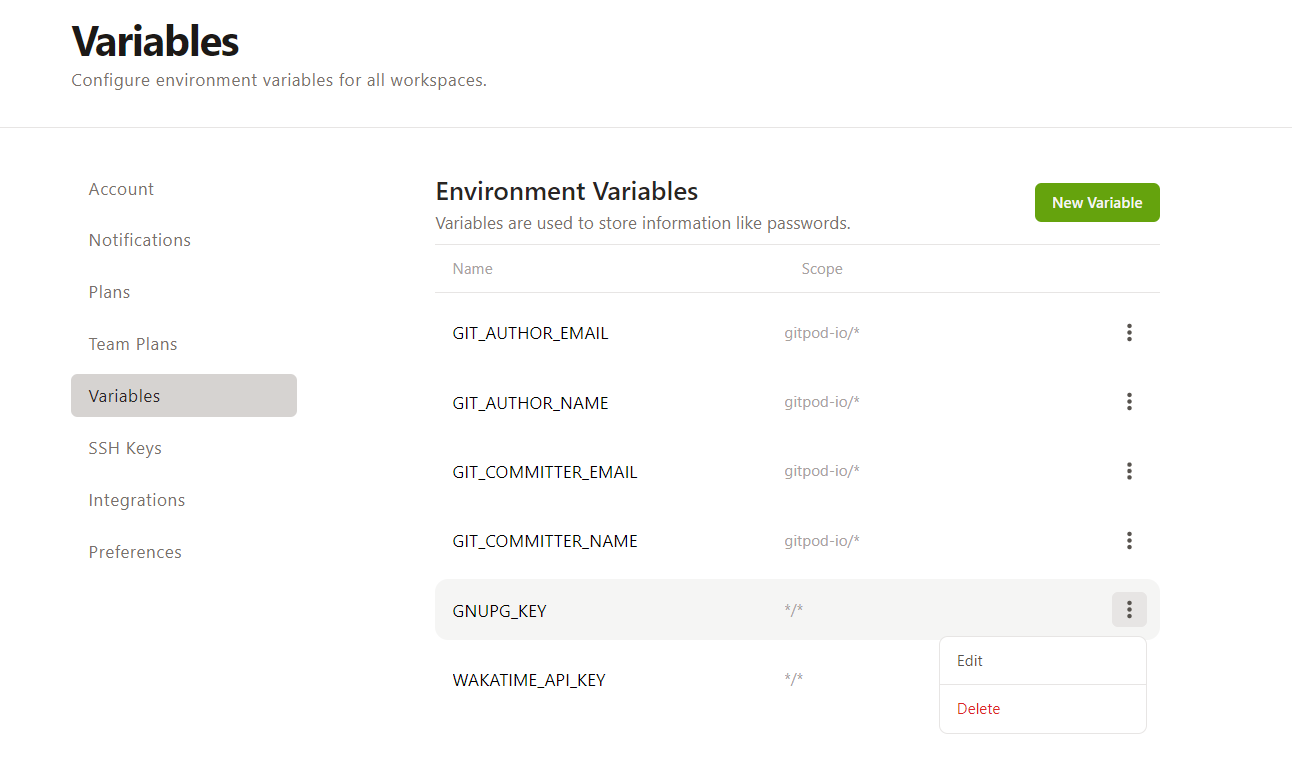
The scope of each variable determines in what workspaces it will be available. Scope patterns follow the owner/repository pattern:
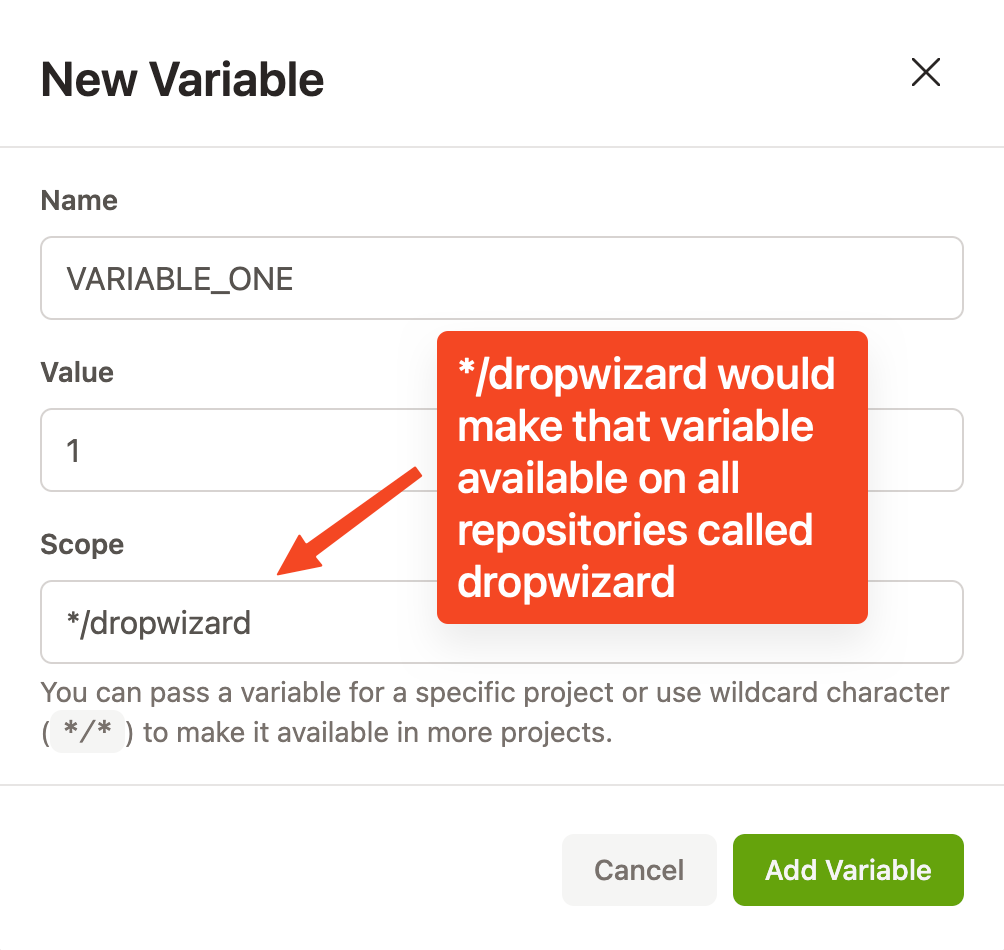
You can use a wildcard (denoted with a *) to match either the owner or repo, for example:
- Single organizations - Setting
dropwizard/*would make an environment variable available in all repositories owned by the organization dropwizard. - Single repository -
*/dropwizardwould make an environment variable available on all repositories calleddropwizard; this is especially useful for forks. - All organizations or repositories - Using
*/*would make an environment variable available in every repository for any organization for that given user.
You can read more about environment variables in Environment Variables on Gitpod.
Persisting files between workspace restarts
For those of you who are looking to persist personal configurations with non-sensitive data, such as bash or zsh configs, you can use dotfiles. For sensitive information, an option (outside of introducing your secret store, such as vault) is to leverage: environment variables and consider encoding, e.g. with base64. See blog posts[1] [2] .
There would be some use cases where we would want to persist some files between workspace starts. For example, .bash_history refers to previously used history commands.
Here we would like to persist the .bash_history file under the $HOME directory. For this, we will create a folder .persist inside the /workspace folder.
Inside your workspace, Open the terminal & run the following steps:
- Step 1:
mkdir -p /workspace/.persist - Step 2:
cp $HOME/.bash_history /workspace/.persist - Step 3: Add the following task inside
.gitpod.yml:
ymltasks:
- name: Restore persist
before: |
cp /workspace/.persist/.bash_history $HOME;
# Copy more files as necessary below
exit;- Step 4: See it in action
Note: This is just a temporary solution. The issue for this is still open Issue URL
Recommended Reading
- Docs: Config Dotfiles
- GitHub Repository: Bring your own Dotfiles to Gitpod | dotfiles on Gitpod
- GitHub Repository: AWS Single Sign-On (SSO) and Amazon Elastic Container Registry (ECR) with Gitpod
- Guide: Gitpodifying — The Ultimate Guide
- Blog: Personalize your Gitpod Workspace Environments
Ready to code 🚀
Yay! You are now ready to get started with an ephemeral Dev Environment on Gitpod.
If you have questions about configuring your project, drop by our community Discord server. We would love to hear your feedback in the Gitpod Community.
